

Wooden Cutting Board Care: It’s more than just wiping it down! I know, I know, you’re probably thinking, “Another article about cleaning a cutting board?” But trust me, this isn’t your average scrub-and-go routine. We’re diving deep into the world of wooden cutting board care, unlocking secrets to keep your beloved board looking beautiful and functioning flawlessly for years to come. Think of it as a spa day for your kitchen workhorse!
For centuries, wooden cutting boards have been a staple in kitchens worldwide. From rustic farmhouses to modern culinary spaces, they’ve been cherished for their durability, natural beauty, and gentle touch on knives. But unlike their plastic counterparts, wooden boards require a little extra TLC to prevent warping, cracking, and the dreaded bacteria buildup.
Let’s face it, nobody wants to chop veggies on a breeding ground for germs! And nobody wants to replace their favorite wooden board every year because it’s cracked and splintered. That’s why mastering these simple DIY tricks and hacks is essential. I’m going to show you how to clean, condition, and maintain your wooden cutting board like a pro, extending its lifespan and ensuring it remains a safe and beautiful addition to your kitchen for years to come. So, grab your board, and let’s get started!
Revive Your Beloved Wooden Cutting Board: A DIY Guide
Hey there, fellow DIY enthusiasts! I’m so excited to share my tried-and-true method for restoring wooden cutting boards. We all know how much we rely on these workhorses in the kitchen, but they can take a beating. Scratches, stains, and even lingering odors are common. But don’t despair! With a little elbow grease and the right techniques, you can bring your wooden cutting board back to life and keep it looking beautiful for years to come.
What You’ll Need
Before we dive in, let’s gather our supplies. This is a pretty straightforward project, and you probably have most of these items already:
* Coarse Salt: This acts as a gentle abrasive to scrub away stains and debris. I prefer kosher salt, but any coarse salt will do.
* Lemon: The acidity of the lemon helps to disinfect and deodorize the wood. Plus, it smells amazing!
* White Vinegar: Another fantastic natural cleaner and disinfectant.
* Food-Grade Mineral Oil: This is crucial for rehydrating the wood and preventing it from cracking. Don’t use vegetable oil, as it can go rancid.
* Beeswax (Optional): If you want to create a protective barrier and give your board a nice sheen, beeswax is a great addition.
* Clean Rags or Paper Towels: For wiping and cleaning.
* Scraper or Putty Knife (Optional): For removing stubborn stuck-on food.
* Sandpaper (Various Grits): We’ll use this to smooth out scratches and imperfections. I recommend starting with 80-grit for deep scratches, then moving to 120-grit, and finally 220-grit for a smooth finish.
* Sanding Block (Optional): Makes sanding easier and more even.
* Double Boiler or Microwave-Safe Bowl (If using Beeswax): For melting the beeswax.
* Heat-Resistant Container (If using Beeswax): For pouring the melted beeswax mixture.
* Gloves (Optional): To protect your hands.
Phase 1: Cleaning and Disinfecting
This is the first and most important step. We need to get rid of any surface grime and bacteria before we start sanding.
1. Scrape Away Debris: Use a scraper or putty knife to remove any stuck-on food particles. Be gentle to avoid scratching the wood further.
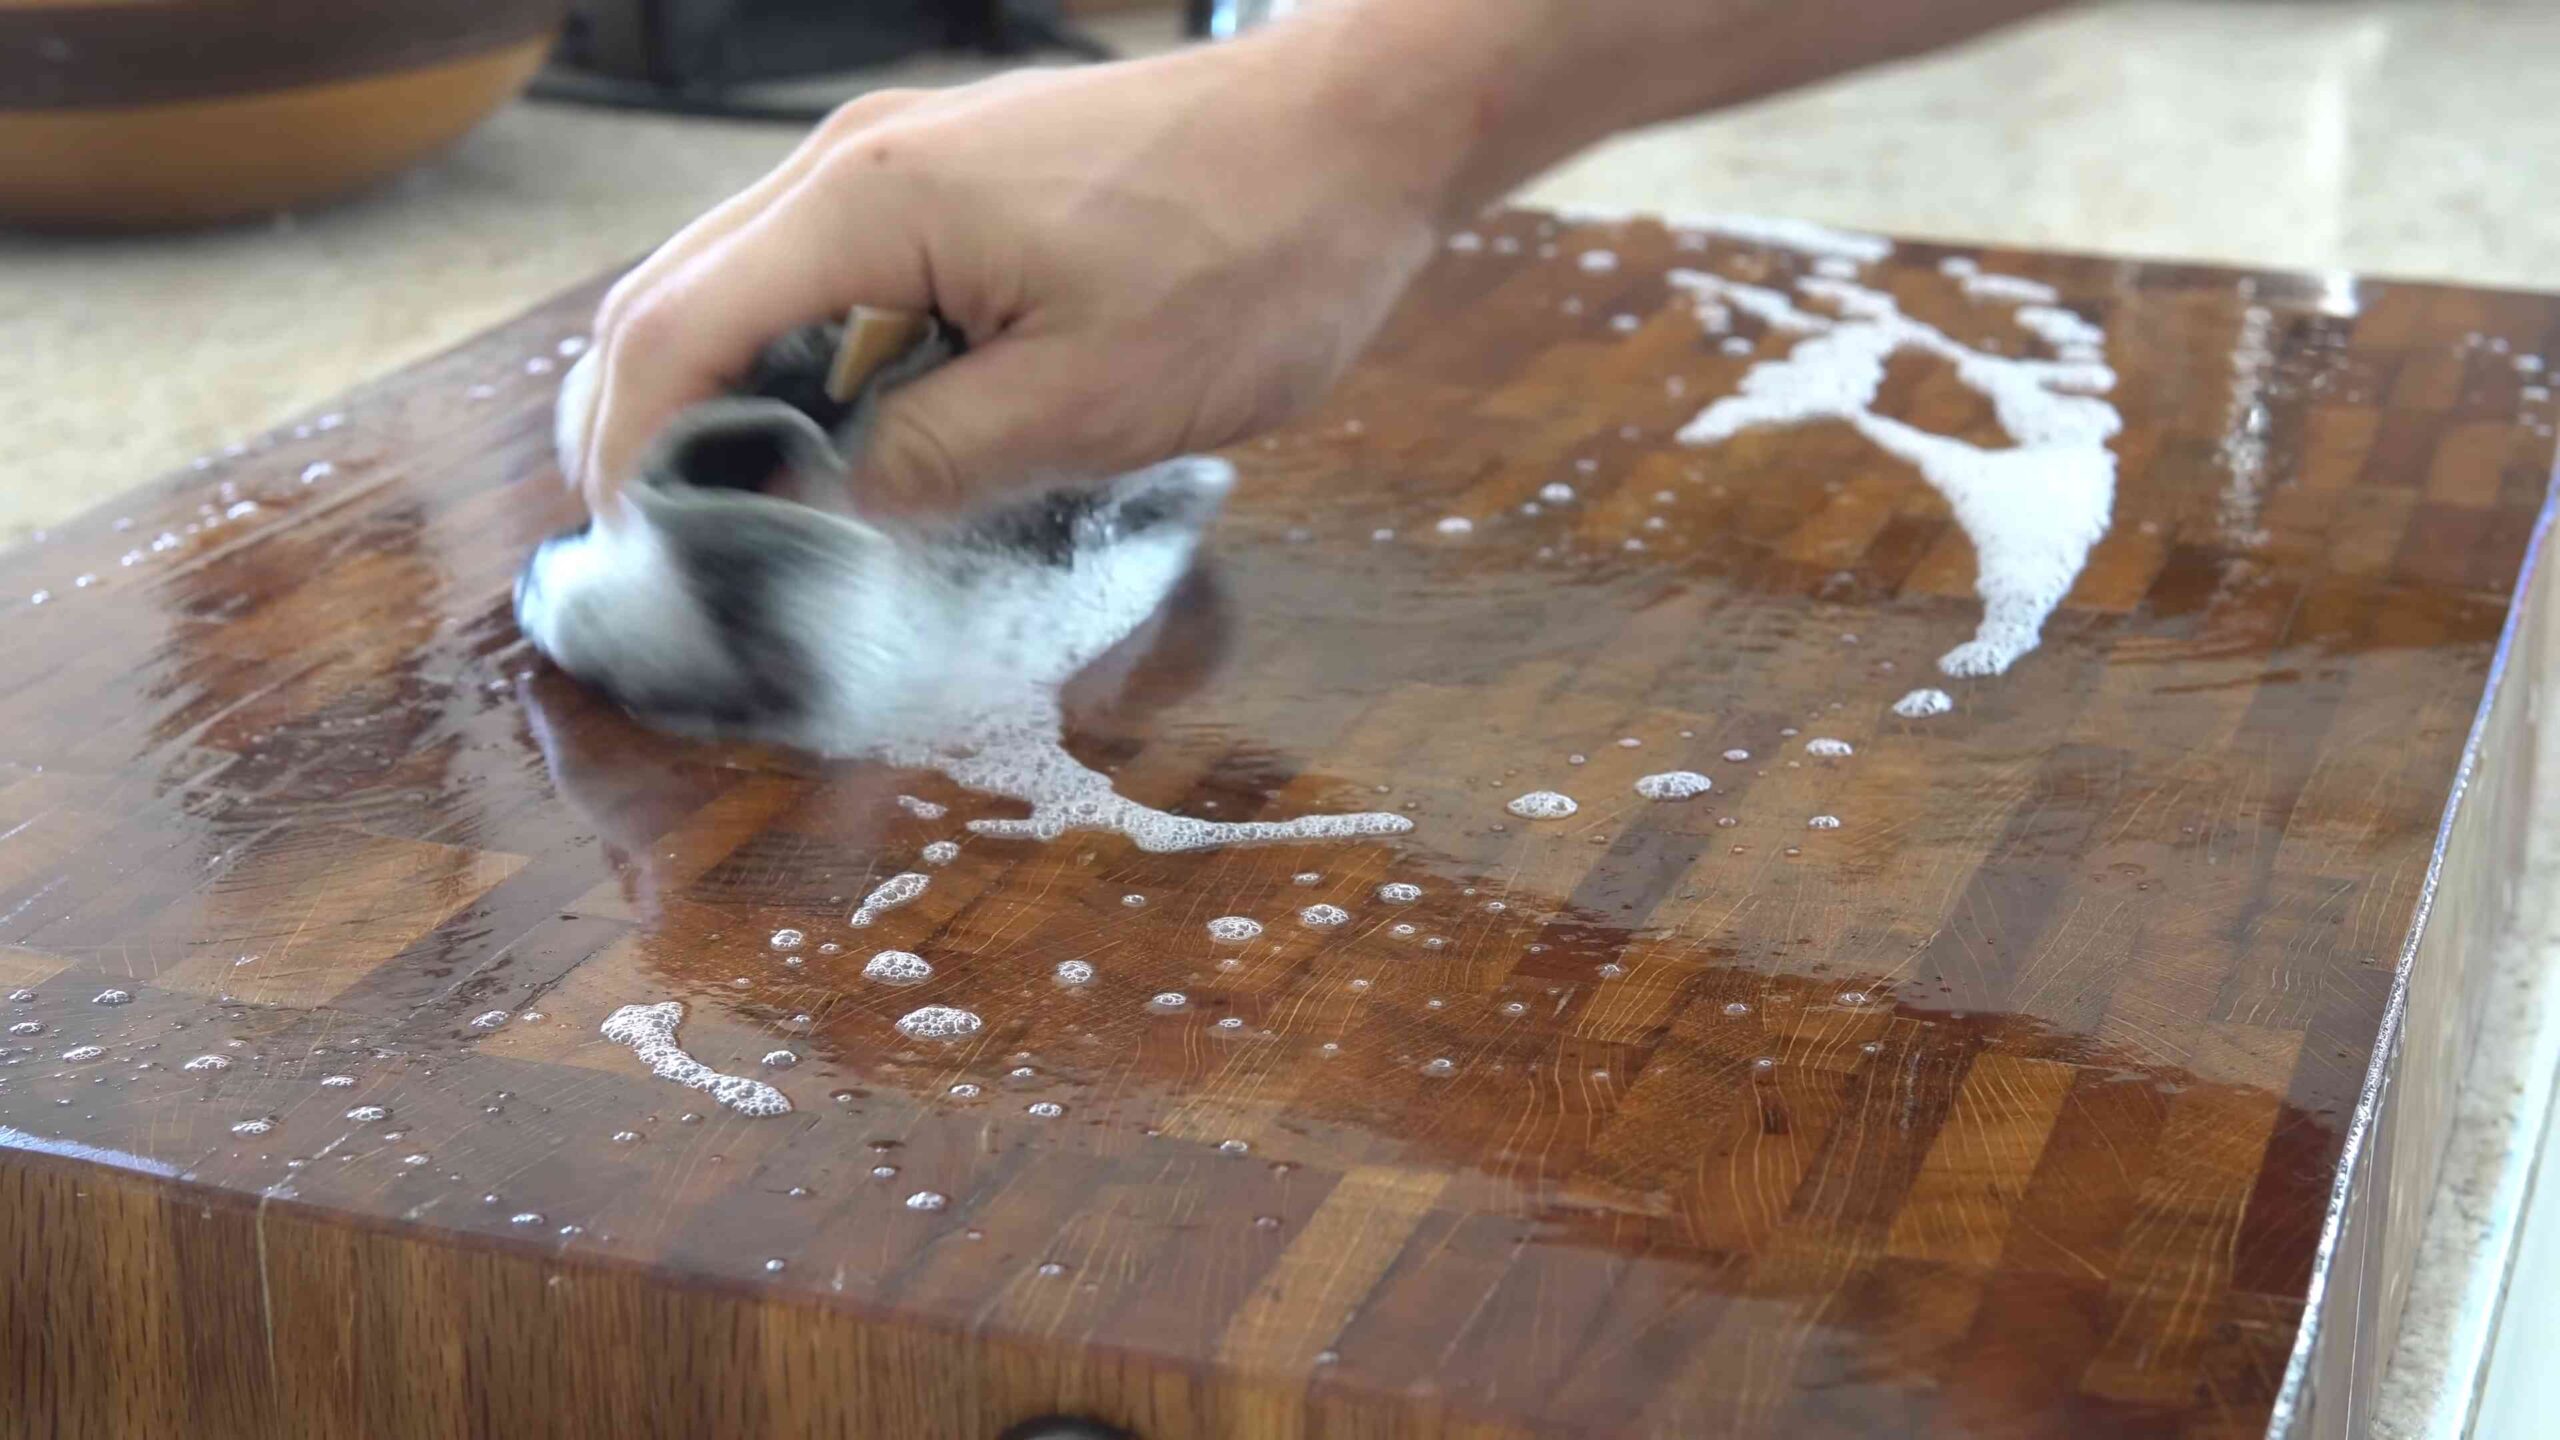
2. Salt and Lemon Scrub: Cut a lemon in half. Sprinkle a generous amount of coarse salt all over the cutting board. Use the cut side of the lemon to scrub the salt into the wood in a circular motion. Apply firm pressure, focusing on stained or heavily used areas. The salt will act as an abrasive, while the lemon juice will disinfect and deodorize.
3. Vinegar Rinse: Rinse the cutting board thoroughly with white vinegar. This will help to remove any remaining salt and lemon residue, and it will also provide an extra layer of disinfection.
4. Wash with Soap and Water: Wash the cutting board with warm, soapy water. Use a mild dish soap and a soft sponge or cloth.
5. Dry Thoroughly: Pat the cutting board dry with a clean towel. Then, let it air dry completely. This is crucial to prevent mold and mildew growth. I usually leave mine to dry overnight.
Phase 2: Sanding (The Key to a Smooth Surface)
Now comes the fun part – sanding! This is where we’ll remove scratches, imperfections, and any lingering stains.
1. Assess the Damage: Take a close look at your cutting board. How deep are the scratches? Are there any significant gouges? This will determine which grit of sandpaper to start with.
2. Start with Coarse Grit (If Needed): If your cutting board has deep scratches or gouges, start with 80-grit sandpaper. Attach the sandpaper to a sanding block (optional) and sand with the grain of the wood. Apply even pressure and avoid sanding in circles. The goal here is to remove the deep imperfections, not to create a perfectly smooth surface.
3. Move to Medium Grit: Once you’ve removed the deep scratches, switch to 120-grit sandpaper. Sand the entire surface of the cutting board, again with the grain of the wood. This will smooth out the rough surface created by the 80-grit sandpaper.
4. Finish with Fine Grit: Finally, use 220-grit sandpaper to create a super-smooth finish. Sand the entire surface of the cutting board one last time, with the grain of the wood.
5. Dust Removal: After sanding, thoroughly remove all the sanding dust. You can use a vacuum cleaner with a brush attachment, a tack cloth, or a damp cloth. Make sure the cutting board is completely clean and dry before moving on to the next step.
Phase 3: Oiling and Sealing (Protecting Your Investment)
This is where we’ll rehydrate the wood and protect it from future damage.
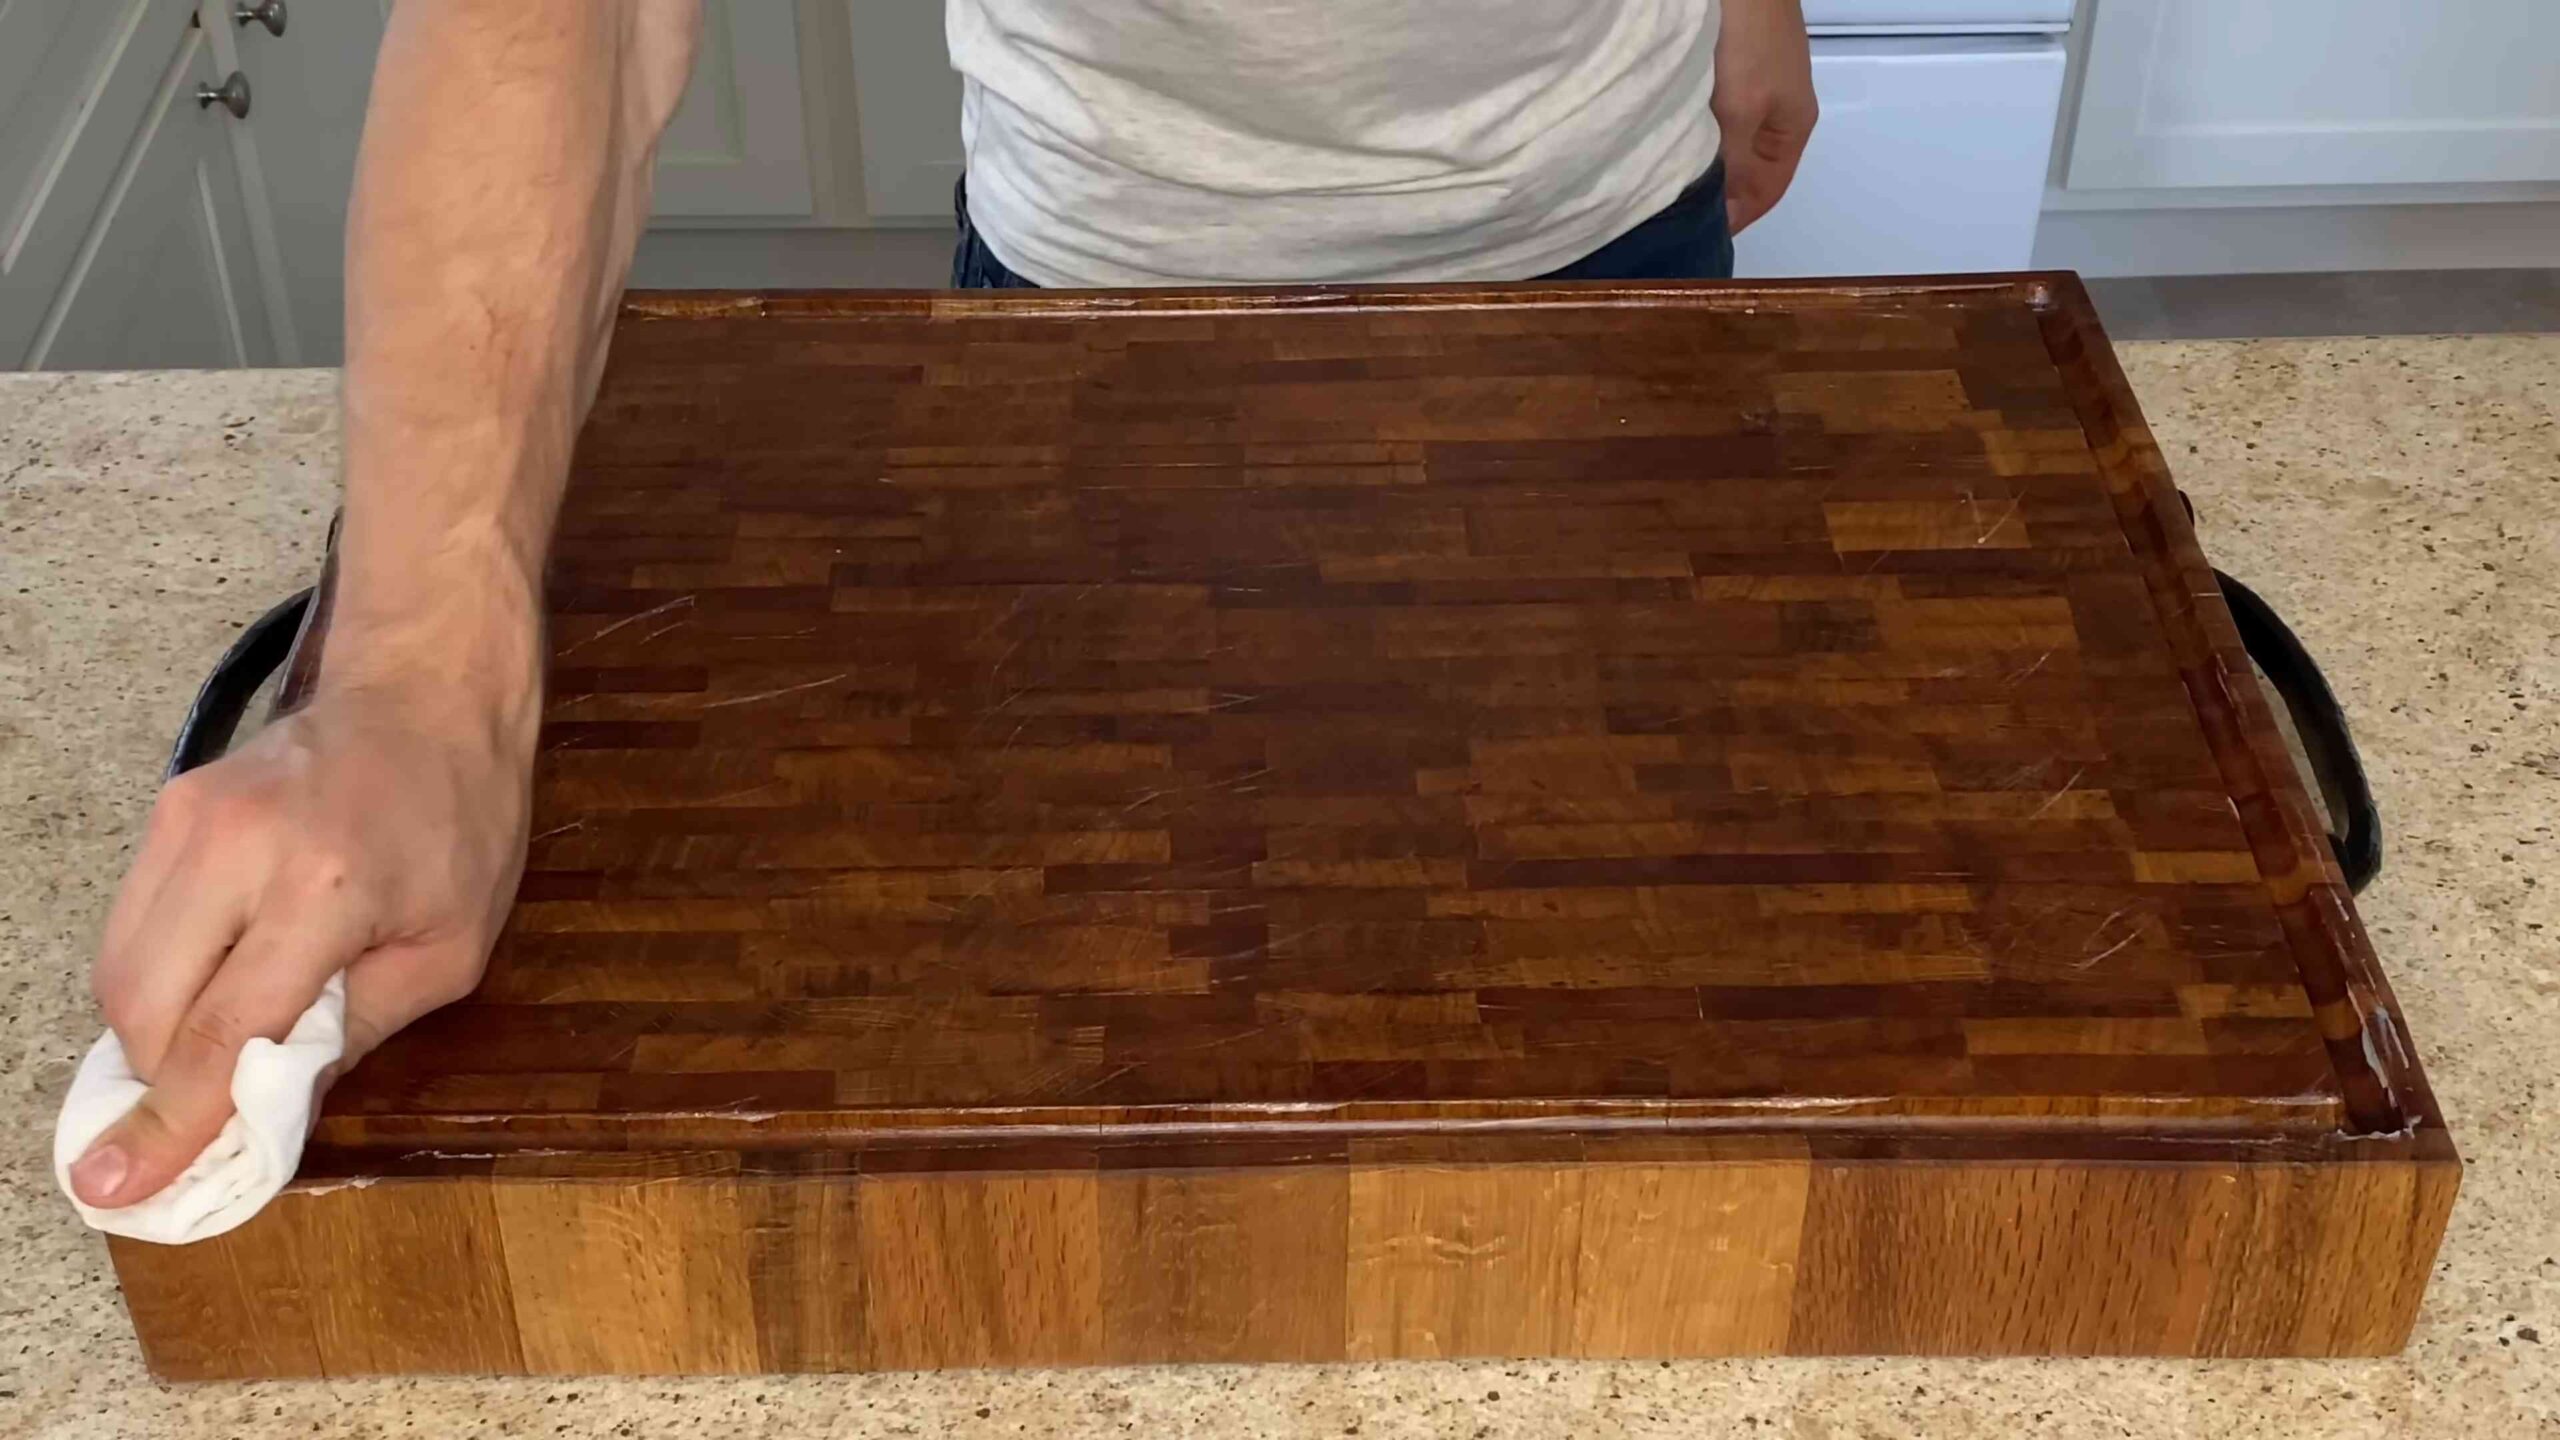
1. Apply Mineral Oil: Pour a generous amount of food-grade mineral oil onto the cutting board. Use a clean rag or paper towel to spread the oil evenly over the entire surface, including the edges and end grain.
2. Let it Soak In: Allow the oil to soak into the wood for at least a few hours, or even overnight. The longer it soaks, the better. You’ll notice the wood will start to look richer and more vibrant as it absorbs the oil.
3. Wipe Off Excess Oil: After the oil has soaked in, wipe off any excess oil with a clean rag or paper towel. You don’t want the surface to be sticky or greasy.
4. Repeat Oiling (Optional): For heavily used cutting boards, you may want to repeat the oiling process a few times. This will ensure that the wood is fully saturated and protected. I usually do this every few months to keep my boards in top condition.
Phase 4: Beeswax Finish (Optional, But Highly Recommended!)
This step adds an extra layer of protection and gives your cutting board a beautiful sheen.
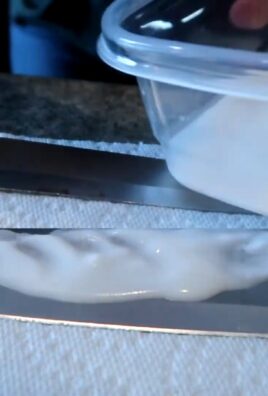
1. Melt the Beeswax: In a double boiler or microwave-safe bowl, melt equal parts beeswax and mineral oil. If using a microwave, heat in 30-second intervals, stirring in between, until the beeswax is completely melted. Be careful, as the mixture will be hot.
2. Pour into a Container: Carefully pour the melted beeswax mixture into a heat-resistant container.
3. Apply to the Cutting Board: Once the mixture has cooled slightly but is still pliable, use a clean rag or paper towel to apply a thin layer to the entire cutting board.
4. Buff the Surface: After the beeswax has hardened (this usually takes a few minutes), use a clean, dry rag to buff the surface of the cutting board. This will remove any excess beeswax and create a smooth, shiny finish.
5. Let it Cure: Allow the beeswax finish to cure for at least 24 hours before using the cutting board.
Maintaining Your Revived Cutting Board
Now that you’ve put in all this effort, you’ll want to keep your cutting board looking its best. Here are a few tips:
* Wash After Each Use: Wash your cutting board with warm, soapy water after each use.
* Dry Thoroughly: Always dry your cutting board thoroughly after washing.
* Oil Regularly: Re-oil your cutting board every few weeks or months, depending on how often you use it.
* Avoid Dishwashers: Never put your wooden cutting board in the dishwasher. The high heat and harsh detergents can damage the wood.
* Sanitize Regularly: Sanitize your cutting board regularly with a solution of white vinegar and water.
* Store Properly: Store your cutting board in a dry place, away from direct sunlight.
And that’s it! With a little care and attention, your wooden cutting board will be a cherished kitchen companion for years to come. Happy cooking!
Conclusion
So, there you have it! Mastering the art of wooden cutting board care isn’t just about extending the life of your favorite kitchen tool; it’s about embracing a healthier, more sustainable way of cooking. By implementing these simple yet effective DIY techniques, you’re not only protecting your investment but also ensuring that your food preparation surface remains hygienic and beautiful for years to come.
Why is this DIY approach a must-try? Because it’s cost-effective, environmentally friendly, and gives you complete control over the products you use on a surface that comes into direct contact with your food. Commercial cutting board oils and waxes can be expensive and sometimes contain ingredients you might not be comfortable with. This DIY method allows you to use natural, food-grade ingredients that you likely already have in your pantry.
Think of the satisfaction of knowing you’re using a cutting board that’s been lovingly cared for with your own two hands, using ingredients you trust. It’s a small act of self-sufficiency that can make a big difference in your kitchen routine.
But the benefits don’t stop there. A well-maintained wooden cutting board is less likely to harbor bacteria, making it a safer surface for preparing meals. Regular oiling prevents the wood from drying out and cracking, which can create crevices where bacteria can thrive.
Ready to take your cutting board care to the next level? Consider these variations:
* Infused Oils: Experiment with infusing your mineral oil with herbs like rosemary or thyme for a subtle, aromatic touch. Simply add a few sprigs of your chosen herb to the oil and let it sit for a week or two before straining and using.
* Beeswax Polish Variations: Add a touch of carnauba wax to your beeswax polish for an even harder, more durable finish. This is especially useful for cutting boards that see heavy use.
* Lemon Juice Boost: For extra sanitizing power, add a tablespoon of lemon juice to your cleaning solution. The natural acidity of lemon juice helps to kill bacteria and neutralize odors.
We wholeheartedly encourage you to try these DIY wooden cutting board care methods. The results speak for themselves – a beautifully conditioned, long-lasting cutting board that’s a joy to use. Don’t be intimidated; it’s easier than you think!
Once you’ve given it a try, we’d love to hear about your experience! Share your tips, tricks, and before-and-after photos in the comments below. Let’s build a community of cutting board care enthusiasts and help each other keep our kitchens clean, safe, and beautiful. Your insights could be invaluable to someone just starting out. Let us know what worked best for you, any challenges you encountered, and any creative variations you came up with. Together, we can elevate the art of wooden cutting board care and ensure that these essential kitchen tools remain cherished companions for years to come.
Frequently Asked Questions (FAQ)
What type of oil should I use for my wooden cutting board?
The best oil for wooden cutting boards is food-grade mineral oil. It’s odorless, tasteless, and won’t go rancid. You can also use coconut oil, but be aware that it can sometimes impart a slight coconut flavor. Avoid using vegetable oils like olive oil or canola oil, as they can become sticky and rancid over time. Walnut oil is another good option, but only if you’re sure no one in your household has a nut allergy.
How often should I oil my wooden cutting board?
The frequency of oiling depends on how often you use your cutting board and how dry your environment is. As a general rule, oil your cutting board at least once a month, or more often if it starts to look dry or feels rough to the touch. A good way to tell if your cutting board needs oiling is to sprinkle a few drops of water on the surface. If the water beads up, the board is still well-oiled. If the water soaks in quickly, it’s time to oil it.
How do I clean my wooden cutting board after each use?
After each use, wash your wooden cutting board with warm, soapy water. Use a scrub brush or sponge to remove any food particles. Rinse thoroughly with clean water and dry immediately with a clean towel. Avoid soaking your cutting board in water, as this can cause it to warp or crack.
Can I put my wooden cutting board in the dishwasher?
No, never put your wooden cutting board in the dishwasher. The high heat and harsh detergents can damage the wood, causing it to dry out, crack, and warp. Hand washing is the only safe way to clean your wooden cutting board.
How do I sanitize my wooden cutting board?
To sanitize your wooden cutting board, you can use a solution of white vinegar and water (1 part vinegar to 5 parts water). Spray the solution onto the cutting board and let it sit for a few minutes before wiping it clean with a damp cloth. You can also use a solution of hydrogen peroxide (3%) to sanitize your cutting board. Apply the hydrogen peroxide to the cutting board and let it sit for a few minutes before rinsing with water.
How do I remove stains and odors from my wooden cutting board?
To remove stains and odors, sprinkle coarse salt over the surface of the cutting board. Cut a lemon in half and use it to scrub the salt into the wood. The salt will act as an abrasive to remove stains, while the lemon juice will help to neutralize odors. Rinse the cutting board with water and dry thoroughly.
How do I fix a warped or cracked wooden cutting board?
If your wooden cutting board is slightly warped, you can try to flatten it by placing it under a heavy object for several days. If the warping is severe, you may need to take it to a professional woodworker for repair. For small cracks, you can fill them with wood glue and clamp the board together until the glue dries. For larger cracks, you may need to replace the cutting board.
Is it safe to cut raw meat on a wooden cutting board?
Yes, it is safe to cut raw meat on a wooden cutting board, as long as you clean and sanitize it properly afterwards. Wood has natural antibacterial properties that can help to kill bacteria. However, it’s still important to wash the cutting board thoroughly with hot, soapy water and sanitize it with a vinegar or hydrogen peroxide solution after each use. Consider using a separate cutting board specifically for raw meat to minimize the risk of cross-contamination.
How long will my wooden cutting board last?
With proper care, a wooden cutting board can last for many years. The lifespan of your cutting board will depend on the type of wood it’s made from, how often you use it, and how well you maintain it. Regular cleaning, oiling, and sanitizing will help to extend the life of your cutting board and keep it looking its best.


Leave a Comment