

Remove Water Rings Wood – those dreaded white circles that seem to appear on our beloved wooden furniture like unwelcome guests! Have you ever hosted a gathering, only to discover a constellation of water rings marring your beautiful coffee table the next morning? I know I have! It’s a common woe, and it can feel like a mini-disaster. But don’t despair, because I’m here to share some simple, effective DIY tricks to banish those rings and restore your wood to its former glory.
Wood, as a material, has been cherished for centuries, used in everything from grand cathedrals to humble homes. Its natural beauty and warmth bring a sense of history and connection to our living spaces. But wood is also porous, making it susceptible to moisture damage. Those pesky water rings are essentially trapped moisture beneath the finish, creating that cloudy appearance.
Why is learning to remove water rings wood so important? Because replacing furniture is expensive and often unnecessary! These DIY hacks are not only budget-friendly but also empower you to care for your cherished pieces, extending their lifespan and preserving their beauty. Plus, knowing these tricks gives you the confidence to host without constantly worrying about coasters. So, let’s dive in and learn how to say goodbye to water rings for good!
DIY Water Ring Removal from Wood Furniture: A Comprehensive Guide
Hey there, fellow DIY enthusiasts! Water rings on wood furniture – we’ve all been there, right? That dreaded white mark left by a rogue glass or a forgotten coaster. Don’t panic! Before you resign yourself to living with those unsightly rings, I’m here to share some tried-and-true methods to banish them for good. I’ve personally tested these techniques, and I’m confident you’ll find one that works for you. Let’s dive in!
Understanding the Enemy: What Causes Water Rings?
First, it’s important to understand what’s actually happening when a water ring forms. That white ring isn’t just water sitting on the surface. It’s moisture that has penetrated the finish of your wood furniture. The heat from the glass (or mug, or whatever caused it) helps the moisture seep into the finish, creating that cloudy appearance. The good news is that because the damage is usually only in the finish, it can often be reversed without refinishing the entire piece.
The Ironing Method: A Classic Solution
This is probably the most well-known method, and for good reason – it often works wonders! The heat from the iron helps to draw the moisture back out of the finish.
What You’ll Need:
* An iron (dry, no steam!)
* A clean, soft cotton cloth (an old t-shirt works great)
* Water (optional, for stubborn rings)
Step-by-Step Instructions:
1. Prepare the Surface: Make sure the surface of your furniture is clean and dry. Wipe away any dust or debris with a soft cloth.
2. Position the Cloth: Place the clean cotton cloth directly over the water ring. Make sure the cloth is smooth and covers the entire ring.
3. Heat Up the Iron: Set your iron to a low, dry setting (no steam!). You want a gentle heat, not scorching temperatures.
4. Iron the Ring: Gently press the iron onto the cloth over the water ring. Use a circular motion and keep the iron moving. Don’t leave the iron in one spot for too long, as this could damage the finish.
5. Check Your Progress: Lift the cloth periodically to check if the ring is disappearing. You should start to see the white mark fading.
6. Repeat as Needed: If the ring is still visible, repeat steps 4 and 5. You might need to do this several times.
7. Stubborn Rings: If the ring is particularly stubborn, you can try lightly dampening the cloth with water. Make sure the cloth is only slightly damp, not soaking wet. Repeat the ironing process as described above.
8. Buff the Surface: Once the ring is gone, buff the area with a clean, dry cloth to restore the shine.
The Hair Dryer Method: A Gentler Approach
If you’re nervous about using an iron, the hair dryer method is a gentler alternative. It works on the same principle – using heat to draw out the moisture – but it’s less likely to damage the finish.
What You’ll Need:
* A hair dryer
* A clean, soft cotton cloth
Step-by-Step Instructions:
1. Prepare the Surface: As with the ironing method, make sure the surface is clean and dry.
2. Position the Cloth: Place the clean cotton cloth over the water ring.
3. Heat with the Hair Dryer: Set your hair dryer to a low or medium heat setting. Hold the hair dryer a few inches away from the cloth and direct the heat onto the water ring.
4. Move the Hair Dryer: Keep the hair dryer moving in a circular motion. Don’t hold it in one spot for too long.
5. Check Your Progress: Lift the cloth periodically to check if the ring is fading.
6. Repeat as Needed: Repeat steps 3-5 until the ring disappears. This method might take longer than the ironing method, so be patient.
7. Buff the Surface: Once the ring is gone, buff the area with a clean, dry cloth.
The Mayonnaise Method: A Surprising Solution
Yes, you read that right! Mayonnaise can actually help remove water rings. The oils in mayonnaise can help to rehydrate the finish and draw out the moisture.
What You’ll Need:
* Mayonnaise (full-fat is best)
* A clean, soft cloth
* Paper towels
Step-by-Step Instructions:
1. Apply the Mayonnaise: Apply a generous amount of mayonnaise to the water ring.
2. Let it Sit: Let the mayonnaise sit on the ring for at least an hour, or even overnight for stubborn rings.
3. Wipe Away the Mayonnaise: After the allotted time, wipe away the mayonnaise with a clean, soft cloth.
4. Clean the Surface: Clean the area with a damp cloth to remove any remaining mayonnaise residue.
5. Dry and Buff: Dry the surface thoroughly with a clean cloth and then buff to restore the shine.
The Toothpaste Method: A Gentle Abrasive
Toothpaste, specifically non-gel toothpaste, can act as a very mild abrasive to gently buff away the water ring. It’s important to use a non-gel toothpaste, as the gel varieties can contain ingredients that could damage the finish.
What You’ll Need:
* Non-gel toothpaste (white toothpaste)
* A clean, soft cloth
* Water
Step-by-Step Instructions:
1. Apply the Toothpaste: Apply a small amount of toothpaste to the water ring.
2. Gently Rub: Using a clean, soft cloth, gently rub the toothpaste into the ring in a circular motion. Be careful not to apply too much pressure, as you don’t want to scratch the finish.
3. Wipe Away the Toothpaste: After a few minutes of rubbing, wipe away the toothpaste with a damp cloth.
4. Dry and Buff: Dry the surface thoroughly with a clean cloth and then buff to restore the shine.
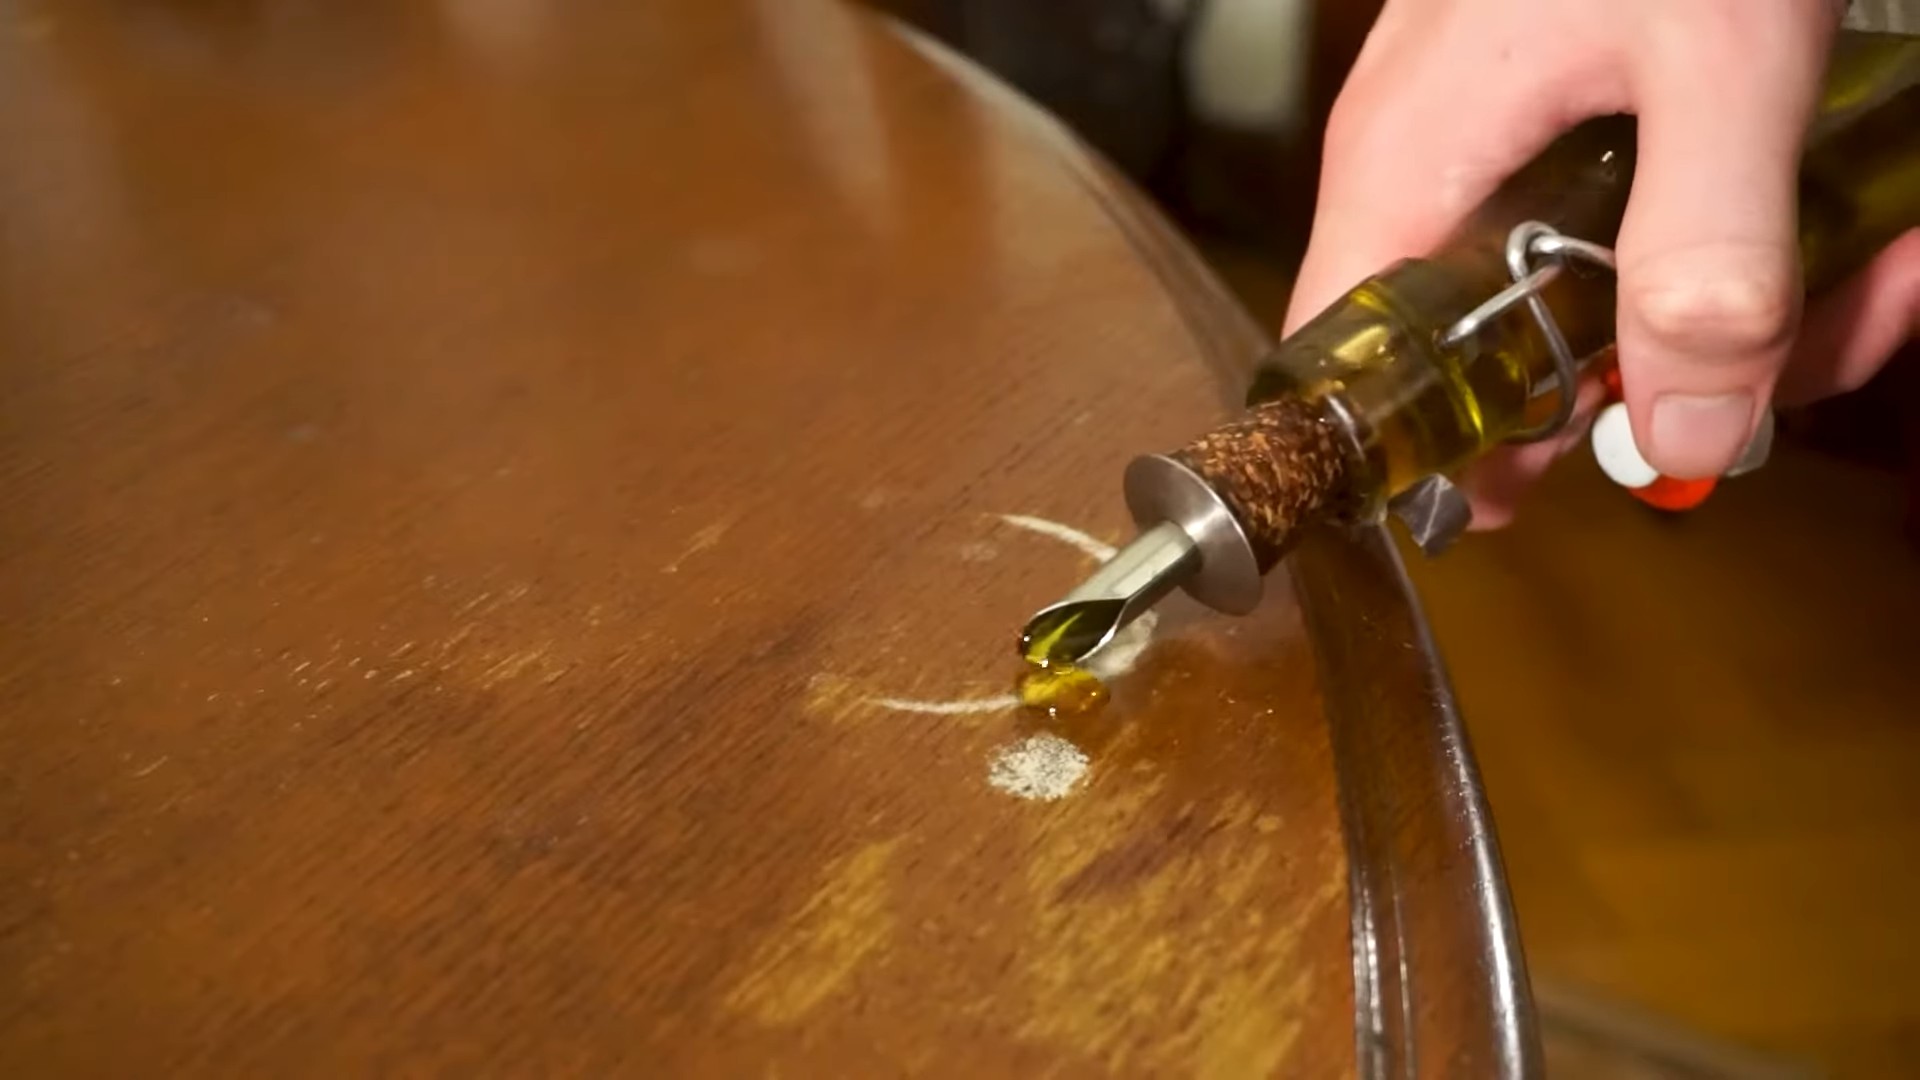
The Olive Oil and Salt Method: Another Abrasive Option
Similar to toothpaste, this method uses a gentle abrasive (salt) combined with a moisturizing agent (olive oil) to tackle the water ring.
What You’ll Need:
* Olive oil
* Salt (table salt or sea salt)
* A clean, soft cloth
Step-by-Step Instructions:
1. Make a Paste: Mix together olive oil and salt to form a thick paste.
2. Apply the Paste: Apply the paste to the water ring.
3. Gently Rub: Using a clean, soft cloth, gently rub the paste into the ring in a circular motion. Again, be careful not to apply too much pressure.
4. Wipe Away the Paste: After a few minutes of rubbing, wipe away the paste with a damp cloth.
5. Dry and Buff: Dry the surface thoroughly with a clean cloth and then buff to restore the shine.
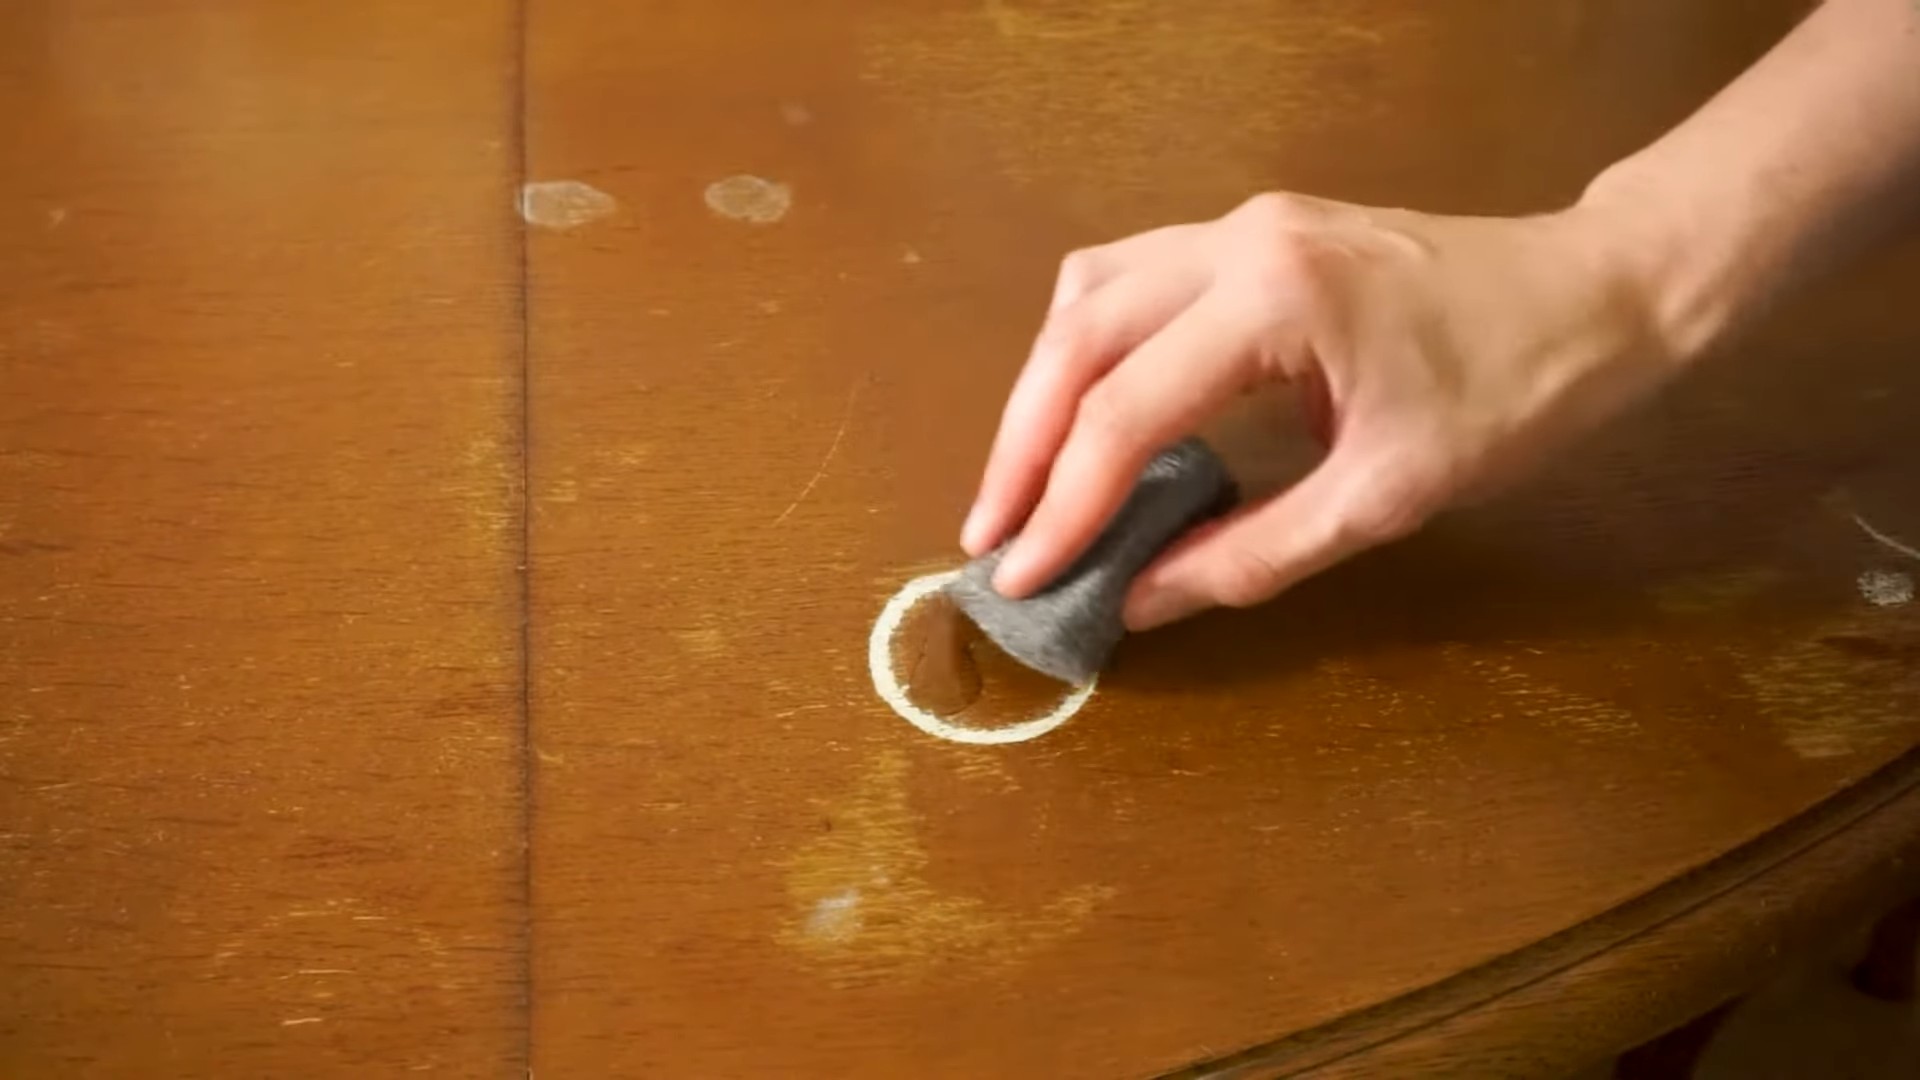
The Steel Wool Method (Use with Extreme Caution!)
I want to emphasize that this method should be used as a last resort and with extreme caution. It can easily damage the finish if you’re not careful. Only use this method if the other methods have failed and you’re willing to risk potentially damaging the finish.
What You’ll Need:
* 0000 steel wool (the finest grade)
* Furniture polish or wax
* A clean, soft cloth
Step-by-Step Instructions:
1. Apply Furniture Polish: Apply a small amount of furniture polish or wax to the water ring.
2. Gently Rub with Steel Wool: Very gently rub the water ring with the 0000 steel wool in the direction of the wood grain. Use extremely light pressure. You’re not trying to sand the finish off, just gently buff away the ring.
3. Wipe Away Residue: Wipe away any residue with a clean, soft cloth.
4. Apply More Polish/Wax: Apply another coat of furniture polish or wax to protect the finish.
5. Buff the Surface: Buff the surface to restore the shine.
Preventing Future Water Rings: A Proactive Approach
Of course, the best way to deal with water rings is to prevent them from happening in the first place! Here are a few tips:
* Use Coasters: This is the most obvious one, but it’s worth repeating. Always use coasters under glasses, mugs, and anything else that might leave a water ring.
* Use Placemats: Placemats can protect your dining table from spills and water rings.
* Wipe Up Spills Immediately: Don’t let spills sit on your furniture. Wipe
Conclusion
So, there you have it! Removing water rings from wood furniture doesn’t have to be a daunting task requiring expensive products or professional help. This simple, DIY trick, using items you likely already have in your home, is a game-changer for preserving the beauty and integrity of your beloved wooden pieces. We’ve explored a method that’s not only effective but also gentle, minimizing the risk of further damage to the finish.
Why is this a must-try? Because those unsightly water rings can detract from the overall aesthetic of your furniture and even diminish its value over time. Ignoring them isn’t an option if you want to maintain the elegance and charm of your wooden surfaces. This DIY solution offers a cost-effective and readily available alternative to commercial products, many of which contain harsh chemicals that could potentially harm the wood’s finish.
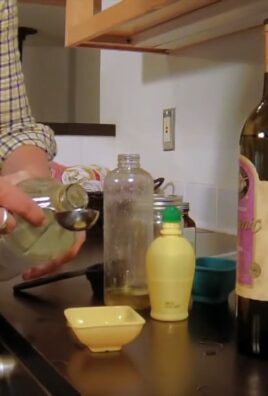
But the beauty of this method lies not only in its simplicity but also in its adaptability. While we’ve focused on the iron and cloth technique, remember that variations exist. For instance, some people have found success using a hairdryer on a low setting, carefully directing the heat towards the water ring while gently wiping with a soft cloth. Others swear by a mixture of equal parts olive oil and vinegar, applied with a soft cloth and buffed until the ring disappears. Experimentation is key to finding what works best for your specific type of wood and finish.
Consider the age and type of your wood when choosing your approach. Antique furniture, for example, may require a more delicate touch. Always test any method in an inconspicuous area first to ensure it doesn’t cause any discoloration or damage. And remember, patience is crucial. Don’t rush the process; allow the heat or solution to work its magic gradually.
Don’t let water rings ruin the beauty of your wood furniture any longer! This DIY trick is a simple, effective, and affordable way to restore your furniture to its former glory. We encourage you to give it a try and see the amazing results for yourself.
But most importantly, we want to hear about your experiences! Did this method work for you? Did you try any variations? Share your tips, tricks, and before-and-after photos in the comments below. Your feedback will not only help other readers but also contribute to a collective knowledge base for tackling this common household problem. Let’s work together to keep our wood furniture looking its best! We are confident that you will find this method to remove water rings from wood to be a valuable addition to your home maintenance arsenal.
FAQ
What causes water rings on wood furniture?
Water rings, also known as white rings or heat rings, are caused by moisture becoming trapped beneath the finish of the wood. When a cold or hot glass (or any object containing moisture) is placed directly on a wooden surface without protection, the moisture condenses and penetrates the finish. This trapped moisture creates a cloudy or white appearance, which is the dreaded water ring. The finish acts as a barrier, but over time, moisture can seep through microscopic pores or cracks.
Will this DIY trick work on all types of wood and finishes?
While this DIY trick is generally effective, it’s essential to understand that different types of wood and finishes react differently to heat and moisture. Hardwoods like oak and maple tend to be more resilient than softwoods like pine. Similarly, durable finishes like polyurethane are more resistant to water damage than delicate finishes like lacquer or varnish.
Therefore, it’s crucial to test the method in an inconspicuous area first, regardless of the type of wood or finish. This will allow you to assess how the wood reacts to the heat and ensure that it doesn’t cause any discoloration or damage. If you’re unsure about the type of wood or finish, consult a professional furniture restorer before attempting any DIY repairs.
How long does it take for the water ring to disappear?
The time it takes for the water ring to disappear can vary depending on the severity of the ring, the type of wood, and the finish. In some cases, the ring may disappear almost immediately after applying heat. In other cases, it may take several attempts or even a few hours for the ring to fade completely.
Patience is key. Don’t rush the process or apply excessive heat, as this could damage the finish. Instead, work gradually and allow the heat to work its magic. If the ring persists after several attempts, you may need to try a different method or consult a professional.
What if the water ring is very old or deep?
Old or deep water rings can be more challenging to remove than fresh ones. In these cases, the moisture may have penetrated deeper into the wood, making it more difficult to evaporate. You may need to repeat the DIY trick several times or try a combination of methods.
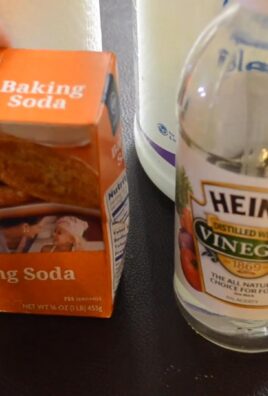
For stubborn water rings, consider using a mixture of equal parts olive oil and vinegar. Apply the mixture to the ring with a soft cloth and buff gently until the ring disappears. The olive oil helps to moisturize the wood, while the vinegar helps to dissolve the trapped moisture.
If the water ring is extremely deep or old, it may be necessary to refinish the affected area. This involves removing the existing finish, sanding the wood, and applying a new finish. Refinishing is a more involved process that requires specialized tools and skills, so it’s best left to a professional.
Can I use a regular iron instead of a dry iron?
No, it’s crucial to use a dry iron for this DIY trick. A steam iron will introduce more moisture to the wood, which will only exacerbate the problem. The goal is to evaporate the trapped moisture, not to add more.
Ensure that your iron is set to the lowest heat setting and that the steam function is turned off. You can also place a thin cotton cloth between the iron and the wood to protect the finish from direct heat.
What type of cloth should I use?
A thin, clean cotton cloth is ideal for this DIY trick. Avoid using synthetic fabrics or cloths with rough textures, as these could scratch the finish. An old t-shirt or pillowcase works well.
Ensure that the cloth is clean and free of any dirt or debris. You can also dampen the cloth slightly to help conduct heat more effectively. However, avoid using a wet cloth, as this could introduce more moisture to the wood.
How can I prevent water rings from forming in the future?
Prevention is always better than cure. To prevent water rings from forming in the future, always use coasters or placemats under glasses, cups, and other objects that contain moisture. This will create a barrier between the object and the wood, preventing moisture from penetrating the finish.
You can also apply a protective coating to your wood furniture, such as a wax or polish. This will help to seal the finish and make it more resistant to water damage. Reapply the protective coating regularly, according to the manufacturer’s instructions.
Finally, be mindful of the humidity levels in your home. High humidity can contribute to moisture buildup in wood furniture, making it more susceptible to water rings. Consider using a dehumidifier to maintain a comfortable humidity level.

Leave a Comment