

Quick cleaning hacks – who doesn’t need them? Let’s be honest, between work, family, and trying to squeeze in a little “me time,” cleaning often falls to the bottom of the to-do list. But what if I told you that you could reclaim your weekends and still have a sparkling clean home?
For centuries, people have been devising clever ways to keep their homes tidy. From ancient Roman bathhouses to the meticulously cleaned homes of the Victorian era, the desire for a clean and organized living space is deeply ingrained in our history. But unlike our ancestors, we have the added pressure of a fast-paced modern lifestyle. That’s where these quick cleaning hacks come in!
I’m going to share some of my favorite DIY cleaning tricks that will save you time, money, and a whole lot of elbow grease. Imagine spending less time scrubbing and more time doing the things you love. These aren’t just your grandma’s cleaning tips (though some of those are pretty genius!). We’re talking about innovative, easy-to-implement solutions that use everyday items you probably already have in your pantry. So, ditch the all-day cleaning marathons and get ready to discover how to achieve a spotless home with minimal effort!
DIY Cleaning Hacks That Will Save You Time and Money!
Okay, let’s be honest, cleaning isn’t exactly anyone’s favorite pastime. But a clean home is a happy home, right? So, I’m going to share some of my absolute favorite DIY cleaning hacks that are not only super effective but also use ingredients you probably already have in your pantry! Get ready to ditch those expensive cleaning products and embrace the power of simple, natural solutions.
Unclogging Drains Like a Pro
Clogged drains are the bane of my existence! But fear not, because I’ve got a method that works wonders, and it doesn’t involve harsh chemicals.
What you’ll need:
* 1 cup baking soda
* 2 cups white vinegar
* Boiling water
Step-by-step instructions:
1. Pour the baking soda down the drain. Make sure it goes directly into the drain opening. You might need a spoon to help guide it.
2. Follow with the white vinegar. As soon as the vinegar hits the baking soda, you’ll see some fizzing action. This is exactly what we want!
3. Let it fizz for about 30 minutes. This allows the baking soda and vinegar to work their magic, breaking down the gunk and grime that’s causing the clog. I usually set a timer so I don’t forget.
4. Flush with boiling water. After the 30 minutes are up, carefully pour a pot of boiling water down the drain. This will help flush away the loosened debris.
5. Repeat if necessary. For stubborn clogs, you might need to repeat the process. Sometimes, I’ll even let the baking soda and vinegar sit overnight before flushing with boiling water.
Making Your Microwave Sparkle
Microwaves can get pretty gross, pretty quickly. Splatters, spills, and lingering odors – yuck! But this hack makes cleaning your microwave a breeze.
What you’ll need:
* 1 cup water
* 1 tablespoon white vinegar or lemon juice
* Microwave-safe bowl
Step-by-step instructions:
1. Combine water and vinegar (or lemon juice) in a microwave-safe bowl. I prefer lemon juice because it leaves a fresh, citrusy scent.
2. Microwave on high for 5-10 minutes. The water will boil and create steam, which will loosen the grime inside the microwave.
3. Let it stand for 5 minutes (without opening the door). This allows the steam to continue working its magic.
4. Carefully remove the bowl. Be careful, it will be hot!
5. Wipe down the inside of the microwave. The loosened grime should wipe away easily with a damp cloth or sponge. For stubborn spots, you might need to scrub a little.
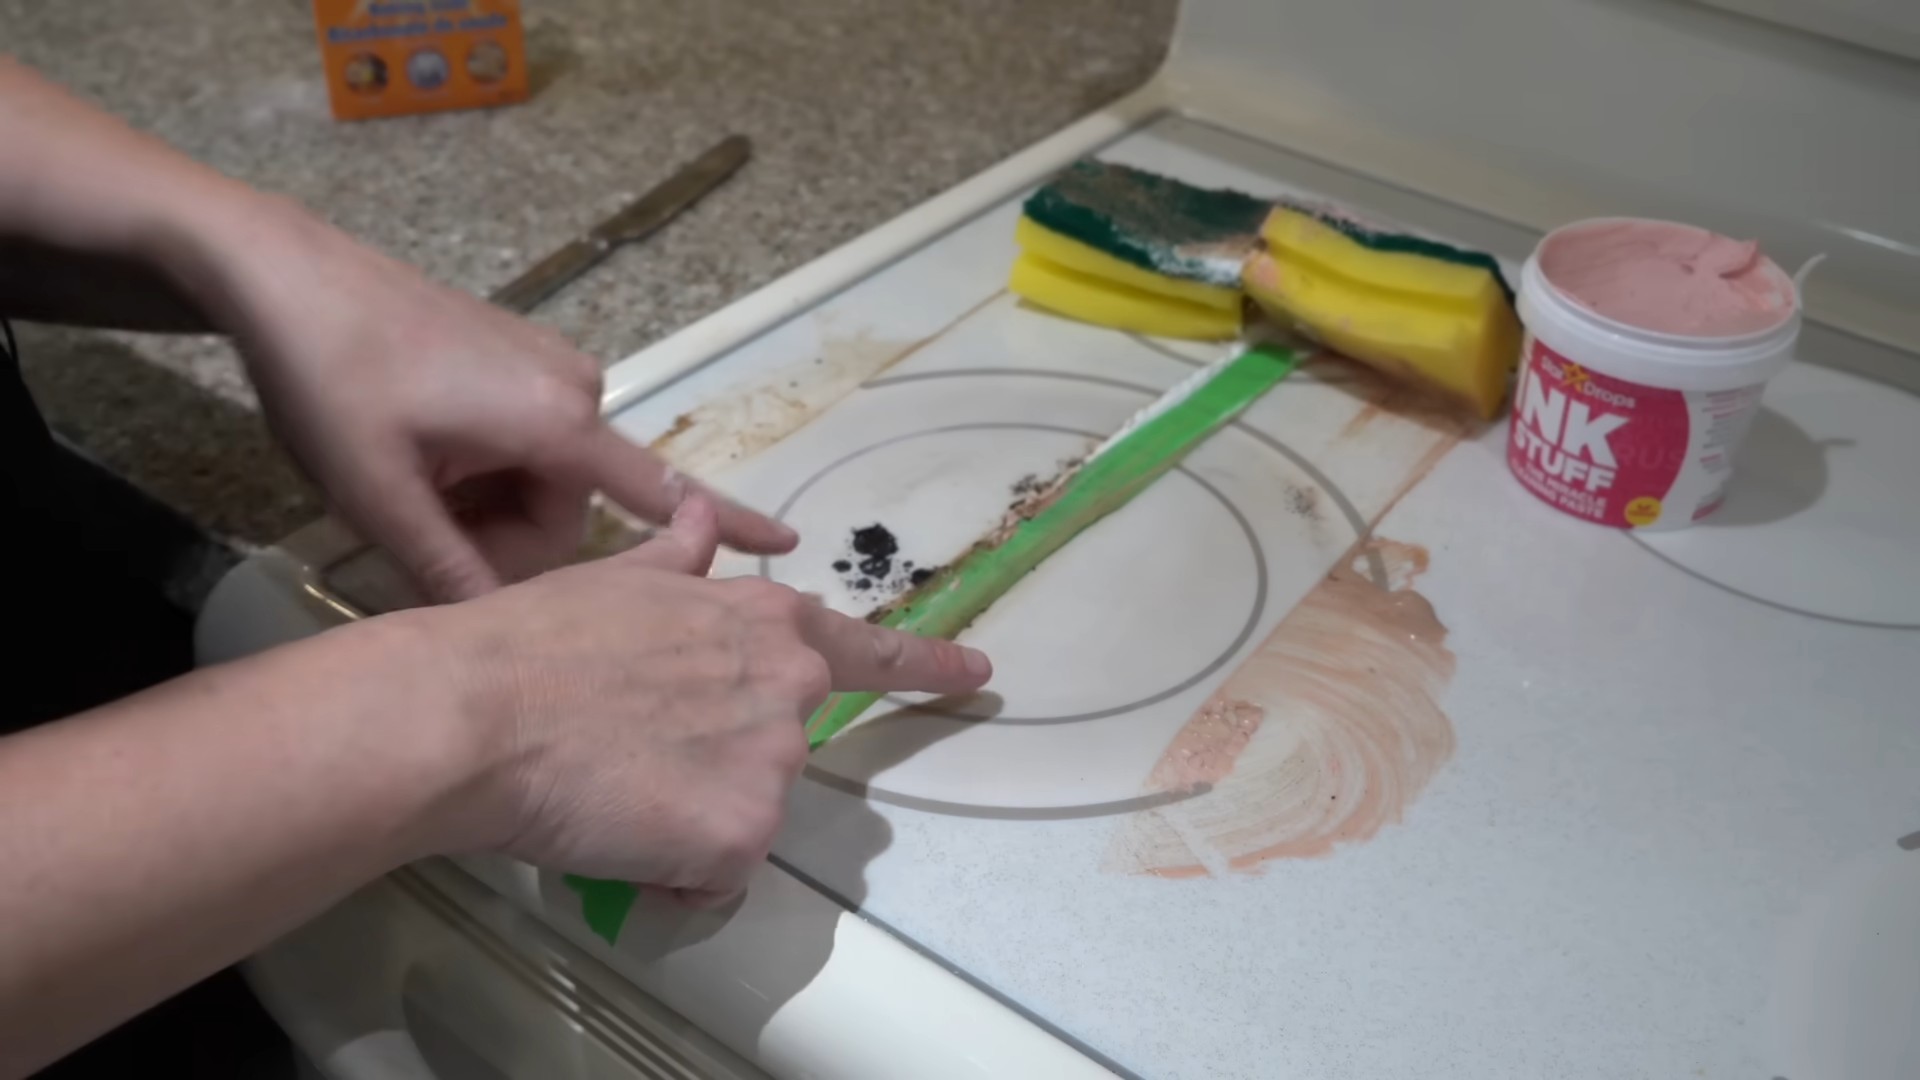
Cleaning Your Grout Like a Pro
Dirty grout can make even the cleanest tiles look dingy. But don’t worry, I’ve got a simple solution that will have your grout looking brand new.
What you’ll need:
* Baking soda
* White vinegar
* Old toothbrush or grout brush
* Spray bottle
* Water
Step-by-step instructions:
1. Make a baking soda paste. Mix baking soda with a little water to form a thick paste.
2. Apply the paste to the grout lines. Use your fingers or a small spatula to spread the paste evenly over the grout.
3. Spray with white vinegar. The vinegar will react with the baking soda, creating a fizzing action that helps to lift the dirt.
4. Let it sit for 5-10 minutes. This allows the mixture to penetrate the grout and break down the grime.
5. Scrub with a toothbrush or grout brush. Use a circular motion to scrub the grout lines, paying extra attention to stubborn stains.
6. Rinse with water. Use a damp cloth or sponge to wipe away the baking soda and vinegar mixture. You might need to rinse several times to remove all the residue.
Shining Stainless Steel Appliances
Stainless steel appliances look great, but they’re notorious for showing fingerprints and smudges. Here’s how to keep them looking their best.
What you’ll need:
* White vinegar
* Microfiber cloth
* Olive oil (optional)
Step-by-step instructions:
1. Spray the stainless steel with white vinegar. Make sure to cover the entire surface.
2. Wipe with a microfiber cloth. Wipe in the direction of the grain to avoid streaks.
3. Buff with a clean microfiber cloth. This will remove any remaining vinegar residue and leave a streak-free shine.
4. (Optional) Polish with olive oil. For an extra shine, put a few drops of olive oil on a clean microfiber cloth and buff the stainless steel. This will also help to protect the surface from fingerprints.
Freshening Up Your Garbage Disposal
Garbage disposals can get pretty smelly, but this simple hack will freshen them up in no time.
What you’ll need:
* Ice cubes
* Lemon or lime wedges
* Salt
Step-by-step instructions:
1. Fill the garbage disposal with ice cubes. The ice will help to dislodge any food particles that are stuck to the blades.
2. Add lemon or lime wedges. The citrus will help to freshen the disposal and remove any lingering odors.
3. Sprinkle with salt. The salt will act as an abrasive, helping to scrub the disposal clean.
4. Turn on the cold water and run the disposal. Let the disposal run for about 30 seconds to a minute, or until all the ice cubes are gone.
Cleaning Burnt Pots and Pans
Accidentally burnt dinner again? Don’t worry, I’ve been there! This hack will help you salvage your pots and pans.
What you’ll need:
* Baking soda
* Water
* Dish soap
* Scrubbing pad or sponge
Step-by-step instructions:
1. Cover the burnt area with baking soda. Make sure to cover all the burnt food.
2. Add water. Add enough water to form a paste.
3. Let it sit overnight. This allows the baking soda to loosen the burnt food.
4. Add dish soap. Add a squirt of dish soap to the pot or pan.
5. Scrub with a scrubbing pad or sponge. Scrub the burnt food until it comes loose. You might need to scrub a little harder for stubborn spots.
6. Rinse with water. Rinse the pot or pan thoroughly with water.
Deodorizing Your Fridge
A smelly fridge is never a good thing. Here’s how to keep your fridge smelling fresh and clean.
What you’ll need:
* Baking soda
* Open container (small bowl or box)
Step-by-step instructions:
1. Pour baking soda into an open container. Fill the container about halfway with baking soda.
2. Place the container in the fridge. Place the container in the back of the fridge, where it won’t be easily knocked over.
3. Replace the baking soda every month. The baking soda will absorb odors from the fridge, keeping it smelling fresh.
Cleaning Your Showerhead
Over time, showerheads can get clogged with mineral deposits, reducing water pressure. This hack will help you clean your showerhead and restore its flow.
What you’ll need:
* White vinegar
* Plastic bag
* Rubber band or twist tie
Step-by-step instructions:
1. Fill the plastic bag with white vinegar. You’ll need enough vinegar to completely submerge the showerhead.
2. Attach the bag to the showerhead. Secure the bag to the showerhead with a rubber band or twist tie. Make sure the showerhead is completely submerged in the vinegar.
3. Let it soak overnight. This allows the vinegar to dissolve the mineral deposits.
4. Remove the bag and rinse the showerhead. Remove the bag and rinse the showerhead thoroughly with water.
5. Wipe clean. Wipe the showerhead clean with a cloth.
Cleaning Your Dishwasher
Your dishwasher cleans your dishes, but it needs cleaning too! This hack will help keep your dishwasher running smoothly and smelling fresh.
What you’ll need:
* White vinegar
* Baking soda
Step-by-step instructions:
1. Remove any food debris from the dishwasher. Make sure the dishwasher is empty.
2. Pour a cup of white vinegar into a dishwasher-safe bowl. Place the bowl on the top
Conclusion
So, there you have it! This simple yet incredibly effective DIY cleaning trick is more than just a shortcut; it’s a game-changer for maintaining a sparkling clean home without breaking the bank or relying on harsh chemicals. We’ve shown you how to harness the power of readily available ingredients to tackle common cleaning challenges, saving you time, money, and effort.
Why is this a must-try? Because it’s practical, eco-friendly, and delivers noticeable results. Imagine effortlessly removing stubborn stains, banishing unpleasant odors, and restoring the shine to your surfaces with minimal fuss. This isn’t just about cleaning; it’s about creating a healthier and more enjoyable living space.
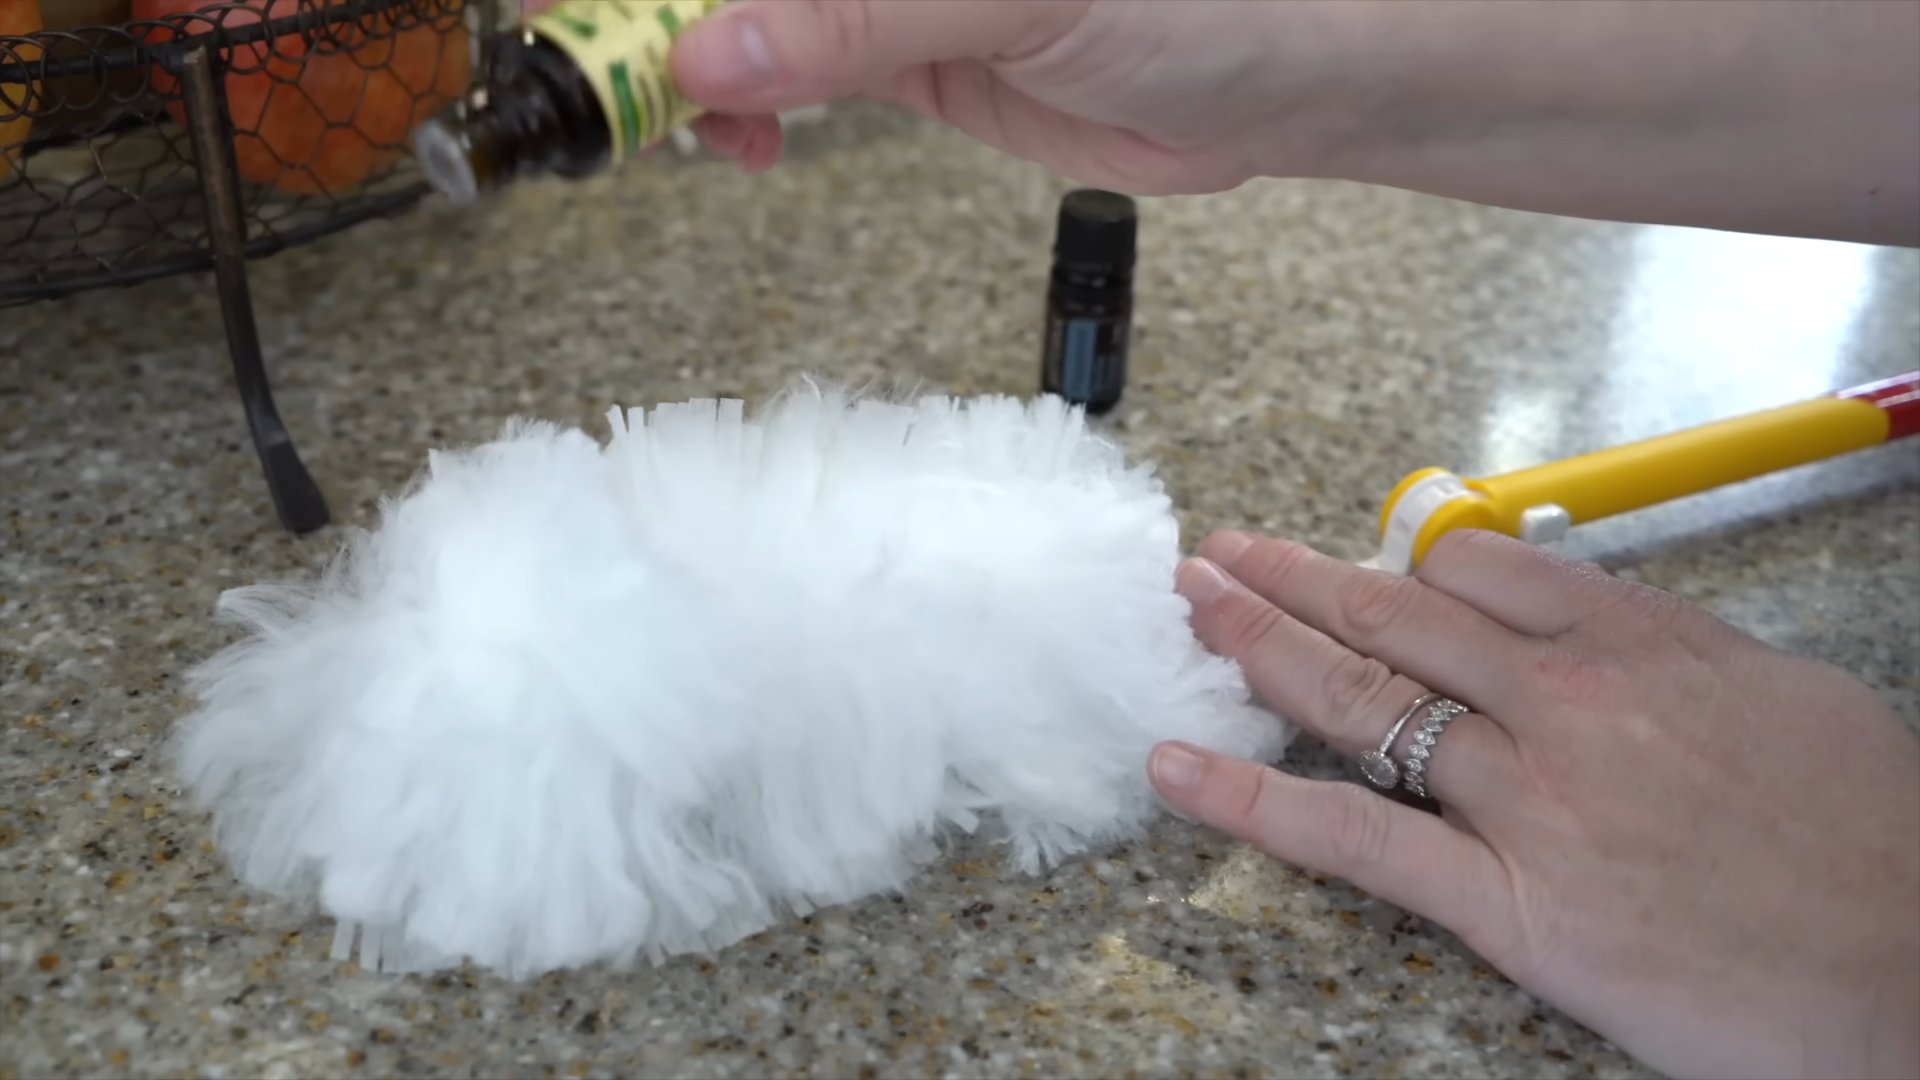
But the beauty of this DIY cleaning trick lies in its versatility. Feel free to experiment with variations to suit your specific needs and preferences. For instance, if you’re dealing with particularly tough grime, consider adding a tablespoon of baking soda to the mixture for extra scrubbing power. Or, if you prefer a more fragrant cleaning experience, a few drops of your favorite essential oil (lemon, lavender, or tea tree are excellent choices) can transform your cleaning routine into an aromatherapy session. For delicate surfaces, dilute the solution further to prevent any potential damage. Remember to always test a small, inconspicuous area first before applying any cleaning solution to the entire surface.
Don’t be afraid to get creative and adapt this DIY cleaning trick to your unique cleaning challenges. Perhaps you’ll discover a new combination of ingredients that works wonders for your specific needs. The possibilities are endless!
We are confident that once you try this DIY cleaning trick, you’ll be amazed by the results. It’s a simple, effective, and sustainable way to keep your home clean and fresh. So, ditch the expensive store-bought cleaners and embrace the power of DIY!
We wholeheartedly encourage you to give this DIY cleaning trick a try. We’re eager to hear about your experiences and see how it transforms your cleaning routine. Share your before-and-after photos, your favorite variations, and any tips or tricks you discover along the way. Let’s create a community of DIY cleaning enthusiasts who are passionate about creating clean and healthy homes.
Remember, a clean home is a happy home, and this DIY cleaning trick is your secret weapon for achieving just that. So, grab your ingredients, roll up your sleeves, and get ready to experience the joy of effortless cleaning! We believe that this **quick cleaning hack** will become a staple in your cleaning arsenal.
Frequently Asked Questions (FAQs)
Q: What types of surfaces can I use this DIY cleaning trick on?
A: This DIY cleaning trick is generally safe for a wide range of surfaces, including countertops, sinks, tiles, appliances, and even some fabrics. However, it’s crucial to exercise caution and test the solution on a small, inconspicuous area first, especially when dealing with delicate or sensitive materials like wood, marble, or painted surfaces. If you notice any discoloration, damage, or adverse reaction, discontinue use immediately. For specific surfaces, always consult the manufacturer’s instructions or guidelines.
Q: Can I use this DIY cleaning trick to clean my bathroom?
A: Absolutely! This DIY cleaning trick is particularly effective for cleaning bathrooms. It can help remove soap scum, water stains, and mildew from tiles, shower doors, sinks, and toilets. For stubborn stains, you can increase the concentration of the cleaning solution or add a small amount of baking soda for extra scrubbing power. Remember to ventilate the bathroom well while cleaning and rinse thoroughly with water after application.
Q: Is this DIY cleaning trick safe for pets and children?
A: While this DIY cleaning trick typically uses natural and non-toxic ingredients, it’s still essential to exercise caution when using it around pets and children. Keep the cleaning solution out of their reach and ensure that surfaces are thoroughly rinsed and dried after cleaning to prevent accidental ingestion or contact. If you have pets that are particularly sensitive to certain smells, consider using essential oils with caution or omitting them altogether. Always supervise children when they are helping with cleaning tasks.
Q: How often should I use this DIY cleaning trick?
A: The frequency of use depends on your cleaning needs and preferences. For regular maintenance, you can use this DIY cleaning trick once or twice a week to keep your surfaces clean and fresh. For more heavily soiled areas, you may need to use it more frequently. Pay attention to the condition of your surfaces and adjust the frequency accordingly.
Q: Can I store the leftover cleaning solution?
A: Yes, you can store the leftover cleaning solution in a sealed container for future use. However, it’s best to use it within a week or two, as the ingredients may start to separate or lose their effectiveness over time. Store the container in a cool, dark place away from direct sunlight and heat. Be sure to label the container clearly to avoid any confusion.
Q: What essential oils are best to use in this DIY cleaning trick?
A: The best essential oils to use in this DIY cleaning trick depend on your personal preferences and the desired cleaning effect. Lemon essential oil is a popular choice for its refreshing scent and antibacterial properties. Lavender essential oil is known for its calming and relaxing aroma, while tea tree essential oil is a powerful antiseptic and antifungal agent. Other good options include eucalyptus, peppermint, and orange essential oils. Experiment with different combinations to find your favorite scent and cleaning power.
Q: Can I use this DIY cleaning trick on my hardwood floors?
A: While this DIY cleaning trick can be used on some hardwood floors, it’s crucial to exercise extreme caution and test the solution on a small, inconspicuous area first. Hardwood floors are particularly sensitive to moisture and harsh chemicals, so it’s essential to use a diluted solution and avoid excessive wetting. Always wring out your mop or cloth thoroughly before applying it to the floor. If you notice any discoloration, damage, or adverse reaction, discontinue use immediately. For hardwood floors, it’s often best to use a cleaning solution specifically designed for that type of surface.
Q: What if I don’t have all the ingredients listed in the recipe?
A: Don’t worry if you don’t have all the ingredients listed in the recipe. You can often substitute ingredients or omit them altogether without significantly affecting the cleaning power of the solution. For example, if you don’t have vinegar, you can use lemon juice instead. If you don’t have essential oils, you can simply omit them. The key is to experiment and find a combination of ingredients that works best for you.
Q: How do I share my experience with this DIY cleaning trick?
A: We would love to hear about your experience with this DIY cleaning trick! You can share your before-and-after photos, your favorite variations, and any tips or tricks you discover along the way on our social media pages. You can also leave a comment on our website or send us an email. We’re always eager to hear from our readers and learn from their experiences. Let’s create a community of DIY cleaning enthusiasts who are passionate about creating clean and healthy homes!
Leave a Comment