

Planting Pointed Cabbage Guide: Unlock the secrets to a bountiful harvest right in your backyard! Have you ever dreamed of strolling through your garden, basket in hand, ready to pluck perfectly formed, delicious pointed cabbages? It’s more attainable than you think, and this DIY guide is your key to making that dream a reality. For centuries, cabbage has been a staple in diets around the world, from the hearty stews of Eastern Europe to the vibrant slaws of Asia. Its versatility and nutritional value have cemented its place in culinary history.
But why should you bother growing your own? In today’s world, where fresh, locally sourced produce is increasingly valued, knowing how to cultivate your own vegetables is a powerful skill. Plus, store-bought cabbages often lack the flavor and freshness of homegrown varieties. This planting pointed cabbage guide will empower you to bypass the grocery store and enjoy the unparalleled taste of cabbages nurtured by your own hands. I’ll walk you through every step, from selecting the right seeds to harvesting your prize-winning crop. Get ready to dig in and discover the joy of growing your own pointed cabbages!
Planting Pointed Cabbage: A Gardener’s Guide to Success
Hey there, fellow gardening enthusiasts! I’m so excited to share my tried-and-true method for growing beautiful, delicious pointed cabbage. It’s a rewarding experience, and with a little know-how, you can enjoy a bountiful harvest. Let’s dive in!
Choosing the Right Variety and Location
Before we get our hands dirty, let’s talk about variety and location. These are crucial for a successful cabbage crop.
* Variety Selection: Pointed cabbage comes in several varieties, each with slightly different characteristics. Some mature earlier, while others are more resistant to certain pests or diseases. Do some research and choose a variety that suits your climate and growing conditions. I personally love ‘Hispi’ for its early maturity and sweet flavor.
* Sunlight: Cabbage needs at least 6 hours of direct sunlight per day. Choose a location in your garden that receives ample sunlight throughout the growing season.
* Soil: Well-drained, fertile soil is essential. Cabbage prefers a slightly acidic to neutral soil pH (around 6.0 to 7.0). If your soil is heavy clay or sandy, amend it with compost or other organic matter to improve drainage and fertility.
* Crop Rotation: Avoid planting cabbage in the same spot where other brassicas (like broccoli, cauliflower, or kale) were grown in the previous year. This helps prevent the buildup of soilborne diseases and pests.
Starting Seeds Indoors (Optional but Recommended)
Starting seeds indoors gives your cabbage plants a head start, especially in regions with short growing seasons.
* Timing: Start seeds indoors about 4-6 weeks before the last expected frost in your area.
* Materials: You’ll need seed starting trays or pots, seed starting mix, and a grow light (optional but helpful).
* Sowing: Sow seeds about 1/4 inch deep in the seed starting mix. Gently water the soil and keep it moist but not soggy.
* Germination: Cabbage seeds typically germinate in 5-10 days at a temperature of 65-75°F (18-24°C).
* Lighting: Once the seedlings emerge, provide them with plenty of light. A grow light is ideal, but a sunny windowsill can also work.
* Hardening Off: Before transplanting the seedlings outdoors, you’ll need to harden them off. This process gradually acclimates the plants to outdoor conditions. Start by placing the seedlings outdoors in a sheltered location for a few hours each day, gradually increasing the amount of time they spend outside over the course of a week or two.
Preparing the Garden Bed
A well-prepared garden bed is key to healthy cabbage growth.
* Clearing: Remove any weeds, rocks, or debris from the planting area.
* Tilling or Digging: Loosen the soil to a depth of at least 12 inches. This will improve drainage and allow the roots to penetrate easily.
* Amending: Incorporate plenty of compost or other organic matter into the soil. This will improve fertility, drainage, and water retention.
* Fertilizing: Apply a balanced fertilizer according to package directions. Cabbage is a heavy feeder, so it needs plenty of nutrients. I like to use a slow-release fertilizer that will provide nutrients throughout the growing season.
* pH Testing: Test the soil pH and adjust it if necessary. Lime can be added to raise the pH, while sulfur can be added to lower it.
Transplanting Seedlings or Direct Sowing
Now comes the exciting part – getting those cabbage plants into the ground!
* Timing: Transplant seedlings outdoors after the last expected frost, when the soil has warmed up to at least 50°F (10°C). You can also direct sow seeds outdoors, but this is best done in areas with long growing seasons.
* Spacing: Space cabbage plants 12-18 inches apart in rows that are 24-36 inches apart. This will give them enough room to grow and mature.
* Planting Depth: Plant seedlings at the same depth they were growing in the seed starting trays. For direct sowing, sow seeds about 1/2 inch deep.
* Watering: Water the plants thoroughly after transplanting or sowing.
* Mulching: Apply a layer of mulch around the plants to help retain moisture, suppress weeds, and regulate soil temperature. Straw, wood chips, or shredded leaves are all good options.
Caring for Your Cabbage Plants
Once your cabbage plants are in the ground, they’ll need regular care to thrive.
* Watering: Cabbage needs consistent moisture, especially during hot, dry weather. Water deeply and regularly, aiming to keep the soil consistently moist but not soggy.
* Fertilizing: Side-dress the plants with a nitrogen-rich fertilizer every 4-6 weeks. This will help promote leafy growth.
* Weeding: Keep the garden bed free of weeds, which can compete with the cabbage plants for nutrients and water.
* Pest Control: Cabbage is susceptible to several pests, including cabbage worms, aphids, and flea beetles. Monitor your plants regularly and take action if you see signs of infestation.
* Cabbage Worms: These green caterpillars can quickly devour cabbage leaves. Handpicking them off the plants is an effective method of control. You can also use Bacillus thuringiensis (Bt), a biological insecticide that is safe for humans and pets.
* Aphids: These small, sap-sucking insects can weaken cabbage plants. Spraying the plants with a strong stream of water can dislodge aphids. You can also use insecticidal soap or neem oil.
* Flea Beetles: These tiny beetles can create small holes in cabbage leaves. Covering the plants with row covers can prevent flea beetles from reaching them. You can also use insecticidal soap or neem oil.
* Disease Control: Cabbage can also be affected by several diseases, including black rot and clubroot. Choose disease-resistant varieties and practice good sanitation to prevent these diseases.
* Black Rot: This bacterial disease can cause yellowing and wilting of cabbage leaves. Remove and destroy any infected plants.
* Clubroot: This fungal disease can cause swollen and distorted roots. Avoid planting cabbage in areas where clubroot has been a problem. You can also amend the soil with lime to raise the pH, which can help suppress the disease.
Harvesting Your Pointed Cabbage
The moment you’ve been waiting for – harvesting your delicious pointed cabbage!
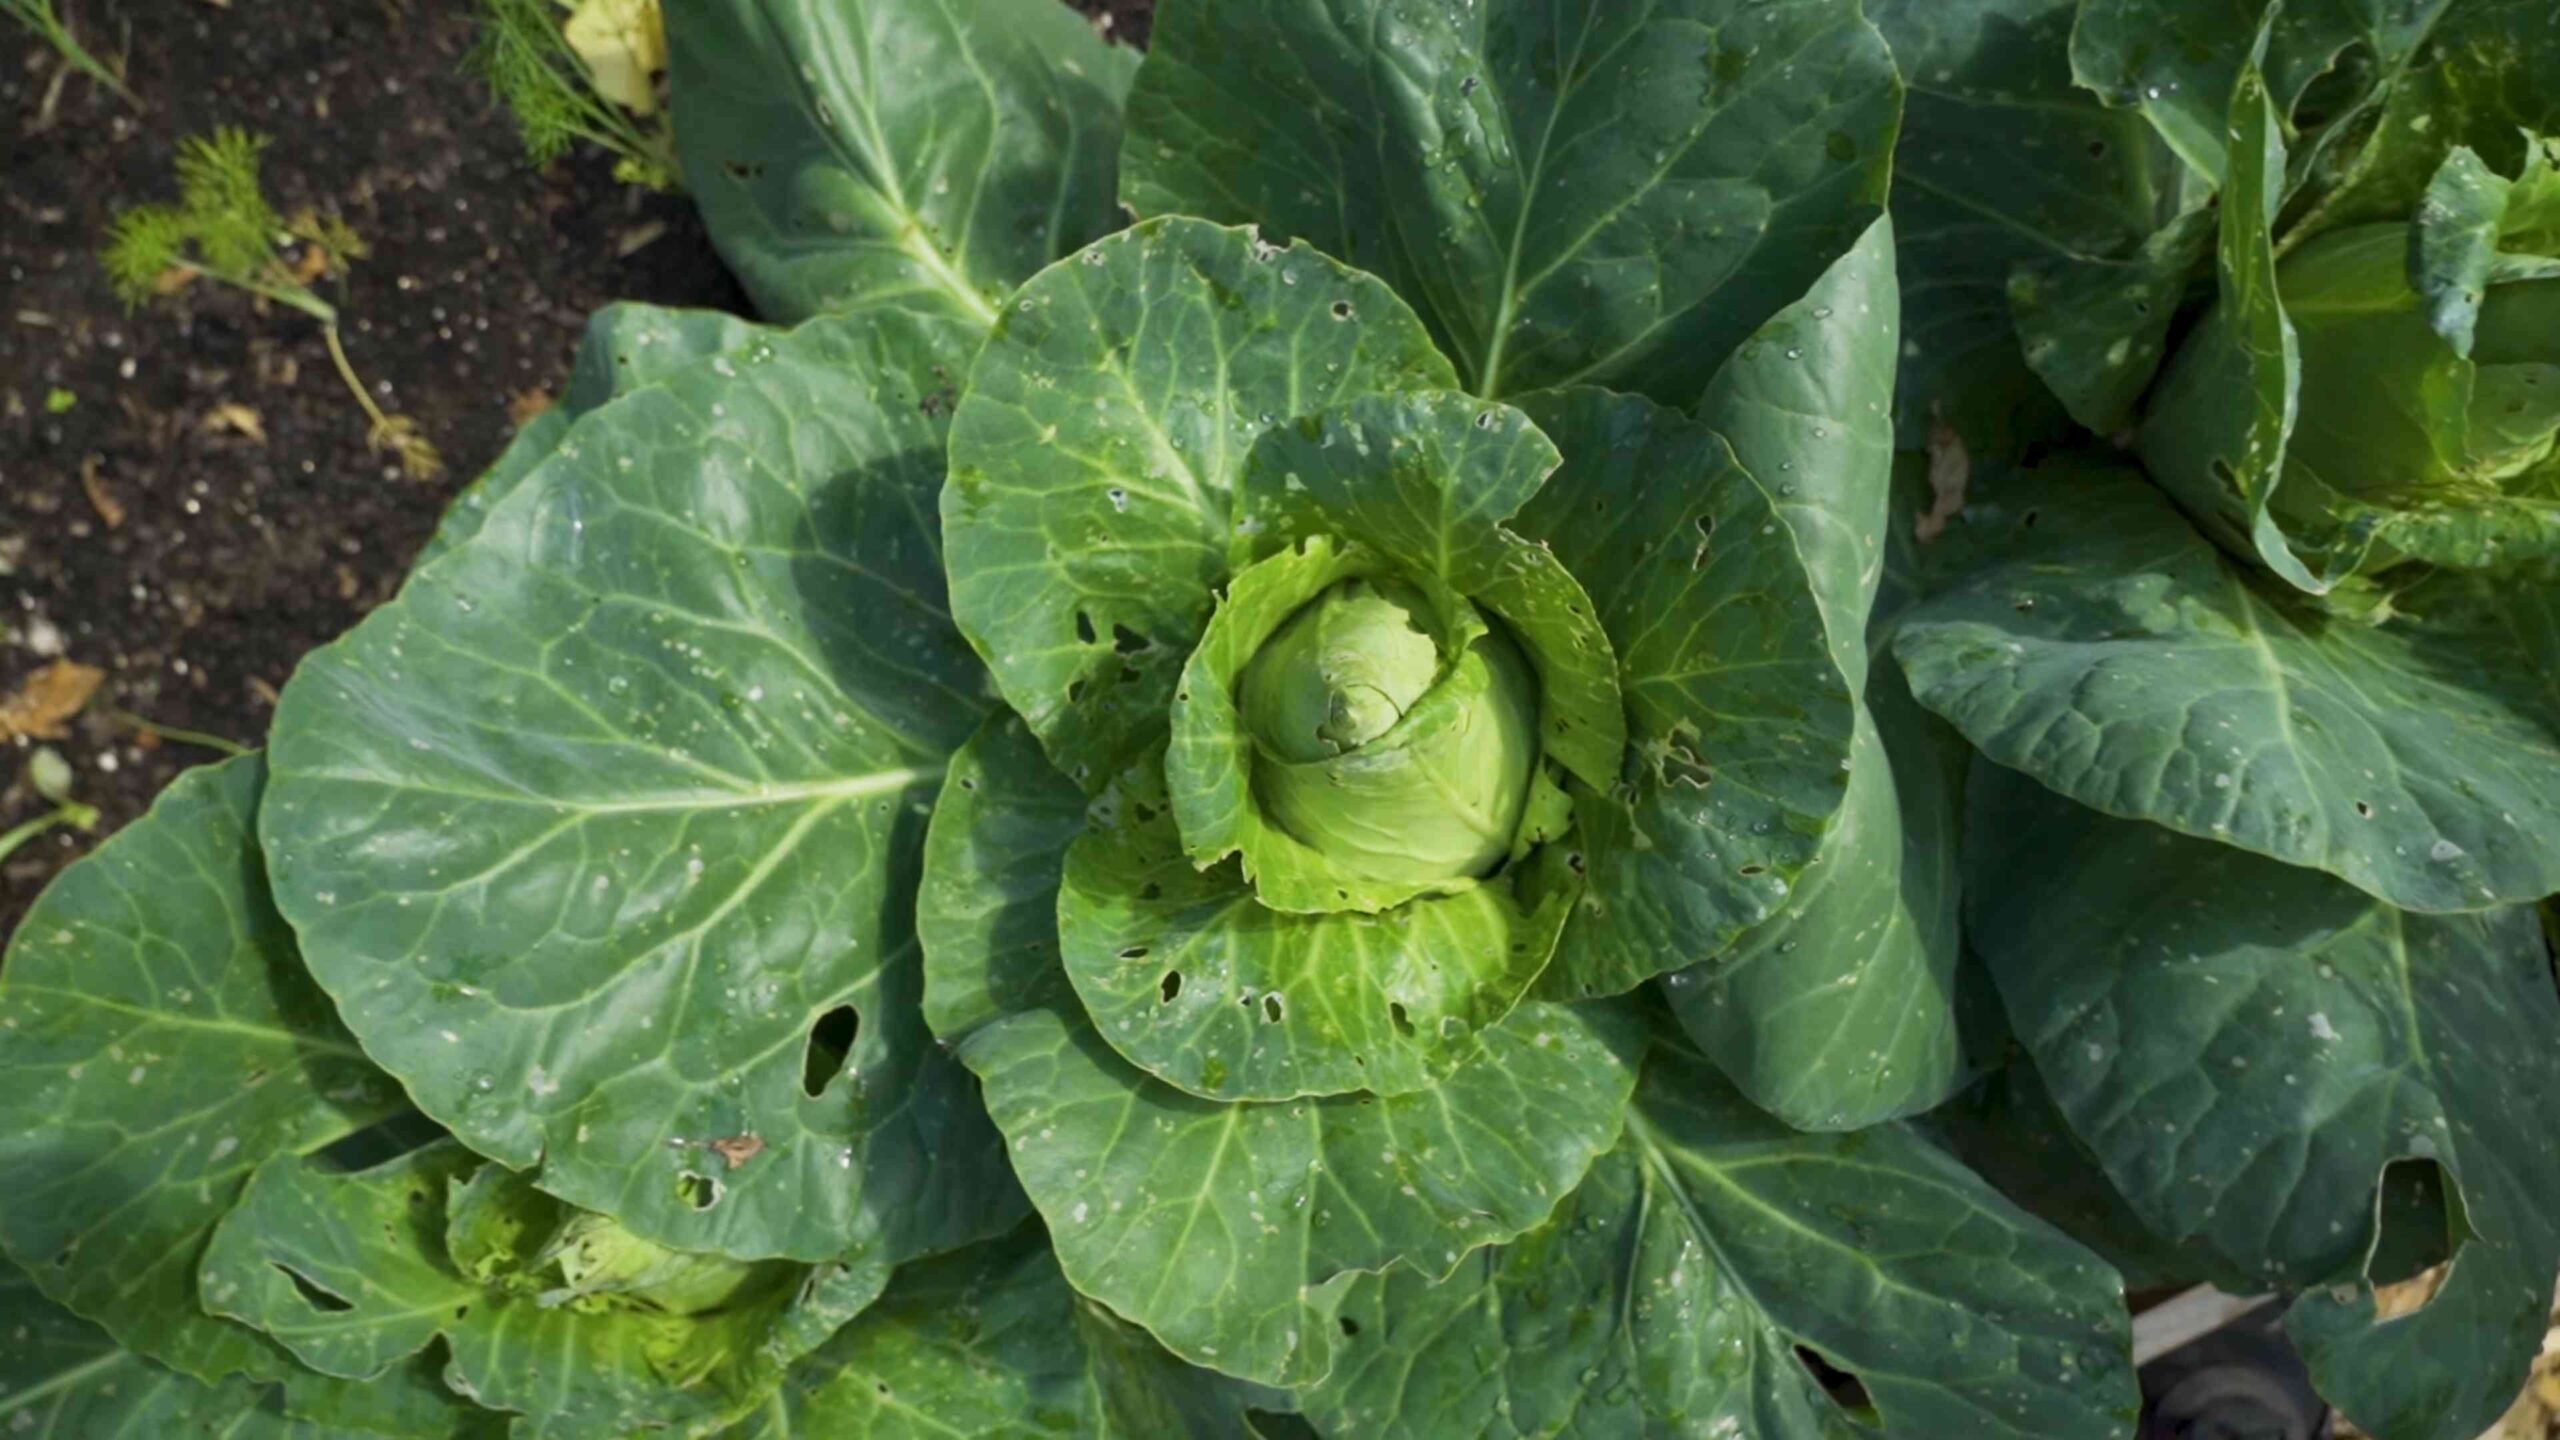
* Timing: Pointed cabbage is typically ready to harvest 60-80 days after transplanting. The heads should be firm and compact.
* Harvesting: Cut the cabbage head from the stem with a sharp knife. Leave a few outer leaves on the stem, as these can help protect the remaining plant from pests and diseases.
* Storage: Store harvested cabbage in the refrigerator for up to 2 weeks.
Troubleshooting Common Problems
Even with the best care, you may encounter some problems while growing pointed cabbage. Here are some common issues and how to address them:
* Heads Don’t Form: This can be caused by insufficient sunlight, poor soil fertility, or inadequate watering. Make sure your plants are getting enough sunlight, fertilize them regularly, and water them deeply.
* Bolting: Bolting occurs when cabbage plants flower prematurely. This can be caused by stress, such as hot weather or inconsistent watering. Choose bolt-resistant varieties and provide consistent care to prevent bolting.
* Splitting Heads: Splitting heads can be caused by excessive watering after a period of drought. Water your plants consistently to prevent splitting.
Step-by-Step Instructions: From Seed to Table
Let’s break down the entire process into easy-to-follow steps:
1. Choose Your Variety: Select a pointed cabbage variety that suits your climate and growing conditions.
2. Start Seeds Indoors (Optional): 4-6 weeks before the last frost, sow seeds indoors in seed starting mix. Keep the soil moist and provide plenty of light.
3. Prepare the Garden Bed: Clear the planting area, till or dig the soil, and amend it with compost or other organic matter. Fertilize and test the soil pH.
4. Harden Off Seedlings: Gradually acclimate seedlings to outdoor conditions before transplanting.
5. Transplant or Direct Sow: Transplant seedlings or direct sow seeds after the last frost, spacing plants 12-18 inches apart.
6. Water Thoroughly: Water the plants deeply after transplanting or sowing.
7. Mulch: Apply a layer of mulch around the plants to retain moisture and suppress weeds.
8. Water Regularly: Water deeply and regularly, especially during hot, dry weather.
9. Fertilize: Side-dress

Conclusion
So, there you have it! Planting pointed cabbage doesn’t have to be a daunting task reserved for seasoned gardeners. With a little preparation, attention to detail, and the right timing, you can cultivate your own crop of these delicious and versatile vegetables right in your backyard. This guide has armed you with the knowledge to confidently navigate the entire process, from selecting the perfect variety to harvesting your bountiful yield.
But why should you bother with planting pointed cabbage yourself? Beyond the sheer satisfaction of nurturing something from seed to table, growing your own pointed cabbage offers several compelling advantages. Firstly, you have complete control over the growing process, ensuring that your cabbage is free from harmful pesticides and herbicides. This is a significant benefit for those seeking organic and healthy food options. Secondly, homegrown pointed cabbage boasts a freshness and flavor that simply cannot be matched by store-bought varieties. The crisp texture and subtly sweet taste are truly enhanced when harvested at peak ripeness. Finally, planting pointed cabbage is a cost-effective way to enjoy this nutritious vegetable. The initial investment in seeds and supplies is quickly offset by the abundance of cabbage you can harvest throughout the growing season.
Don’t be afraid to experiment with different varieties of pointed cabbage to find your favorites. Consider trying ‘Hispi’ for its early maturity and compact size, or ‘Caraflex’ for its exceptional sweetness and tenderness. You can also explore different planting methods, such as succession planting, to extend your harvest season and enjoy a continuous supply of fresh cabbage. Companion planting is another avenue to explore; planting aromatic herbs like rosemary or thyme near your pointed cabbage can help deter pests naturally.
We wholeheartedly encourage you to give planting pointed cabbage a try. It’s a rewarding experience that connects you with nature, provides you with healthy food, and adds a touch of beauty to your garden. Remember to document your journey, take photos of your progress, and most importantly, share your experiences with us! We’d love to hear about your successes, challenges, and any unique tips or tricks you discover along the way. Your insights can help other aspiring gardeners embark on their own pointed cabbage growing adventures. So, grab your seeds, get your hands dirty, and prepare to enjoy the fruits (or rather, vegetables) of your labor! Happy gardening!
Frequently Asked Questions (FAQ)
What is the best time to start planting pointed cabbage seeds indoors?
The ideal time to start planting pointed cabbage seeds indoors is typically 6-8 weeks before the last expected frost in your area. This allows the seedlings to develop a strong root system before being transplanted outdoors. Check your local weather forecasts and gardening resources to determine the average last frost date for your region. Starting seeds indoors gives you a head start on the growing season, especially in areas with shorter summers. Remember to provide adequate light and ventilation for your seedlings to prevent them from becoming leggy or developing diseases.
How much sunlight does pointed cabbage need?
Pointed cabbage thrives in full sun, requiring at least 6 hours of direct sunlight per day. Sunlight is essential for photosynthesis, the process by which plants convert light energy into chemical energy for growth. Insufficient sunlight can result in stunted growth, pale leaves, and reduced yields. Choose a planting location that receives ample sunlight throughout the day. If you live in an area with intense summer heat, consider providing some afternoon shade to prevent the leaves from scorching.
What type of soil is best for planting pointed cabbage?
Pointed cabbage prefers well-drained, fertile soil that is rich in organic matter. The soil should have a slightly acidic to neutral pH, ideally between 6.0 and 7.0. Before planting, amend the soil with compost, well-rotted manure, or other organic materials to improve its structure, drainage, and nutrient content. Avoid planting in heavy clay soil, as it can become waterlogged and inhibit root growth. If your soil is compacted, consider adding sand or perlite to improve drainage. A soil test can help you determine the pH and nutrient levels of your soil and guide you in making necessary amendments.
How often should I water pointed cabbage?
Pointed cabbage requires consistent moisture, especially during hot and dry weather. Water deeply and regularly, aiming to keep the soil consistently moist but not waterlogged. The frequency of watering will depend on factors such as weather conditions, soil type, and plant size. Check the soil moisture regularly by inserting your finger into the soil to a depth of about an inch. If the soil feels dry, it’s time to water. Avoid overhead watering, as it can promote fungal diseases. Instead, water at the base of the plants using a soaker hose or drip irrigation system. Mulching around the plants can help retain moisture and suppress weeds.
What are some common pests and diseases that affect pointed cabbage?
Pointed cabbage is susceptible to various pests and diseases, including cabbage worms, aphids, flea beetles, clubroot, and black rot. Regularly inspect your plants for signs of infestation or disease. Cabbage worms can be controlled by handpicking them off the plants or using Bacillus thuringiensis (Bt), a natural insecticide. Aphids can be washed off with a strong stream of water or controlled with insecticidal soap. Flea beetles can be deterred by using row covers. Clubroot is a soilborne disease that can be prevented by practicing crop rotation and maintaining a soil pH above 7.0. Black rot is a bacterial disease that can be prevented by using disease-free seeds and avoiding overhead watering.
How do I know when my pointed cabbage is ready to harvest?
Pointed cabbage is ready to harvest when the head is firm and compact. The size of the head will vary depending on the variety, but it should feel solid when gently squeezed. The outer leaves should be tightly wrapped around the head. To harvest, use a sharp knife to cut the head from the stem, leaving a few outer leaves attached. Harvested pointed cabbage can be stored in the refrigerator for several weeks.
Can I grow pointed cabbage in containers?
Yes, pointed cabbage can be successfully grown in containers, provided that you choose a large enough container and use a well-draining potting mix. Select a container that is at least 12 inches in diameter and 12 inches deep. Fill the container with a high-quality potting mix that is rich in organic matter. Water regularly and fertilize every few weeks with a balanced fertilizer. Place the container in a location that receives at least 6 hours of direct sunlight per day. Container-grown pointed cabbage may require more frequent watering and fertilization than plants grown in the ground.
What are some good companion plants for pointed cabbage?
Companion planting can help deter pests, attract beneficial insects, and improve the overall health of your pointed cabbage plants. Some good companion plants for pointed cabbage include:
* **Aromatic herbs:** Rosemary, thyme, sage, and oregano can help repel cabbage moths and other pests.
* **Marigolds:** Marigolds are known to deter nematodes and other soil pests.
* **Nasturtiums:** Nasturtiums attract aphids, which can help keep them away from your cabbage plants.
* **Dill:** Dill attracts beneficial insects such as ladybugs and lacewings, which prey on aphids and other pests.
* **Clovers:** Clovers can help fix nitrogen in the soil, which is beneficial for cabbage growth.
How can I prevent my pointed cabbage from splitting?
Splitting can occur when pointed cabbage heads grow too quickly due to excessive watering or fertilization. To prevent splitting, water consistently but avoid overwatering, especially during periods of rapid growth. Avoid fertilizing with high-nitrogen fertilizers, as they can promote rapid growth. Harvest the cabbage as soon as it is mature to prevent it from becoming overripe and splitting.
Is pointed cabbage a good source of nutrients?
Yes, pointed cabbage is a nutritious vegetable that is rich in vitamins, minerals, and antioxidants. It is a good source of vitamin C, vitamin K, folate, and fiber. It also contains glucosinolates, which are compounds that have been shown to have anti-cancer properties. Adding pointed cabbage to your diet can contribute to overall health and well-being.

Leave a Comment