

Oven Cleaning No Scrub: Sounds like a dream, right? I know, I know, the mere thought of tackling that baked-on grime in your oven can send shivers down your spine. But what if I told you there’s a way to reclaim your sparkling clean oven without the back-breaking scrubbing and harsh chemicals?
For generations, oven cleaning has been a dreaded chore. Our grandmothers likely spent hours wrestling with lye-based cleaners and steel wool, a far cry from the convenience we crave today. Thankfully, we’ve come a long way! This DIY guide is all about embracing modern solutions and clever hacks to make oven cleaning a breeze.
Why is this so important? Well, a clean oven isn’t just about aesthetics. Burnt food residue can actually affect the taste of your dishes and even impact your oven’s efficiency. Plus, who wants to cook in a dirty oven? I’m here to share my favorite oven cleaning no scrub method, a simple and effective way to banish that stubborn grime using ingredients you probably already have in your pantry. Get ready to say goodbye to harsh chemicals and hello to a sparkling clean oven with minimal effort!
DIY Oven Cleaning: The No-Scrub Method That Actually Works!
Okay, let’s be honest, cleaning the oven is the absolute WORST chore. I mean, who enjoys wrestling with burnt-on food and harsh chemicals? Not me! That’s why I’m so excited to share this amazing no-scrub oven cleaning method that I’ve perfected over time. It’s surprisingly simple, uses mostly natural ingredients, and, best of all, requires minimal elbow grease. Get ready to say goodbye to that grimy oven!
What You’ll Need
Before we dive in, let’s gather our supplies. This is a pretty straightforward process, so you probably already have most of these items on hand.
* Baking Soda: This is our main cleaning agent. It’s a natural deodorizer and has mild abrasive properties that help loosen grime.
* White Vinegar: The magic ingredient that reacts with the baking soda to create a powerful cleaning foam.
* Water: For mixing and rinsing.
* Spray Bottle: To apply the vinegar solution.
* Spatula or Scraper: For removing large chunks of debris. (Plastic is best to avoid scratching the oven surface.)
* Microfiber Cloths or Sponges: For wiping down the oven.
* Rubber Gloves: To protect your hands. (Trust me, you’ll want these!)
* Old Towels or Newspaper: To protect your floor.
* Small Bowl: For mixing the baking soda paste.
Step-by-Step Instructions: The No-Scrub Oven Cleaning Process
Alright, let’s get started! Follow these steps carefully, and you’ll be amazed at how clean your oven becomes with minimal effort.
1. Prep the Oven: First things first, remove everything from your oven. That includes racks, baking stones, thermometers, and anything else you might have stored inside. I usually give the racks a good soak in hot, soapy water while I’m working on the oven itself. This helps loosen any baked-on gunk. Don’t forget to remove any large pieces of food debris from the bottom of the oven using your spatula or scraper. This will make the cleaning process much easier. Lay down old towels or newspaper around the base of your oven to protect your floor from any spills.
2. Make the Baking Soda Paste: In your small bowl, mix together about ½ cup of baking soda with enough water to form a thick, spreadable paste. The consistency should be similar to frosting. You might need to add a little more water or baking soda to get it just right.
3. Coat the Oven: Now, put on your rubber gloves (seriously, don’t skip this step!). Using your hands or a spatula, spread the baking soda paste all over the interior surfaces of your oven. This includes the walls, floor, door (inside and out), and even the heating elements (if you can reach them safely). Avoid the heating elements if you are unsure. Make sure to apply a thick, even layer. I usually focus on the areas with the most baked-on grime. You’ll notice the paste might turn brown in some areas – that’s perfectly normal!
4. Let it Sit (The Key to No-Scrub!): This is the most important step! Once you’ve coated the entire oven, close the door and let the baking soda paste sit for at least 12 hours, or even overnight. The longer it sits, the more time it has to loosen the grime. I usually do this before I go to bed so it can work its magic while I sleep.
5. Prepare the Vinegar Solution: After the baking soda paste has sat overnight (or for at least 12 hours), fill your spray bottle with plain white vinegar. No need to dilute it!
6. Spray the Vinegar: Open the oven door and generously spray the baking soda paste with the white vinegar. You’ll immediately see it start to fizz and bubble. This is the chemical reaction between the baking soda and vinegar, and it’s what helps to lift the remaining grime.
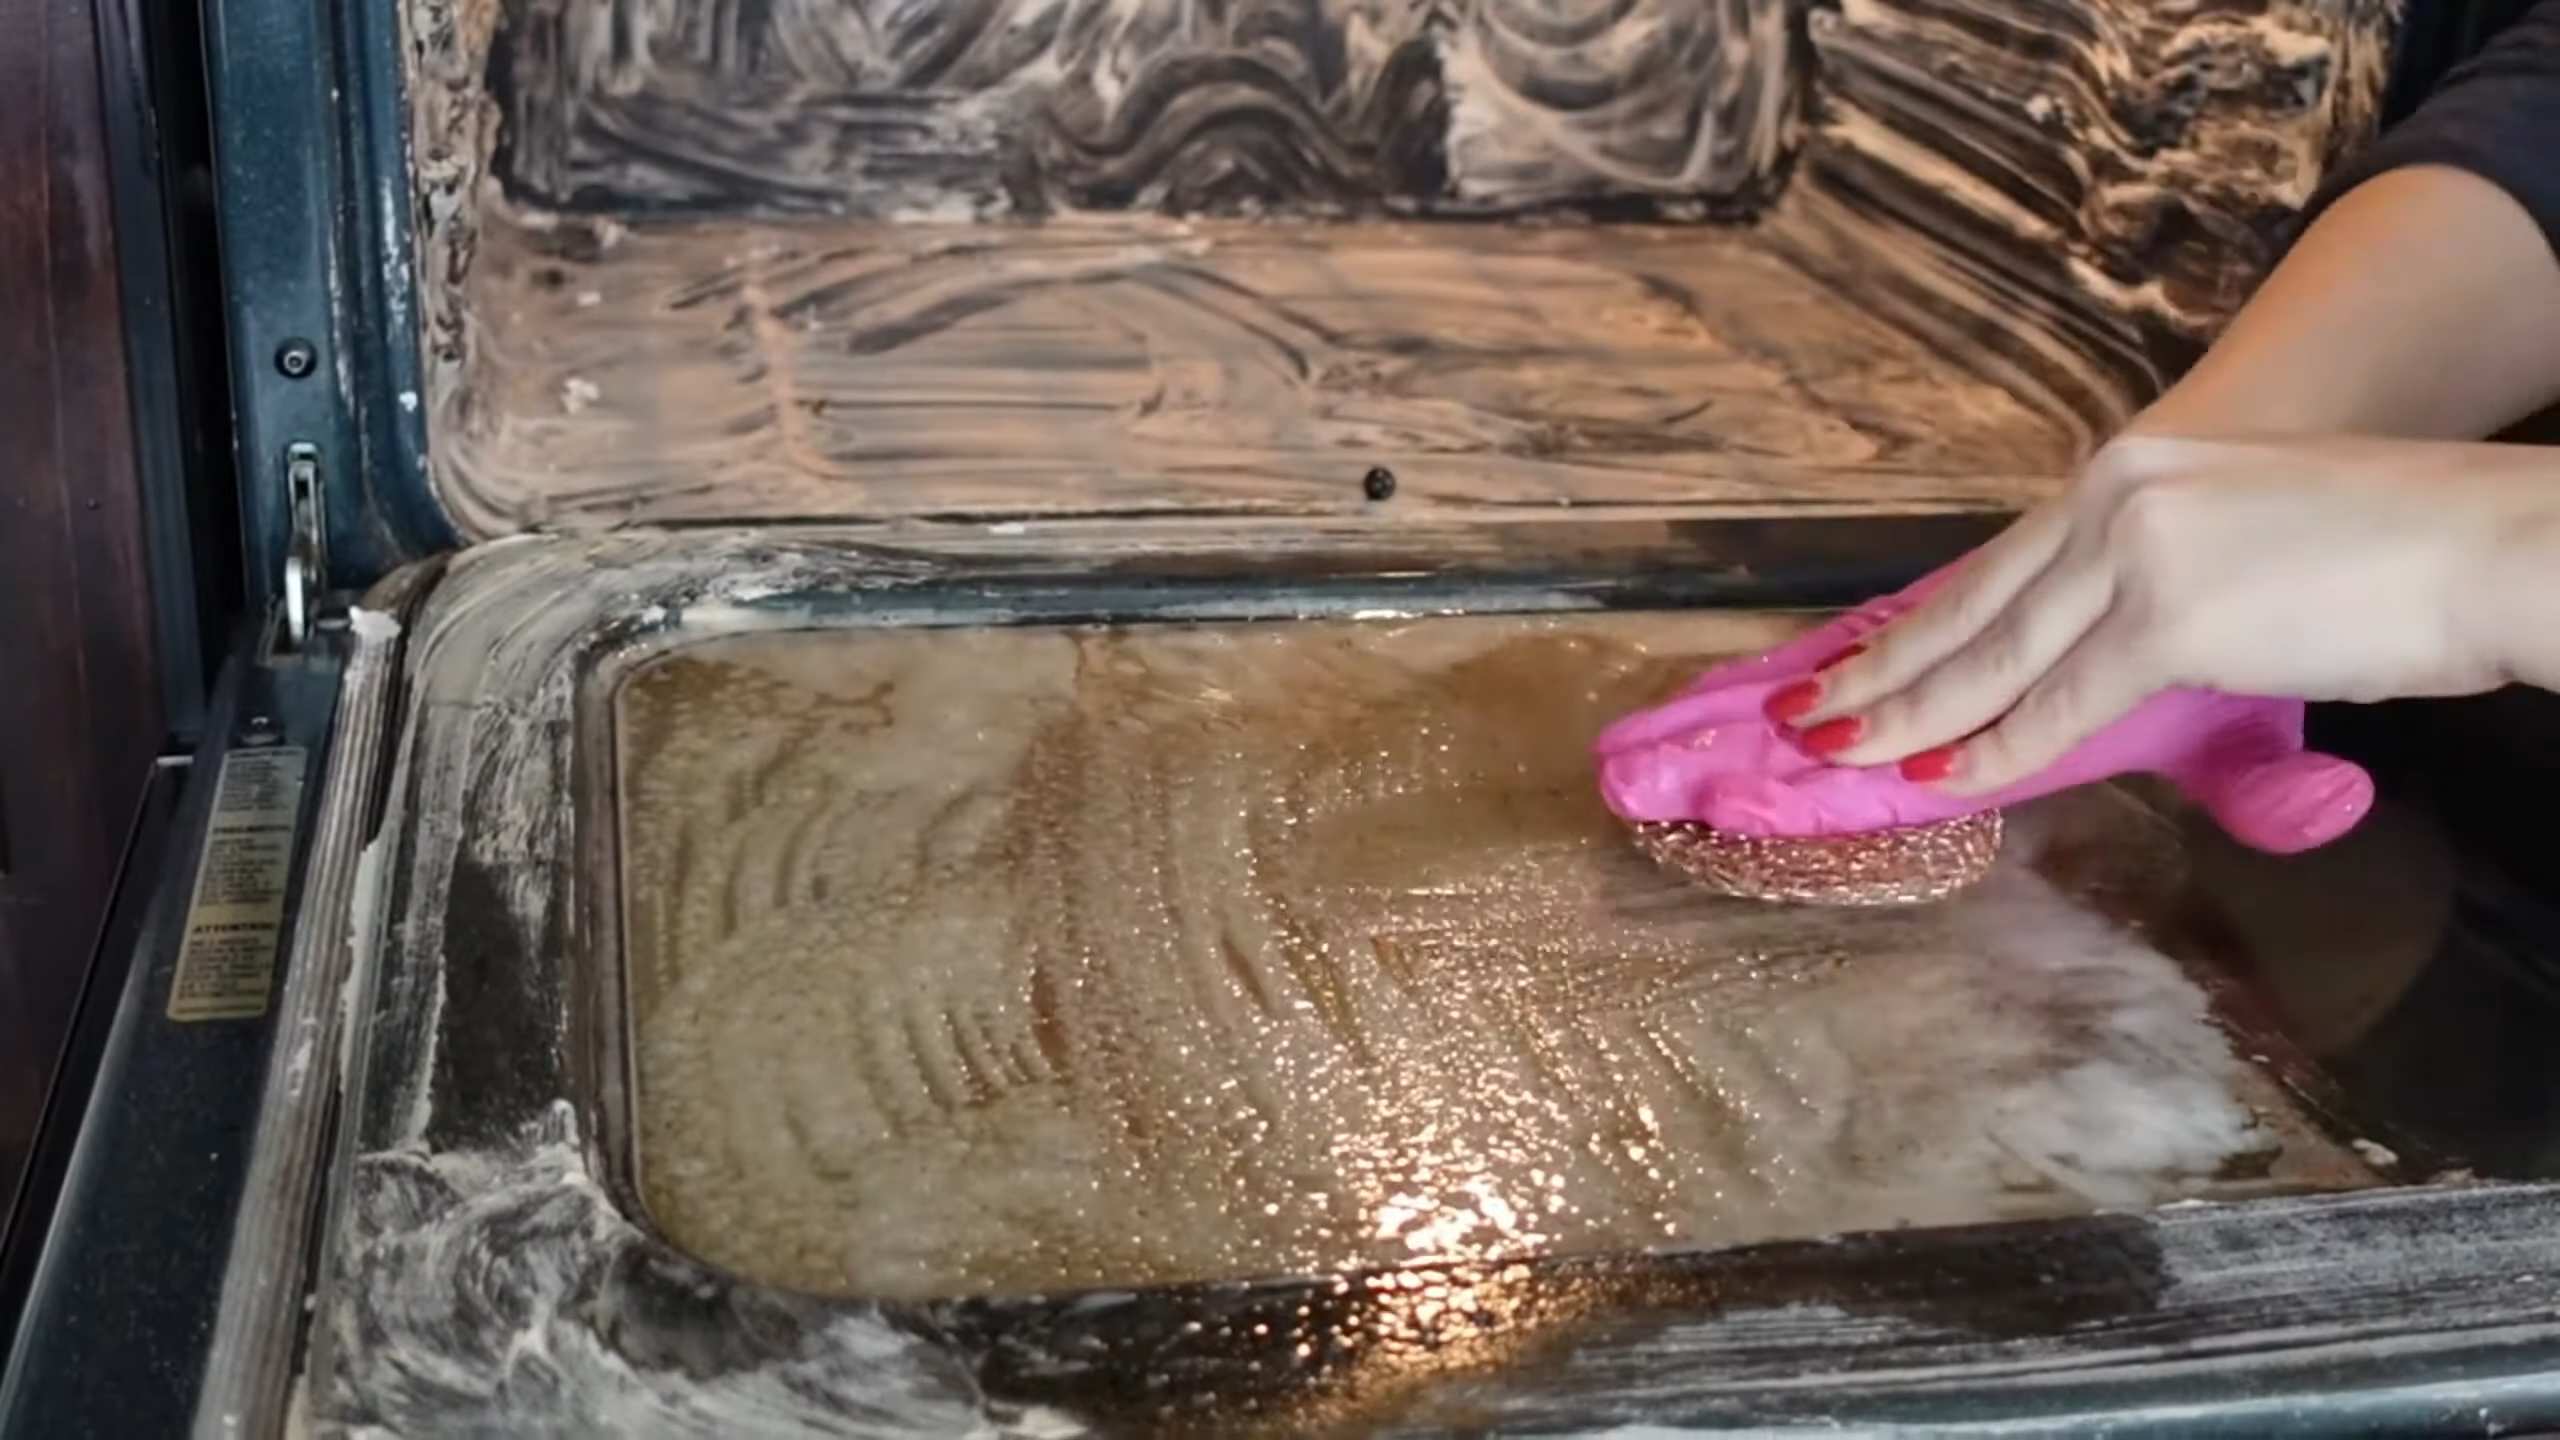
7. Wipe it Down: Now, using your microfiber cloths or sponges, start wiping down the interior of the oven. The baking soda paste should come off fairly easily, along with the loosened grime. You might need to use a little bit of elbow grease in some areas, but it should be significantly less than if you were scrubbing without the baking soda paste. Rinse your cloths or sponges frequently in clean water.
8. Rinse Thoroughly: Once you’ve wiped away all the baking soda paste and grime, rinse the interior of the oven thoroughly with clean water. You can use a damp cloth or sponge to do this. Make sure to remove any remaining residue.
9. Dry the Oven: Use a clean, dry cloth to dry the interior of the oven. This will help prevent any water spots from forming.
10. Clean the Racks: Remember those racks you soaked earlier? Now’s the time to give them a good scrub with a sponge or brush. Rinse them thoroughly and dry them before putting them back in the oven.
11. Reassemble and Enjoy: Finally, put the racks back in the oven and admire your sparkling clean oven!
Dealing with Stubborn Spots
Even with this no-scrub method, you might encounter some stubborn spots that just won’t budge. Don’t worry, I’ve got a few tricks up my sleeve!
* Extra Baking Soda Paste: For particularly stubborn areas, apply a fresh layer of baking soda paste and let it sit for a few more hours.
* Vinegar Soak: Soak a cloth or sponge in white vinegar and place it directly on the stubborn spot for about 30 minutes. This will help to loosen the grime.
* Baking Soda and Salt Scrub: Mix equal parts baking soda and salt to create a slightly more abrasive scrub. Use this sparingly and gently to avoid scratching the oven surface.
* Commercial Oven Cleaner (As a Last Resort): If all else fails, you can use a commercial oven cleaner. However, be sure to follow the instructions carefully and wear appropriate protective gear. I always try to avoid harsh chemicals if possible, but sometimes they’re necessary for really tough stains.
Maintaining a Clean Oven
Now that you’ve got your oven sparkling clean, let’s talk about how to keep it that way!
* Wipe Up Spills Immediately: The best way to prevent baked-on grime is to wipe up spills as soon as they happen. This will save you a lot of time and effort in the long run.
* Use Oven Liners: Oven liners can help to catch drips and spills, preventing them from baking onto the bottom of your oven.
* Self-Cleaning Cycle (Use Sparingly): If your oven has a self-cleaning cycle, use it sparingly. These cycles can generate extremely high temperatures, which can damage your oven over time.
* Regular Spot Cleaning: Do a quick spot clean of your oven every few weeks to prevent grime from building up.
Safety First!
Before I wrap up, I want to emphasize the importance of safety when cleaning your oven.
* Always wear rubber gloves to protect your hands from the baking soda and vinegar.
* Make sure your oven is completely cool before you start cleaning it.
* Avoid getting baking soda or vinegar in your eyes. If you do, rinse them immediately with plenty of water.
* If you’re using a commercial oven cleaner, follow the instructions carefully and wear appropriate protective gear, such as gloves and a mask.
* Ventilate the area well when cleaning your oven, especially if you’re using a commercial oven cleaner.
And that’s it! I hope you found this no-scrub oven cleaning method helpful. It’s definitely made my life a lot easier, and I’m sure it will do the same for you. Happy cleaning!

Conclusion
So, there you have it! The “Oven Cleaning No Scrub” method – a game-changer for anyone who dreads tackling that baked-on grime. We’ve walked you through a simple, effective, and surprisingly satisfying way to reclaim your oven’s sparkle without the elbow grease, harsh chemicals, or hours of scrubbing.
Why is this a must-try? Because it’s not just about a clean oven; it’s about reclaiming your time and energy. Think of all the things you could do with those extra hours you’d normally spend battling burnt food residue. Imagine the satisfaction of opening your oven to a gleaming interior, ready to bake your next culinary masterpiece. This method is also gentler on your oven’s surfaces, preventing scratches and damage that can occur with abrasive cleaners and vigorous scrubbing. Plus, it’s a more environmentally friendly option, reducing your reliance on harsh chemicals that can pollute your home and the environment.
But don’t just take our word for it. The beauty of this “Oven Cleaning No Scrub” technique lies in its adaptability. Feel free to experiment with variations to suit your specific needs and preferences. For instance, if you have particularly stubborn stains, you can increase the concentration of baking soda or let the paste sit for a longer period. You can also add a few drops of your favorite essential oil, like lemon or tea tree, to the baking soda paste for a fresh, clean scent. If you’re concerned about the ammonia smell, ensure proper ventilation by opening windows and using a fan. Alternatively, you can substitute the ammonia with a mixture of vinegar and water, although this may require a bit more soaking time.
Another variation involves using a steam cleaner after the baking soda paste has done its work. The steam will help to loosen any remaining residue, making it even easier to wipe away. For ovens with self-cleaning functions, you can use this method as a pre-treatment to loosen grime before running the self-cleaning cycle, potentially reducing the intensity and duration of the cycle.
We understand that trying a new cleaning method can be daunting, especially when it involves something as important as your oven. But we’re confident that once you experience the ease and effectiveness of this “Oven Cleaning No Scrub” approach, you’ll never go back to traditional scrubbing.
So, go ahead, give it a try! We’re eager to hear about your experience. Did it work as well for you as it did for us? Did you discover any helpful variations or tips along the way? Share your thoughts, photos, and stories in the comments below. Let’s build a community of happy, scrub-free oven owners! Your feedback will not only help us improve this guide but also inspire others to ditch the scrubbing and embrace a cleaner, easier way of life. Remember, a clean oven is a happy oven, and a happy oven leads to delicious meals and joyful baking experiences. Let’s get cleaning!
Frequently Asked Questions (FAQ)
What exactly makes this “Oven Cleaning No Scrub” method so effective?
The magic lies in the combination of baking soda and ammonia (or vinegar as an alternative). Baking soda is a mild alkali that helps to loosen grease and grime. When combined with ammonia, which is a stronger alkali, it creates a powerful cleaning solution that can break down even the most stubborn baked-on residue. The key is the extended soaking time, which allows the solution to penetrate and lift the grime, making it easy to wipe away without scrubbing. The ammonia fumes also help to loosen the grime, making it easier to remove.
Is it safe to use ammonia in my oven? I’m concerned about the fumes.
Ammonia can be safely used for oven cleaning if you take proper precautions. Always ensure adequate ventilation by opening windows and using a fan to circulate the air. Avoid inhaling the fumes directly. Wear gloves to protect your skin. Never mix ammonia with bleach, as this can create toxic fumes. If you are sensitive to ammonia or have respiratory problems, consider using the vinegar and water alternative instead. While it may require a longer soaking time, it’s a safer option for those with sensitivities. After cleaning, thoroughly wipe down the oven to remove any remaining ammonia residue.
Can I use this method on a self-cleaning oven?
Yes, you can use this method on a self-cleaning oven, but with a slight modification. Instead of running the self-cleaning cycle immediately after applying the baking soda paste, allow the paste to sit overnight as described in the instructions. Then, wipe away the paste and any loosened grime before running the self-cleaning cycle. This pre-treatment can help to loosen stubborn stains and reduce the intensity and duration of the self-cleaning cycle, which can be harsh on your oven. However, always consult your oven’s manual before using any cleaning method, including this one.
How often should I use this “Oven Cleaning No Scrub” method?
The frequency of cleaning depends on how often you use your oven and how much it tends to get dirty. For most people, cleaning the oven every 3-6 months is sufficient. However, if you frequently bake or cook dishes that splatter a lot, you may need to clean it more often. Regularly wiping up spills and splatters as they occur can also help to prevent buildup and reduce the need for deep cleaning.
What if I have really stubborn stains that won’t come off with just the baking soda and ammonia?
For particularly stubborn stains, you can try a few things. First, increase the concentration of baking soda in the paste. Second, let the paste sit for a longer period, even up to 24 hours. Third, you can try using a plastic scraper to gently loosen the grime before wiping it away. Avoid using metal scrapers, as they can scratch the oven’s surface. Finally, you can try using a steam cleaner after the baking soda paste has done its work. The steam will help to loosen any remaining residue, making it even easier to wipe away.
Can I use this method on the oven door glass?
Yes, this method is safe to use on the oven door glass. The baking soda paste will help to loosen baked-on splatters and grime, making it easier to wipe away. However, be careful not to get any of the ammonia solution on the rubber seal around the door, as it can damage it. If you do get some on the seal, wipe it off immediately with a damp cloth.
What if I don’t have ammonia? Can I use something else?
Yes, you can substitute the ammonia with a mixture of vinegar and water. Mix equal parts vinegar and water in a spray bottle and spray it liberally inside the oven after applying the baking soda paste. Let it sit for several hours or overnight before wiping it away. While this method may require a bit more soaking time, it’s a safer and more natural alternative to ammonia.
Will this method work on all types of ovens?
This method is generally safe to use on most types of ovens, including electric, gas, and convection ovens. However, it’s always a good idea to consult your oven’s manual before using any cleaning method, especially if you have a newer or more specialized oven. Some ovens may have specific cleaning instructions or recommendations that you should follow.
How do I get rid of the baking soda residue after cleaning?
After wiping away the baking soda paste and loosened grime, thoroughly rinse the oven with a damp cloth. You may need to rinse it several times to remove all traces of baking soda residue. You can also use a solution of vinegar and water to help neutralize any remaining baking soda.
Is this method safe for my pets?
While the ingredients themselves are not inherently toxic to pets in small amounts, it’s best to keep pets away from the oven while you’re cleaning it. The ammonia fumes can be irritating to their respiratory systems, and they may be tempted to lick the baking soda paste. After cleaning, thoroughly rinse the oven to remove any remaining residue and ensure that the area is well-ventilated before allowing your pets back into the kitchen.


Leave a Comment