

Living room cleaning tips – who doesn’t need them? Let’s be honest, our living rooms often bear the brunt of daily life. From movie nights with spilled popcorn to impromptu playdates with scattered toys, it’s a space that sees it all. But keeping it clean and inviting doesn’t have to be a daunting chore. I’m here to share some simple, effective, and even fun DIY tricks that will transform your living room from chaotic to cozy in no time!
For centuries, cultures around the world have placed great importance on a clean and welcoming home. Think of the ancient Roman mosaics, meticulously cleaned and polished, or the Japanese art of osouji, a deep cleaning ritual that’s as much about spiritual cleansing as it is about physical tidiness. While we might not be aiming for Roman grandeur or Zen-like perfection, the underlying principle remains: a clean living space contributes to a sense of well-being and peace.
In today’s busy world, finding the time and energy for a thorough cleaning can feel impossible. That’s where these living room cleaning tips come in! I’ve compiled a collection of DIY hacks that are not only budget-friendly but also incredibly effective. Whether you’re battling stubborn stains on your sofa or struggling to keep dust bunnies at bay, I’ve got you covered. Get ready to discover how to reclaim your living room and create a space you’ll truly love to relax in.

DIY Deep Clean: Revitalize Your Living Room Like a Pro!
Hey there! Ready to transform your living room from a chaotic zone to a sparkling sanctuary? I know, cleaning isn’t always the most exciting activity, but trust me, a deep clean can do wonders for your mood and your home. This guide will walk you through every step, making the process manageable and even (dare I say?) enjoyable. Let’s get started!
Phase 1: Decluttering – The Foundation of a Clean Space
Before we even think about dusting or vacuuming, we need to tackle the clutter. This is crucial because cleaning around piles of stuff is just moving dirt from one place to another.
* Gather your supplies: Grab three large boxes or bags. Label them “Keep,” “Donate/Sell,” and “Trash.”
* Start with a surface: Pick a starting point, like the coffee table or a bookshelf.
* Be ruthless: Ask yourself these questions for each item:
* Have I used this in the past year?
* Do I love it?
* Is it functional?
* If the answer to all three is “no,” it goes in the “Donate/Sell” or “Trash” box.
* Don’t get sentimental (too much): It’s easy to get bogged down in memories, but try to be objective. Photos and truly special items are exceptions, of course!
* Empty the boxes promptly: Once you’re done decluttering, immediately take the “Donate/Sell” box to a donation center or list items online. Dispose of the “Trash” box. This prevents clutter from creeping back in.
Phase 2: Dusting – Reaching Every Nook and Cranny
Dust is the enemy! It settles everywhere and makes the whole room look dingy. We’re going to wage war on dust, armed with the right tools and techniques.
* Gather your supplies: You’ll need:
* Microfiber cloths (these are amazing for trapping dust)
* A duster with an extendable handle (for high places)
* A vacuum cleaner with a brush attachment
* Furniture polish (optional, but recommended for wood surfaces)
* A small brush (like an old toothbrush) for tight spots
* Work from top to bottom: Dust falls downwards, so start with the highest surfaces and work your way down.
* Ceiling fans: Use the duster with the extendable handle to clean the fan blades. Make sure to cover the area below with a sheet or old towel to catch the falling dust.
* Light fixtures: Carefully dust light fixtures. If they’re glass, you can use a glass cleaner. Make sure the lights are off and cool before cleaning.
* Shelves and bookcases: Remove everything from the shelves and dust them thoroughly. Dust each item before placing it back.
* Electronics: Use a dry microfiber cloth to dust your TV, stereo, and other electronics. Avoid using liquids, as they can damage the screens.
* Picture frames and wall art: Dust the frames and the glass (if applicable).
* Baseboards and moldings: Use the vacuum cleaner with the brush attachment or a damp cloth to clean baseboards and moldings.
* Don’t forget the corners: Dust tends to accumulate in corners, so pay special attention to those areas.
Phase 3: Cleaning Surfaces – Bringing Back the Shine
Now that we’ve decluttered and dusted, it’s time to tackle the surfaces. This includes everything from the coffee table to the windows.
* Gather your supplies: You’ll need:
* All-purpose cleaner
* Glass cleaner
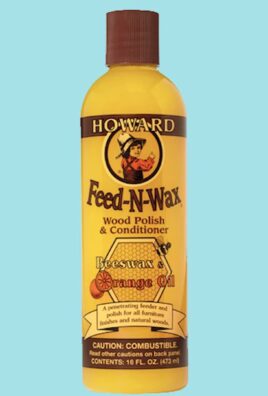
* Furniture polish (if you have wood furniture)
* Sponges and cloths
* Bucket of warm water
* Coffee table and side tables: Wipe down these surfaces with all-purpose cleaner. If they’re wood, follow up with furniture polish.
* Windows and mirrors: Spray glass cleaner on the windows and mirrors and wipe them clean with a clean cloth or paper towel. For streak-free results, use a microfiber cloth.
* Window sills: Wipe down the window sills with all-purpose cleaner.
* Upholstery: This is a big one!
1. Vacuum first: Use the upholstery attachment on your vacuum cleaner to remove loose dirt and debris. Pay special attention to crevices and seams.
2. Spot clean: Treat any stains with a stain remover specifically designed for upholstery. Follow the instructions on the product label.
3. Deep clean (optional): If your upholstery is heavily soiled, you may want to consider renting a steam cleaner or hiring a professional upholstery cleaner.
* Leather furniture:
1. Dust: Wipe down the leather with a dry microfiber cloth.
2. Clean: Use a leather cleaner and conditioner to clean and protect the leather. Follow the instructions on the product label.
* Hardwood floors:
1. Sweep or vacuum: Remove loose dirt and debris.
2. Mop: Use a hardwood floor cleaner and a damp mop to clean the floors. Avoid using too much water, as it can damage the wood.
* Carpet:
1. Vacuum thoroughly: Vacuum the carpet in multiple directions to remove as much dirt and debris as possible.
2. Spot clean: Treat any stains with a carpet stain remover.
3. Deep clean (optional): If your carpet is heavily soiled, you may want to consider renting a carpet cleaner or hiring a professional carpet cleaner.
Phase 4: The Finishing Touches – Adding the Sparkle
Now that we’ve done the heavy lifting, it’s time for the finishing touches that will really make your living room shine.
* Arrange pillows and throws: Fluff the pillows and arrange them neatly on the sofa. Fold the throws and drape them over the arm of the sofa or a chair.
* Style the coffee table: Add a few decorative items to the coffee table, such as a vase of flowers, a stack of books, or a tray with candles.
* Straighten curtains or blinds: Make sure the curtains or blinds are straight and evenly spaced.
* Empty trash cans: Take out the trash and replace the liners.
* Add a fresh scent: Light a scented candle, use a room spray, or diffuse essential oils to create a pleasant atmosphere.
* Arrange your remotes: Designate a spot for your remotes, whether it’s a decorative box or a small tray. This will prevent them from getting lost.
* Fluff rugs: Give your rugs a good shake or vacuum to fluff them up.
* Water plants: If you have plants in your living room, make sure they are watered and healthy.
* Open the windows: Let some fresh air in to ventilate the room.
Step-by-Step Instructions: A Quick Recap
Okay, let’s break down the entire process into easy-to-follow steps:
1. Declutter: Sort through everything in your living room and get rid of anything you don’t need or use.
2. Dust: Start from the top and work your way down, dusting all surfaces, including ceiling fans, light fixtures, shelves, and electronics.
3. Clean surfaces: Wipe down tables, windows, and mirrors with appropriate cleaners.
4. Upholstery and furniture: Vacuum and spot clean upholstery. Clean and condition leather furniture.
5. Floors: Sweep or vacuum hardwood floors and mop with a hardwood floor cleaner. Vacuum carpets thoroughly and spot clean stains.
6. Finishing touches: Arrange pillows and throws, style the coffee table, straighten curtains, empty trash cans, and add a fresh scent.
Extra Tips and Tricks for a Super Clean Living Room
* Clean as you go: Don’t let messes accumulate. Wipe up spills immediately and put things away after you use them.
* Establish a cleaning routine: Set aside a few minutes each day or week to tidy up your living room. This will prevent it from getting too messy.
* Involve the whole family: Get everyone involved in the cleaning process. Even young children can help with simple tasks like putting away toys.
* Use the right tools: Invest in quality cleaning supplies that will make the job easier and more effective.
* Don’t be afraid to ask for help: If you’re feeling overwhelmed, don’t hesitate to ask a friend or family member for help.
* Make it fun: Put on some music, listen to a podcast, or watch a movie while you clean to make the process more enjoyable.
* Reward yourself: After you’re finished cleaning, treat yourself to something you

Conclusion
So, there you have it! Transforming your living room into a sparkling, inviting haven doesn’t require a small fortune or an army of cleaning professionals. By embracing these simple yet effective DIY living room cleaning tips, you’re not just cleaning; you’re creating a healthier, happier, and more relaxing space for yourself and your loved ones.
The beauty of these methods lies in their adaptability. Feel free to experiment with different essential oil combinations in your cleaning solutions to find scents that uplift your mood and complement your décor. For instance, a few drops of lavender and chamomile can create a calming atmosphere, while lemon and eucalyptus can invigorate and energize. If you’re dealing with particularly stubborn stains on your upholstery, consider creating a paste of baking soda and water, applying it to the stain, letting it sit for a few minutes, and then gently scrubbing with a soft brush. Remember to always test any cleaning solution on an inconspicuous area first to ensure it doesn’t damage the fabric.
Don’t underestimate the power of regular maintenance. A quick daily sweep or vacuum can prevent dirt and dust from accumulating, making your weekly deep clean much easier. Similarly, wiping down surfaces after use can prevent spills from becoming permanent stains. Think of it as preventative medicine for your living room!
Beyond the practical benefits, adopting these DIY living room cleaning tips is also a conscious choice to reduce your reliance on harsh chemicals and contribute to a more sustainable lifestyle. Many commercial cleaning products contain ingredients that can be harmful to your health and the environment. By making your own cleaning solutions, you have complete control over what goes into them, ensuring a safer and healthier home for you and your family.
We truly believe that these DIY living room cleaning tips are a game-changer for anyone looking to maintain a clean and comfortable living space without breaking the bank or compromising their health. The satisfaction of knowing you’ve created a sparkling clean living room using natural, affordable ingredients is truly rewarding.
Now, it’s your turn! We encourage you to try these DIY living room cleaning tips and experience the difference for yourself. Don’t be afraid to get creative and adapt the methods to suit your specific needs and preferences. And most importantly, share your experiences with us! We’d love to hear your success stories, your tips and tricks, and any variations you’ve discovered. Let’s create a community of clean living enthusiasts who are passionate about creating healthy and happy homes. Share your before-and-after photos, your favorite cleaning recipes, and any other insights you have on social media using [Your Hashtag Here]. Together, we can make the world a cleaner, brighter, and more inviting place, one living room at a time.
Frequently Asked Questions (FAQ)
Q: Are these DIY cleaning solutions safe for all types of furniture and surfaces?
A: While most of these DIY cleaning solutions are generally safe and effective, it’s always crucial to test them on an inconspicuous area first, especially when dealing with delicate fabrics, antique furniture, or sensitive surfaces. Different materials react differently to various cleaning agents, so a patch test will help you avoid any potential damage or discoloration. For example, vinegar, while a great all-purpose cleaner, can be too acidic for certain types of stone or wood finishes. Similarly, essential oils can sometimes stain certain fabrics if not diluted properly. When in doubt, consult the manufacturer’s instructions or a professional cleaning service.
Q: How often should I deep clean my living room?
A: The frequency of deep cleaning depends on several factors, including the size of your living room, the number of people and pets living in your home, and your lifestyle. As a general guideline, a deep clean every 1-3 months is usually sufficient for most households. However, if you have children or pets, or if you frequently entertain guests, you may need to deep clean more often. Regular maintenance, such as daily sweeping or vacuuming and weekly dusting, can help extend the time between deep cleans.
Q: What are some essential cleaning supplies I should always have on hand?
A: Having a well-stocked cleaning caddy can make tackling messes much easier and more efficient. Some essential cleaning supplies include:
* Microfiber cloths: These are excellent for dusting, wiping surfaces, and polishing furniture.
* Spray bottles: For storing and dispensing your DIY cleaning solutions.
* Baking soda: A versatile cleaning agent for deodorizing, scrubbing, and removing stains.
* White vinegar: A natural disinfectant and degreaser.
* Essential oils: For adding fragrance and antibacterial properties to your cleaning solutions.
* A vacuum cleaner with various attachments: For cleaning carpets, rugs, and upholstery.
* A mop and bucket: For cleaning hard floors.
* A scrub brush: For tackling stubborn stains and grime.
* Rubber gloves: To protect your hands from harsh chemicals and bacteria.
Q: Can I use these DIY cleaning solutions on my electronics?
A: Cleaning electronics requires extra care to avoid damage. Never spray cleaning solutions directly onto electronic devices. Instead, dampen a microfiber cloth with a small amount of distilled water or a specialized electronic cleaner and gently wipe the screen, keyboard, and other surfaces. Avoid using harsh chemicals or abrasive cleaners, as these can scratch or damage the delicate components. Always unplug electronic devices before cleaning them.
Q: How can I get rid of lingering odors in my living room?
A: Lingering odors can be a challenge, but there are several natural ways to freshen up your living room. Open windows and doors to air out the space regularly. Place bowls of baking soda around the room to absorb odors. You can also simmer a pot of water with citrus peels, cinnamon sticks, or cloves on the stove to create a pleasant aroma. For pet odors, consider using an enzymatic cleaner specifically designed to break down the odor-causing molecules. Regularly wash or vacuum your carpets and upholstery to remove trapped odors.
Q: What’s the best way to clean my living room windows?
A: Clean windows can make a huge difference in the brightness and overall appearance of your living room. A simple DIY window cleaner can be made by mixing equal parts white vinegar and water in a spray bottle. Spray the solution onto the windows and wipe clean with a microfiber cloth or a squeegee. For streak-free results, avoid cleaning windows on a sunny day, as the sun can cause the cleaning solution to dry too quickly.
Q: How can I involve my family in the cleaning process?
A: Making cleaning a family affair can make it less of a chore and more of a team effort. Assign age-appropriate tasks to each family member. For example, younger children can help with dusting or putting away toys, while older children can help with vacuuming or mopping. Make it fun by playing music or turning it into a game. Reward your family for their efforts with a special treat or activity. By working together, you can create a cleaner and more enjoyable living space for everyone.

Leave a Comment