

Ink Stain Removal Toothpaste: Sounds like a magician’s secret, right? Well, in a way, it is! We’ve all been there – that dreaded moment when a pen explodes, a leaky marker strikes, or a rogue ink droplet lands on our favorite shirt. Panic sets in, and you might think the garment is doomed. But hold on! Before you resign yourself to throwing it away, let me share a simple, yet incredibly effective DIY trick that has saved countless items from the brink: using toothpaste for ink stain removal.
The use of abrasive substances for cleaning stains isn’t new. Historically, people have used everything from wood ash to lemon juice to combat stubborn marks. But the beauty of toothpaste lies in its readily available nature and its gentle abrasive properties. It’s a modern twist on an age-old problem, bringing a touch of everyday magic to our laundry routines.
Why is this ink stain removal toothpaste trick so essential? Because life is messy! Accidents happen, and sometimes, those accidents involve ink. Instead of spending money on expensive stain removers or, worse, losing a beloved item, this DIY solution offers a cost-effective and convenient way to tackle those pesky ink stains. I’m going to show you how to use this common household item to banish ink stains and restore your fabrics to their former glory. So, grab your toothpaste, and let’s get started!

DIY Ink Stain Removal with Toothpaste: A Comprehensive Guide
Hey there, fellow DIY enthusiasts! Ever had that heart-stopping moment when you realize ink has decided to make your favorite shirt its new canvas? Don’t panic! Before you resign yourself to wearing that shirt only for painting projects, let me share a simple yet incredibly effective trick: using toothpaste to remove ink stains. Yes, you read that right! That minty fresh stuff you use to keep your pearly whites sparkling can also be a stain-fighting superhero.
This guide will walk you through the process step-by-step, ensuring you can salvage your garments and other items from the dreaded ink blot. I’ve personally used this method countless times, and I’m confident it will work wonders for you too.
What You’ll Need
Before we dive in, let’s gather our supplies. You probably have most of these items already lying around the house, which is part of what makes this DIY hack so fantastic!
* Non-Gel Toothpaste: This is crucial! You need a plain, white, non-gel toothpaste. Gel toothpastes often contain ingredients that can actually set the stain further, so stick to the classic white paste. Think of the kind your grandma used!
* Clean Cloth or Sponge: A soft, clean cloth or sponge will be our applicator and blotting tool. Microfiber cloths work particularly well.
* Water: We’ll need water for rinsing and dampening the cloth.
* Old Toothbrush (Optional): For stubborn stains or delicate fabrics, an old toothbrush can provide gentle scrubbing power.
* Hair Dryer (Optional): To speed up the drying process.
* Laundry Detergent: For washing the item after stain removal.
* Cotton Swabs (Optional): For precise application on small stains.
* Rubbing Alcohol (For Extra Stubborn Stains – Use with Caution): If the toothpaste alone isn’t cutting it, rubbing alcohol can be a powerful ally, but always test it in an inconspicuous area first!
* Patience: Stain removal sometimes takes a little time and effort. Don’t get discouraged if it doesn’t disappear instantly.
Testing, Testing, 1, 2, 3… (Important!)
Before you slather toothpaste all over your precious item, it’s absolutely essential to perform a spot test. This is especially important for delicate fabrics or brightly colored items.
1. Find an Inconspicuous Area: Choose a hidden area of the fabric, like an inside seam, hem, or pocket lining.
2. Apply a Small Amount of Toothpaste: Dab a tiny amount of toothpaste onto the chosen area.
3. Wait and Observe: Let the toothpaste sit for about 5-10 minutes.
4. Rinse and Dry: Rinse the area with water and let it dry completely.
5. Check for Damage: Examine the area for any discoloration, fading, or damage to the fabric. If everything looks good, you’re safe to proceed! If you notice any adverse effects, try a different stain removal method or consult a professional cleaner.
The Toothpaste Stain Removal Process
Alright, let’s get down to business! Here’s the step-by-step guide to removing ink stains with toothpaste:
1. Dampen the Stained Area: Lightly dampen the stained area with water. Don’t soak it! Just a little moisture will help the toothpaste work its magic.
2. Apply Toothpaste Generously: Apply a generous amount of non-gel toothpaste directly onto the ink stain. Make sure the entire stain is covered. Don’t be shy!
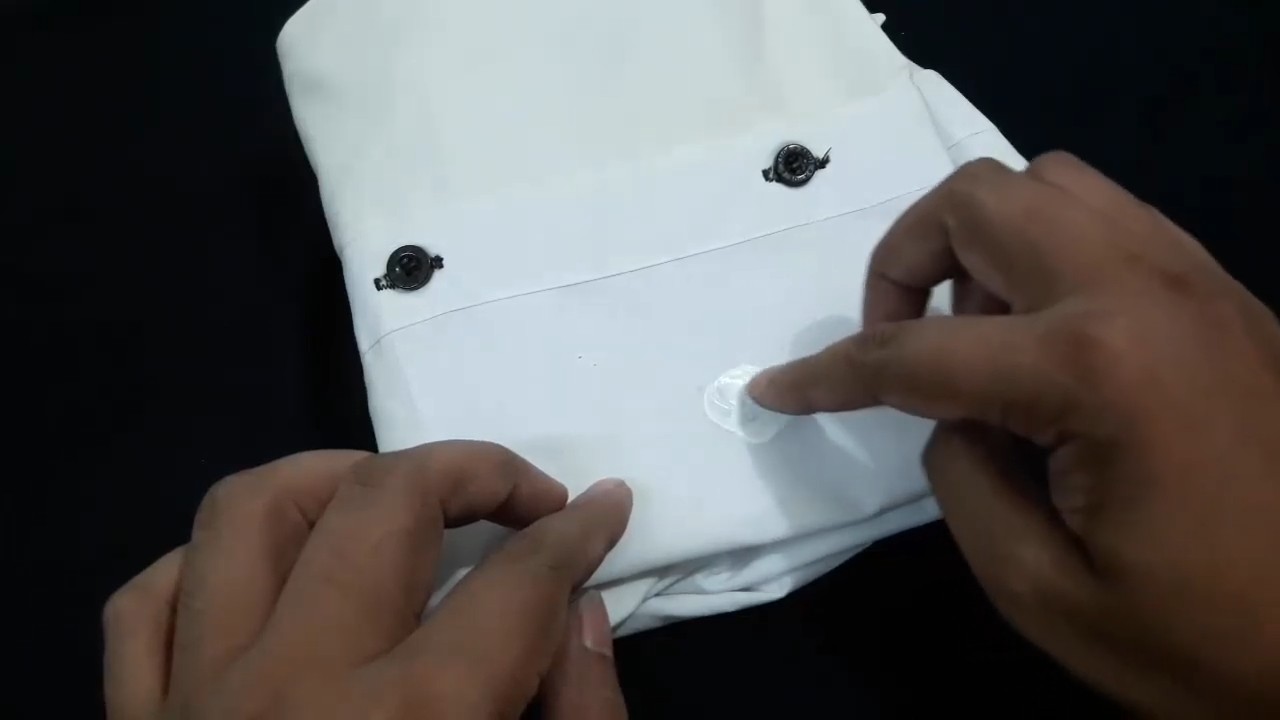
3. Gently Rub the Toothpaste: Using a clean cloth, sponge, or old toothbrush, gently rub the toothpaste into the stain. Use circular motions and avoid scrubbing too hard, especially on delicate fabrics. The goal is to work the toothpaste into the fibers of the material.
4. Let it Sit: This is where patience comes in. Let the toothpaste sit on the stain for at least 30 minutes. For stubborn stains, you can leave it on for an hour or even longer. The longer it sits, the more time it has to break down the ink.
5. Rinse Thoroughly: After the waiting period, rinse the area thoroughly with cool water. Make sure all the toothpaste is completely removed.
6. Check for Stain Removal: Examine the area to see if the stain has been removed. If the stain is gone, great! Proceed to the next step. If the stain is still visible, repeat steps 2-5. Sometimes it takes a few applications to completely remove the ink.
7. Wash as Usual: Once the stain is gone (or significantly faded), wash the item as usual according to the care label. This will remove any remaining toothpaste residue and ensure the stain doesn’t reappear.
8. Air Dry or Use a Hair Dryer: After washing, air dry the item or use a hair dryer on a low setting to speed up the drying process. Avoid putting it in the dryer until you’re absolutely sure the stain is gone, as the heat can set the stain permanently.
Dealing with Stubborn Stains
Sometimes, despite our best efforts, the ink stain just won’t budge. Don’t give up hope! Here are a few extra tips and tricks for tackling those stubborn stains:
* Rubbing Alcohol Boost: If the toothpaste alone isn’t working, try dabbing a small amount of rubbing alcohol onto the stain with a cotton swab. Be very careful with this method, as rubbing alcohol can damage some fabrics. Always test it in an inconspicuous area first! After applying the rubbing alcohol, follow the toothpaste application steps outlined above.
* Baking Soda Paste: Create a paste of baking soda and water and apply it to the stain. Let it sit for 30 minutes, then rinse and wash as usual. Baking soda is a gentle abrasive that can help lift the stain.
* Lemon Juice Power: Lemon juice is a natural bleaching agent that can be effective on some ink stains. Apply lemon juice to the stain, let it sit for 30 minutes, then rinse and wash as usual. Be cautious when using lemon juice on dark fabrics, as it can cause fading.
* Professional Help: If you’ve tried everything and the stain is still there, it might be time to call in the professionals. A dry cleaner has specialized equipment and cleaning solutions that can often remove even the most stubborn stains.
Toothpaste on Different Surfaces
While this guide primarily focuses on fabric, toothpaste can also be used to remove ink stains from other surfaces, such as:
* Leather: Apply toothpaste to the stain, gently rub it in with a soft cloth, and then wipe it clean with a damp cloth. Follow with a leather conditioner to prevent drying.
* Wood: Apply toothpaste to the stain, let it sit for a few minutes, and then wipe it clean with a damp cloth. Be careful not to scratch the wood surface.
* Plastic: Apply toothpaste to the stain, gently rub it in with a soft cloth, and then wipe it clean with a damp cloth.
Important Considerations
* Act Fast: The sooner you treat the stain, the easier it will be to remove. Fresh ink stains are much easier to tackle than old, set-in stains.
* Avoid Heat: As mentioned earlier, avoid using heat (like a dryer) until you’re absolutely sure the stain is gone. Heat can permanently set the stain, making it impossible to remove.
* Be Gentle: Avoid scrubbing too hard, especially on delicate fabrics. Gentle rubbing is usually sufficient to work the toothpaste into the stain.
* Patience is Key: Stain removal can be a process. Don’t get discouraged if the stain doesn’t disappear immediately. Keep trying, and you’ll eventually see results.
* Read Care Labels: Always check the care label of the item before attempting any stain removal method. Some fabrics require special cleaning instructions.
Why This Works: The Science Behind the Magic
You might be wondering, “Why toothpaste? What’s the secret ingredient?” Well, it’s not exactly magic, but there’s some science behind it. Toothpaste contains mild abrasives and detergents that help to lift and break down the ink particles. The abrasives gently scrub the stain away, while the detergents help to dissolve the ink and lift it from the fabric. The non-gel formula is important because it avoids ingredients that could potentially set the stain.
Final Thoughts
So there you have it! A comprehensive guide to removing ink stains with toothpaste. I hope this DIY hack helps you save your favorite items from the dreaded ink blot. Remember to always test in an inconspicuous area first, be patient, and don’t be afraid to try different techniques until you find what works best for you. Happy stain removing!
Conclusion
So, there you have it! This simple yet incredibly effective ink stain removal toothpaste trick is a game-changer for anyone who’s ever faced the frustration of a rogue pen mark. We’ve all been there – a beautiful white shirt, a favorite notebook, or even a cherished piece of furniture suddenly marred by an unsightly ink blot. Instead of resigning yourself to the stain or resorting to harsh chemicals that could damage the material, why not try this gentle and readily available solution?
The beauty of using toothpaste for ink stain removal lies in its simplicity and accessibility. You likely already have a tube in your bathroom, making it a convenient first line of defense against accidental ink spills. The mild abrasives in toothpaste gently lift the ink particles from the fabric or surface without causing significant damage. This is especially crucial for delicate fabrics or porous materials that could be easily harmed by stronger solvents.
But the benefits don’t stop there. Beyond its effectiveness and convenience, this DIY method is also incredibly cost-effective. Compared to expensive stain removers or professional cleaning services, a dab of toothpaste is a budget-friendly alternative that delivers impressive results. Think of all the money you’ll save by rescuing your favorite items from the brink of stain-induced oblivion!
Now, let’s talk about variations. While plain white toothpaste is generally recommended, you can experiment with different types depending on the severity of the stain and the material you’re working with. For instance, a toothpaste with baking soda might provide extra cleaning power for stubborn stains on durable fabrics. However, always test a small, inconspicuous area first to ensure the toothpaste doesn’t discolor or damage the material. For particularly delicate fabrics, consider using a gel toothpaste, as it tends to be less abrasive. Remember, patience is key. Multiple applications and gentle blotting may be necessary to completely remove the stain.
Furthermore, this method isn’t limited to just clothing. You can also use it to remove ink stains from furniture, carpets, and even walls. Just be sure to adjust your technique accordingly. For example, when cleaning walls, use a damp cloth to wipe away the toothpaste residue to avoid damaging the paint.
We are confident that this ink stain removal toothpaste trick will become your go-to solution for tackling those pesky ink stains. It’s a simple, effective, and affordable way to keep your belongings looking their best.
So, what are you waiting for? Give it a try! We’re eager to hear about your experiences. Did it work wonders on your favorite shirt? Did it rescue your beloved notebook from an ink-stained fate? Share your success stories, tips, and variations in the comments below. Your insights could help others discover the magic of toothpaste for ink stain removal! Don’t forget to tell us what kind of toothpaste you used and what type of material you were cleaning. Your feedback is invaluable!
Frequently Asked Questions (FAQs)
What kind of toothpaste works best for ink stain removal?
Generally, plain white toothpaste (not gel) is recommended. The mild abrasives in the toothpaste help to lift the ink particles from the fabric or surface. Avoid using colored or heavily flavored toothpastes, as these could potentially stain the material further. Toothpastes with baking soda can be effective for tougher stains, but always test on an inconspicuous area first. Gel toothpastes are generally less abrasive and may be suitable for delicate fabrics.
Can I use this method on all types of fabrics?
While this method is generally safe for most fabrics, it’s always best to test it on a small, hidden area first to ensure it doesn’t cause discoloration or damage. Delicate fabrics like silk or wool may require extra caution. Consider using a gel toothpaste or diluting the toothpaste with water before applying it to these materials. If you’re unsure, consult a professional cleaner.
How long should I leave the toothpaste on the stain?
The amount of time you leave the toothpaste on the stain will depend on the severity of the stain and the type of material. For fresh stains, you can leave it on for 5-10 minutes. For older, more stubborn stains, you may need to leave it on for 30 minutes or even longer. Check the stain periodically and gently blot with a clean cloth to see if the ink is lifting.
What if the toothpaste doesn’t completely remove the stain?
If the toothpaste doesn’t completely remove the stain on the first try, don’t give up! You can try repeating the process multiple times. Gently blot the area with a clean cloth after each application. You can also try using a slightly different type of toothpaste or adding a small amount of baking soda to the toothpaste for extra cleaning power. If the stain persists, consider consulting a professional cleaner.
Will this method work on ballpoint pen ink, gel pen ink, or permanent marker?
This method is most effective on ballpoint pen ink. It may also work on some gel pen inks, but permanent marker is much more difficult to remove. For permanent marker stains, you may need to try a different solvent-based cleaner, but always test on an inconspicuous area first.
Can I use this method on leather?
Using toothpaste on leather is not generally recommended, as it can dry out and damage the material. There are specialized leather cleaners available that are designed to safely remove stains without harming the leather. If you’re determined to try toothpaste, test it on a very small, hidden area first and use a very small amount. Follow up with a leather conditioner to rehydrate the leather.
How do I remove the toothpaste residue after removing the stain?
After removing the stain, use a clean, damp cloth to gently wipe away the toothpaste residue. Be sure to remove all traces of the toothpaste, as any remaining residue could attract dirt or cause discoloration. You may need to rinse the area with water and then blot it dry with a clean towel.
Is this method safe for colored fabrics?
While this method is generally safe for colored fabrics, there is always a risk of discoloration. It’s essential to test the toothpaste on a small, hidden area first to ensure it doesn’t fade or alter the color of the fabric. If you notice any color change, discontinue use immediately.
Can I use this method on carpets or upholstery?
Yes, you can use this method on carpets or upholstery. Apply a small amount of toothpaste to the stain and gently blot with a clean cloth. Avoid rubbing, as this could spread the stain. After removing the stain, use a damp cloth to wipe away the toothpaste residue. You may need to vacuum the area to remove any remaining residue.
What are some other tips for preventing ink stains?
The best way to deal with ink stains is to prevent them from happening in the first place. Store pens and markers properly, away from clothing and other items that could be easily stained. Be careful when handling pens and markers, especially around delicate fabrics. If you do spill ink, act quickly to blot up as much of the ink as possible before it sets. The sooner you treat the stain, the easier it will be to remove.

Leave a Comment