

Home cleaning supplies checklist – that’s the secret weapon you need to conquer clutter and grime! Let’s face it, nobody *loves* cleaning, but having the right tools at your fingertips can transform it from a dreaded chore into a surprisingly satisfying accomplishment. Imagine this: you’re ready to tackle that overflowing bathroom, armed with everything you need, from the perfect scrub brush to a streak-free window cleaner. No more frantic searches for that one missing bottle or improvising with less-than-ideal substitutes!
For generations, keeping a tidy home has been a cornerstone of health and well-being. From ancient civilizations using natural herbs and oils to disinfect their dwellings, to the meticulously cleaned homes of the Victorian era, cleanliness has always been valued. But in today’s busy world, efficiency is key. That’s where a well-organized home cleaning supplies checklist comes in. It’s not just about having the supplies; it’s about having them readily available, knowing what you have, and preventing those last-minute runs to the store when you’re already in the cleaning zone.
I’m here to help you create the ultimate home cleaning supplies checklist, tailored to your specific needs and preferences. Whether you’re a minimalist who prefers natural solutions or someone who loves the power of commercial cleaners, this guide will help you stay organized, save time, and achieve a sparkling clean home you can be proud of. So, let’s dive in and create a cleaning arsenal that will make your life easier and your home shine!
DIY All-Purpose Citrus Cleaner: Sparkling Clean the Natural Way!
Hey everyone! I’m so excited to share one of my favorite DIY cleaning hacks with you – a fantastic all-purpose citrus cleaner! Not only is it incredibly effective at cutting through grease and grime, but it also smells absolutely amazing, leaving your home feeling fresh and revitalized. Plus, it’s a much more eco-friendly and budget-friendly alternative to store-bought cleaners. Let’s get started!
What You’ll Need: Your Citrus Cleaning Arsenal
Before we dive in, let’s gather all the necessary supplies. This is a pretty simple recipe, so you probably already have most of these items on hand.
* Citrus Peels: This is the star of the show! You’ll need the peels from about 6-8 citrus fruits. Oranges, lemons, limes, grapefruits – a mix is great! The more variety, the more complex and lovely the scent will be. Make sure you’re only using the peels, avoiding as much of the white pith as possible, as it can make the cleaner bitter.
* White Vinegar: This is our cleaning powerhouse! White vinegar is a natural disinfectant and degreaser.
* Water: Distilled water is best, but tap water will work in a pinch.
* Spray Bottle: A clean, empty spray bottle to store and dispense your cleaner.
* Large Glass Jar or Container: This is where we’ll infuse the vinegar with the citrus peels. Make sure it’s clean and has a lid.
* Optional: Essential Oils: If you want to boost the scent or add extra cleaning power, you can add a few drops of your favorite essential oils. Lemon, orange, tea tree, and eucalyptus are all great choices.
* Optional: Funnel: A funnel will make transferring the cleaner to the spray bottle much easier and less messy.
Step-by-Step: Creating Your Citrus Infusion
This is where the magic happens! We’re going to infuse the white vinegar with the citrus peels to create a potent and fragrant cleaning solution.
1. Prepare the Citrus Peels: After you’ve enjoyed your citrus fruits, don’t throw away the peels! Give them a quick rinse to remove any dirt or residue. Then, roughly chop the peels into smaller pieces. This will help the vinegar extract more of the essential oils and fragrance.
2. Fill the Jar: Place the chopped citrus peels into your large glass jar or container. You want to fill the jar about halfway with the peels.
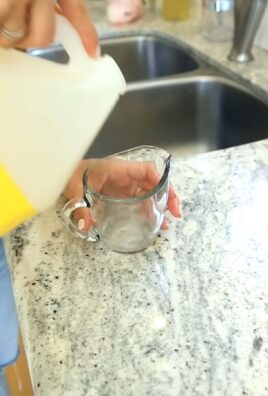
3. Pour in the Vinegar: Now, pour the white vinegar over the citrus peels, making sure they are completely submerged. Leave about an inch of space at the top of the jar.
4. Seal and Infuse: Secure the lid tightly on the jar and place it in a cool, dark place. A pantry or cupboard works perfectly. Let the mixture infuse for at least 2 weeks, but ideally 4-6 weeks for a stronger scent and more potent cleaning power. The longer it infuses, the better!
5. Shake it Up: Every few days, give the jar a gentle shake to help the infusion process along.
Mixing and Bottling: Ready to Clean!
After the infusion period, it’s time to strain and dilute your citrus-infused vinegar.
1. Strain the Mixture: Carefully strain the vinegar through a fine-mesh sieve or cheesecloth to remove the citrus peels. Discard the peels (or compost them!). You’ll be left with a beautifully scented, citrus-infused vinegar.
2. Dilute the Concentrate: In your spray bottle, combine equal parts of the citrus-infused vinegar and water. For example, if your spray bottle holds 16 ounces, use 8 ounces of vinegar and 8 ounces of water.
3. Add Essential Oils (Optional): If you’re using essential oils, add a few drops (around 5-10 drops per 16-ounce bottle) to the spray bottle.
4. Shake Well: Secure the spray nozzle and shake the bottle well to combine all the ingredients.
5. Label Your Bottle: Don’t forget to label your spray bottle with the contents and date. This will help you keep track of what’s inside and when you made it.
Using Your Citrus Cleaner: Sparkling Results!
Now for the fun part – putting your DIY citrus cleaner to work!
* General Cleaning: This cleaner is perfect for wiping down countertops, sinks, appliances, and other surfaces. Simply spray the cleaner onto the surface and wipe clean with a damp cloth or sponge.
* Grease Cutting: The acidity of the vinegar and the degreasing properties of the citrus oils make this cleaner effective at cutting through grease and grime in the kitchen.
* Glass and Mirrors: Use this cleaner to achieve streak-free shine on glass and mirrors. Just spray lightly and wipe clean with a microfiber cloth.
* Floor Cleaning: You can add a small amount of this cleaner to your mop bucket for a natural and effective floor cleaner. Be sure to test it in an inconspicuous area first to ensure it doesn’t damage the finish.
* Deodorizing: The fresh citrus scent will help to deodorize your home. Spray it in the air or on fabrics to eliminate odors.
Important Considerations: A Few Things to Keep in Mind
While this cleaner is generally safe and effective, there are a few things to keep in mind:
* Test on Delicate Surfaces: Before using this cleaner on delicate surfaces like marble, granite, or wood, test it in an inconspicuous area first to ensure it doesn’t cause any damage or discoloration.
* Avoid Contact with Eyes: Avoid direct contact with eyes. If contact occurs, rinse thoroughly with water.
* Not for All Surfaces: Avoid using this cleaner on porous surfaces like unsealed grout, as it can penetrate and potentially stain.
* Storage: Store your citrus cleaner in a cool, dark place away from direct sunlight.
* Shelf Life: This cleaner will typically last for several months. If you notice any changes in color, scent, or consistency, it’s best to discard it and make a fresh batch.
Troubleshooting: Addressing Common Issues
Sometimes, things don’t go exactly as planned. Here are a few common issues you might encounter and how to address them:
* Weak Scent: If your cleaner doesn’t have a strong citrus scent, it could be because you didn’t use enough citrus peels, the infusion time was too short, or the citrus fruits weren’t very fragrant to begin with. Try using more peels, infusing for a longer period, or using a different type of citrus fruit. Adding a few drops of citrus essential oil can also help boost the scent.
* Cloudy Cleaner: A cloudy cleaner is usually nothing to worry about. It’s often caused by the natural oils in the citrus peels. It won’t affect the cleaning power of the solution.
* Bitter Smell: If your cleaner has a bitter smell, it could be because you included too much of the white pith from the citrus peels. Try to remove as much of the pith as possible when preparing the peels.
* Residue: If you’re noticing a residue after cleaning, it could be because you’re using too much cleaner or not wiping the surface thoroughly enough. Try using less cleaner and wiping the surface with a clean, damp cloth.
Boosting the Cleaning Power: Extra Tips and Tricks
Want to take your DIY citrus cleaner to the next level? Here are a few extra tips and tricks:
* Add Baking Soda: For extra scrubbing power, add a tablespoon of baking soda to your spray bottle. Baking soda is a mild abrasive that can help remove stubborn stains and grime.
* Use Different Citrus Fruits: Experiment with different citrus fruits to create unique scent combinations. Grapefruit, tangerines, and blood oranges all have distinct fragrances that can add a special touch to your cleaner.
* Infuse with Herbs: For an even more complex scent, try infusing your vinegar with herbs like rosemary, lavender, or thyme.
* Make a Paste: For tough stains, create a paste by mixing the citrus-infused vinegar with baking soda. Apply the paste to the stain, let it sit for a few minutes, and then scrub gently.
* Use for Laundry: Add a cup of citrus-infused vinegar to your washing machine as a natural fabric softener and odor eliminator.
Why I Love This DIY Cleaner: My Personal Experience
I’ve been using this DIY citrus cleaner for years, and I absolutely love it! Not only is it effective at cleaning my home, but it also makes me feel good knowing that I’m using a natural and eco-friendly product. I love the fresh, clean scent, and I appreciate that I’m not exposing my family to harsh chemicals. Plus, it’s so much cheaper than buying store-bought cleaners! I highly recommend giving this recipe a try. You won’t be disappointed!
I hope you found this guide helpful! Happy cleaning
Conclusion
So, there you have it! Transforming your cleaning routine with this simple, yet incredibly effective DIY trick for creating your own home cleaning supplies checklist is more than just a cost-saving measure; it’s about taking control of your home environment and ensuring a healthier, more organized living space. We’ve walked you through the process, highlighting the benefits and offering practical tips to make it a seamless experience.
Why is this DIY approach a must-try? Because it empowers you to customize your cleaning supplies checklist to perfectly match your specific needs and preferences. No more buying pre-made lists that include items you never use or forgetting essential supplies when you’re halfway through a cleaning project. This method allows you to create a personalized checklist that reflects your cleaning habits, the size of your home, and the types of surfaces you need to clean.
Furthermore, creating your own checklist encourages mindful consumption. By carefully considering what you truly need, you can reduce waste and avoid impulse purchases of cleaning products that often end up gathering dust in your cupboards. This not only saves you money but also contributes to a more sustainable lifestyle.
But the benefits don’t stop there. A well-organized home cleaning supplies checklist can significantly streamline your cleaning process. Imagine having a readily available list that guides you through each room, ensuring you have all the necessary tools and products at your fingertips. This eliminates the frustration of searching for missing items and allows you to focus on the task at hand, making cleaning more efficient and less of a chore.
Variations and Suggestions:
* Digital vs. Physical: While we’ve focused on creating a physical checklist, don’t hesitate to embrace the digital world. Use a note-taking app on your phone or tablet to create a digital checklist that you can easily update and access on the go.
* Categorize by Room: Organize your checklist by room (kitchen, bathroom, living room, etc.) to make it even easier to navigate and ensure you don’t miss any areas.
* Add Frequency: Include a column to indicate how often you need to replenish each item (e.g., weekly, monthly, quarterly). This will help you stay on top of your supplies and avoid running out unexpectedly.
* Color-Coding: Use color-coding to differentiate between different types of cleaning supplies (e.g., green for eco-friendly products, blue for bathroom cleaners, yellow for kitchen cleaners).
* Include DIY Recipes: If you’re a fan of homemade cleaning solutions, add those recipes to your checklist along with the necessary ingredients.
We strongly encourage you to give this DIY trick a try. It’s a simple yet powerful way to transform your cleaning routine and create a more organized and efficient home. Once you’ve created your own home cleaning supplies checklist, we’d love to hear about your experience! Share your tips, variations, and success stories in the comments below. Let’s inspire each other to create cleaner, healthier, and more organized homes.
Frequently Asked Questions (FAQ)
What if I’m not sure what cleaning supplies I need?
That’s perfectly fine! Start by taking a walk through your home and making a note of all the surfaces and areas that need regular cleaning. Consider the types of messes you typically encounter and the cleaning products you currently use. If you’re unsure about specific products, do some research online or consult with cleaning experts to find the best solutions for your needs. You can always start with a basic checklist and add items as you discover new cleaning challenges.
How often should I update my home cleaning supplies checklist?
It’s a good idea to review and update your checklist at least once a season, or every three months. This will allow you to adjust it based on changes in your cleaning habits, the season, or any new cleaning products you’ve discovered. You may also need to update your checklist if you move to a new home or if your cleaning needs change due to lifestyle changes.
Can I use this checklist for professional cleaning services?
Absolutely! This DIY checklist can be a valuable tool for professional cleaning services. It allows you to create a standardized list of supplies that your team can use to ensure consistent and thorough cleaning. You can also customize the checklist to meet the specific needs of each client.
What are some essential items that should be on every home cleaning supplies checklist?
While the specific items on your checklist will depend on your individual needs, some essential items that should be included on almost every list are:
* All-purpose cleaner
* Glass cleaner
* Bathroom cleaner
* Disinfectant wipes or spray
* Floor cleaner
* Dusting spray or cloths
* Sponges
* Microfiber cloths
* Paper towels
* Trash bags
* Vacuum cleaner
* Mop and bucket
* Broom and dustpan
* Rubber gloves
How can I make my cleaning supplies checklist more eco-friendly?
There are several ways to make your cleaning supplies checklist more eco-friendly:
* Choose cleaning products that are labeled as “eco-friendly,” “biodegradable,” or “non-toxic.”
* Make your own cleaning solutions using natural ingredients like vinegar, baking soda, lemon juice, and essential oils.
* Use reusable cleaning cloths and sponges instead of disposable paper towels.
* Buy cleaning products in bulk to reduce packaging waste.
* Look for concentrated cleaning products that require less packaging and water.
What if I have allergies or sensitivities to certain cleaning products?
If you have allergies or sensitivities to certain cleaning products, it’s important to choose products that are specifically formulated for sensitive skin or allergies. Look for products that are fragrance-free, dye-free, and hypoallergenic. You can also make your own cleaning solutions using natural ingredients that are less likely to trigger allergic reactions. Always test new cleaning products on a small, inconspicuous area before using them on a larger surface.
How can I store my cleaning supplies in an organized way?
Organizing your cleaning supplies can make your cleaning routine much more efficient. Here are some tips for storing your cleaning supplies:
* Designate a specific area for storing your cleaning supplies, such as a closet, cabinet, or shelf.
* Use clear storage containers to easily see what’s inside.
* Label all of your containers clearly.
* Group similar items together, such as bathroom cleaners, kitchen cleaners, and dusting supplies.
* Store cleaning supplies out of reach of children and pets.
* Consider using a cleaning caddy to easily transport your supplies from room to room.
Where can I find inspiration for creating my home cleaning supplies checklist?
There are many resources available online that can provide inspiration for creating your home cleaning supplies checklist. You can search for sample checklists on websites and blogs dedicated to cleaning and organization. You can also browse online forums and social media groups to see what cleaning supplies other people are using and recommending. Don’t be afraid to experiment and customize your checklist to find what works best for you.

Leave a Comment