

Growing Shallots at Home can seem daunting, but trust me, it’s easier than you think! Have you ever dreamt of snipping fresh, flavorful shallots right from your backyard for your favorite recipes? Imagine the burst of flavor in your next vinaigrette or the aromatic depth they’ll add to your stir-fries. This isn’t just about gardening; it’s about elevating your culinary experiences with homegrown goodness.
Shallots, with their delicate onion-garlic flavor, have been cultivated for centuries, tracing their roots back to Central and Southeast Asia. They’ve been prized in various cultures for both their culinary and medicinal properties. Historically, they were even used as currency in some regions! Now, you can bring this rich history and delicious flavor right to your own garden.
Why should you learn this DIY trick? Well, store-bought shallots can be expensive and sometimes lack the freshness you desire. Plus, growing shallots at home allows you to control the entire process, ensuring organic and healthy produce. I’m going to share some simple, effective DIY methods that will have you harvesting your own shallots in no time, even if you’re a complete beginner. Get ready to transform your garden and your kitchen!
Growing Shallots at Home: A Beginner’s Guide
Hey there, fellow gardening enthusiasts! I’m so excited to share my experience with growing shallots at home. They’re incredibly versatile in the kitchen, and honestly, there’s nothing quite like harvesting your own homegrown produce. This guide will walk you through everything you need to know, from choosing the right shallots to planting, caring for, and harvesting them. Let’s get started!
Choosing Your Shallots
Before we dive into the planting process, let’s talk about selecting the right shallots. You have a couple of options here:
* Sets: These are small, immature shallots that are specifically grown for planting. They’re readily available at garden centers and online. Look for firm, healthy sets without any signs of mold or damage.
* Shallots from the Grocery Store: Yes, you can actually use shallots you bought for cooking! Just make sure they’re organic. Non-organic shallots are often treated to prevent sprouting, which is exactly what we want them to do. Choose firm, plump shallots that haven’t started to sprout yet (although a little green tip is okay).
Important Note: Avoid using shallots that are soft, mushy, or have any signs of rot. These won’t grow well.
Preparing for Planting
Okay, you’ve got your shallots. Now, let’s get the planting area ready. Shallots need a sunny spot with well-drained soil.
* Sunlight: Shallots need at least 6 hours of sunlight per day.
* Soil: They prefer loose, fertile soil that’s rich in organic matter. If your soil is heavy clay, amend it with compost, well-rotted manure, or other organic materials to improve drainage.
* pH: The ideal soil pH for shallots is between 6.0 and 7.0. You can test your soil pH with a home testing kit or by sending a sample to your local agricultural extension office.
Planting Your Shallots
This is where the magic happens! Here’s how to plant your shallots:
1. Timing: The best time to plant shallots is in the fall (about 4-6 weeks before the first expected frost) or early spring (as soon as the ground can be worked). Fall planting allows the shallots to establish roots over the winter, resulting in an earlier and larger harvest. I personally prefer fall planting whenever possible.
2. Preparing the Soil: Loosen the soil to a depth of about 12 inches. Incorporate compost or other organic matter to improve soil fertility and drainage.
3. Planting Depth: Plant the shallot sets or bulbs about 1-2 inches deep, with the pointed end facing up.
4. Spacing: Space the shallots about 6-8 inches apart in rows that are 12-18 inches apart. This gives them enough room to grow and prevents overcrowding.
5. Watering: After planting, water the shallots thoroughly to settle the soil and encourage root growth.
Caring for Your Shallots
Now that your shallots are planted, it’s time to give them some TLC. Here’s what you need to do:
* Watering: Shallots need consistent moisture, especially during dry periods. Water them deeply whenever the top inch of soil feels dry. Avoid overwatering, as this can lead to rot.
* Weeding: Keep the area around your shallots free of weeds. Weeds compete with the shallots for nutrients and water. Hand-pull weeds carefully to avoid disturbing the shallot roots.
* Fertilizing: Shallots are relatively light feeders, but they benefit from a boost of nutrients during the growing season. Apply a balanced fertilizer (such as 10-10-10) according to the package directions. You can also side-dress with compost or well-rotted manure. I like to use a liquid seaweed fertilizer every few weeks for an extra boost.
* Mulching: Apply a layer of mulch around your shallots to help retain moisture, suppress weeds, and regulate soil temperature. Straw, shredded leaves, or wood chips are all good options.
* Pest and Disease Control: Shallots are generally pest-resistant, but they can be susceptible to certain problems, such as onion maggots and fungal diseases. Inspect your plants regularly for signs of pests or diseases. If you notice any problems, take action promptly. For onion maggots, you can use row covers to prevent the flies from laying eggs near the plants. For fungal diseases, ensure good air circulation and avoid overhead watering.
Harvesting Your Shallots
The moment you’ve been waiting for! Here’s how to harvest your shallots:
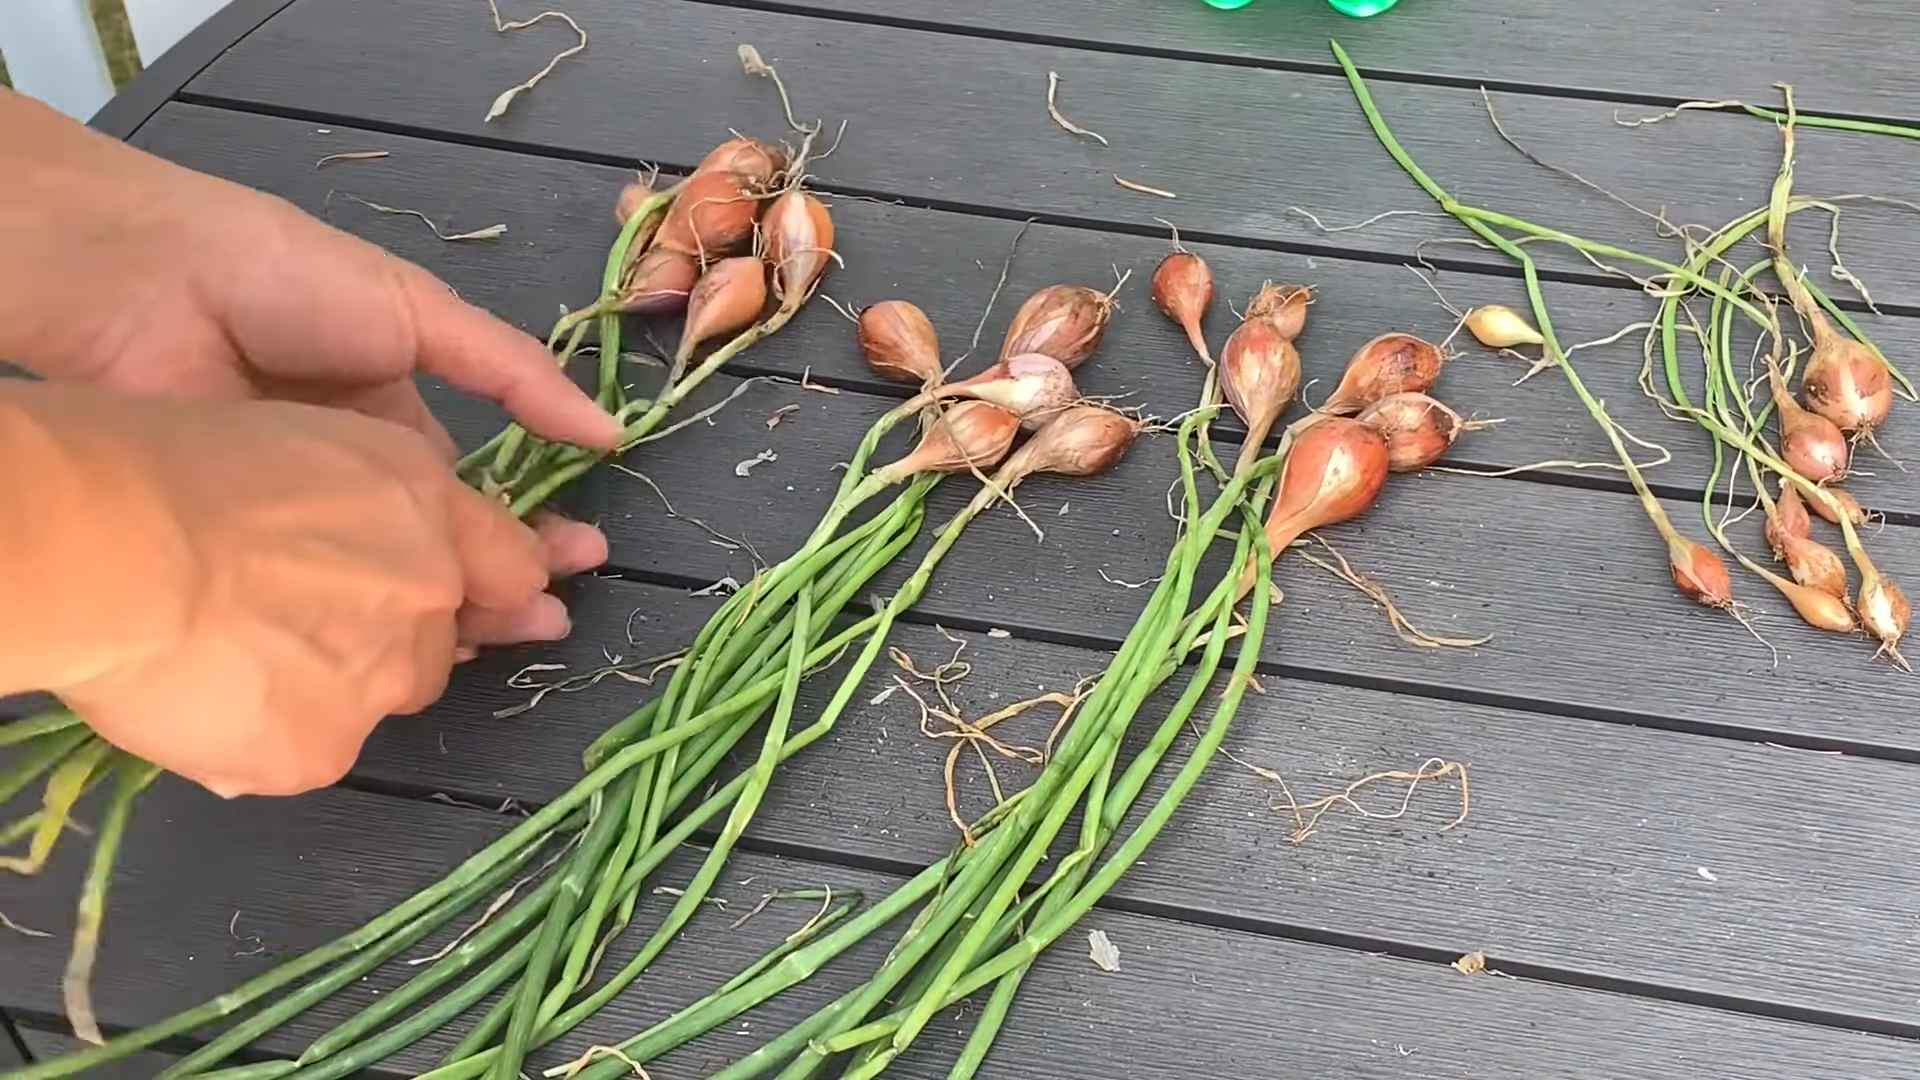
1. Timing: Shallots are typically ready to harvest in late summer or early fall, about 100-120 days after planting. The leaves will start to turn yellow and brown, and the bulbs will be plump and well-formed.
2. Harvesting: Gently loosen the soil around the shallots with a garden fork or trowel. Carefully lift the bulbs from the soil.
3. Curing: After harvesting, cure the shallots in a warm, dry, well-ventilated place for about 2-3 weeks. This allows the outer layers of the bulbs to dry and harden, which helps to prevent rot during storage. I usually spread them out on a screen or in a shallow box.
4. Storing: Once the shallots are cured, store them in a cool, dry, dark place. A pantry or basement is ideal. Properly cured and stored shallots can last for several months.
Troubleshooting
Even with the best care, you might encounter some challenges along the way. Here are a few common problems and how to address them:
* Shallots Not Bulbing: This can be caused by several factors, including insufficient sunlight, poor soil fertility, or overcrowding. Make sure your shallots are getting at least 6 hours of sunlight per day, fertilize them regularly, and space them properly.
* Yellowing Leaves: Yellowing leaves can be a sign of nutrient deficiency, overwatering, or disease. Check the soil moisture and fertility levels, and inspect the plants for signs of disease.
* Rotting Bulbs: Rotting bulbs are usually caused by overwatering or poor drainage. Make sure your soil is well-drained, and avoid overwatering.
Propagating Shallots
Shallots are propagated vegetatively, meaning you grow new plants from existing bulbs. Here’s how:
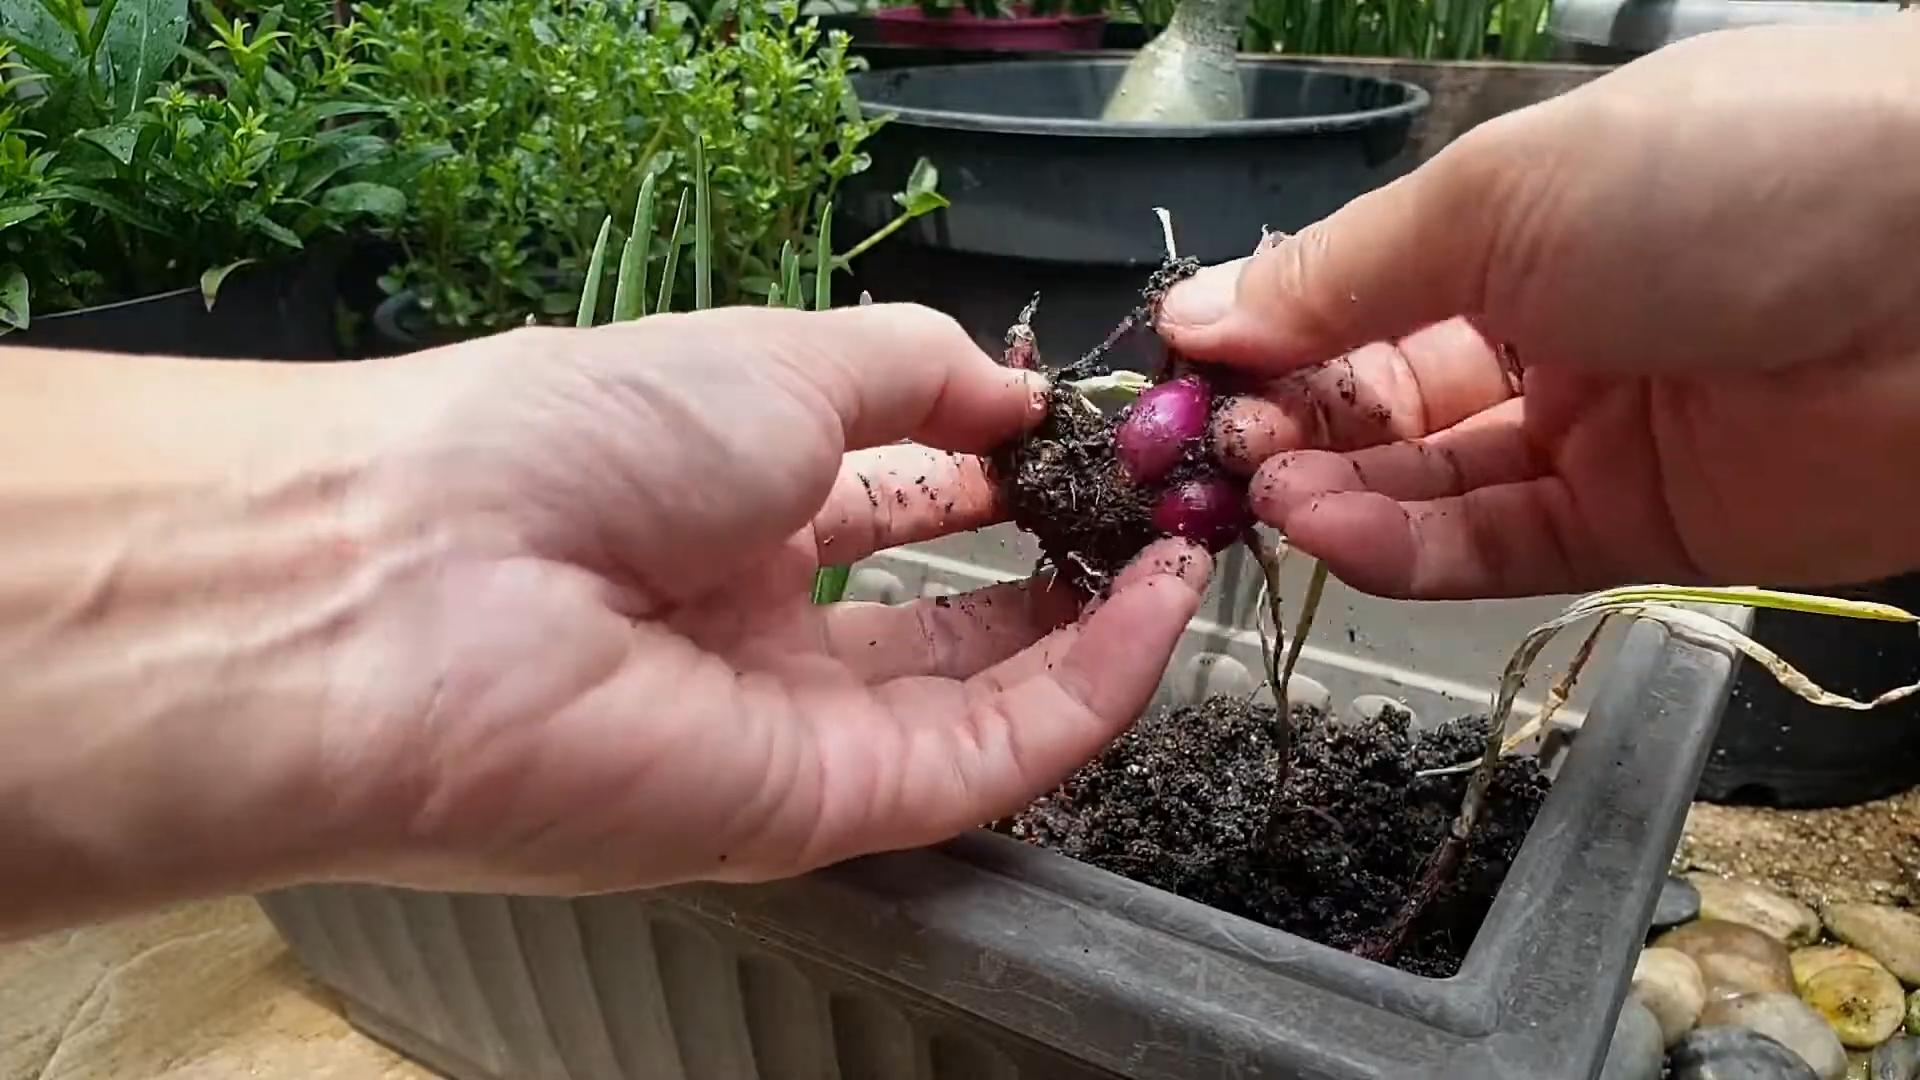
* Division: When you harvest your shallots, you’ll notice that each bulb has multiplied into a cluster of smaller bulbs. These can be separated and replanted to grow new shallot plants.
* Saving Sets: You can also save some of your harvested shallots to use as sets for planting the following year. Choose the largest, healthiest bulbs and store them in a cool, dry place until planting time.
Enjoying Your Harvest
Now for the best part – enjoying the fruits (or rather, bulbs!) of your labor. Shallots are incredibly versatile in the kitchen. Here are just a few ways to use them:
* Raw: Finely chop shallots and add them to salads, salsas, or vinaigrettes.
* Cooked: Sauté shallots with butter or olive oil and use them as a base for sauces, soups, and stews.
* Roasted: Roast shallots whole or halved with other vegetables for a delicious and flavorful side dish.
* Pickled: Pickle shallots for a tangy and flavorful condiment.
Shallot Varieties
While you can grow shallots from grocery store finds, exploring different varieties can be fun! Here are a few popular options:
* French Red Shallots: Known for their mild, sweet flavor and beautiful red skin.
* Gray Shallots (Griselle): These have a stronger, more pungent flavor and are prized by chefs.
* Dutch Yellow Shallots: A reliable and productive variety with a good storage life.
Conclusion
Growing shallots at home is a rewarding experience that’s easier than you might think. With a little bit of planning and care, you can enjoy a bountiful harvest of these delicious and versatile bulbs. So, grab some shallots, get your hands dirty, and start growing! Happy gardening!
Conclusion
So, there you have it! Growing shallots at home, while it might seem daunting at first, is a remarkably rewarding experience. It’s not just about saving money at the grocery store; it’s about connecting with your food, understanding its journey from seed (or bulb!) to table, and enjoying the unparalleled flavor of freshly harvested, homegrown produce.
Why is this DIY trick a must-try? Because it empowers you to control the quality of your shallots. You know exactly what goes into their growth – no harsh chemicals, no mystery ingredients, just good old-fashioned care and attention. Plus, the taste difference is undeniable. Store-bought shallots often lack the vibrant, nuanced flavor of those you nurture yourself. They can be bland, or even bitter, compared to the sweet, delicate pungency of homegrown shallots.
Beyond the superior flavor and control over growing conditions, growing shallots at home is also incredibly satisfying. There’s a unique joy in watching those little bulbs sprout and flourish, knowing that you played a direct role in their development. It’s a small act of self-sufficiency that can bring a surprising amount of pleasure.
Ready to take your shallot game to the next level? Consider these variations and suggestions:
* Experiment with different varieties: There are numerous shallot varieties available, each with its own unique flavor profile and growing characteristics. Try French Red shallots for their classic, robust flavor, or Griselle shallots for their delicate sweetness.
* Companion planting: Shallots thrive when planted alongside certain other vegetables and herbs. Carrots, beets, chamomile, and rosemary are all excellent companions that can help deter pests and improve growth.
* Shallot Greens: Don’t forget to use the shallot greens! They have a mild onion flavor and can be used in salads, soups, and as a garnish. Snip them as needed throughout the growing season.
* Pickling Shallots: If you find yourself with a bumper crop, consider pickling some of your shallots. Pickled shallots are a delicious and versatile condiment that can add a tangy kick to sandwiches, salads, and charcuterie boards.
* Shallot Scapes: Similar to garlic scapes, shallots also produce scapes. These can be harvested and used in stir-fries or pesto.
We wholeheartedly encourage you to give this DIY trick a try. It’s easier than you might think, and the rewards are well worth the effort. Whether you have a sprawling garden or just a few pots on a balcony, you can successfully grow shallots at home.
Don’t be afraid to experiment, learn from your mistakes, and most importantly, have fun! And once you’ve harvested your first crop of homegrown shallots, we’d love to hear about your experience. Share your tips, tricks, and photos in the comments below. Let’s build a community of shallot-growing enthusiasts! We are confident that you will enjoy the process of growing shallots at home.
Frequently Asked Questions (FAQ)
1. When is the best time to plant shallots?
The ideal planting time for shallots depends on your climate. In general, you should plant shallots in the fall (September-November) in warmer climates, and in the early spring (February-April) in colder climates. Fall planting allows the shallots to establish roots before winter, resulting in a larger harvest the following summer. Spring planting is necessary in areas with harsh winters to prevent the bulbs from freezing. A good rule of thumb is to plant shallots about 4-6 weeks before the last expected frost in spring, or 4-6 weeks before the first expected frost in fall.
2. How much sunlight do shallots need?
Shallots require at least 6-8 hours of direct sunlight per day to thrive. Choose a location in your garden that receives full sun for optimal growth and bulb development. If you’re growing shallots in containers, make sure to place them in a sunny spot on your patio or balcony. Insufficient sunlight can result in smaller bulbs and reduced yields.
3. What kind of soil is best for growing shallots?
Shallots prefer well-drained, fertile soil that is rich in organic matter. The ideal soil pH is between 6.0 and 7.0. Before planting, amend your soil with compost, aged manure, or other organic materials to improve drainage and fertility. Avoid heavy clay soils, as they can retain too much moisture and lead to bulb rot. If you have clay soil, consider growing shallots in raised beds or containers with a well-draining potting mix.
4. How far apart should I plant shallots?
When planting shallot bulbs, space them about 6-8 inches apart in rows that are 12-18 inches apart. This spacing allows the bulbs to develop properly without overcrowding. If you’re planting shallots from seed, sow the seeds about 1 inch apart and thin them to 6-8 inches apart once they have sprouted.
5. How often should I water shallots?
Shallots need consistent moisture, especially during bulb formation. Water deeply whenever the top inch of soil feels dry to the touch. Avoid overwatering, as this can lead to bulb rot. During periods of heavy rainfall, you may need to reduce watering frequency. Mulching around the shallots can help retain moisture and suppress weeds.
6. Do shallots need fertilizer?
Shallots benefit from regular fertilization, especially during the early stages of growth. Apply a balanced fertilizer (e.g., 10-10-10) at planting time, and then side-dress with a nitrogen-rich fertilizer every 4-6 weeks throughout the growing season. Avoid over-fertilizing, as this can lead to excessive foliage growth at the expense of bulb development.
7. How do I know when shallots are ready to harvest?
Shallots are typically ready to harvest when the tops begin to turn yellow and fall over. This usually occurs in late summer or early fall, depending on your climate and the variety of shallot you are growing. To harvest, gently loosen the soil around the bulbs and pull them up. Cure the shallots by allowing them to dry in a well-ventilated area for 1-2 weeks before storing them.
8. How do I store shallots?
Proper storage is essential for preserving the quality of your shallots. After curing, store the shallots in a cool, dry, and well-ventilated place, such as a pantry or basement. Avoid storing shallots in the refrigerator, as this can cause them to sprout or rot. Properly stored shallots can last for several months.
9. What are some common pests and diseases that affect shallots?
Shallots are susceptible to a few common pests and diseases, including onion maggots, thrips, and fungal diseases such as downy mildew and white rot. To prevent pest and disease problems, practice good garden hygiene, such as removing plant debris and rotating crops. You can also use organic pest control methods, such as insecticidal soap or neem oil, to control pests. If fungal diseases become a problem, apply a fungicide according to the manufacturer’s instructions.
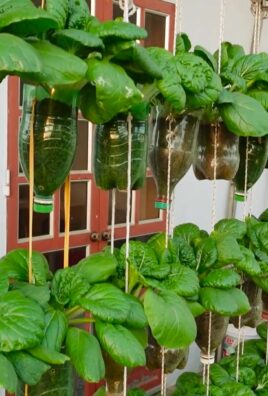
10. Can I grow shallots in containers?
Yes, shallots can be successfully grown in containers. Choose a container that is at least 8-10 inches deep and wide, and fill it with a well-draining potting mix. Plant the shallot bulbs about 4-6 inches apart. Water regularly and fertilize every 4-6 weeks. Place the container in a sunny location that receives at least 6-8 hours of direct sunlight per day. Container-grown shallots may require more frequent watering than those grown in the ground.
Leave a Comment