

Growing peas from seed can feel like unlocking a secret garden, and trust me, it’s a secret worth knowing! Have you ever dreamt of plucking sweet, plump peas straight from the vine, bursting with flavor that store-bought varieties just can’t match? This DIY guide is your key to making that dream a reality, even if you’re a complete beginner.
Peas have a rich history, cultivated for thousands of years and enjoyed by cultures worldwide. From ancient civilizations to medieval gardens, these little legumes have been a staple food source. But beyond their nutritional value, there’s something incredibly satisfying about nurturing a plant from a tiny seed to a bountiful harvest.
In today’s fast-paced world, reconnecting with nature is more important than ever. Growing peas from seed offers a therapeutic escape, a chance to slow down, and a rewarding experience that nourishes both body and soul. Plus, with rising grocery costs, growing your own food is a smart and sustainable way to supplement your diet. I’m here to show you simple, effective techniques to ensure your pea plants thrive, providing you with a delicious and abundant crop. Let’s get started!
Growing Peas From Seed: A Beginner’s Guide
Hey there, fellow gardening enthusiasts! I’m so excited to share my experience with growing peas from seed. It’s a surprisingly easy and rewarding process, and nothing beats the taste of fresh, homegrown peas straight from the pod. This guide will walk you through everything you need to know, from choosing the right variety to harvesting your delicious crop.
Choosing Your Pea Variety
Before we get our hands dirty, let’s talk about pea varieties. There are three main types:
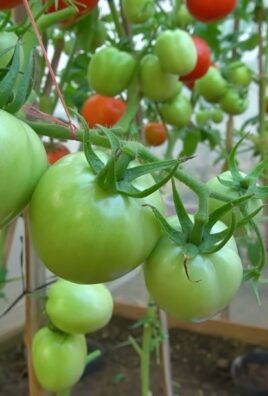
* Shelling Peas (English Peas): These are the classic peas you shell to eat the round seeds inside. They have tough pods that aren’t meant to be eaten. Popular varieties include ‘Little Marvel’ and ‘Green Arrow’.
* Snap Peas: These are my personal favorite! You can eat the entire pod, which is plump and crunchy. ‘Sugar Snap’ is a widely loved variety.
* Snow Peas: These have flat, edible pods with small peas inside. They’re often used in stir-fries. ‘Oregon Sugar Pod II’ is a reliable choice.
Consider your climate and growing space when choosing a variety. Some are bush types, perfect for smaller gardens, while others are vining types that need support.
Timing is Everything: When to Plant
Peas are cool-season crops, which means they thrive in cooler temperatures. The best time to plant them is in early spring, as soon as the soil is workable. You can also plant them in late summer for a fall harvest in milder climates.
* Spring Planting: Aim to plant 4-6 weeks before the last expected frost.
* Fall Planting: Plant 8-10 weeks before the first expected frost.
To figure out your local frost dates, check with your local agricultural extension office or use an online frost date calculator.
Preparing the Soil: A Pea’s Paradise
Peas aren’t too fussy, but they do appreciate well-drained soil that’s rich in organic matter. Here’s how I prepare my soil:
* Choose a Sunny Spot: Peas need at least 6 hours of sunlight per day.
* Amend the Soil: Work in compost or well-rotted manure to improve drainage and fertility.
* Check the pH: Peas prefer a slightly acidic to neutral soil pH (around 6.0-7.0). You can test your soil with a home testing kit or send a sample to your local extension office.
* Avoid High Nitrogen Fertilizers: Peas are legumes, which means they can fix nitrogen from the air. Too much nitrogen in the soil can actually hinder their growth.
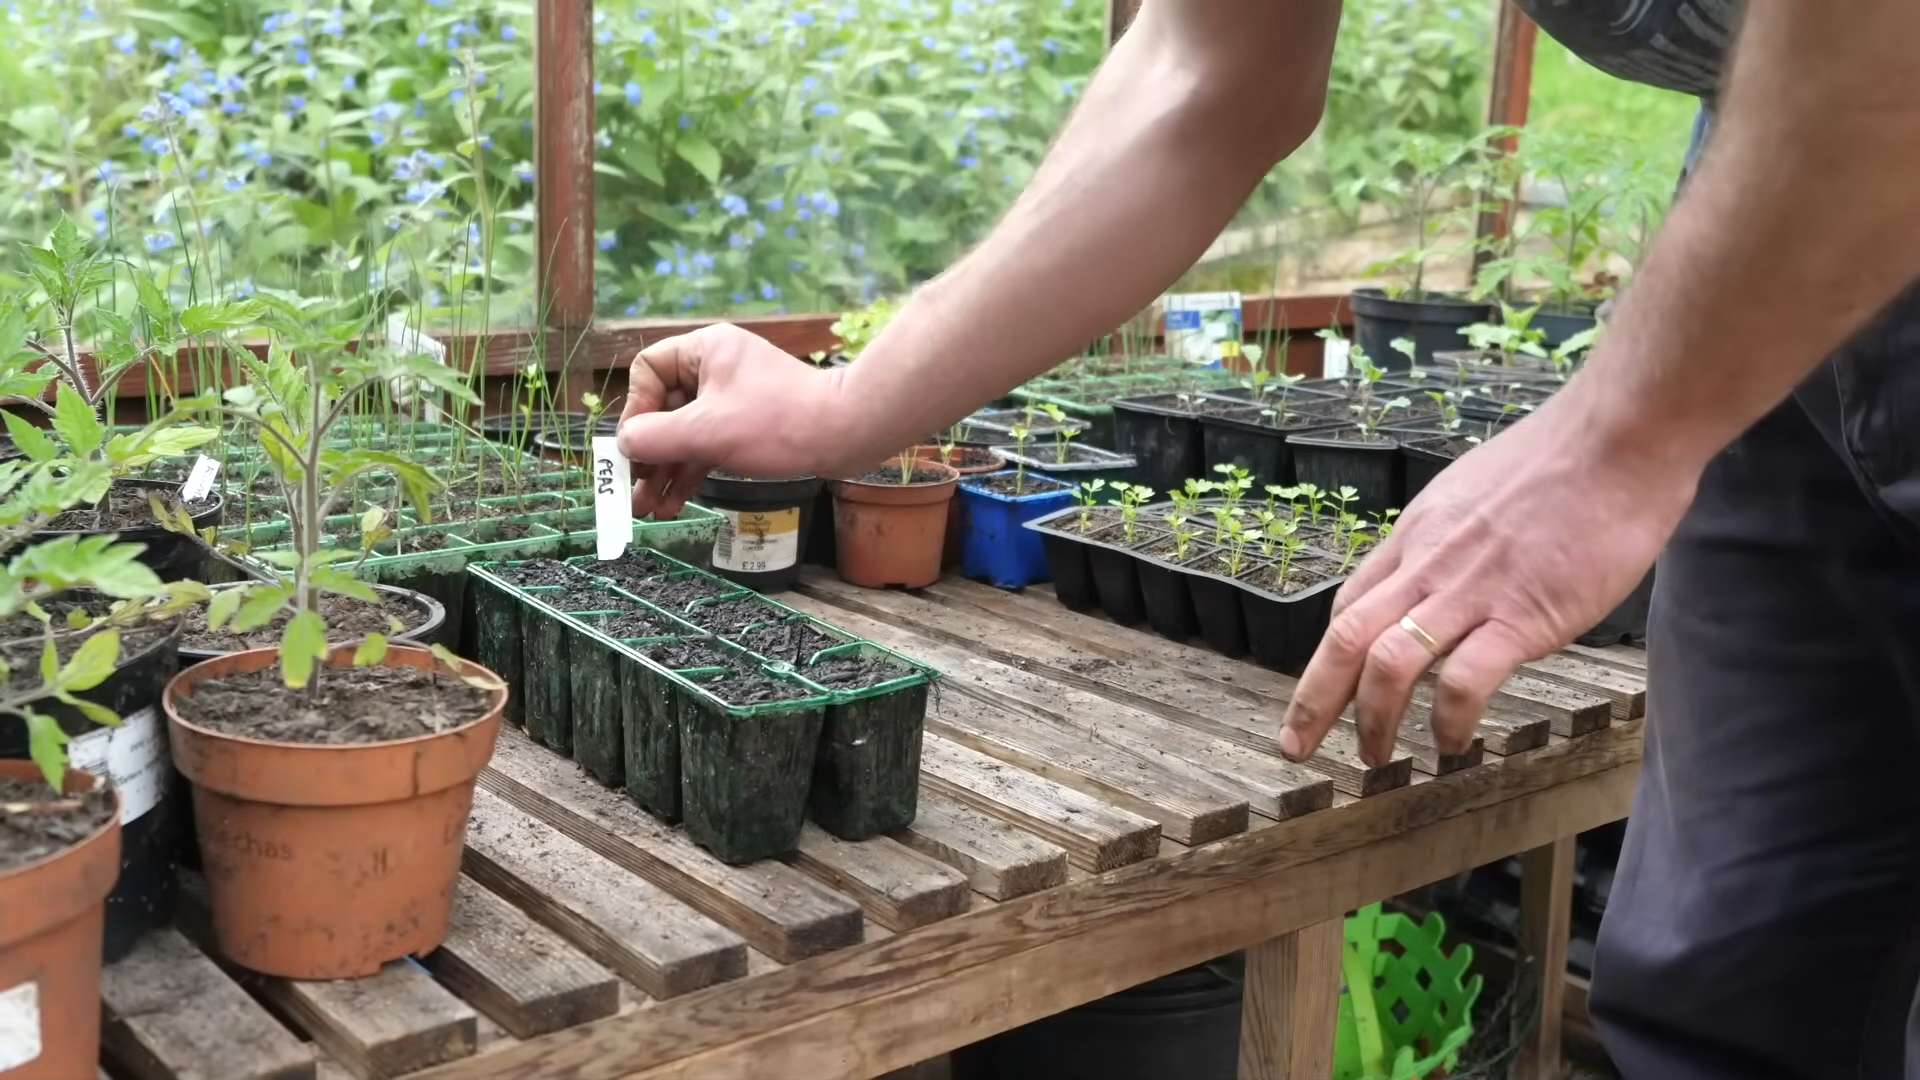
Planting Your Pea Seeds: Getting Started
Now for the fun part! Here’s my step-by-step guide to planting pea seeds:
1. Soak the Seeds (Optional): Soaking the seeds in water for 12-24 hours before planting can help speed up germination. I usually do this, but it’s not essential.
2. Create Furrows: Use a hoe or trowel to create furrows in the soil about 1-2 inches deep. Space the furrows about 2-3 feet apart, depending on the variety. Vining types need more space.
3. Sow the Seeds: Place the pea seeds about 1-2 inches apart in the furrows.
4. Cover the Seeds: Gently cover the seeds with soil and lightly pat it down.
5. Water Thoroughly: Water the area well to ensure the soil is moist.
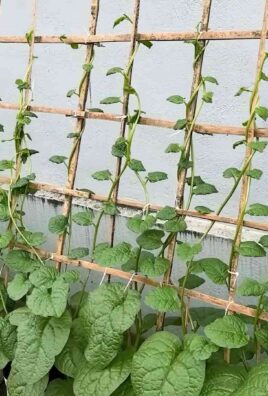
Providing Support: Helping Your Peas Climb
Vining pea varieties need support to climb. This not only keeps the peas off the ground, preventing rot and disease, but also makes harvesting easier. Here are a few options:
* Trellises: These are readily available at garden centers and come in various sizes and materials.
* Fences: A chain-link fence or a wooden fence works great.
* Pea Netting: This is a lightweight netting that you can stretch between stakes.
* DIY Structures: Get creative! You can use branches, bamboo poles, or even old ladders to create a support system.
Install the support system before or shortly after the pea seedlings emerge. This will give them something to grab onto as they grow.
Caring for Your Pea Plants: Keeping Them Happy
Once your pea plants are established, here’s how to keep them thriving:
* Watering: Peas need consistent moisture, especially during flowering and pod development. Water deeply whenever the top inch of soil feels dry. Avoid overhead watering, which can promote fungal diseases.
* Weeding: Keep the area around your pea plants free of weeds. Weeds compete for nutrients and water.
* Fertilizing: As I mentioned earlier, peas don’t need a lot of fertilizer. However, you can side-dress them with a small amount of compost or a balanced fertilizer a few weeks after they emerge.
* Pest Control: Keep an eye out for common pea pests like aphids and pea weevils. You can control aphids with insecticidal soap or by simply spraying them off with water. Pea weevils can be controlled with row covers or by handpicking them off the plants.
* Disease Prevention: To prevent fungal diseases, ensure good air circulation around your plants and avoid overhead watering.
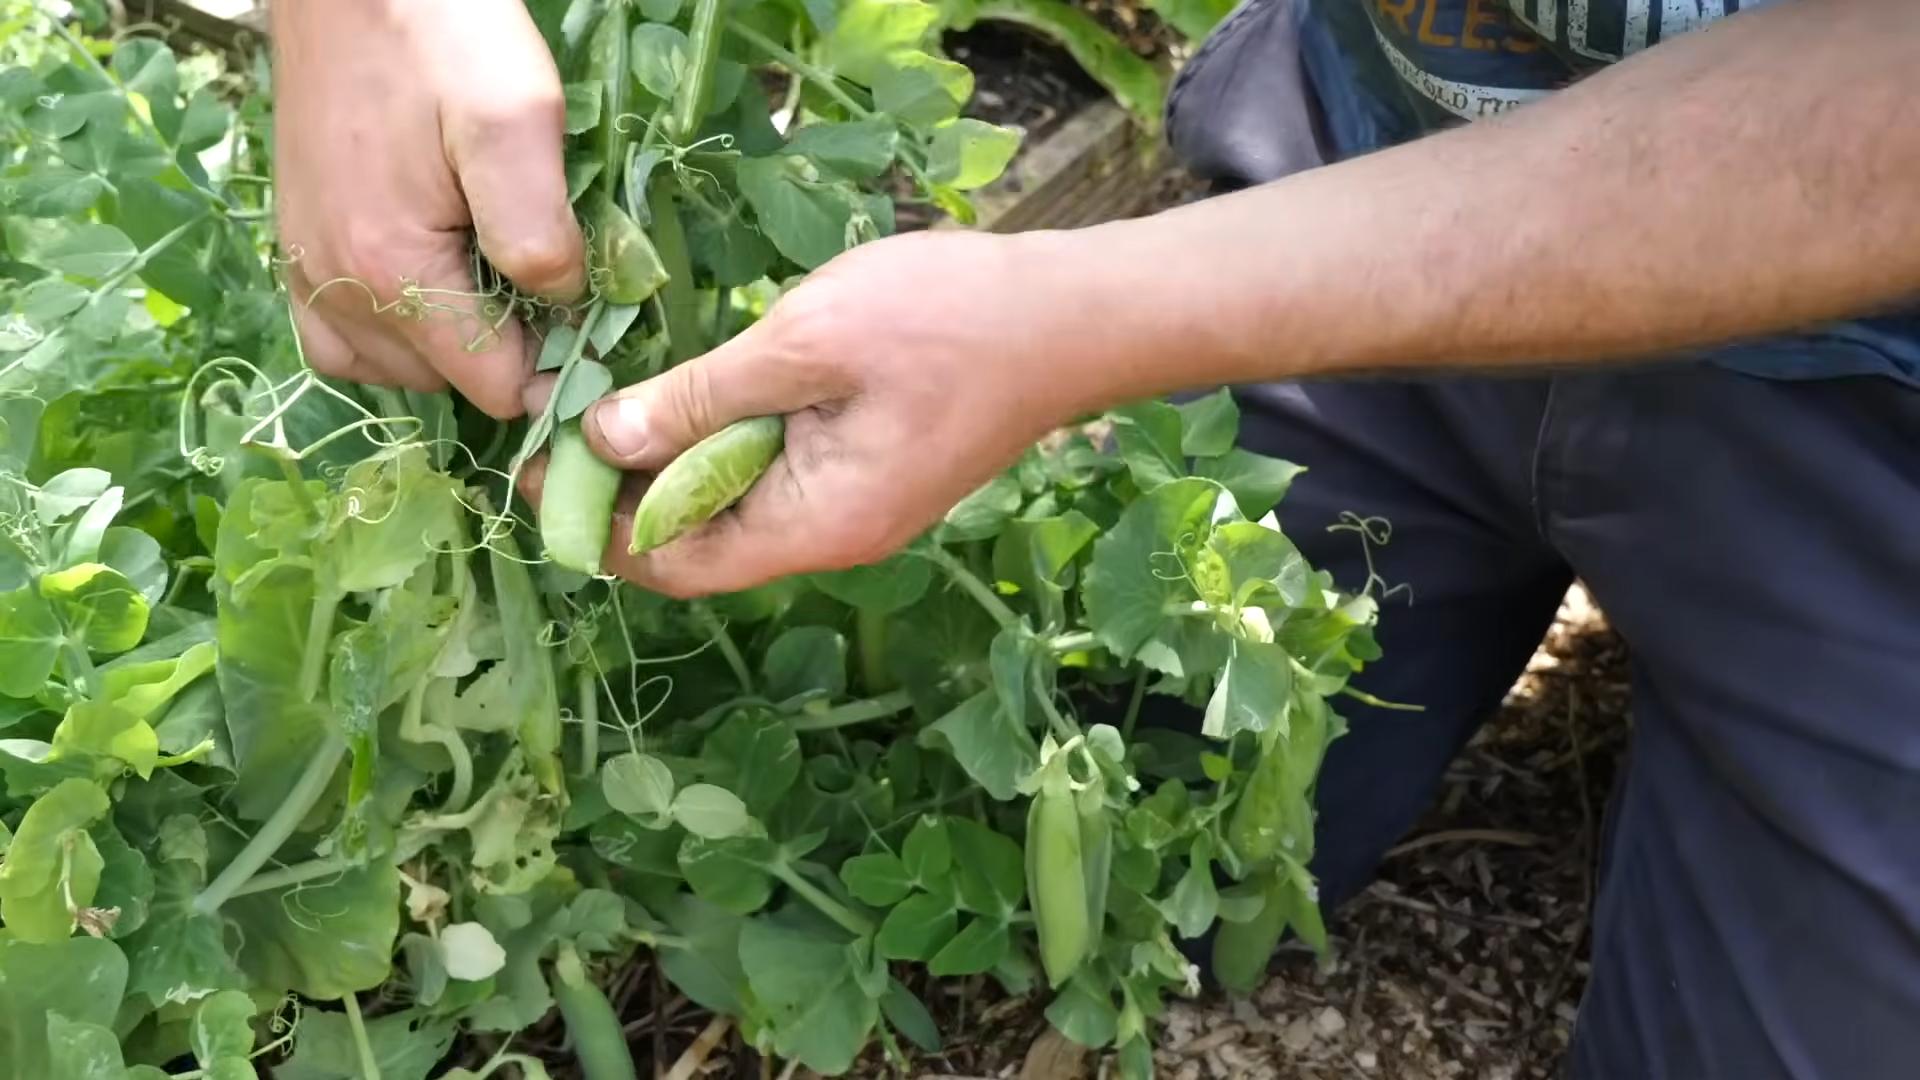
Harvesting Your Peas: The Sweet Reward
Harvesting peas is the most rewarding part of the process! Here’s how to know when your peas are ready:
* Shelling Peas: The pods should be plump and filled with round peas. The pods should feel firm but not hard.
* Snap Peas: The pods should be plump and crunchy. The peas inside should be small and underdeveloped.
* Snow Peas: The pods should be flat and tender. The peas inside should be barely visible.
Harvest your peas regularly to encourage continued production. Use scissors or pruning shears to cut the pods from the vine.
Enjoying Your Harvest: From Garden to Table
Freshly harvested peas are delicious eaten raw, steamed, boiled, or stir-fried. You can also freeze them for later use. To freeze peas, blanch them in boiling water for 2-3 minutes, then plunge them into ice water to stop the cooking process. Drain the peas and spread them out on a baking sheet to freeze. Once frozen, transfer them to a freezer bag or container.
Troubleshooting: Common Pea Problems
Even with the best care, you might encounter some problems when growing peas. Here are a few common issues and how to address them:
* Poor Germination: This can be caused by cold soil, poor-quality seeds, or overwatering. Make sure the soil temperature is above 40°F (4°C) before planting. Use fresh seeds and avoid overwatering.
* Yellowing Leaves: This can be a sign of nutrient deficiency or disease. Check the soil pH and amend with compost or fertilizer if needed. Ensure good air circulation to prevent fungal diseases.
* Powdery Mildew: This is a fungal disease that causes a white, powdery coating on the leaves. Improve air circulation and apply a fungicide if necessary.
* Aphids: These small, sap-sucking insects can weaken your plants. Control them with insecticidal soap or by spraying them off with water.
Saving Seeds: For Future Gardens
If you want to save seeds from your pea plants for future gardens, choose open-pollinated varieties. Allow the pods to dry completely on the vine. Once dry, shell the peas and store them in an airtight container in a cool, dry place.
Conclusion: Happy Pea Growing!
Growing peas from seed is a simple and satisfying experience. With a little planning and care, you can enjoy a bountiful harvest of fresh, delicious peas. So get out there, get your hands dirty, and start growing! Happy gardening!
Conclusion
So, there you have it! Growing peas from seed isn’t just a gardening activity; it’s a rewarding experience that connects you directly to the source of your food. From the initial thrill of seeing those tiny sprouts emerge to the satisfaction of harvesting your own sweet, plump peas, the entire process is incredibly fulfilling. We’ve walked you through each step, from selecting the right pea variety and preparing your soil to providing the necessary support and protecting your precious plants from pests.
But why is this DIY trick a must-try? Because it empowers you to control the quality of your food, reduces your reliance on store-bought produce (often shipped long distances), and offers a significantly fresher, more flavorful harvest. Imagine the taste difference between peas that have been sitting on a grocery store shelf for days and peas that you picked just moments before adding them to your dinner. The difference is truly remarkable. Plus, growing your own peas is a fantastic way to get outdoors, connect with nature, and enjoy some healthy exercise.
Don’t be afraid to experiment with different pea varieties to find your favorites. Consider trying snow peas for their edible pods, snap peas for their crunchy texture, or shelling peas for their classic sweetness. You can also adjust the planting time based on your local climate and growing season. If you live in a warmer region, you might be able to enjoy two pea harvests – one in the spring and another in the fall.
For a fun variation, try succession planting. Sow a new batch of pea seeds every two weeks to ensure a continuous supply of fresh peas throughout the growing season. This is especially useful if you have a large family or enjoy sharing your harvest with friends and neighbors. Another variation is to grow your peas vertically using a trellis or netting. This not only saves space in your garden but also makes harvesting easier and improves air circulation around the plants, reducing the risk of disease.
We are confident that you will find success in **growing peas from seed** and that you will enjoy the process as much as we do. So, grab your seeds, prepare your soil, and get ready to embark on this exciting gardening adventure. We encourage you to try this DIY trick and share your experiences with us. Let us know what varieties you planted, what challenges you faced, and what tips you discovered along the way. Your feedback will not only help us improve this guide but also inspire other gardeners to give it a try. Happy gardening!
Frequently Asked Questions (FAQ)
1. What is the best time to start growing peas from seed?
The best time to start growing peas from seed depends on your local climate. Peas are a cool-season crop, meaning they thrive in cooler temperatures. In most regions, the ideal time to plant peas is in early spring, as soon as the soil can be worked. This is typically about 4-6 weeks before the last expected frost. In areas with mild winters, you can also plant peas in the fall for a winter or early spring harvest. Check your local weather forecasts and gardening resources to determine the best planting time for your specific area.
2. What kind of soil is best for growing peas?
Peas prefer well-drained soil that is rich in organic matter. Before planting, amend your soil with compost or well-rotted manure to improve its fertility and drainage. Peas also prefer a slightly acidic to neutral soil pH, ideally between 6.0 and 7.0. You can test your soil pH using a soil testing kit and adjust it accordingly if necessary. Avoid planting peas in heavy clay soil, as this can lead to poor drainage and root rot. If you have clay soil, consider adding sand or other amendments to improve its drainage.
3. How deep should I plant pea seeds?
Plant pea seeds about 1 inch deep and 2-3 inches apart. If you are planting in rows, space the rows about 18-24 inches apart. After planting, gently water the soil to ensure good seed-to-soil contact. Avoid overwatering, as this can cause the seeds to rot.
4. Do peas need a trellis or other support?
Yes, most pea varieties benefit from having a trellis or other support to climb on. This helps to keep the plants off the ground, which improves air circulation and reduces the risk of disease. It also makes harvesting easier. You can use a variety of materials for your pea trellis, such as bamboo stakes, netting, or even branches. The trellis should be at least 4-6 feet tall, depending on the variety of pea you are growing.
5. How often should I water my pea plants?
Pea plants need consistent moisture to thrive. Water them regularly, especially during dry periods. Aim to keep the soil consistently moist but not waterlogged. A good rule of thumb is to water deeply once or twice a week, depending on the weather conditions. Avoid overhead watering, as this can promote fungal diseases. Instead, water at the base of the plants.
6. What are some common pests and diseases that affect pea plants?
Some common pests that affect pea plants include aphids, pea weevils, and slugs. Aphids can be controlled with insecticidal soap or by introducing beneficial insects like ladybugs. Pea weevils can be controlled by handpicking them off the plants or by using row covers. Slugs can be controlled with slug bait or by creating barriers around your plants. Common diseases that affect pea plants include powdery mildew and root rot. Powdery mildew can be prevented by ensuring good air circulation around the plants and by avoiding overhead watering. Root rot can be prevented by planting in well-drained soil and by avoiding overwatering.
7. How long does it take for peas to mature?
The time it takes for peas to mature depends on the variety and the growing conditions. In general, most pea varieties will be ready to harvest in about 60-70 days after planting. Check the seed packet for specific information on the maturity time for your chosen variety.
8. How do I know when my peas are ready to harvest?
The best time to harvest peas is when the pods are plump and filled with peas. The pods should be firm but not hard. If the pods are starting to turn yellow or brown, they are overripe. Harvest peas regularly to encourage continued production.
9. Can I save pea seeds for next year?
Yes, you can save pea seeds for next year. To do this, allow some of the pea pods to dry completely on the vine. Once the pods are dry and brittle, shell the peas and store them in an airtight container in a cool, dry place. Be sure to label the container with the variety of pea and the date of harvest.
10. What are some good companion plants for peas?
Peas are known as nitrogen fixers, meaning they can convert atmospheric nitrogen into a form that plants can use. This makes them a great companion plant for other vegetables, such as carrots, radishes, and cucumbers. Avoid planting peas near onions or garlic, as these can inhibit their growth.
Leave a Comment