

Growing Napa Cabbage Indoors might seem like a challenge reserved for seasoned gardeners, but trust me, it’s more achievable than you think! Have you ever craved the crisp, slightly sweet flavor of Napa cabbage in the dead of winter, only to find the grocery store selection lacking? Or perhaps you’re simply looking for a rewarding and sustainable way to enjoy fresh produce year-round? Well, you’re in the right place!
Napa cabbage, also known as Chinese cabbage, has a rich history deeply rooted in Asian cuisine. For centuries, it’s been a staple ingredient, prized for its versatility in dishes like kimchi, stir-fries, and salads. Beyond its culinary appeal, growing your own Napa cabbage connects you to this heritage and allows you to appreciate the journey from seed to table.
In this DIY guide, I’m going to share some simple yet effective tricks and hacks that will empower you to successfully grow Napa cabbage indoors, regardless of your gardening experience. We’ll cover everything from seed starting and lighting to watering and pest control. Imagine the satisfaction of harvesting your own fresh, organic Napa cabbage, knowing you nurtured it from a tiny seed right in your own home! So, let’s ditch the grocery store disappointments and embark on this exciting indoor gardening adventure together. I promise, with a little know-how, growing Napa Cabbage Indoors can be a truly rewarding experience!

Growing Napa Cabbage Indoors: A Complete DIY Guide
Hey there, fellow gardening enthusiasts! Ever dreamt of enjoying fresh, crisp Napa cabbage straight from your own indoor garden, even when the weather outside is frightful? Well, dream no more! I’m here to guide you through the surprisingly simple process of growing Napa cabbage indoors. It’s easier than you think, and the reward of homegrown veggies is totally worth it. Let’s get started!
What You’ll Need
Before we dive into the nitty-gritty, let’s gather our supplies. Here’s a checklist of everything you’ll need to successfully grow Napa cabbage indoors:
* Napa Cabbage Seeds: Choose a variety suitable for container gardening. Smaller varieties tend to do better indoors.
* Seed Starting Tray or Small Pots: These will be your nursery for the baby cabbage plants.
* Seed Starting Mix: A light, well-draining mix is crucial for germination.
* Larger Pots (at least 5 gallons): These will be the permanent homes for your cabbage plants.
* Potting Soil: A good quality potting mix amended with compost is ideal.
* Grow Lights: Napa cabbage needs plenty of light, so invest in some good quality grow lights. LED grow lights are energy-efficient and work great.
* Watering Can or Spray Bottle: For gentle watering.
* Fertilizer: A balanced liquid fertilizer or slow-release fertilizer.
* pH Meter (optional): To monitor the soil pH. Napa cabbage prefers a slightly acidic to neutral pH (6.0-7.5).
* Thermometer: To monitor the temperature.
* Humidity Meter (optional): To monitor humidity levels.
* Spray Bottle with Neem Oil (optional): For pest control.
Phase 1: Starting Your Seeds
This is where the magic begins! We’ll start by germinating our Napa cabbage seeds.
1. Prepare Your Seed Starting Tray: Fill your seed starting tray or small pots with seed starting mix. Gently moisten the mix with water. You want it damp, not soggy.
2. Sow the Seeds: Sow 2-3 seeds per cell or pot, about ¼ inch deep. Lightly cover the seeds with more seed starting mix.
3. Water Gently: Use a spray bottle to gently water the seeds. Avoid overwatering, as this can lead to damping off (a fungal disease that kills seedlings).
4. Provide Warmth and Light: Place the seed starting tray in a warm location (around 65-75°F or 18-24°C). If you don’t have a naturally warm spot, you can use a heat mat designed for seed starting. Position your grow lights about 2-4 inches above the tray.
5. Maintain Moisture: Keep the seed starting mix consistently moist, but not waterlogged. Check the moisture level daily and water as needed.
6. Germination Time: Napa cabbage seeds typically germinate in 5-10 days.
Phase 2: Transplanting Seedlings
Once your seedlings have developed their first true leaves (the leaves that appear after the initial seed leaves), it’s time to transplant them into larger pots.
1. Prepare Your Larger Pots: Fill your 5-gallon (or larger) pots with potting soil amended with compost. Leave about an inch or two of space at the top of the pot.
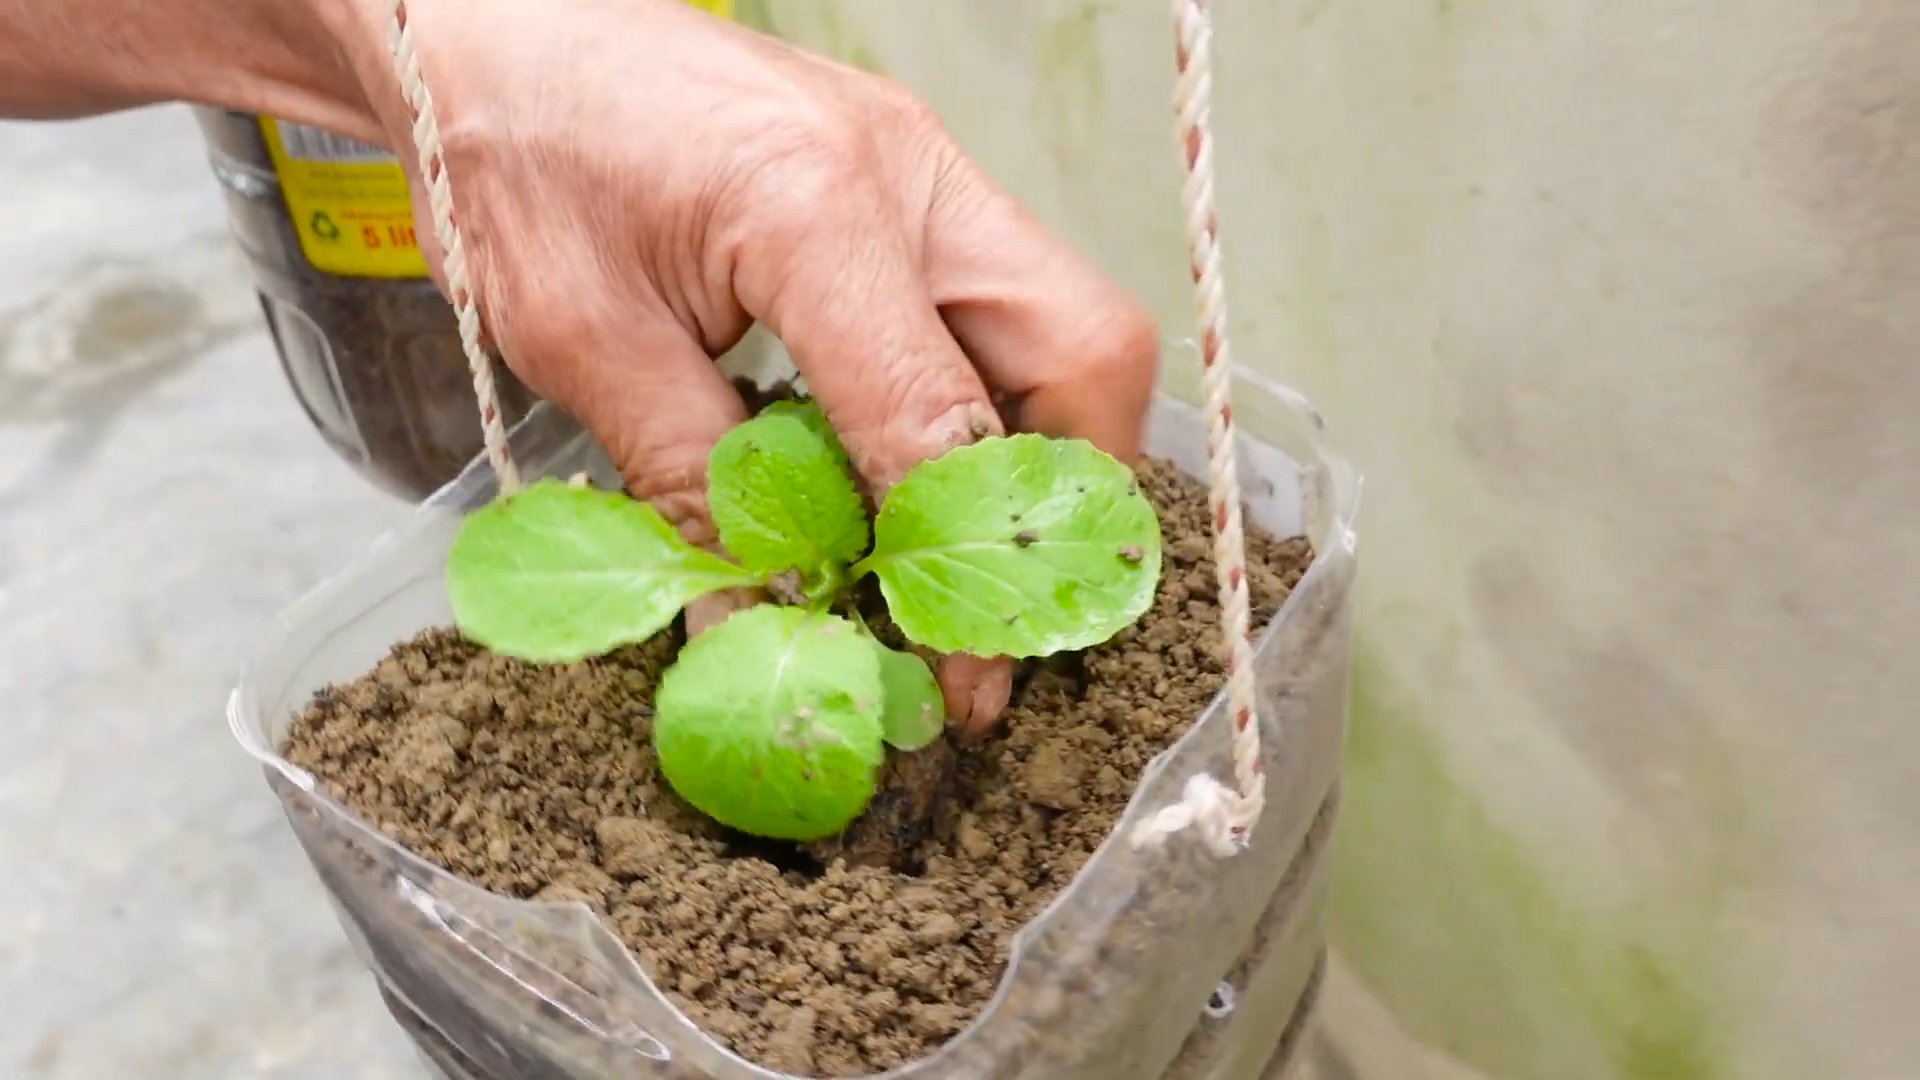
2. Gently Remove Seedlings: Carefully remove the seedlings from the seed starting tray or small pots. Try to disturb the roots as little as possible. If you planted multiple seeds in one cell, gently separate the seedlings, choosing the strongest one to transplant.
3. Plant the Seedlings: Make a small hole in the potting soil and gently place the seedling in the hole. The top of the root ball should be level with the surface of the soil.
4. Water Thoroughly: Water the transplanted seedlings thoroughly.
5. Provide Light and Warmth: Place the pots under your grow lights. Adjust the height of the lights so they are about 6-12 inches above the plants. Maintain a temperature of around 60-70°F (15-21°C).
Phase 3: Ongoing Care
Now that your Napa cabbage plants are settled in their new homes, it’s time to provide them with the ongoing care they need to thrive.
1. Watering: Water your Napa cabbage plants regularly, keeping the soil consistently moist but not waterlogged. Check the soil moisture level daily and water when the top inch of soil feels dry. Avoid getting water on the leaves, as this can promote fungal diseases.
2. Fertilizing: Feed your Napa cabbage plants with a balanced liquid fertilizer every 2-3 weeks. Follow the instructions on the fertilizer label. You can also use a slow-release fertilizer at planting time.
3. Light: Napa cabbage needs at least 6-8 hours of light per day. If you’re using grow lights, keep them on for 12-16 hours per day.
4. Temperature: Napa cabbage prefers cooler temperatures, around 60-70°F (15-21°C). Avoid exposing your plants to temperatures above 80°F (27°C).
5. Humidity: Napa cabbage prefers moderate humidity levels. If the air in your home is very dry, you can increase the humidity by placing a tray of water near the plants or using a humidifier.
6. Pest Control: Keep an eye out for pests such as aphids, cabbage worms, and slugs. If you notice any pests, you can spray your plants with neem oil or insecticidal soap. You can also handpick pests off the plants.
7. Air Circulation: Good air circulation is important for preventing fungal diseases. Make sure your plants have plenty of space around them and that there is good airflow in the room. A small fan can help with this.
8. Support: As your Napa cabbage plants grow, they may need some support. You can use stakes or cages to support the plants and prevent them from falling over.
Phase 4: Harvesting Your Napa Cabbage
The moment you’ve been waiting for! Harvesting your homegrown Napa cabbage.
1. Harvest Time: Napa cabbage is typically ready to harvest in 70-80 days from planting. The heads should be firm and compact.
2. Harvesting: To harvest your Napa cabbage, use a sharp knife to cut the head off at the base of the plant.
3. Storage: Store your Napa cabbage in the refrigerator for up to 2 weeks.
Troubleshooting
Even with the best care, you might encounter some challenges along the way. Here are a few common problems and how to address them:
* Yellowing Leaves: This could be a sign of overwatering, underwatering, nutrient deficiency, or pest infestation. Check the soil moisture level, fertilize your plants, and inspect them for pests.
* Stunted Growth: This could be caused by insufficient light, poor soil, or rootbound plants. Make sure your plants are getting enough light, transplant them into larger pots if necessary, and amend the soil with compost.
* Pest Infestation: Regularly inspect your plants for pests and take action immediately if you find any. Neem oil and insecticidal soap are effective treatments for many common pests.
* Bolting (Premature Flowering): This can happen if the temperature is too high or if the plants are stressed. Try to keep the temperature cool and provide your plants with consistent care.
Tips for Success
Here are a few extra tips to help you succeed in growing Napa cabbage indoors:
* Choose the Right Variety: Look for Napa cabbage varieties that are specifically bred for container gardening. These varieties tend to be smaller and more compact.
* Use Good Quality Potting Soil: Don’t skimp on the potting soil. Use a good quality potting mix that is well-draining and rich in nutrients.
* Provide Adequate Light: Napa cabbage needs plenty of light, so invest in some good quality grow lights.
* Water Regularly: Keep the soil consistently moist, but not waterlogged.
* Fertilize Regularly: Feed your plants with a balanced fertilizer every 2-3 weeks.
* Monitor for Pests and Diseases: Regularly inspect your plants for pests and diseases and take action immediately if you find any.
* Be Patient: Growing Napa cabbage indoors takes time and patience. Don’t get discouraged if you don’t see results immediately.
Growing Napa cabbage indoors can be a rewarding experience. With a little bit of effort and the right knowledge, you can enjoy fresh, homegrown cabbage all year round. Happy gardening!
Conclusion
So, there you have it! Growing Napa cabbage indoors might seem like a challenge, but with the right approach, it’s entirely achievable and incredibly rewarding. We’ve walked through the steps, from selecting the perfect seeds and providing optimal lighting to ensuring proper watering and nutrient balance. But why should you even bother with this DIY project?
Simply put, growing your own Napa cabbage offers a level of freshness and control you simply can’t get from store-bought varieties. Imagine the satisfaction of harvesting crisp, vibrant leaves, knowing exactly where they came from and what went into their cultivation. No pesticides, no long transportation times – just pure, unadulterated goodness ready to elevate your stir-fries, salads, and kimchi.
Beyond the freshness factor, growing Napa cabbage indoors allows you to extend the growing season, enjoying this delicious vegetable even when outdoor conditions aren’t favorable. This is especially beneficial for those living in colder climates with shorter growing seasons. Plus, it’s a fantastic way to add a touch of green to your living space and connect with nature, even in the heart of the city.
But the benefits don’t stop there. By embracing this DIY approach, you’re also contributing to a more sustainable lifestyle. You’re reducing your reliance on commercially grown produce, minimizing your carbon footprint, and potentially saving money in the long run. It’s a win-win for your taste buds, your wallet, and the planet!
Now, let’s talk about variations. While we’ve focused on the basic method, there’s plenty of room for experimentation. Consider trying different varieties of Napa cabbage, such as the ‘Blues’ or ‘Optiko’ cultivars, to see which ones thrive best in your indoor environment. You could also explore different growing mediums, such as coco coir or perlite, to optimize drainage and aeration.
Another exciting variation is to experiment with companion planting. Certain herbs and flowers, like basil or marigolds, can help deter pests and attract beneficial insects, creating a healthier and more balanced ecosystem for your Napa cabbage.
And don’t forget about the power of observation! Pay close attention to your plants, noting any changes in their appearance or growth patterns. This will help you identify potential problems early on and adjust your care accordingly.
Ultimately, the key to success with growing Napa cabbage indoors is to be patient, persistent, and willing to learn. Don’t be afraid to make mistakes – they’re all part of the learning process. And most importantly, have fun!
We wholeheartedly encourage you to give this DIY trick a try. Whether you’re a seasoned gardener or a complete beginner, we believe you’ll find the experience both rewarding and enjoyable. Once you’ve harvested your first batch of homegrown Napa cabbage, we’d love to hear about your experience. Share your tips, tricks, and photos in the comments below. Let’s create a community of indoor Napa cabbage enthusiasts and inspire others to embrace the joys of homegrown goodness! We are confident that with a little effort, you will be enjoying fresh, delicious, home-grown Napa cabbage in no time.
Frequently Asked Questions (FAQ)
1. What are the best varieties of Napa cabbage to grow indoors?
While most Napa cabbage varieties can be grown indoors, some are better suited than others due to their size and growth habits. Compact varieties like ‘Blues’ or ‘Optiko’ are excellent choices as they don’t require as much space as larger varieties. These varieties also tend to mature more quickly, making them ideal for indoor growing. Consider also looking for varieties specifically bred for container gardening, as they often have more compact root systems. Ultimately, the best variety for you will depend on your specific growing conditions and preferences, so don’t be afraid to experiment!
2. How much light does Napa cabbage need when grown indoors?
Napa cabbage requires a significant amount of light to thrive, typically 6-8 hours of direct sunlight per day. However, since indoor environments often lack sufficient natural light, supplemental lighting is usually necessary. LED grow lights are an excellent option as they are energy-efficient and provide the full spectrum of light that plants need for photosynthesis. Position the grow lights 6-12 inches above the plants and adjust the height as they grow. If you notice the leaves becoming pale or leggy, it’s a sign that they’re not getting enough light.
3. What type of soil is best for growing Napa cabbage indoors?
Napa cabbage prefers well-draining, fertile soil with a slightly acidic pH (around 6.0-6.5). A good potting mix for indoor growing should consist of a combination of peat moss, perlite, and vermiculite. This mixture provides good drainage, aeration, and water retention. You can also amend the soil with compost or other organic matter to improve its fertility. Avoid using garden soil, as it can be too heavy and may contain pests or diseases.
4. How often should I water my Napa cabbage plants indoors?
Watering frequency will depend on several factors, including the size of the container, the type of soil, and the ambient temperature. As a general rule, water your Napa cabbage plants when the top inch of soil feels dry to the touch. Water thoroughly until excess water drains out of the bottom of the container. Avoid overwatering, as this can lead to root rot. Also, be sure to avoid letting the soil dry out completely, as this can stress the plants.
5. What are some common pests and diseases that affect Napa cabbage, and how can I prevent them indoors?
While indoor growing environments are generally less susceptible to pests and diseases than outdoor gardens, Napa cabbage can still be affected by certain problems. Common pests include aphids, cabbage worms, and spider mites. To prevent infestations, inspect your plants regularly for signs of pests and take action immediately if you spot any. You can use insecticidal soap or neem oil to control pests. Diseases like damping-off and black rot can also affect Napa cabbage. To prevent these diseases, use sterile potting mix, avoid overwatering, and ensure good air circulation.
6. How long does it take to grow Napa cabbage indoors?
The time it takes to grow Napa cabbage indoors will vary depending on the variety, growing conditions, and your level of experience. Generally, it takes about 60-80 days from seed to harvest. However, some faster-maturing varieties may be ready in as little as 50 days. Be patient and monitor your plants closely. You’ll know they’re ready to harvest when the heads are firm and compact.
7. Can I grow Napa cabbage indoors year-round?
Yes, you can grow Napa cabbage indoors year-round, provided you have the right growing conditions. This includes providing adequate light, temperature, and humidity. You may need to adjust your watering and fertilization schedule depending on the season. For example, during the winter months, when the days are shorter and the temperatures are cooler, you may need to reduce watering and fertilization.
8. What are some signs that my Napa cabbage plants are not doing well indoors?
There are several signs that your Napa cabbage plants may not be thriving indoors. These include yellowing leaves, stunted growth, wilting, and the presence of pests or diseases. If you notice any of these signs, take action immediately to address the underlying problem. This may involve adjusting your watering or fertilization schedule, providing more light, or treating for pests or diseases.
9. How do I harvest Napa cabbage grown indoors?
Harvesting Napa cabbage is relatively simple. Once the heads are firm and compact, use a sharp knife to cut them off at the base of the plant. You can also harvest individual leaves as needed, but be sure to leave enough leaves on the plant to allow it to continue growing. After harvesting, store the Napa cabbage in the refrigerator for up to a week.
10. Can I save seeds from my indoor-grown Napa cabbage?
Saving seeds from Napa cabbage can be challenging, especially indoors. Napa cabbage is a biennial plant, meaning it typically takes two years to produce seeds. In the first year, the plant focuses on vegetative growth, and in the second year, it flowers and produces seeds. To save seeds, you would need to overwinter the plants and allow them to flower and produce seeds in the second year. This can be difficult to do indoors, as it requires specific temperature and lighting conditions. Additionally, Napa cabbage is cross-pollinated, so if you have other brassica plants nearby, the seeds may not be true to type. For best results, it’s generally recommended to purchase seeds from a reputable source.
Leave a Comment