

Growing Honeysuckle on Trellis: Imagine your garden transformed into a fragrant haven, buzzing with life and overflowing with the sweet scent of honeysuckle. Sounds dreamy, right? Well, it’s more achievable than you think! For centuries, honeysuckle has been cherished not only for its beauty but also for its medicinal properties and symbolic meaning – often representing love and devotion. From ancient herbal remedies to adorning cottage gardens, this climbing vine has a rich history.
But let’s be honest, sometimes getting those gorgeous vines to climb exactly where you want them can be a bit of a challenge. That’s where this DIY guide comes in! I’m going to share my favorite tricks and tips for successfully growing honeysuckle on a trellis, ensuring your garden becomes the envy of the neighborhood. We’ll cover everything from choosing the right trellis to training your honeysuckle for maximum impact.
Why is this important? Because a well-supported honeysuckle not only looks stunning but also thrives better, producing more blooms and attracting more pollinators like hummingbirds and butterflies. Plus, a little DIY satisfaction is always a good thing! So, grab your gardening gloves, and let’s get started on creating your own honeysuckle paradise. You’ll be amazed at how easy and rewarding it is!
DIY: Creating a Stunning Honeysuckle Trellis Display
Alright, honeysuckle lovers! Get ready to transform your garden into a fragrant paradise. I’m going to walk you through building a beautiful and functional trellis for your honeysuckle to climb and thrive. This project is totally doable for beginners, and the results are absolutely worth it. Let’s get started!
Choosing Your Honeysuckle Variety
Before we even think about building the trellis, let’s talk honeysuckle. There are tons of varieties, and picking the right one is key. Consider these factors:
* Fragrance: Some honeysuckles are intensely fragrant, while others have a milder scent. Research different varieties to find one that appeals to your nose. Goldflame and Japanese honeysuckle are known for their strong fragrance.
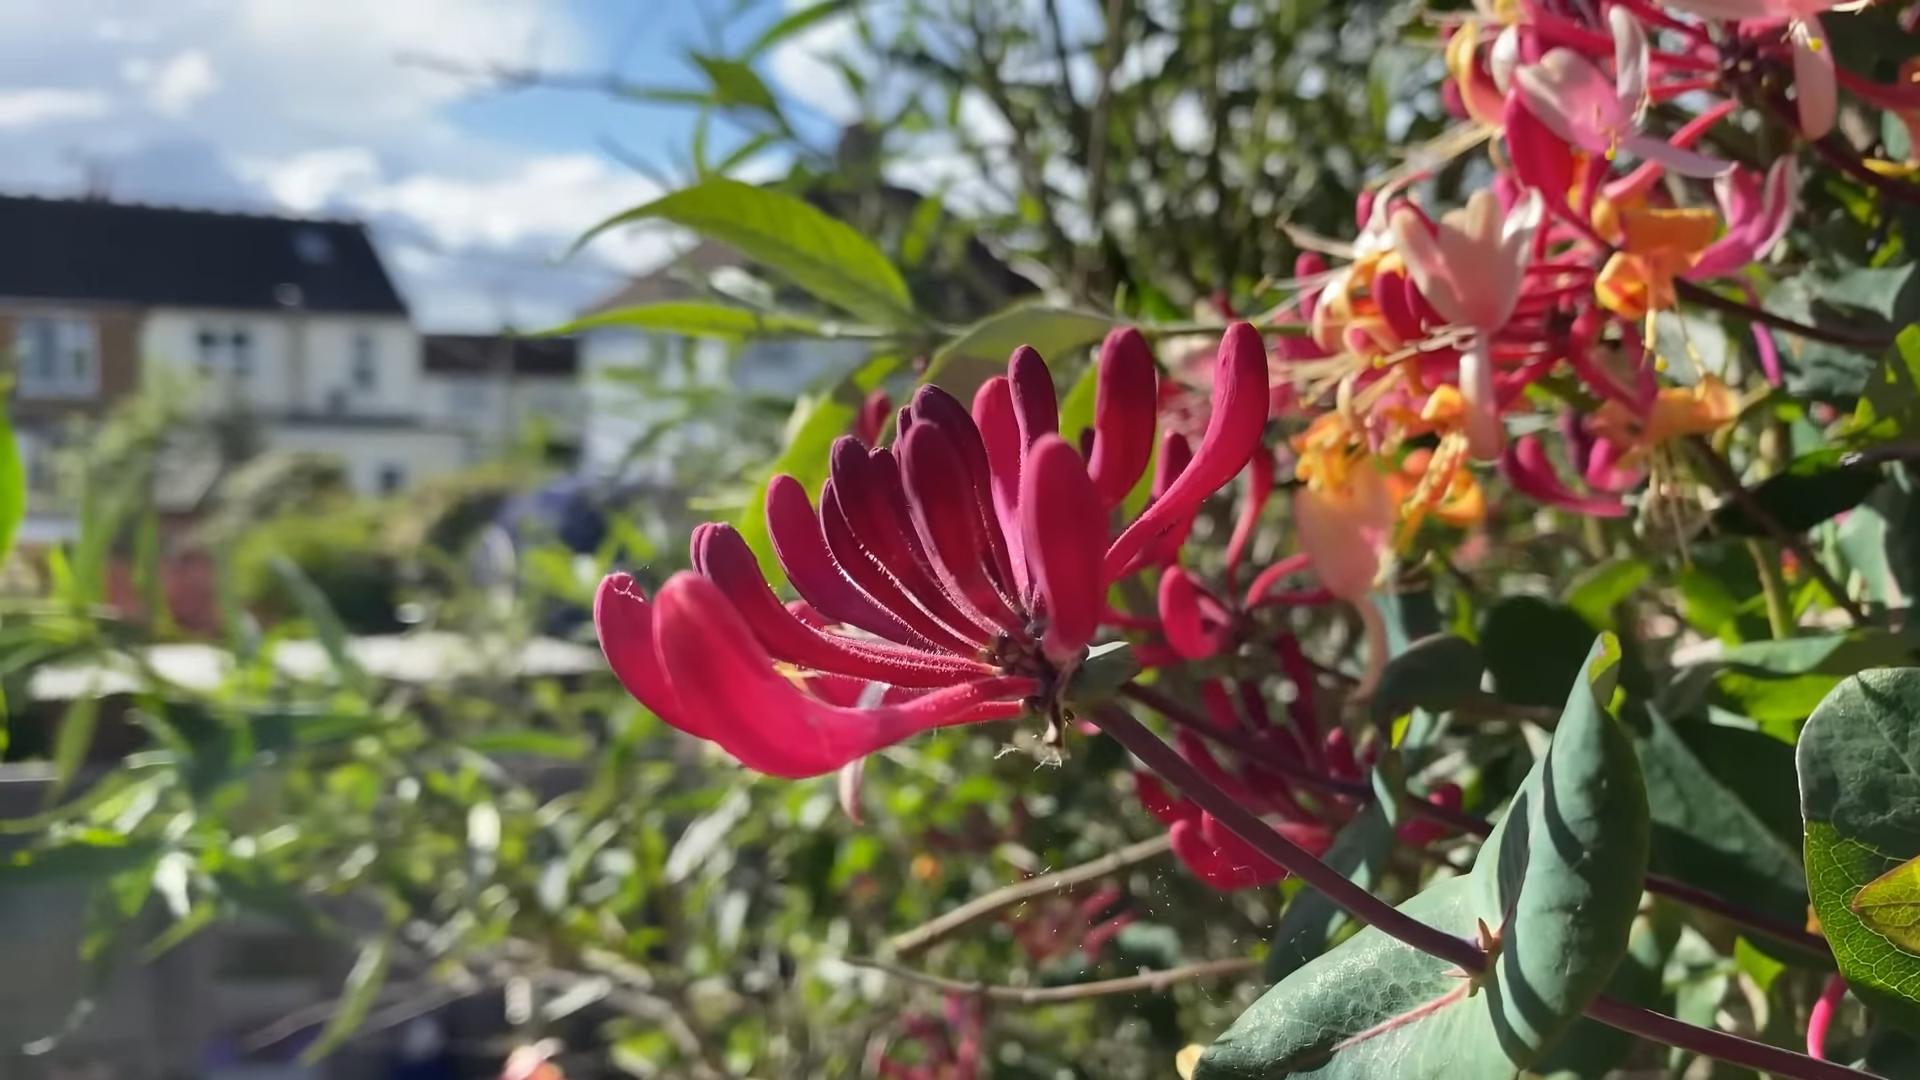
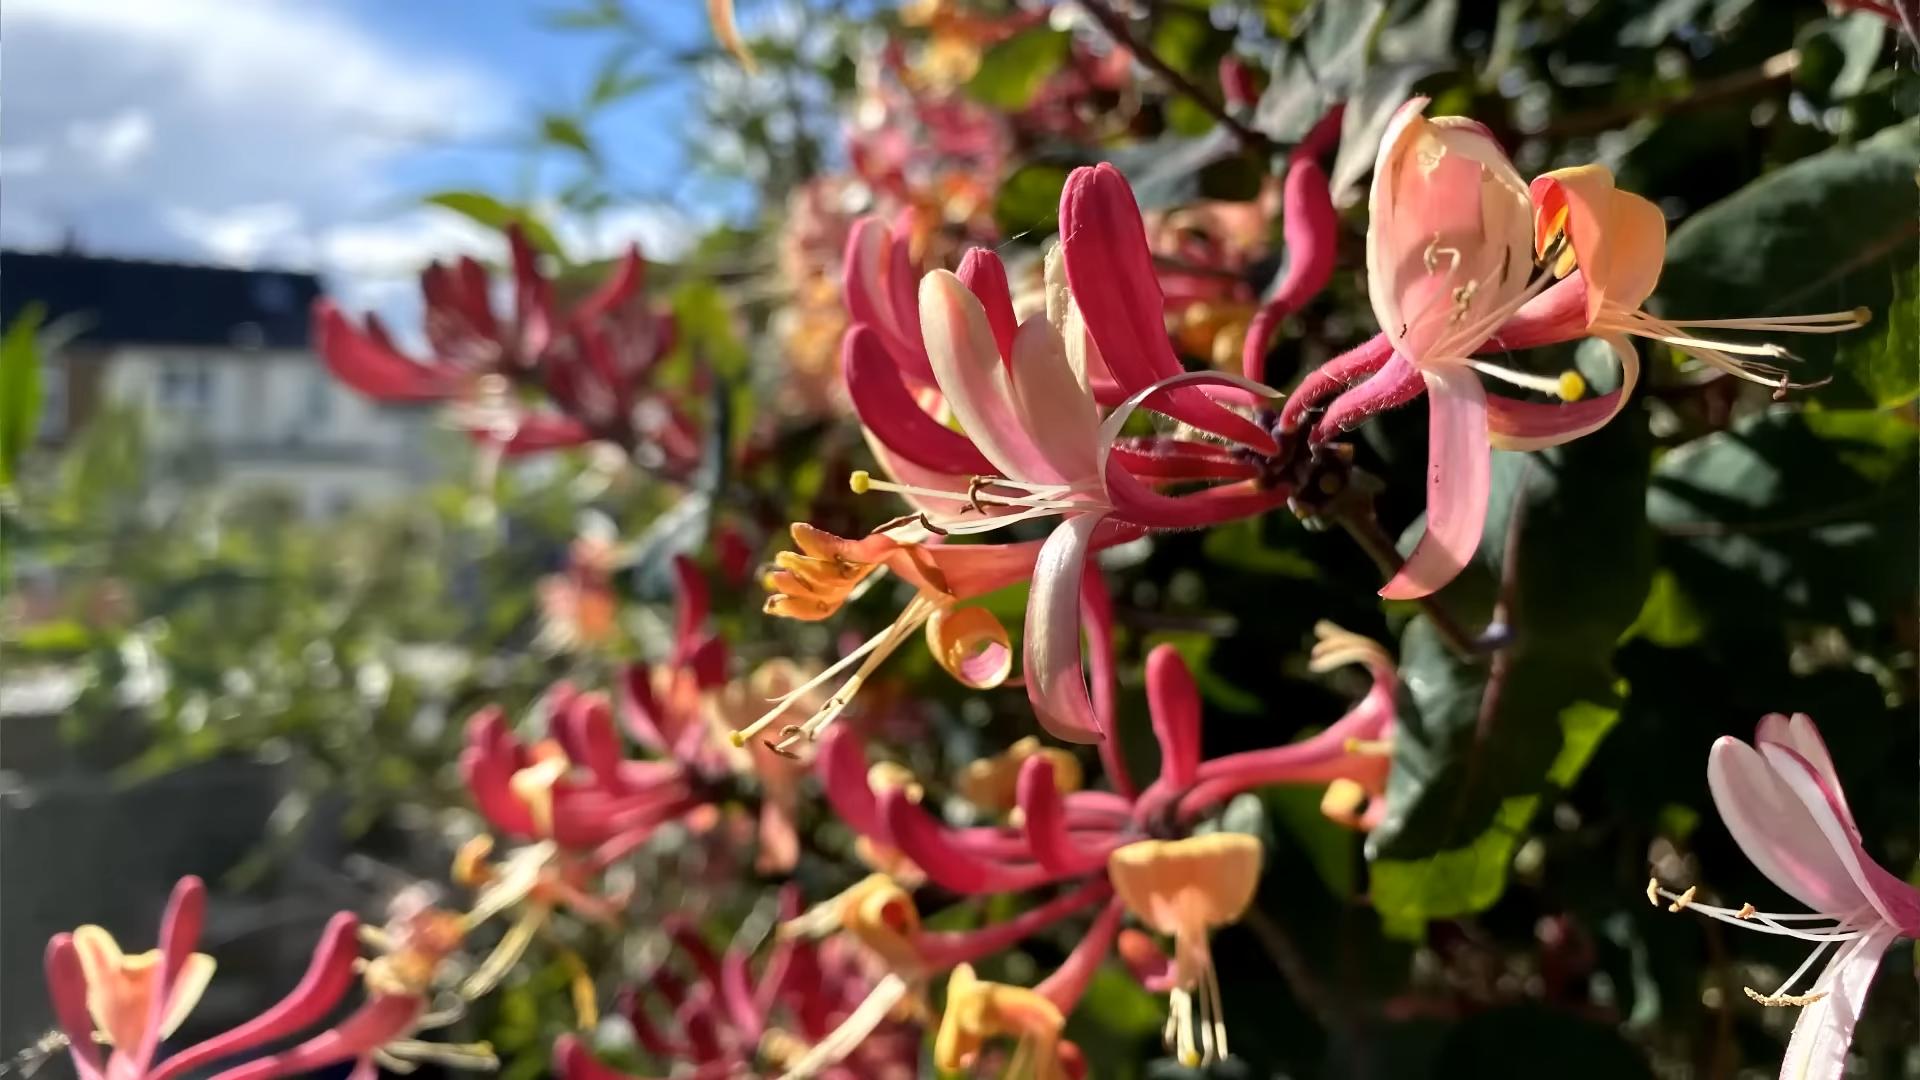
* Color: Honeysuckles come in a range of colors, from classic white and yellow to vibrant pinks and reds. Think about what will complement your garden’s existing color scheme.
* Growth Habit: Some honeysuckles are more vigorous growers than others. Make sure the variety you choose is suitable for the size of your trellis and the space you have available. ‘Dropmore Scarlet’ is a popular choice for its manageable size and stunning red blooms.
* Native vs. Non-Native: This is a big one! Some honeysuckle varieties, like Japanese honeysuckle, are considered invasive in certain regions. Opt for a native variety to support your local ecosystem and avoid potential problems. Consider options like Trumpet Honeysuckle (Lonicera sempervirens).
Once you’ve chosen your honeysuckle, you’re ready to move on to the trellis!
Planning Your Trellis Design
Now for the fun part – designing your trellis! Here are some things to consider:
* Size: How big do you want your trellis to be? Think about the mature size of your honeysuckle and how much space you have available. A good starting point is 6-8 feet tall and 4-6 feet wide.
* Style: Do you want a simple, rustic trellis or something more elaborate? There are tons of options, from basic lattice panels to custom-built structures.
* Materials: Wood is a classic choice for trellises, but you can also use metal, bamboo, or even repurposed materials. Cedar is a great option for wood because it’s naturally rot-resistant.
* Location: Where will your trellis be located? Make sure it’s in a spot that gets plenty of sunlight (at least 6 hours a day) and has well-draining soil.
I’m going to guide you through building a simple, sturdy wooden trellis that’s perfect for honeysuckle.
Materials You’ll Need
Okay, let’s gather our supplies. Here’s what you’ll need for a basic wooden trellis:
* Lumber:
* Two 8-foot 4×4 posts (for the main supports)
* Four 8-foot 2×4 boards (for the horizontal and vertical supports)
* One 4-foot 2×2 board (for the top decorative piece – optional)
* Fasteners:
* 3-inch exterior wood screws
* 2-inch exterior wood screws
* Tools:
* Measuring tape
* Pencil
* Circular saw or hand saw
* Drill with drill bits
* Level
* Post hole digger or shovel
* Safety glasses
* Work gloves
* Optional:
* Wood stain or paint (for finishing)
* Sandpaper (for smoothing rough edges)
* Wood glue
Building Your Honeysuckle Trellis: Step-by-Step
Alright, let’s get building!
Phase 1: Preparing the Posts and Supports
1. Cut the Lumber: Using your measuring tape and saw, cut the 2×4 boards into the following lengths:
* Two 4-foot pieces (for the top and bottom horizontal supports)
* Four 6-foot pieces (for the vertical supports)
* If you’re adding a decorative top, cut the 2×2 board to 4 feet.
2. Sand the Edges: Use sandpaper to smooth any rough edges on the lumber. This will prevent splinters and give your trellis a more polished look.
3. Pre-Drill Holes: Before attaching the boards, pre-drill holes with a drill bit slightly smaller than the diameter of your screws. This will make it easier to drive the screws in and prevent the wood from splitting.
Phase 2: Assembling the Trellis Frame
1. Attach the Top and Bottom Supports: Position one 4-foot 2×4 board at the top of the two 4×4 posts, flush with the top edge. Use 3-inch wood screws to attach the 2×4 to each post. Repeat this process for the bottom support, positioning it about 1 foot from the bottom of the posts. Make sure the posts are parallel and the frame is square. Use a level to ensure everything is straight.
2. Attach the Vertical Supports: Now, attach the 6-foot vertical 2×4 boards to the frame. Space them evenly between the top and bottom supports. I usually aim for about 12-18 inches between each vertical support. Use 2-inch wood screws to attach each vertical support to the horizontal supports. Again, make sure everything is level and square.
3. Add the Decorative Top (Optional): If you’re adding a decorative top, center the 4-foot 2×2 board on top of the frame. Use wood glue and 2-inch wood screws to attach it securely. You can get creative with the shape of the top piece – add curves, angles, or even a small overhang.
Phase 3: Installing the Trellis in the Ground
1. Dig the Post Holes: Use a post hole digger or shovel to dig two holes for the 4×4 posts. The holes should be deep enough to bury the posts about 2 feet into the ground. This will provide a stable base for the trellis.
2. Position the Trellis: Carefully lower the trellis into the holes, making sure it’s level and plumb. Use a level to check both the vertical and horizontal alignment.
3. Backfill the Holes: Fill the holes with soil, tamping it down firmly around the posts. You can also add gravel or crushed stone to the bottom of the holes for better drainage.
4. Secure the Trellis: For added stability, you can use concrete to set the posts in the ground. Mix the concrete according to the manufacturer’s instructions and pour it into the holes around the posts. Let the concrete cure for at least 24 hours before planting your honeysuckle.
Phase 4: Finishing Touches
1. Stain or Paint the Trellis (Optional): If you want to protect your trellis from the elements and give it a more finished look, apply a coat of wood stain or paint. Choose a color that complements your garden and your honeysuckle. Make sure to use exterior-grade stain or paint.
2. Let it Dry: Allow the stain or paint to dry completely before planting your honeysuckle.
3. Prepare the Soil: Before planting, amend the soil around the base of the trellis with compost or other organic matter. This will provide your honeysuckle with the nutrients it needs to thrive.
Planting Your Honeysuckle
Now for the moment we’ve all been waiting for – planting your honeysuckle!
1. Dig a Hole: Dig a hole that’s twice as wide and as deep as the root ball of your honeysuckle plant.
2. Remove the Plant from the Container: Gently remove the honeysuckle plant from its container, being careful not to damage the roots.
3. Loosen the Roots: Gently loosen the roots of the plant to encourage them to spread out into the surrounding soil.
4. Plant the Honeysuckle: Place the honeysuckle plant in the hole, making sure the top of the root ball is level with the surrounding soil.
5. Backfill the Hole: Fill the hole with soil, tamping it down gently around the plant.
6. Water Thoroughly: Water the honeysuckle plant thoroughly after planting.
7. Mulch: Apply a layer of mulch around the base of the plant to help retain moisture and suppress weeds.
Training Your Honeysuckle to Climb
Honeysuckle needs a little help getting started on its climbing journey. Here’s how to train it:
1. Tie the Vines: Use soft twine or plant ties to gently attach the honeysuckle vines to the trellis. Space the ties about 6-12 inches apart.
2. Guide the Growth: As the honeysuckle grows, continue to tie the vines to the trellis, guiding them in the direction you want them to
Conclusion
So, there you have it! Growing honeysuckle on a trellis isn’t just about adding a beautiful, fragrant plant to your garden; it’s about creating a living, breathing work of art. It’s about attracting hummingbirds and butterflies, filling your outdoor space with intoxicating scents, and enjoying the satisfaction of nurturing something beautiful from a young vine to a flourishing spectacle. This DIY project is a must-try for anyone looking to elevate their garden’s aesthetic and ecological value.
The beauty of this project lies in its adaptability. Feel free to experiment with different honeysuckle varieties. ‘Halliana’ is a classic choice with its creamy white flowers that age to yellow, while ‘Dropmore Scarlet’ offers a vibrant splash of color. Consider the size and growth habit of the variety you choose to ensure it’s well-suited to your trellis. You can also play with the trellis design itself. A simple wooden lattice works wonders, but you could also use a wrought iron structure for a more formal look, or even repurpose an old ladder for a rustic charm.
Don’t be afraid to get creative with companion plants. Plant low-growing, shade-tolerant flowers at the base of your honeysuckle to create a layered effect and suppress weeds. Consider plants like impatiens, hostas, or even groundcover such as creeping thyme. This will not only enhance the visual appeal but also create a more diverse and thriving ecosystem.
Remember, patience is key. It takes time for honeysuckle to establish itself and climb the trellis. But the reward is well worth the wait. Imagine sitting on your patio, surrounded by the sweet fragrance of honeysuckle, watching hummingbirds flit among the blossoms. It’s an experience that will enrich your life and bring joy to your garden for years to come.
We wholeheartedly encourage you to embark on this rewarding DIY journey. Growing honeysuckle on a trellis is a project that offers both beauty and satisfaction. Once you’ve completed your project, we’d love to hear about your experience! Share your photos, tips, and challenges in the comments below. Let’s create a community of honeysuckle enthusiasts and inspire others to transform their gardens into fragrant havens. We are confident that you will find that growing honeysuckle on a trellis is a rewarding and beautiful addition to your outdoor space.
Frequently Asked Questions (FAQ)
What type of trellis is best for honeysuckle?
The best type of trellis for honeysuckle depends on your aesthetic preferences and the space you have available. A sturdy wooden lattice is a popular and reliable choice, providing ample support for the vines to climb. Wrought iron trellises offer a more elegant and formal look, while repurposed materials like old ladders or metal gates can add a touch of rustic charm. The key is to choose a trellis that is strong enough to support the weight of the mature honeysuckle vine and has openings or a structure that the vines can easily grip and climb. Consider the mature size of your chosen honeysuckle variety when selecting the trellis size.
How often should I water my honeysuckle?
Newly planted honeysuckle needs regular watering to establish a strong root system. Water deeply and frequently, especially during dry spells. Once established, honeysuckle is relatively drought-tolerant but will still benefit from occasional watering during prolonged periods of dryness. Check the soil moisture regularly and water when the top inch or two feels dry to the touch. Avoid overwatering, as this can lead to root rot. Mulching around the base of the plant can help retain moisture and suppress weeds.
What kind of soil does honeysuckle need?
Honeysuckle thrives in well-drained soil that is rich in organic matter. Amend heavy clay soils with compost or other organic materials to improve drainage and aeration. Honeysuckle prefers a slightly acidic to neutral soil pH (around 6.0 to 7.0). You can test your soil pH with a home testing kit and amend it accordingly if necessary. Adding compost or well-rotted manure to the planting hole will provide essential nutrients and improve soil structure.
How do I prune honeysuckle?
Pruning is essential for maintaining the shape and health of your honeysuckle vine. Prune after flowering to remove dead, damaged, or crossing branches. You can also prune to control the size and shape of the vine and encourage bushier growth. Avoid heavy pruning, as this can reduce flowering. For overgrown vines, you can rejuvenate them by cutting them back hard in late winter or early spring. Regular pruning will help keep your honeysuckle healthy, vigorous, and blooming profusely.
Is honeysuckle invasive?
Some varieties of honeysuckle, particularly Japanese honeysuckle (Lonicera japonica), are considered invasive in certain regions. It’s crucial to research the specific variety you’re considering planting and check with your local extension office to determine if it’s considered invasive in your area. Choose non-invasive or native honeysuckle varieties to avoid potential ecological problems. Native honeysuckle varieties are also better adapted to your local climate and will require less maintenance.
How do I attract hummingbirds to my honeysuckle?
Honeysuckle is a favorite of hummingbirds due to its tubular flowers and abundant nectar. To attract more hummingbirds to your honeysuckle, avoid using pesticides or herbicides, as these can harm the birds and their food sources. Plant other hummingbird-friendly flowers nearby, such as salvia, bee balm, and petunias. Provide a source of fresh water, such as a birdbath or fountain. You can also hang a hummingbird feeder nearby to supplement their diet.
My honeysuckle isn’t flowering. What could be the problem?
There are several reasons why your honeysuckle might not be flowering. It could be due to insufficient sunlight, as honeysuckle needs at least six hours of sunlight per day to bloom properly. Over-fertilizing with nitrogen can also inhibit flowering, as it encourages vegetative growth at the expense of blooms. Improper pruning can also remove flower buds. Make sure you’re pruning after flowering and not removing too much growth. Finally, young plants may take a few years to mature and begin flowering. Be patient and provide proper care, and your honeysuckle should eventually reward you with beautiful blooms.
Can I grow honeysuckle in a pot?
Yes, you can grow honeysuckle in a pot, but you’ll need to choose a large container that is at least 18 inches in diameter. Use a well-draining potting mix and provide a trellis or support for the vines to climb. Potted honeysuckle will need more frequent watering and fertilizing than those planted in the ground. Choose a compact or dwarf variety of honeysuckle that is well-suited to container growing. Place the pot in a sunny location and protect it from strong winds.
How do I protect my honeysuckle from pests and diseases?
Honeysuckle is generally resistant to pests and diseases, but it can occasionally be affected by aphids, powdery mildew, or leaf spot. Inspect your plants regularly for signs of infestation or disease. Treat aphids with insecticidal soap or neem oil. Improve air circulation and avoid overhead watering to prevent powdery mildew. Remove and destroy any infected leaves to prevent the spread of leaf spot. Choose disease-resistant varieties of honeysuckle to minimize the risk of problems.

Leave a Comment