

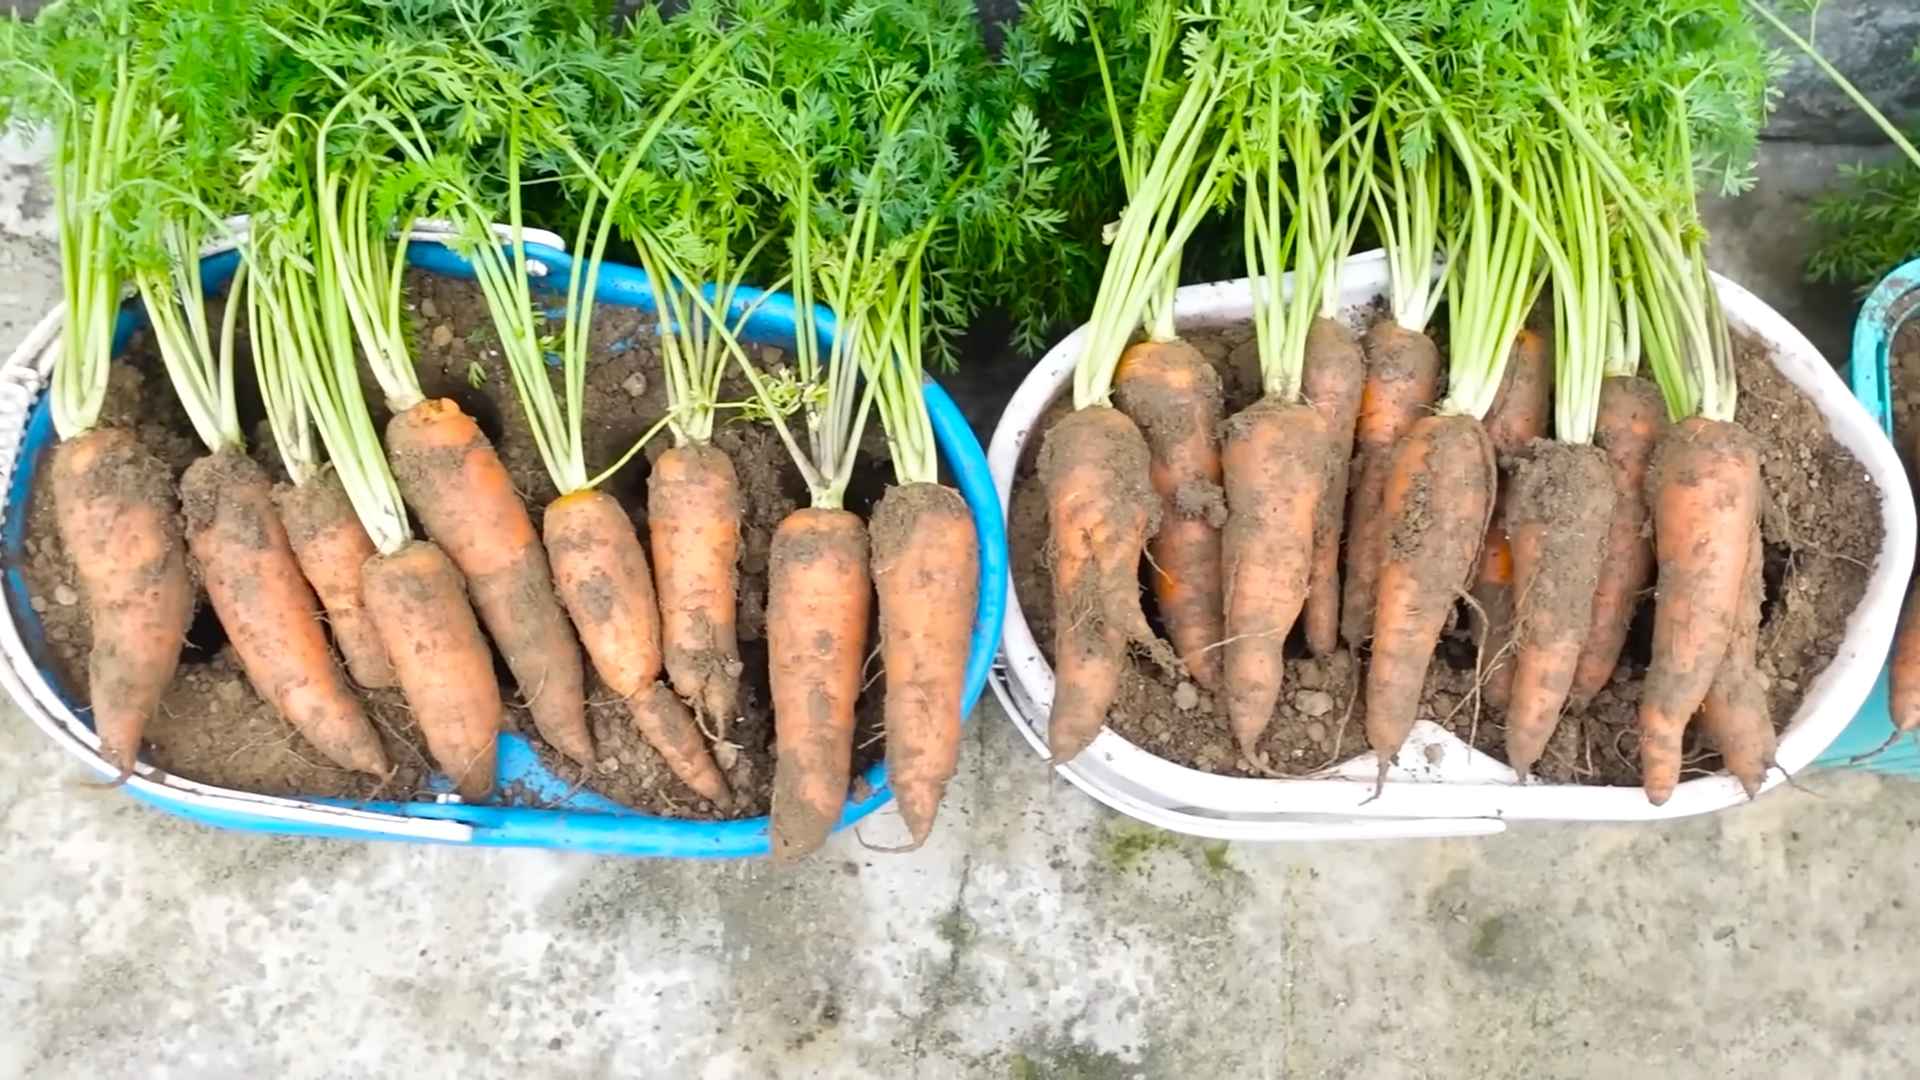
Growing Carrots in Buckets: Imagine plucking vibrant, sweet carrots straight from your patio, balcony, or even your kitchen windowsill! No sprawling garden required. For centuries, carrots have been a staple in diets worldwide, from the vibrant orange varieties we know today to their purple and yellow ancestors enjoyed by the Romans. But what if you lack the space for a traditional garden? That’s where the magic of container gardening comes in, and specifically, the joy of growing carrots in buckets!
I’m here to tell you that even if you’re short on space, you can still enjoy the satisfaction of harvesting your own delicious, homegrown carrots. This DIY guide will walk you through everything you need to know to successfully cultivate these root vegetables in buckets, from choosing the right container and soil to providing the perfect amount of sunlight and water.
Why is this DIY trick so essential? Well, not only does it democratize gardening, making it accessible to everyone regardless of their living situation, but it also allows you to control the growing environment, minimizing pests and diseases. Plus, there’s nothing quite like the taste of a freshly harvested carrot you’ve grown yourself. So, grab your buckets, let’s get our hands dirty, and embark on this exciting journey of growing carrots in buckets!
Growing Carrots in Buckets: A Beginner’s Guide
Hey there, fellow gardening enthusiasts! Ever dreamed of harvesting your own crunchy, sweet carrots but don’t have a sprawling garden? Well, I’m here to tell you that you absolutely CAN grow carrots, even in a small space, using buckets! It’s easier than you think, and I’m going to walk you through every step of the process. Get ready to enjoy fresh, homegrown carrots straight from your patio or balcony!
Why Grow Carrots in Buckets?
Before we dive in, let’s talk about why bucket gardening is such a fantastic option for carrots:
* Space-Saving: Perfect for apartments, balconies, or small yards. You can grow a decent amount of carrots in just a few buckets.
* Control Over Soil: You get to choose the perfect soil mix, ensuring your carrots have the nutrients they need to thrive.
* Mobility: Need to move your carrots to a sunnier spot? No problem! Buckets are easy to relocate.
* Pest Control: It’s easier to monitor and manage pests when your carrots are contained in buckets.
* Early Harvest: The soil in buckets tends to warm up faster than in the ground, potentially leading to an earlier harvest.
What You’ll Need
Okay, let’s gather our supplies. Here’s what you’ll need to get started:
* Buckets: Choose buckets that are at least 12 inches deep, but 18-24 inches is even better. Carrots need room to grow long! Five-gallon buckets are a good starting point. Make sure they are food-grade if you are using recycled buckets.
* Drill: For drainage holes.
* Potting Mix: This is crucial! Don’t use garden soil, as it’s too heavy and can compact, hindering carrot growth. Opt for a loose, well-draining potting mix. I like to use a mix of peat moss, perlite, and vermiculite.
* Carrot Seeds: Choose a variety that’s suitable for container gardening. Shorter, rounder varieties like ‘Thumbelina’ or ‘Parisian’ are excellent choices. Nantes varieties also work well.
* Slow-Release Fertilizer: This will provide your carrots with a steady supply of nutrients throughout the growing season.
* Watering Can or Hose: For watering your carrots.
* Optional:
* Gravel or small stones for the bottom of the bucket (for improved drainage).
* Mulch (straw or wood chips) to help retain moisture.
* Plant labels to keep track of your carrot varieties.
Step-by-Step Instructions: Planting Your Carrots
Alright, let’s get our hands dirty! Here’s how to plant your carrot seeds in buckets:
1. Prepare the Buckets:
* First, clean your buckets thoroughly with soap and water.
* Drill drainage holes in the bottom of each bucket. I usually drill about 4-5 holes, each about 1/2 inch in diameter. This is super important to prevent waterlogging, which can rot your carrots.
* If you’re using gravel, add a 1-2 inch layer to the bottom of the bucket. This will help with drainage.
2. Fill the Buckets with Potting Mix:
* Now, fill your buckets with the potting mix, leaving about an inch or two of space at the top.
* Gently pat down the soil to remove any large air pockets.
3. Sow the Carrot Seeds:
* Carrot seeds are tiny, so be careful not to sow them too densely.
* Sprinkle the seeds evenly over the surface of the soil. Aim for about 2-3 seeds per inch.
* Cover the seeds with a very thin layer of potting mix (about 1/4 inch). Carrot seeds need light to germinate, so don’t bury them too deep.
4. Water Gently:
* Use a watering can with a gentle rose attachment to water the soil thoroughly. You want the soil to be moist but not soggy.
* Avoid using a strong stream of water, as this can wash away the seeds.
5. Add Slow-Release Fertilizer:
* Sprinkle a slow-release fertilizer over the surface of the soil, following the instructions on the fertilizer package. This will provide your carrots with a steady supply of nutrients as they grow.
6. Label Your Buckets:
* If you’re growing multiple varieties of carrots, label each bucket so you know which is which.
Caring for Your Carrots: From Seedling to Harvest
Now that your carrots are planted, it’s time to provide them with the care they need to thrive.
1. Watering:
* Keep the soil consistently moist, but not waterlogged. Water when the top inch of soil feels dry to the touch.
* Water deeply and thoroughly, allowing the water to drain out of the drainage holes.
* Avoid overhead watering, as this can promote fungal diseases. Water at the base of the plants instead.
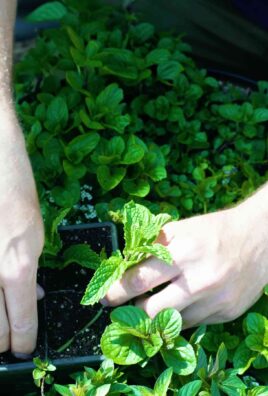
2. Thinning:
* This is a crucial step! Once your carrot seedlings emerge (usually in about 1-3 weeks), you’ll need to thin them out.
* Thin the seedlings when they are about 1-2 inches tall.
* Carefully snip off the weaker seedlings at the soil line, leaving the strongest seedlings spaced about 2-3 inches apart.
* Thinning ensures that each carrot has enough space to grow to its full potential.
3. Sunlight:
* Carrots need at least 6 hours of sunlight per day. Place your buckets in a sunny location.
* If you live in a hot climate, provide some afternoon shade to prevent the soil from drying out too quickly.
4. Fertilizing:
* In addition to the slow-release fertilizer you added at planting, you can also supplement with a liquid fertilizer every 2-3 weeks.
* Choose a fertilizer that is high in phosphorus and potassium, which are essential for root development.
5. Weeding:
* Keep your buckets free of weeds, as they can compete with your carrots for nutrients and water.
* Carefully hand-pull any weeds that emerge.
6. Pest Control:
* Keep an eye out for pests such as carrot rust flies, aphids, and nematodes.
* If you notice any pests, take action immediately. You can use insecticidal soap, neem oil, or other organic pest control methods.
* Good air circulation can also help prevent pest problems.
7. Mulching:
* Add a layer of mulch (straw or wood chips) around your carrot plants to help retain moisture, suppress weeds, and regulate soil temperature.
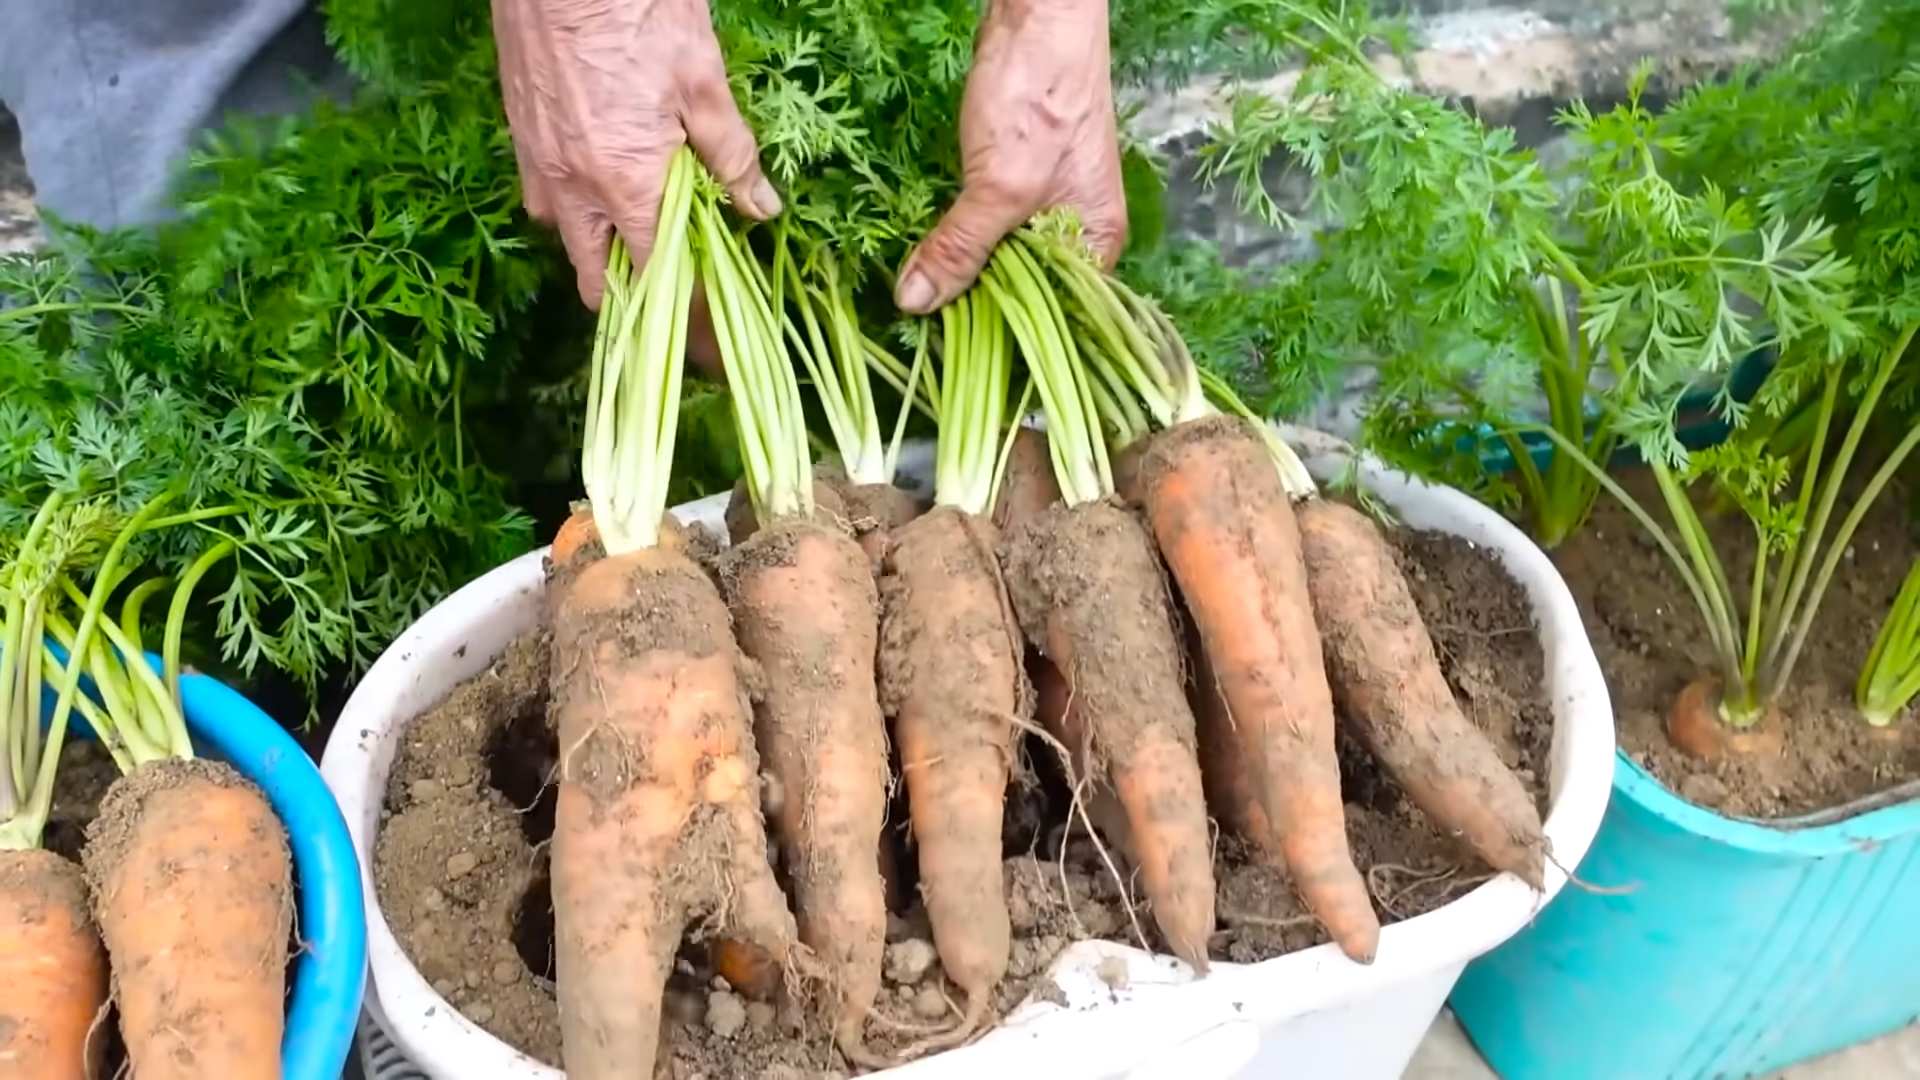
Harvesting Your Carrots
The moment we’ve all been waiting for! Here’s how to harvest your homegrown carrots:
1. Check for Maturity:
* Carrots are typically ready to harvest 60-80 days after planting, depending on the variety.
* Check the seed packet for specific maturity dates.
* You can also gently brush away some of the soil around the top of the carrot to check its size.
2. Harvesting:
* To harvest, gently loosen the soil around the carrot with a trowel or fork.
* Grasp the carrot firmly at the base of the greens and pull straight up.
* If the carrot is difficult to pull, try wiggling it gently from side to side.
* If you’re having trouble harvesting, you can also dig the carrots out with a trowel.
3. Cleaning and Storing:
* Once you’ve harvested your carrots, brush off any excess soil.
* Cut off the greens, leaving about an inch of stem.
* Store your carrots in the refrigerator in a plastic bag or container. They should last for several weeks.
Troubleshooting
Even with the best care, you might encounter some challenges when growing carrots in buckets. Here are a few common problems and how to address them:
* Poor Germination:
* Make sure your seeds are fresh. Carrot seeds lose their viability quickly.
* Keep the soil consistently moist during germination.
* Ensure the soil temperature is warm enough (60-70°F).
* Forked or Twisted Carrots:
* This is usually caused by rocks or other obstacles in the soil. Make sure your potting mix is free of debris.
* Compacted soil can also cause forking. Use a loose, well-draining potting mix.
* Small Carrots:
Conclusion
So, there you have it! Growing carrots in buckets isn’t just a quirky gardening experiment; it’s a game-changer for anyone with limited space, challenging soil, or a penchant for perfectly formed, pest-free carrots. We’ve walked you through the entire process, from selecting the right bucket and soil mix to planting, watering, and harvesting your vibrant, homegrown bounty.
Why is this DIY trick a must-try? Simply put, it democratizes carrot cultivation. No longer are delicious, crunchy carrots the exclusive domain of sprawling gardens. Apartment dwellers, balcony enthusiasts, and even those with rocky, clay-ridden yards can now enjoy the unparalleled satisfaction of pulling their own carrots straight from the “ground” – or, in this case, a bucket! The control you have over the growing environment is unparalleled. You dictate the soil composition, ensuring optimal drainage and nutrient availability. You can easily move your buckets to chase the sun or shelter them from harsh weather. And, perhaps most importantly, you significantly reduce the risk of common carrot pests like carrot root flies, which can decimate an entire crop in traditional gardens.
But the beauty of this method lies in its adaptability. Feel free to experiment! Try different carrot varieties – shorter, rounder types like ‘Parisian’ or ‘Thumbelina’ are particularly well-suited for container growing. Consider adding companion plants like marigolds or basil to your buckets to deter pests and attract beneficial insects. You could even create a tiered system using multiple buckets of varying sizes to maximize your vertical growing space.
For a spicier twist, try adding a pinch of cayenne pepper to your soil mix – it’s rumored to deter pests and give your carrots a subtle, warming flavor. Or, if you’re feeling adventurous, experiment with different soil amendments like compost tea or worm castings to boost nutrient levels and promote even more vigorous growth.
Don’t be afraid to get your hands dirty and personalize your carrot-growing experience. The most rewarding part of gardening is the journey of discovery, and growing carrots in buckets offers ample opportunities for experimentation and innovation.
We’re confident that once you experience the joy of harvesting your own sweet, crisp carrots from a bucket, you’ll be hooked. It’s a simple, rewarding, and surprisingly effective way to enjoy fresh, homegrown produce, regardless of your living situation or gardening expertise.
So, grab a bucket, some soil, and a packet of carrot seeds, and get started today! We can’t wait to hear about your experiences. Share your photos, tips, and triumphs in the comments below. Let’s build a community of bucket-carrot enthusiasts and inspire others to embrace the joys of urban gardening. Happy growing! Let us know how your growing carrots in buckets goes!
Frequently Asked Questions (FAQ)
What size bucket is best for growing carrots?
The ideal bucket size depends on the carrot variety you plan to grow. For shorter, rounder varieties like ‘Parisian’ or ‘Thumbelina,’ a 5-gallon bucket will suffice. However, for longer, more traditional carrot varieties like ‘Nantes’ or ‘Danvers,’ you’ll need a larger bucket, ideally 10 gallons or more. The key is to ensure the bucket is deep enough to accommodate the full length of the carrot root without it hitting the bottom and becoming stunted or misshapen. A good rule of thumb is to choose a bucket that is at least 12 inches deep for shorter varieties and 18-24 inches deep for longer varieties. Also, ensure the bucket has drainage holes to prevent waterlogging.
What kind of soil should I use for growing carrots in buckets?
Carrots need loose, well-draining soil to thrive. Heavy clay soil will hinder their growth and result in short, stubby, or forked carrots. The best soil mix for growing carrots in buckets is a combination of potting mix, compost, and perlite or vermiculite. A good ratio is 1 part potting mix, 1 part compost, and 1 part perlite/vermiculite. The potting mix provides a good base, the compost adds nutrients and improves drainage, and the perlite/vermiculite helps to aerate the soil and prevent compaction. Avoid using garden soil directly in your buckets, as it tends to be too heavy and may contain pests or diseases. You can also purchase specialized “raised bed” or “container gardening” mixes, which are formulated to provide optimal drainage and nutrient retention.
How often should I water my carrots in buckets?
Carrots need consistent moisture to grow properly, but they don’t like to be waterlogged. Water your carrots deeply whenever the top inch of soil feels dry to the touch. The frequency of watering will depend on the weather conditions, the size of your bucket, and the type of soil you’re using. In hot, dry weather, you may need to water your carrots every day, while in cooler, wetter weather, you may only need to water them every few days. Avoid overwatering, as this can lead to root rot. A good way to check if your carrots need water is to stick your finger into the soil. If the soil feels dry an inch or two below the surface, it’s time to water.
How much sunlight do carrots need when grown in buckets?
Carrots need at least 6 hours of sunlight per day to grow well. Choose a location for your buckets that receives full sun, especially during the morning hours. If you live in a particularly hot climate, you may need to provide some afternoon shade to prevent the soil from drying out too quickly. If you don’t have a sunny spot, you can supplement with grow lights. Position the grow lights about 6-12 inches above the plants and keep them on for 12-14 hours per day. Rotate your buckets regularly to ensure that all sides of the plants receive equal sunlight.
When and how should I fertilize my carrots in buckets?
Carrots are relatively light feeders, but they still benefit from regular fertilization. Start fertilizing your carrots about 3-4 weeks after they germinate. Use a balanced, water-soluble fertilizer with an NPK ratio of 10-10-10 or 5-5-5. Follow the instructions on the fertilizer package for application rates. You can also use organic fertilizers like compost tea or fish emulsion. Apply fertilizer every 2-3 weeks throughout the growing season. Avoid over-fertilizing, as this can lead to excessive foliage growth at the expense of root development.
How do I prevent pests and diseases from affecting my carrots in buckets?
Growing carrots in buckets can help to reduce the risk of pests and diseases, but it’s still important to take precautions. One of the most common carrot pests is the carrot root fly, which lays its eggs near the base of the plants. The larvae then burrow into the roots, causing damage and making them unmarketable. To prevent carrot root flies, cover your buckets with a fine mesh netting or row cover. You can also plant companion plants like marigolds or onions, which deter pests. Regularly inspect your plants for signs of pests or diseases. If you notice any problems, treat them promptly with an appropriate insecticide or fungicide. Ensure good air circulation around your plants to prevent fungal diseases.
How long does it take for carrots to grow in buckets?
The time it takes for carrots to mature depends on the variety and the growing conditions. Generally, carrots take between 60 and 80 days to mature. Shorter, rounder varieties tend to mature faster than longer varieties. You can start harvesting your carrots when they reach the desired size. To harvest, gently loosen the soil around the carrot and pull it straight up. If the soil is dry, water it well before harvesting to make it easier to pull the carrots.
Can I grow carrots in buckets during the winter?
Yes, you can grow carrots in buckets during the winter, especially in milder climates. Carrots are a cool-season crop and can tolerate light frosts. If you live in an area with harsh winters, you can protect your carrots by moving the buckets indoors or covering them with a cold frame or greenhouse. Choose a fast-maturing variety and start your seeds indoors a few weeks before the first frost. Provide adequate light and water, and you can enjoy fresh carrots throughout the winter months.
What are some common problems when growing carrots in buckets and how can I fix them?
Some common problems include stunted growth, forked roots, and pest infestations. Stunted growth can be caused by poor soil, lack of sunlight, or insufficient watering. Forked roots are often caused by rocks or other obstructions in the soil. Pest infestations can be controlled with netting, companion planting, or insecticides. Ensure your soil is loose and well-draining, provide adequate sunlight and water, and protect your plants from pests to ensure a successful harvest.


Leave a Comment