

Growing carrots at home can be surprisingly rewarding, and trust me, there’s nothing quite like the taste of a freshly harvested, homegrown carrot! Forget those bland, store-bought versions – we’re talking vibrant color, incredible sweetness, and a satisfying crunch that only comes from nurturing your own little patch of orange goodness.
For centuries, carrots have been a staple in diets around the world. Originating in Afghanistan, these root vegetables weren’t always the vibrant orange we know today. They came in shades of purple, white, and yellow! It wasn’t until the 17th century that Dutch growers cultivated the orange variety we commonly see, and it quickly became a symbol of the Dutch House of Orange. Pretty cool, right?
But why bother with the effort of growing your own? Well, for starters, it’s a fantastic way to connect with nature and enjoy the therapeutic benefits of gardening. Plus, in today’s world, knowing where your food comes from is more important than ever. You control the pesticides, the soil quality, and ultimately, the flavor. And let’s be honest, who doesn’t love a good DIY project? This article is packed with simple, effective tricks and hacks that will help you succeed in growing carrots at home, even if you’re a complete beginner. We’ll cover everything from seed selection to pest control, ensuring you have a bountiful harvest. So, grab your gardening gloves, and let’s get started!
Growing Carrots: A Beginner’s Guide to Sweet Success!
Hey there, fellow garden enthusiasts! I’m so excited to share my experience with growing carrots at home. It’s surprisingly easy and incredibly rewarding to pull those vibrant orange roots straight from your own garden. Forget the bland, store-bought carrots – homegrown ones are bursting with flavor! This guide will walk you through every step, from choosing the right variety to harvesting your delicious bounty.
Choosing the Right Carrot Variety
Before we even think about planting, let’s talk carrots! Not all carrots are created equal. Different varieties thrive in different conditions, so picking the right one is crucial.
* Consider your soil: Short, stubby varieties like ‘Thumbelina’ or ‘Parisian’ are perfect for heavy or rocky soil. Longer varieties like ‘Nantes’ or ‘Imperator’ need loose, well-drained soil to develop properly.
* Think about your climate: Some carrots are better suited for warmer climates, while others tolerate cooler temperatures. ‘Nantes’ is a good all-around choice for many regions.
* Consider your taste preferences: Do you prefer sweet and tender carrots or something with a bit more bite? ‘Danvers’ are known for their classic carrot flavor, while ‘Rainbow’ carrots offer a mix of colors and subtle flavor variations.
* Days to maturity: This is the number of days it takes for the carrots to be ready for harvest. Choose varieties with shorter maturity times if you have a short growing season.
I personally love growing ‘Nantes’ carrots because they’re reliable, sweet, and relatively easy to grow. ‘Rainbow’ carrots are also a fun option for adding color to your garden and your plate!
Preparing the Soil: The Key to Carrot Success
Carrots need loose, well-drained soil to grow long and straight. This is probably the most important step, so don’t skip it!
* Choose a sunny spot: Carrots need at least 6 hours of sunlight per day.
* Remove rocks and debris: Even small rocks can cause carrots to fork or become misshapen. I spend a good amount of time sifting through my soil to remove any obstacles.
* Loosen the soil: Use a garden fork or tiller to loosen the soil to a depth of at least 12 inches. This will allow the carrot roots to penetrate easily.
* Amend the soil: Add compost or well-rotted manure to improve drainage and fertility. Carrots prefer slightly acidic soil with a pH between 6.0 and 6.8. You can test your soil pH with a simple soil testing kit.
* Create raised beds (optional): If you have heavy clay soil, consider growing carrots in raised beds. This will improve drainage and prevent the roots from rotting.
I usually add a generous amount of compost to my carrot bed and then till it in thoroughly. This gives the carrots a great head start.
Planting Carrot Seeds: Tiny Seeds, Big Rewards
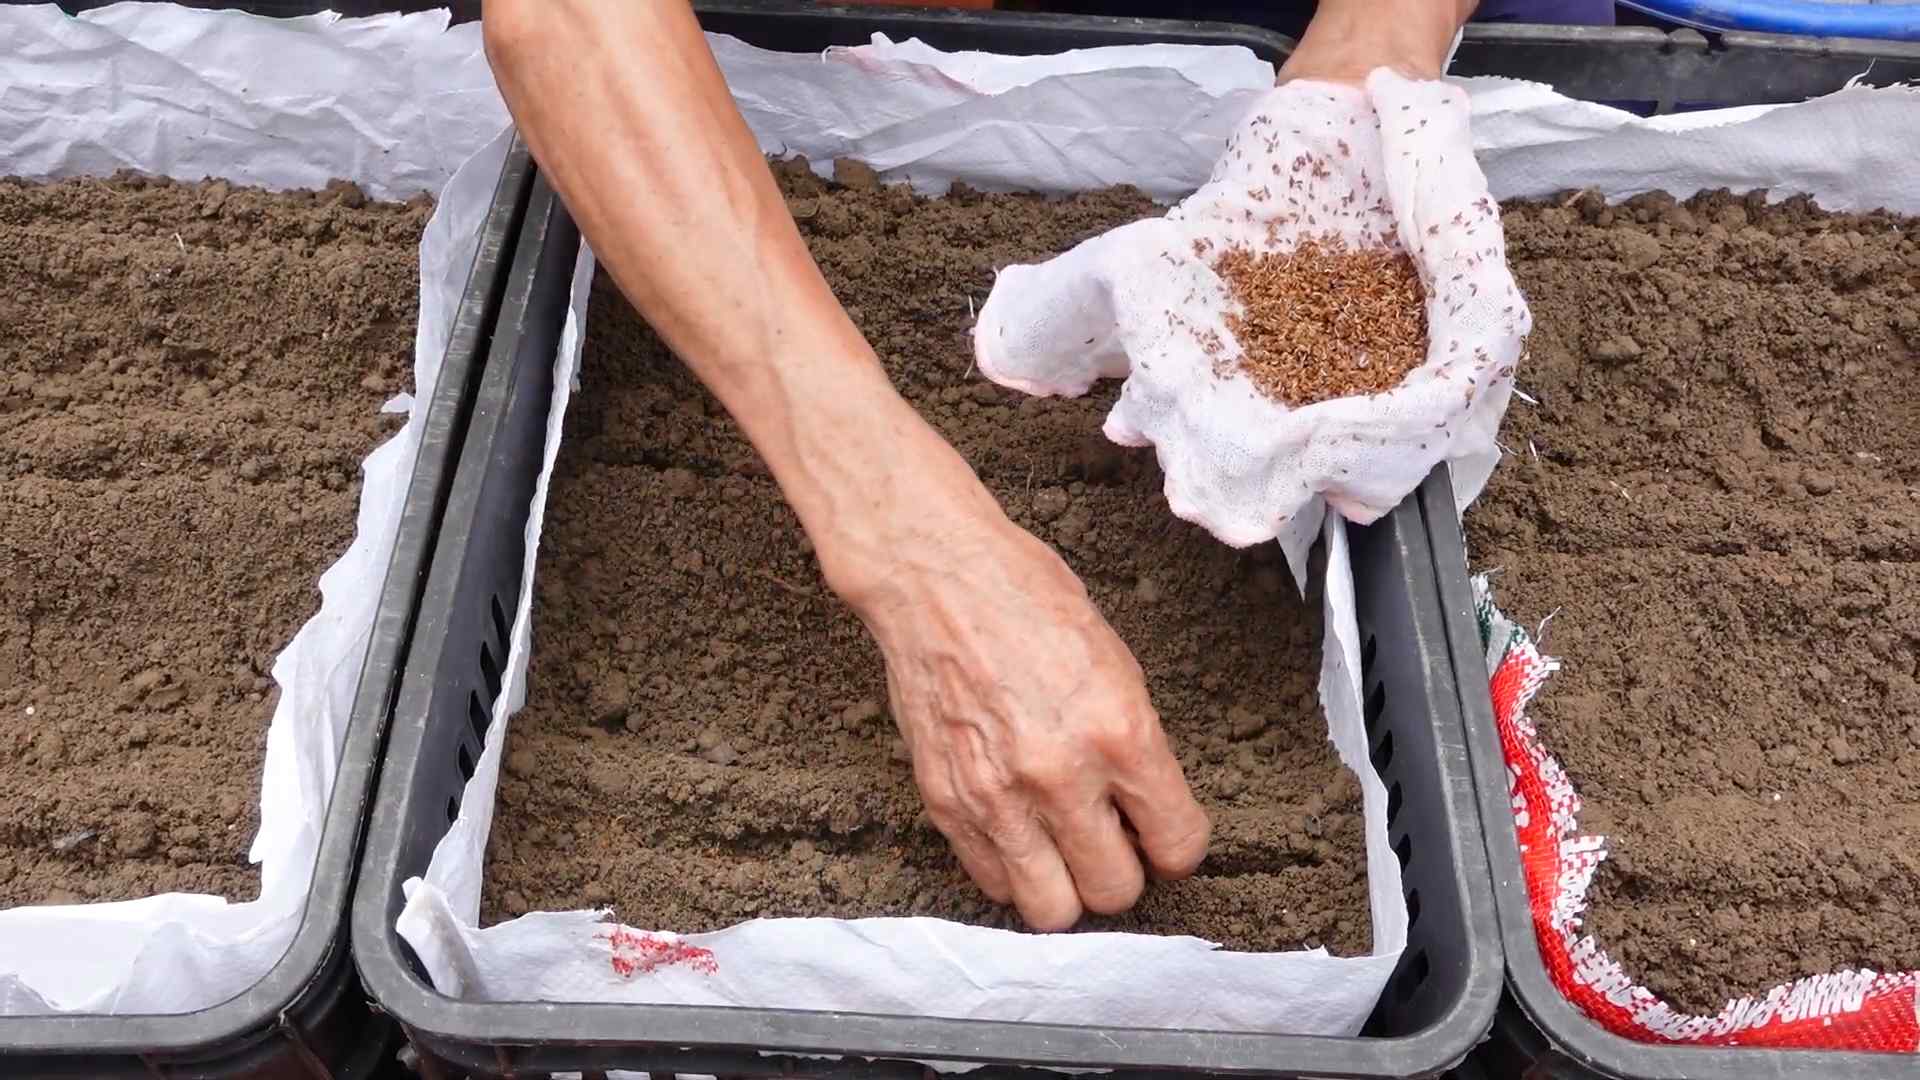
Carrot seeds are tiny, which can make them a bit tricky to plant. But don’t worry, I’ve got some tips to help you succeed!
* Timing is everything: Plant carrot seeds 2-3 weeks before the last expected frost in spring. You can also plant a fall crop 10-12 weeks before the first expected frost in fall.
* Sow seeds thinly: Carrot seeds are small, so it’s easy to sow them too thickly. Aim for about 1/4 inch spacing between seeds. I use a seed dispenser to help me control the seed density.
* Cover lightly: Cover the seeds with a thin layer of soil (about 1/4 inch).
* Water gently: Water the soil gently to avoid washing away the seeds. I use a watering can with a rose head to create a gentle shower.
* Keep the soil moist: Carrot seeds need consistent moisture to germinate. Water regularly, especially during dry spells.
I like to mix my carrot seeds with sand before planting. This helps me spread them more evenly and prevents clumping.
Caring for Your Carrots: Watering, Weeding, and Thinning
Once your carrot seeds have germinated, it’s important to provide them with the care they need to thrive.
* Watering: Water regularly, especially during dry spells. Carrots need about 1 inch of water per week.
* Weeding: Keep the carrot bed free of weeds. Weeds compete with carrots for nutrients and water. I hand-weed my carrot bed regularly to prevent weeds from getting out of control.
* Thinning: This is crucial! When the seedlings are about 2 inches tall, thin them to 1-2 inches apart. When they are 4 inches tall, thin them again to 3-4 inches apart. This will give the carrots enough space to develop properly. Don’t be afraid to thin them aggressively – it’s better to have fewer, larger carrots than a crowded bed of small ones. I know it feels wasteful to pull out those tiny seedlings, but trust me, it’s worth it in the long run.
* Fertilizing: Carrots don’t need a lot of fertilizer, but a side dressing of compost or a balanced organic fertilizer can help them grow. I usually fertilize my carrots once or twice during the growing season.
* Pest control: Carrots are susceptible to a few pests, such as carrot rust flies and aphids. Check your plants regularly for signs of infestation and take action if necessary. I use organic pest control methods, such as insecticidal soap or neem oil.
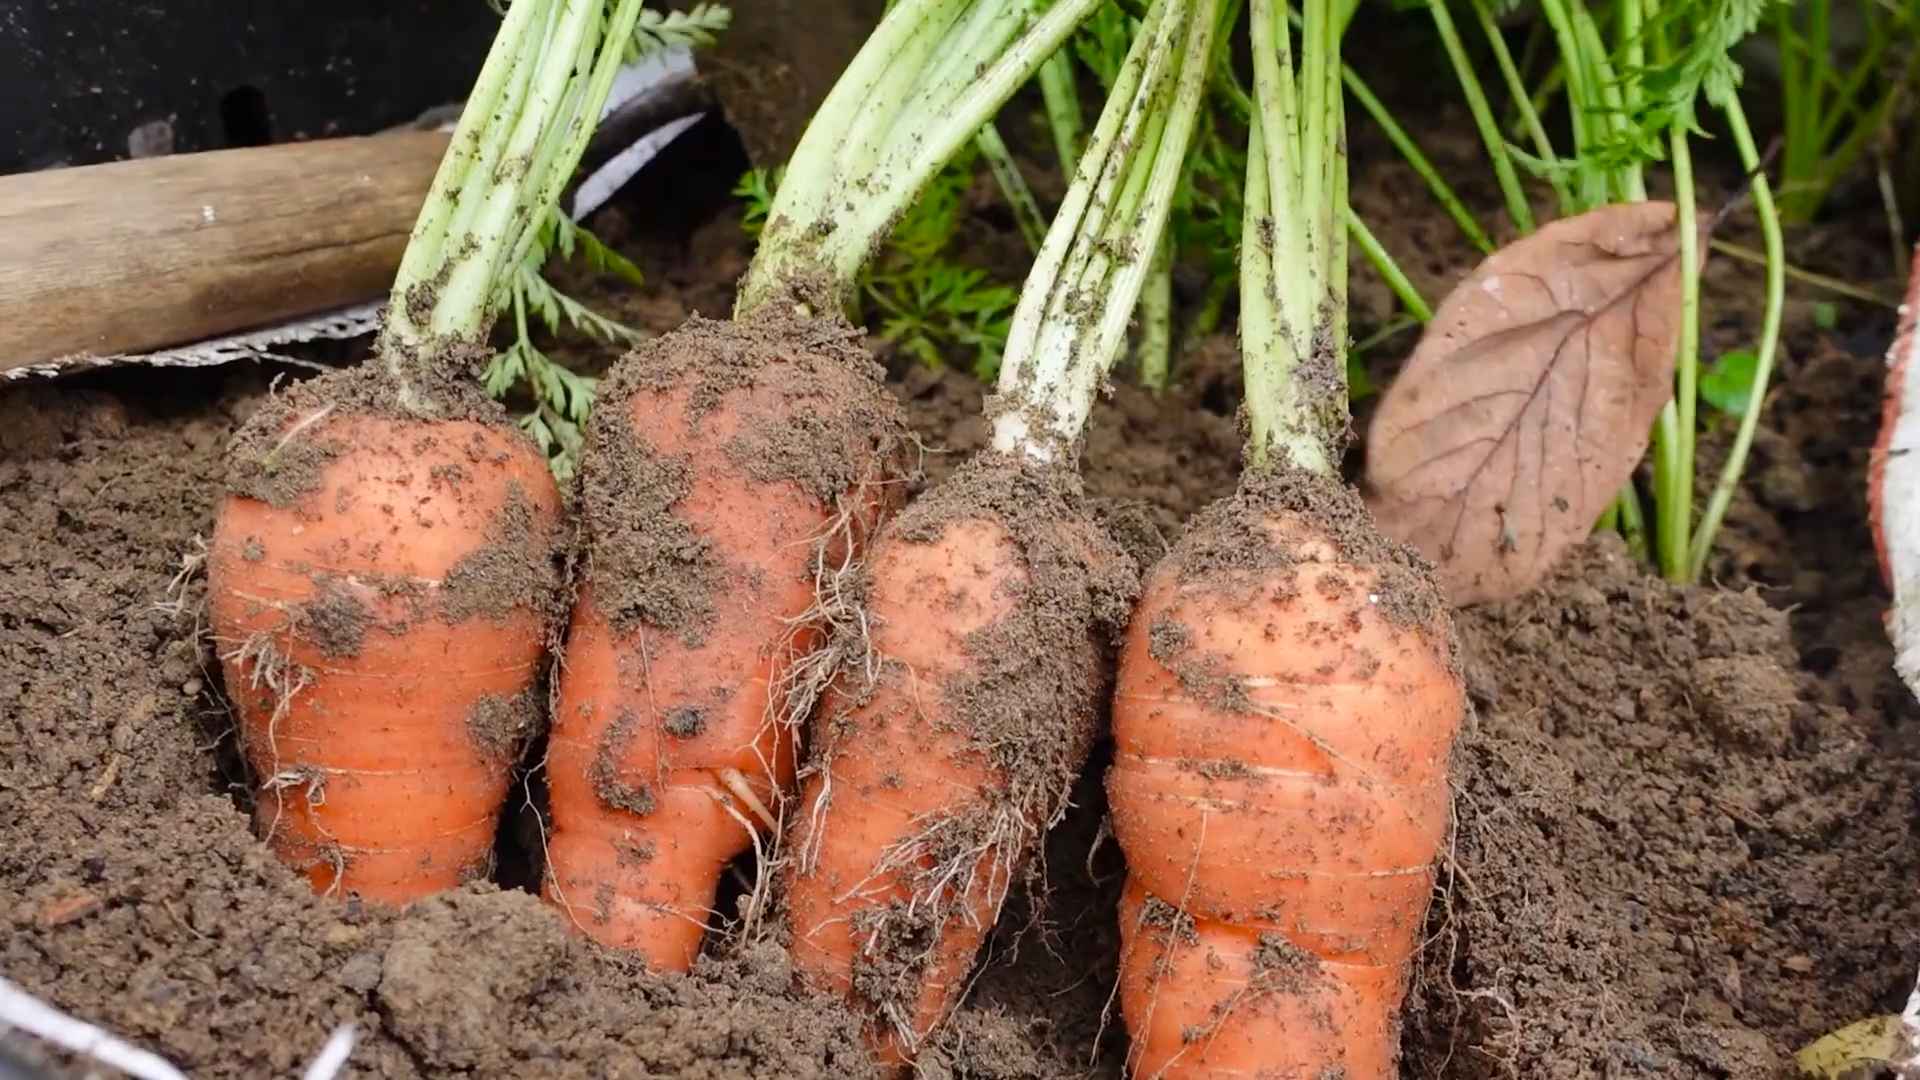
Harvesting Your Carrots: The Sweetest Reward
Harvesting your own carrots is one of the most satisfying experiences in gardening.
* Check the maturity date: Refer to the seed packet to determine the expected maturity date for your carrot variety.
* Look for the shoulders: When the carrot shoulders (the top part of the carrot that’s visible above the soil) reach the desired size, it’s time to harvest.
* Loosen the soil: Use a garden fork to loosen the soil around the carrots. This will make it easier to pull them out without breaking them.
* Pull gently: Grasp the carrot tops firmly and pull gently. If the carrots are difficult to pull, loosen the soil further with the garden fork.
* Wash and enjoy: Wash the carrots thoroughly and enjoy them fresh from the garden!
I love to harvest my carrots on a sunny day and eat them right away. They’re so much sweeter and more flavorful than store-bought carrots.
Troubleshooting Common Carrot Problems
Even with the best care, you might encounter some problems when growing carrots. Here are a few common issues and how to address them:
* Forked or misshapen carrots: This is usually caused by rocks or compacted soil. Make sure to remove rocks and loosen the soil thoroughly before planting.
* Small carrots: This can be caused by overcrowding, poor soil fertility, or lack of water. Thin your carrots properly, amend the soil with compost, and water regularly.
* Carrot rust flies: These pests lay their eggs near the base of the carrot plants, and the larvae tunnel into the roots. Use row covers to prevent the flies from laying eggs, or apply nematodes to the soil to kill the larvae.
* Green shoulders: This happens when the carrot shoulders are exposed to sunlight. Hilling the soil around the carrots can prevent this.
Storing Your Harvest: Keeping Carrots Fresh
If you have a bumper crop of carrots, you’ll want to store them properly to keep them fresh.
* Remove the tops: Cut off the carrot tops, leaving about 1/2 inch of stem.
* Wash and dry: Wash the carrots thoroughly and allow them to dry completely.
* Store in a cool, dark place: The ideal storage temperature for carrots is 32-40°F (0-4°C). You can store them in the refrigerator in a plastic bag or container, or in a root cellar if you have one.
* Layer in sand or sawdust: For longer-term storage, layer the carrots in a container of damp sand or sawdust. This will help keep them from drying out.
I usually store my carrots in the refrigerator in a plastic bag. They’ll stay fresh for several weeks this way.
Growing carrots at home is a rewarding experience that anyone can enjoy. With a little bit of planning and effort, you can harvest your own delicious, homegrown carrots. Happy gardening!
Conclusion
So, there you have it! Growing carrots at home, far from being an intimidating task, is a surprisingly rewarding experience that brings the vibrant flavors of your garden directly to your table. We’ve walked through the essential steps, from selecting the right carrot varieties and preparing the soil to nurturing your seedlings and harvesting your crunchy treasures. But why should you take the plunge and embark on this homegrown adventure?
First and foremost, the taste difference is undeniable. Store-bought carrots, while convenient, often lack the intense sweetness and earthy notes that characterize freshly harvested, homegrown carrots. Imagine biting into a carrot still warm from the sun, its crisp texture and vibrant color a testament to your hard work. This alone is reason enough to give it a try.
Beyond the superior flavor, growing your own carrots offers a level of control and transparency that you simply can’t achieve with commercially grown produce. You know exactly what goes into your garden – no harmful pesticides, no questionable fertilizers, just pure, natural goodness. This is particularly important for families with young children or individuals with dietary sensitivities.
Furthermore, gardening is a fantastic stress reliever. The simple act of tending to your plants, feeling the soil between your fingers, and watching your carrots grow is incredibly therapeutic. It’s a chance to disconnect from the digital world and reconnect with nature, fostering a sense of calm and well-being.
But the benefits don’t stop there. Growing carrots at home is also an incredibly educational experience. It’s a chance to learn about the life cycle of plants, the importance of soil health, and the interconnectedness of the natural world. This knowledge can be passed down to future generations, fostering a lifelong appreciation for gardening and sustainable living.
Now, let’s talk about variations. While we’ve focused on traditional orange carrots, don’t be afraid to experiment with different varieties. Consider planting rainbow carrots for a visually stunning harvest, or try growing shorter, round varieties like Parisian carrots if you have limited space. You can also intercrop carrots with other vegetables like onions or radishes to maximize your garden’s productivity.
Another variation to consider is container gardening. If you don’t have a traditional garden plot, you can still grow carrots in pots or raised beds. Just make sure to choose a container that is at least 12 inches deep and filled with well-draining soil.
Finally, don’t be discouraged if your first attempt isn’t perfect. Gardening is a learning process, and there will be challenges along the way. But with a little patience and persistence, you’ll be harvesting delicious, homegrown carrots in no time.
We wholeheartedly encourage you to try growing carrots at home. It’s a rewarding experience that will enhance your meals, improve your well-being, and connect you with nature. And once you’ve harvested your first batch of homegrown goodness, we’d love to hear about your experience! Share your photos, tips, and stories with us in the comments below. Let’s build a community of carrot-growing enthusiasts and inspire others to embrace the joys of gardening. Happy growing!
Frequently Asked Questions (FAQ)
What is the best time of year to plant carrots?
The best time to plant carrots depends on your climate. In general, carrots are a cool-season crop, meaning they thrive in temperatures between 60°F and 70°F (15°C and 21°C). For most regions, this means planting in early spring or late summer for a fall harvest. In warmer climates, you can plant carrots throughout the winter. Check your local frost dates to determine the best planting time for your area. You want to aim for planting 2-3 weeks before the last expected frost in spring, or 10-12 weeks before the first expected frost in fall.
How much sunlight do carrots need?
Carrots need at least six hours of sunlight per day to thrive. Choose a planting location that receives full sun for the majority of the day. If you live in a particularly hot climate, some afternoon shade can be beneficial to prevent the soil from drying out too quickly.
What kind of soil is best for growing carrots?
Carrots need loose, well-draining soil that is free of rocks and clumps. Rocky or compacted soil can cause the carrots to become stunted or misshapen. Amend your soil with compost or other organic matter to improve drainage and fertility. A slightly acidic soil pH of 6.0 to 6.8 is ideal for growing carrots.
How often should I water my carrots?
Carrots need consistent moisture to grow properly. Water deeply and regularly, especially during dry periods. Aim to keep the soil consistently moist but not waterlogged. A good rule of thumb is to water when the top inch of soil feels dry to the touch. Mulching around your carrot plants can help to retain moisture and suppress weeds.
How do I thin my carrot seedlings?
Thinning is essential for giving your carrots enough space to grow. Once your seedlings are a few inches tall, thin them to about 1-2 inches apart. You can use small scissors to snip off the unwanted seedlings at the soil line. Be careful not to disturb the roots of the remaining seedlings.
What are some common pests and diseases that affect carrots?
Some common pests that affect carrots include carrot rust flies, aphids, and nematodes. Diseases that can affect carrots include leaf blight and root rot. Practice good garden hygiene to prevent pests and diseases. This includes removing weeds, rotating crops, and avoiding overwatering. You can also use organic pest control methods, such as insecticidal soap or neem oil, to control pests.
How do I know when my carrots are ready to harvest?
Carrots are typically ready to harvest 60-80 days after planting, depending on the variety. Check the seed packet for specific maturity dates. You can also gauge ripeness by looking at the size of the carrot tops. When the carrot tops are about 1/2 to 1 inch in diameter, the carrots are usually ready to harvest. Gently loosen the soil around the carrots and pull them up by the tops.
Can I grow carrots in containers?
Yes, you can grow carrots in containers, but you’ll need to choose a container that is at least 12 inches deep. Fill the container with well-draining potting mix and plant your carrot seeds according to the instructions on the seed packet. Water regularly and fertilize every few weeks with a balanced fertilizer.
What are some companion plants for carrots?
Companion planting can help to improve the growth and health of your carrots. Some good companion plants for carrots include onions, garlic, radishes, rosemary, and sage. These plants can help to deter pests and improve soil health.
How do I store my harvested carrots?
To store your harvested carrots, remove the tops and gently brush off any excess soil. Store the carrots in a cool, dark, and humid place, such as a refrigerator or root cellar. You can also store carrots in a container filled with moist sand or sawdust. Carrots can typically be stored for several months under the right conditions.

Leave a Comment