

Growing Bellflowers for Beginners can seem daunting, but trust me, it’s easier than you think! Have you ever walked through a cottage garden and been completely captivated by those charming, bell-shaped blooms swaying gently in the breeze? That’s the magic of bellflowers, and you can bring that magic to your own backyard with a little know-how.
Bellflowers, also known as Campanula, have a rich history, gracing gardens for centuries. Their name, derived from the Latin “campana” meaning bell, perfectly describes their delightful shape. In folklore, they’re often associated with fairies and good luck, adding a touch of whimsy to their appeal. But beyond their beauty and history, why should you consider growing bellflowers for beginners? Well, they’re incredibly versatile, thriving in various climates and adding a splash of color to borders, rock gardens, and even containers. Plus, they attract pollinators like bees and butterflies, making your garden a haven for beneficial insects.
Let’s face it, gardening can sometimes feel overwhelming. There are so many plants to choose from, and so many things that can go wrong! But with the right guidance, even a novice gardener can achieve stunning results. That’s why I’ve put together this guide – to demystify the process of growing bellflowers and empower you to create a beautiful, thriving garden that you can be proud of. I’m going to share my favorite tips and tricks, from choosing the right variety to providing the perfect growing conditions, so you can enjoy a season full of vibrant bellflowers.
Growing Bellflowers: A Beginner’s Guide to Campanula Bliss
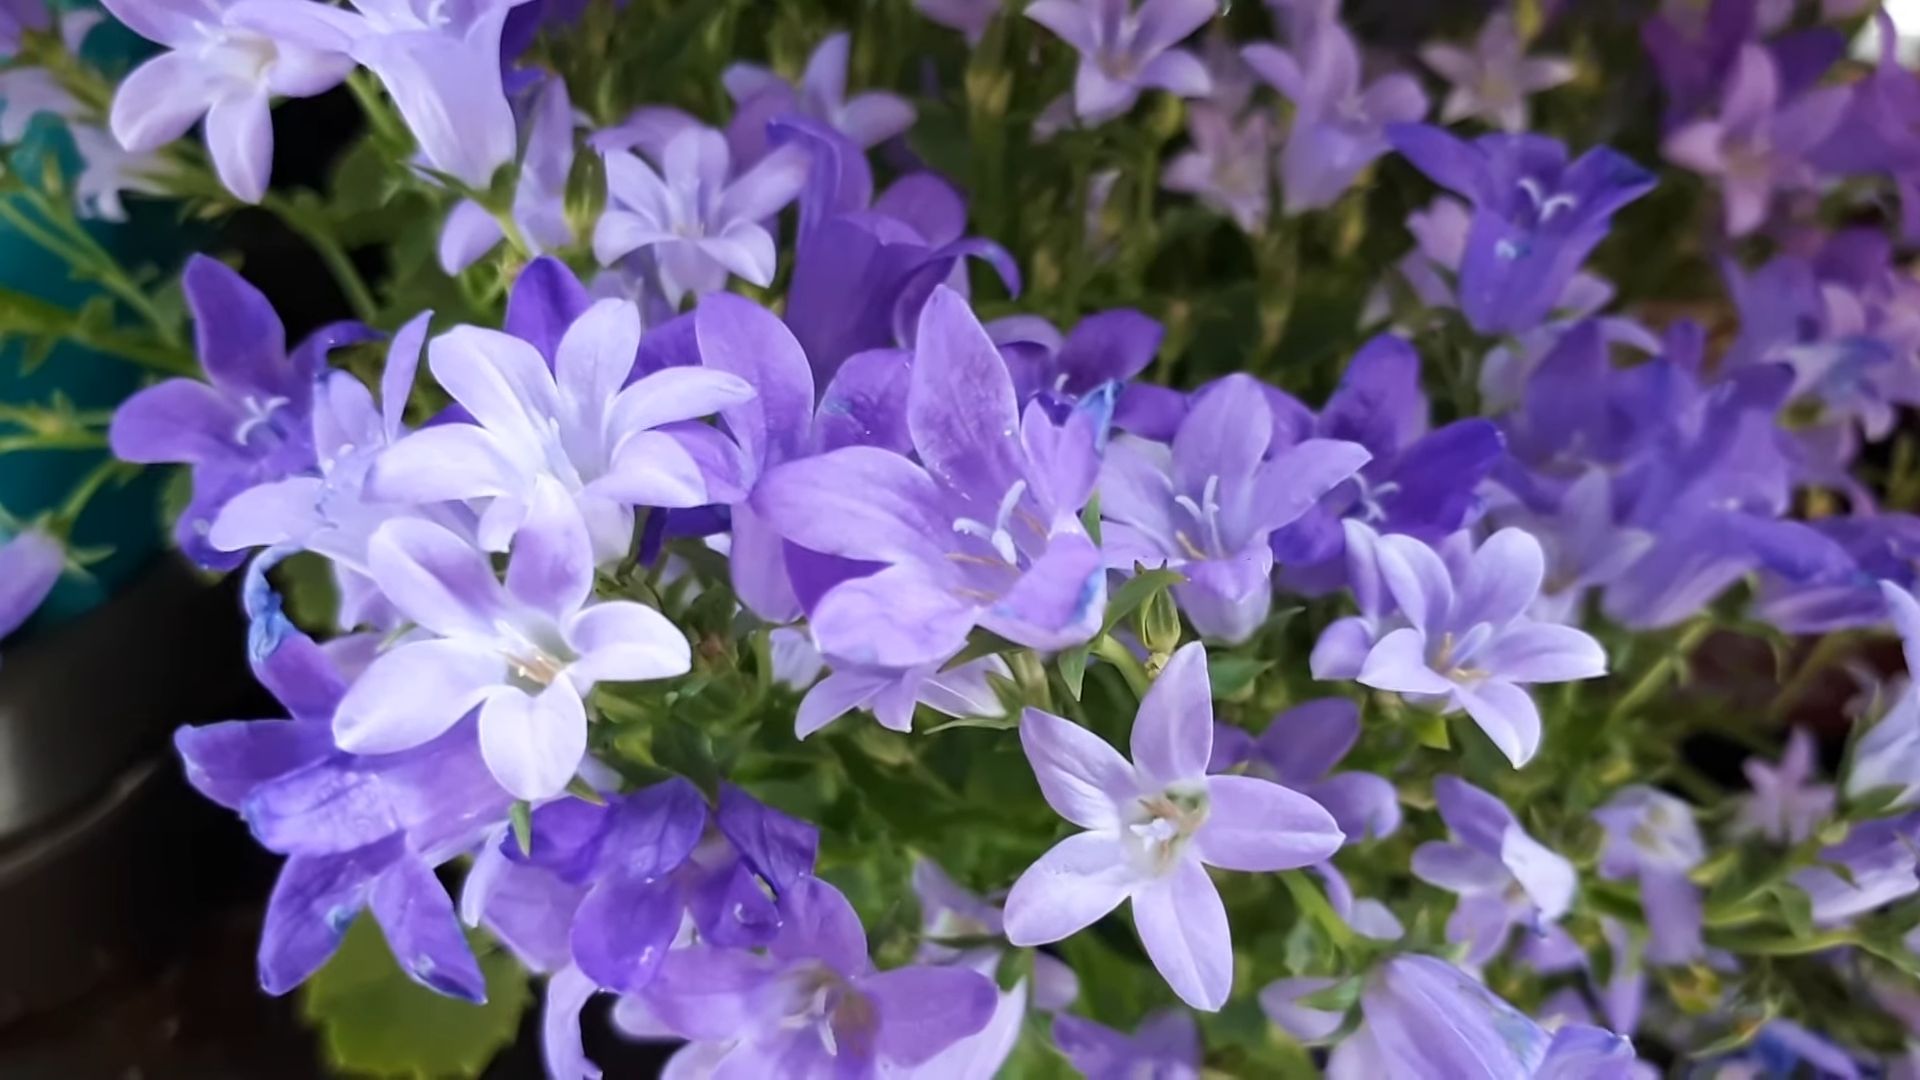
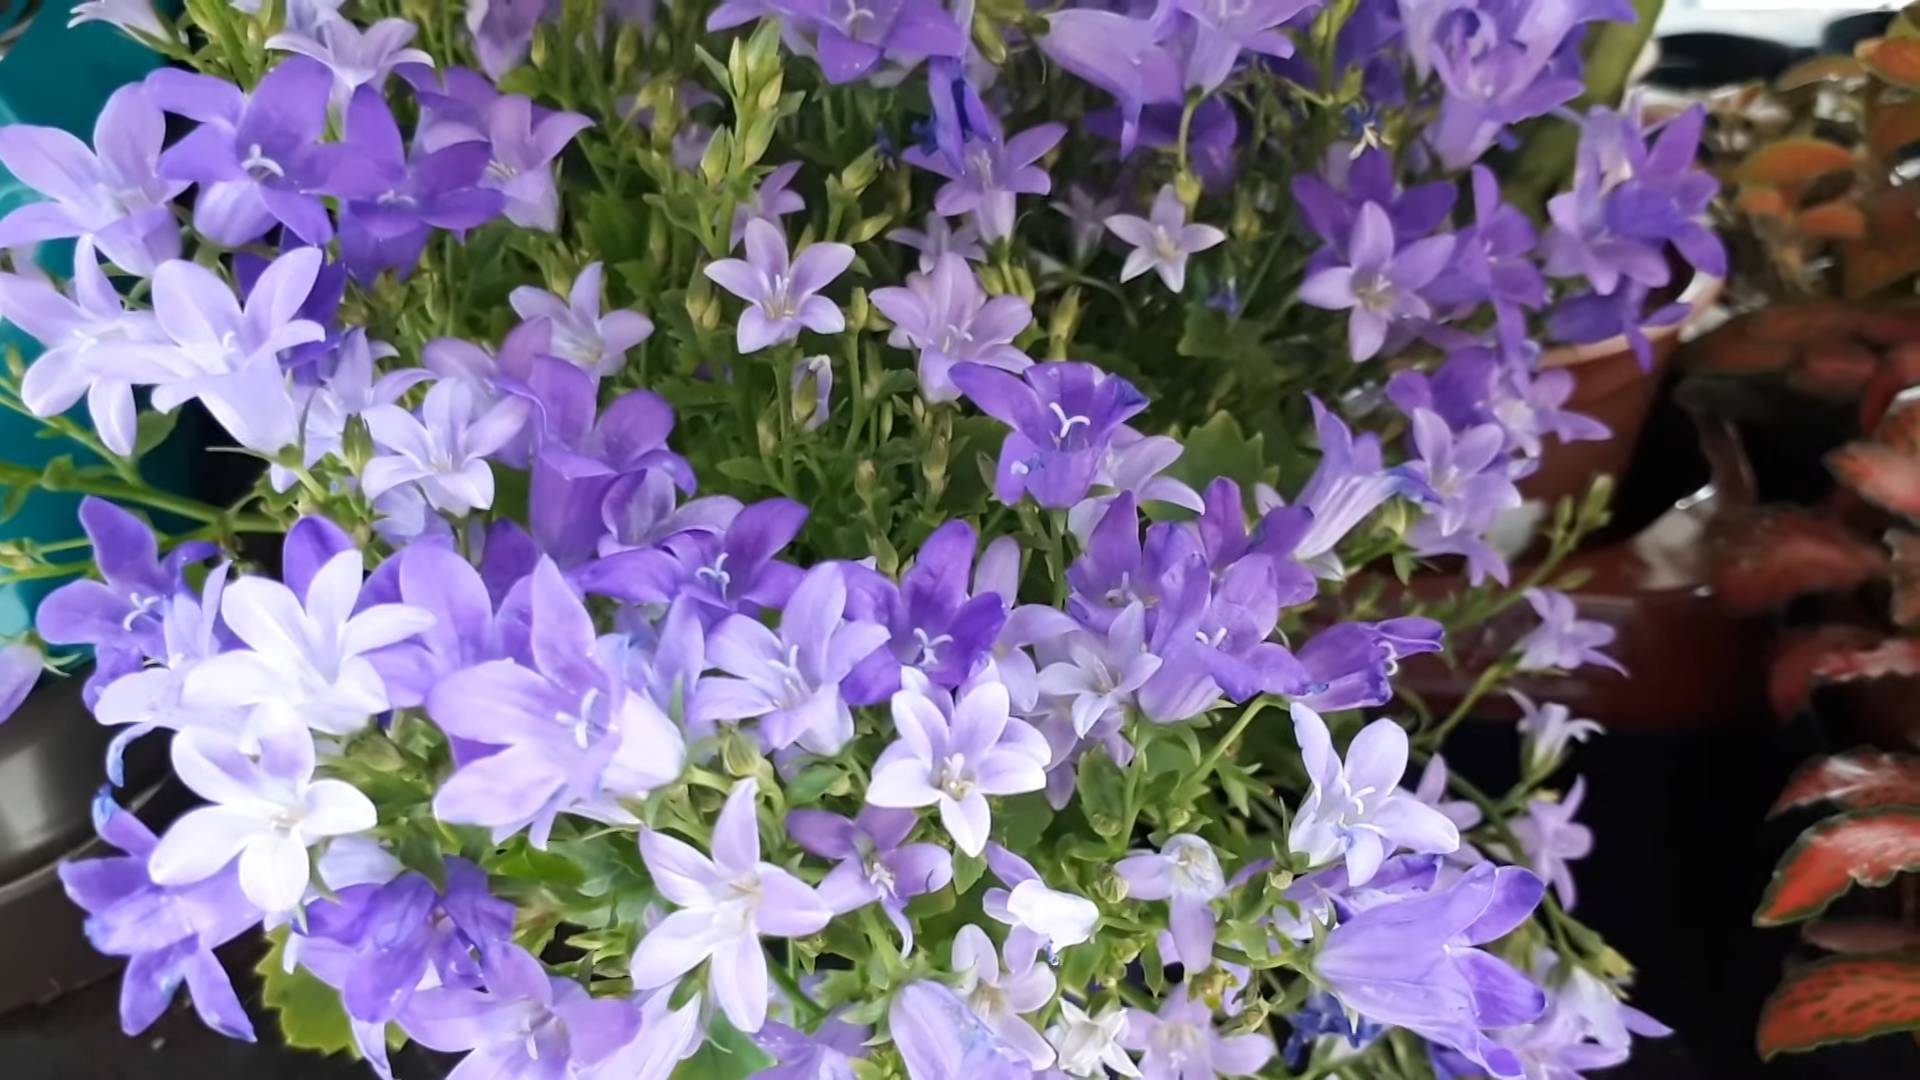
Bellflowers, with their charming, bell-shaped blooms, are a delightful addition to any garden. They come in a variety of sizes and colors, from the towering Campanula pyramidalis to the dainty Campanula rotundifolia, offering something for every gardener. I’ve grown bellflowers for years, and I’m excited to share my tips and tricks for successfully cultivating these beauties. Don’t worry if you’re a beginner; this guide will walk you through everything you need to know!
Choosing the Right Bellflower for Your Garden
Before we dive into the nitty-gritty, let’s talk about selecting the right bellflower for your garden. Not all bellflowers are created equal! Consider your climate, soil type, and the amount of space you have available.
* Climate: Most bellflowers are hardy in zones 3-8, but it’s always best to check the specific variety you’re interested in. Some, like the Serbian Bellflower (Campanula poscharskyana), are particularly tolerant of heat and humidity.
* Sunlight: Bellflowers generally prefer full sun to partial shade. In hotter climates, afternoon shade is essential to prevent scorching.
* Soil: Well-drained soil is crucial. Bellflowers don’t like to sit in soggy conditions, which can lead to root rot. Amend heavy clay soil with compost or other organic matter to improve drainage.
* Size: Bellflowers range in size from a few inches to several feet tall. Consider the mature size of the plant when choosing a location in your garden. Taller varieties may need staking to prevent them from flopping over.
* Growth Habit: Some bellflowers are clump-forming, while others spread aggressively. If you’re concerned about invasiveness, choose a clump-forming variety or plant your bellflowers in containers.
Some popular bellflower varieties include:
* Canterbury Bells (Campanula medium): These are biennials, meaning they grow foliage the first year and bloom the second. They come in a range of colors, including blue, pink, and white.
* Peach-leaved Bellflower (Campanula persicifolia): This perennial bellflower features delicate, peach-like leaves and blue or white flowers.
* Serbian Bellflower (Campanula poscharskyana): This low-growing, spreading bellflower is perfect for rock gardens or ground cover.
* Clustered Bellflower (Campanula glomerata): This bellflower produces clusters of deep purple flowers.
* Fairy Thimbles (Campanula cochleariifolia): A tiny, charming bellflower ideal for rock gardens or alpine troughs.
Getting Started: Planting Your Bellflowers
Now that you’ve chosen your bellflowers, it’s time to get them in the ground! Here’s a step-by-step guide to planting bellflowers:
1. Choose the Right Time: The best time to plant bellflowers is in the spring or fall. This gives them time to establish their roots before the heat of summer or the cold of winter.
2. Prepare the Soil: As I mentioned earlier, well-drained soil is essential. Dig a hole that’s twice as wide as the root ball and just as deep. Amend the soil with compost or other organic matter to improve drainage and fertility.
3. Remove the Plant from its Container: Gently remove the bellflower from its container. If the roots are pot-bound (tightly circling the root ball), gently loosen them with your fingers.
4. Plant the Bellflower: Place the bellflower in the hole, making sure the top of the root ball is level with the surrounding soil.
5. Backfill the Hole: Fill the hole with the amended soil, gently firming it around the plant.
6. Water Thoroughly: Water the bellflower thoroughly after planting. This will help settle the soil and encourage root growth.
7. Mulch: Apply a layer of mulch around the base of the plant to help retain moisture, suppress weeds, and regulate soil temperature. I like to use shredded bark or compost.
Caring for Your Bellflowers: A Few Simple Steps
Once your bellflowers are planted, they’re relatively easy to care for. Here’s what you need to know:
1. Watering: Bellflowers need regular watering, especially during dry periods. Water deeply when the top inch of soil feels dry to the touch. Avoid overwatering, as this can lead to root rot.
2. Fertilizing: Bellflowers don’t need a lot of fertilizer. A light feeding in the spring with a balanced fertilizer is usually sufficient. Avoid over-fertilizing, as this can lead to leggy growth and fewer flowers.
3. Deadheading: Deadheading (removing spent flowers) will encourage more blooms. Simply snip off the faded flowers just below the flower head.
4. Staking: Taller varieties of bellflowers may need staking to prevent them from flopping over. Use bamboo stakes or other supports to keep the plants upright.
5. Pest and Disease Control: Bellflowers are generally pest and disease resistant. However, they can be susceptible to slugs and snails. Use slug bait or handpick them off the plants. Powdery mildew can also be an issue, especially in humid conditions. Improve air circulation by spacing the plants properly and avoid overhead watering. If powdery mildew does occur, treat it with a fungicide.
6. Division: Clump-forming bellflowers can be divided every few years to prevent them from becoming overcrowded. Divide the plants in the spring or fall, separating the clumps into smaller sections and replanting them.
Propagating Bellflowers: Expanding Your Collection
If you want to expand your bellflower collection, you can propagate them from seed or by division.
Propagating from Seed
1. Collect Seeds: Allow the flower heads to dry on the plant. Once they are dry, collect the seeds.
2. Sow Seeds: Sow the seeds indoors in late winter or early spring. Use a seed-starting mix and keep the soil moist.
3. Transplant Seedlings: Once the seedlings are large enough to handle, transplant them into individual pots.
4. Harden Off: Before planting the seedlings outdoors, harden them off by gradually exposing them to outdoor conditions.
5. Plant Outdoors: Plant the seedlings outdoors in the spring or fall.
Propagating by Division
1. Dig Up the Plant: In the spring or fall, carefully dig up the bellflower plant.
2. Divide the Clump: Use a sharp knife or spade to divide the clump into smaller sections. Make sure each section has roots and foliage.
3. Replant the Divisions: Replant the divisions in well-drained soil.
4. Water Thoroughly: Water the divisions thoroughly after planting.
Troubleshooting Common Bellflower Problems
Even with the best care, you may encounter some problems with your bellflowers. Here are some common issues and how to address them:
* Yellowing Leaves: Yellowing leaves can be a sign of overwatering, underwatering, or nutrient deficiency. Check the soil moisture and adjust your watering accordingly. If the soil is dry, water deeply. If the soil is soggy, allow it to dry out before watering again. If the leaves are yellowing due to nutrient deficiency, fertilize the plant with a balanced fertilizer.
* Lack of Blooms: A lack of blooms can be caused by insufficient sunlight, over-fertilizing, or improper pruning. Make sure your bellflowers are getting at least six hours of sunlight per day. Avoid over-fertilizing, as this can lead to leggy growth and fewer flowers. Deadhead spent flowers to encourage more blooms.
* Leggy Growth: Leggy growth (tall, spindly stems with few leaves) is often caused by insufficient sunlight or over-fertilizing. Move the plant to a sunnier location or reduce the amount of fertilizer you’re using.
* Root Rot: Root rot is caused by overwatering and poorly drained soil. Improve drainage by amending the soil with compost or other organic matter. Avoid overwatering.
* Slugs and Snails: Slugs and snails can damage bellflower leaves and flowers. Use slug bait or handpick them off the plants.
* Powdery Mildew: Powdery mildew is a fungal disease that can affect bellflowers, especially in humid conditions. Improve air circulation by spacing the plants properly and avoid overhead watering. If powdery mildew does occur, treat it with a fungicide.
Enjoying Your Bellflowers
Bellflowers are a beautiful and rewarding addition to any garden. With a little care and attention, you can enjoy their charming blooms for many years to come. I love using them in cut flower arrangements, and they also attract pollinators like bees and butterflies to the garden. So, get out there and start growing your own bellflowers! You won’t regret it.
Conclusion
So, there you have it! Growing bellflowers, even for beginners, doesn’t have to be a daunting task. With a little planning, the right conditions, and a touch of patience, you can transform your garden into a vibrant haven of these charming, bell-shaped blooms. The beauty of bellflowers lies not only in their visual appeal but also in their versatility. They attract pollinators, adding life and buzz to your garden, and they make stunning cut flowers, bringing a touch of the outdoors inside.
This guide has armed you with the essential knowledge to successfully cultivate these beauties. Remember the importance of well-draining soil, adequate sunlight, and consistent watering. Don’t be afraid to experiment with different varieties to find the perfect bellflower to complement your garden’s aesthetic.
Consider these variations to further enhance your bellflower growing experience:
* **Container Gardening:** If you have limited space or prefer to keep your plants mobile, bellflowers thrive in containers. Choose a pot with good drainage and use a high-quality potting mix. Dwarf varieties are particularly well-suited for container gardening.
* **Companion Planting:** Bellflowers benefit from companion planting. Consider pairing them with plants like roses, lavender, or daisies. These companions can help deter pests and attract beneficial insects.
* **Extending the Bloom Season:** Deadheading spent flowers encourages continuous blooming throughout the season. Regularly remove faded blooms to keep your bellflowers looking their best and to promote new growth.
* **Color Palette Exploration:** Bellflowers come in a range of colors, from the classic blue and purple to white, pink, and even peach. Experiment with different color combinations to create a visually stunning display in your garden.
* **Vertical Gardening:** For a dramatic effect, consider training bellflowers to climb a trellis or fence. This is particularly effective with taller varieties.
The key to successful bellflower cultivation is observation. Pay attention to your plants’ needs and adjust your care accordingly. Are the leaves turning yellow? Are the blooms sparse? These are signs that your bellflowers may need more or less water, sunlight, or fertilizer.
We strongly encourage you to embark on this rewarding gardening adventure. Growing bellflowers is not only a visually pleasing endeavor but also a therapeutic one. There’s something incredibly satisfying about nurturing a plant from seed to bloom.
Don’t hesitate to share your experiences with us! We’d love to hear about your successes, challenges, and any unique tips or tricks you discover along the way. Post photos of your blooming bellflowers on social media and tag us. Let’s create a community of bellflower enthusiasts and inspire others to embrace the joy of gardening. Remember, even if you’re a complete beginner, you can successfully grow these beautiful flowers with a little guidance and a lot of enthusiasm. So, grab your gardening gloves, get your hands dirty, and prepare to be amazed by the beauty of your own homegrown bellflowers! Happy gardening!
Frequently Asked Questions (FAQ)
What is the best time of year to plant bellflowers?
The ideal time to plant bellflowers depends on whether you’re starting from seeds or transplants. For seeds, start them indoors 6-8 weeks before the last expected frost. This gives them a head start and allows them to develop strong roots before being transplanted outdoors. If you’re purchasing transplants from a nursery, plant them in the spring after the last frost has passed. This ensures that the young plants won’t be damaged by cold temperatures. In warmer climates, you can also plant bellflowers in the fall, allowing them to establish themselves over the winter and bloom in the spring.
How much sunlight do bellflowers need?
Bellflowers generally prefer full sun to partial shade. They need at least six hours of sunlight per day to thrive and produce abundant blooms. However, in hotter climates, they may benefit from some afternoon shade to protect them from the intense heat. Observe your plants closely and adjust their location if necessary. If the leaves are scorched or the blooms are fading quickly, they may be getting too much sun. If the plants are leggy and producing few blooms, they may need more sunlight.
What type of soil is best for bellflowers?
Well-draining soil is crucial for bellflowers. They don’t like to sit in soggy soil, as this can lead to root rot. Amend heavy clay soil with compost or other organic matter to improve drainage. A slightly acidic to neutral soil pH is ideal. You can test your soil pH with a home testing kit or by sending a sample to your local agricultural extension office. If your soil is too alkaline, you can amend it with sulfur or peat moss to lower the pH.
How often should I water bellflowers?
Water bellflowers regularly, especially during dry periods. Aim to keep the soil consistently moist but not waterlogged. Water deeply and less frequently, rather than shallowly and more often. This encourages deep root growth, which makes the plants more drought-tolerant. Check the soil moisture before watering. If the top inch of soil is dry, it’s time to water. Avoid overhead watering, as this can promote fungal diseases. Instead, water at the base of the plants.
Do bellflowers need fertilizer?
Bellflowers benefit from regular fertilization, especially during the growing season. Use a balanced fertilizer, such as a 10-10-10 formula, according to the package directions. Avoid over-fertilizing, as this can lead to excessive foliage growth at the expense of blooms. You can also amend the soil with compost or other organic matter to provide a slow-release source of nutrients.
How do I deadhead bellflowers?
Deadheading is the process of removing spent flowers to encourage continuous blooming. To deadhead bellflowers, simply snip off the faded blooms just below the flower head. This prevents the plant from putting energy into producing seeds and encourages it to produce more flowers. Deadhead regularly throughout the blooming season to keep your bellflowers looking their best.
Are bellflowers susceptible to any pests or diseases?
Bellflowers are generally relatively pest- and disease-resistant. However, they can be susceptible to certain problems, such as slugs, snails, and powdery mildew. Slugs and snails can be controlled with traps or baits. Powdery mildew is a fungal disease that can be prevented by providing good air circulation and avoiding overhead watering. If powdery mildew does occur, treat it with a fungicide.
Are bellflowers deer-resistant?
Bellflowers are considered to be moderately deer-resistant. However, deer may still browse on them if other food sources are scarce. To protect your bellflowers from deer, consider fencing them in or using a deer repellent.
Can I propagate bellflowers?
Yes, bellflowers can be propagated by seed, division, or cuttings. Seed propagation is the easiest method, but it can take longer to produce flowering plants. Division involves separating the root ball of an established plant into multiple plants. Cuttings are taken from the stems of healthy plants and rooted in water or soil.
What are some good companion plants for bellflowers?
Bellflowers benefit from companion planting. Some good companion plants for bellflowers include roses, lavender, daisies, and other flowering perennials. These companions can help deter pests, attract beneficial insects, and create a visually appealing garden display.
Are all bellflowers perennial?
Not all bellflowers are perennial. Some varieties are annual or biennial. Perennial bellflowers will come back year after year, while annual bellflowers will only last for one growing season. Biennial bellflowers will grow foliage in their first year and bloom in their second year before dying. Be sure to check the plant label to determine whether a particular bellflower variety is perennial, annual, or biennial.

Leave a Comment