

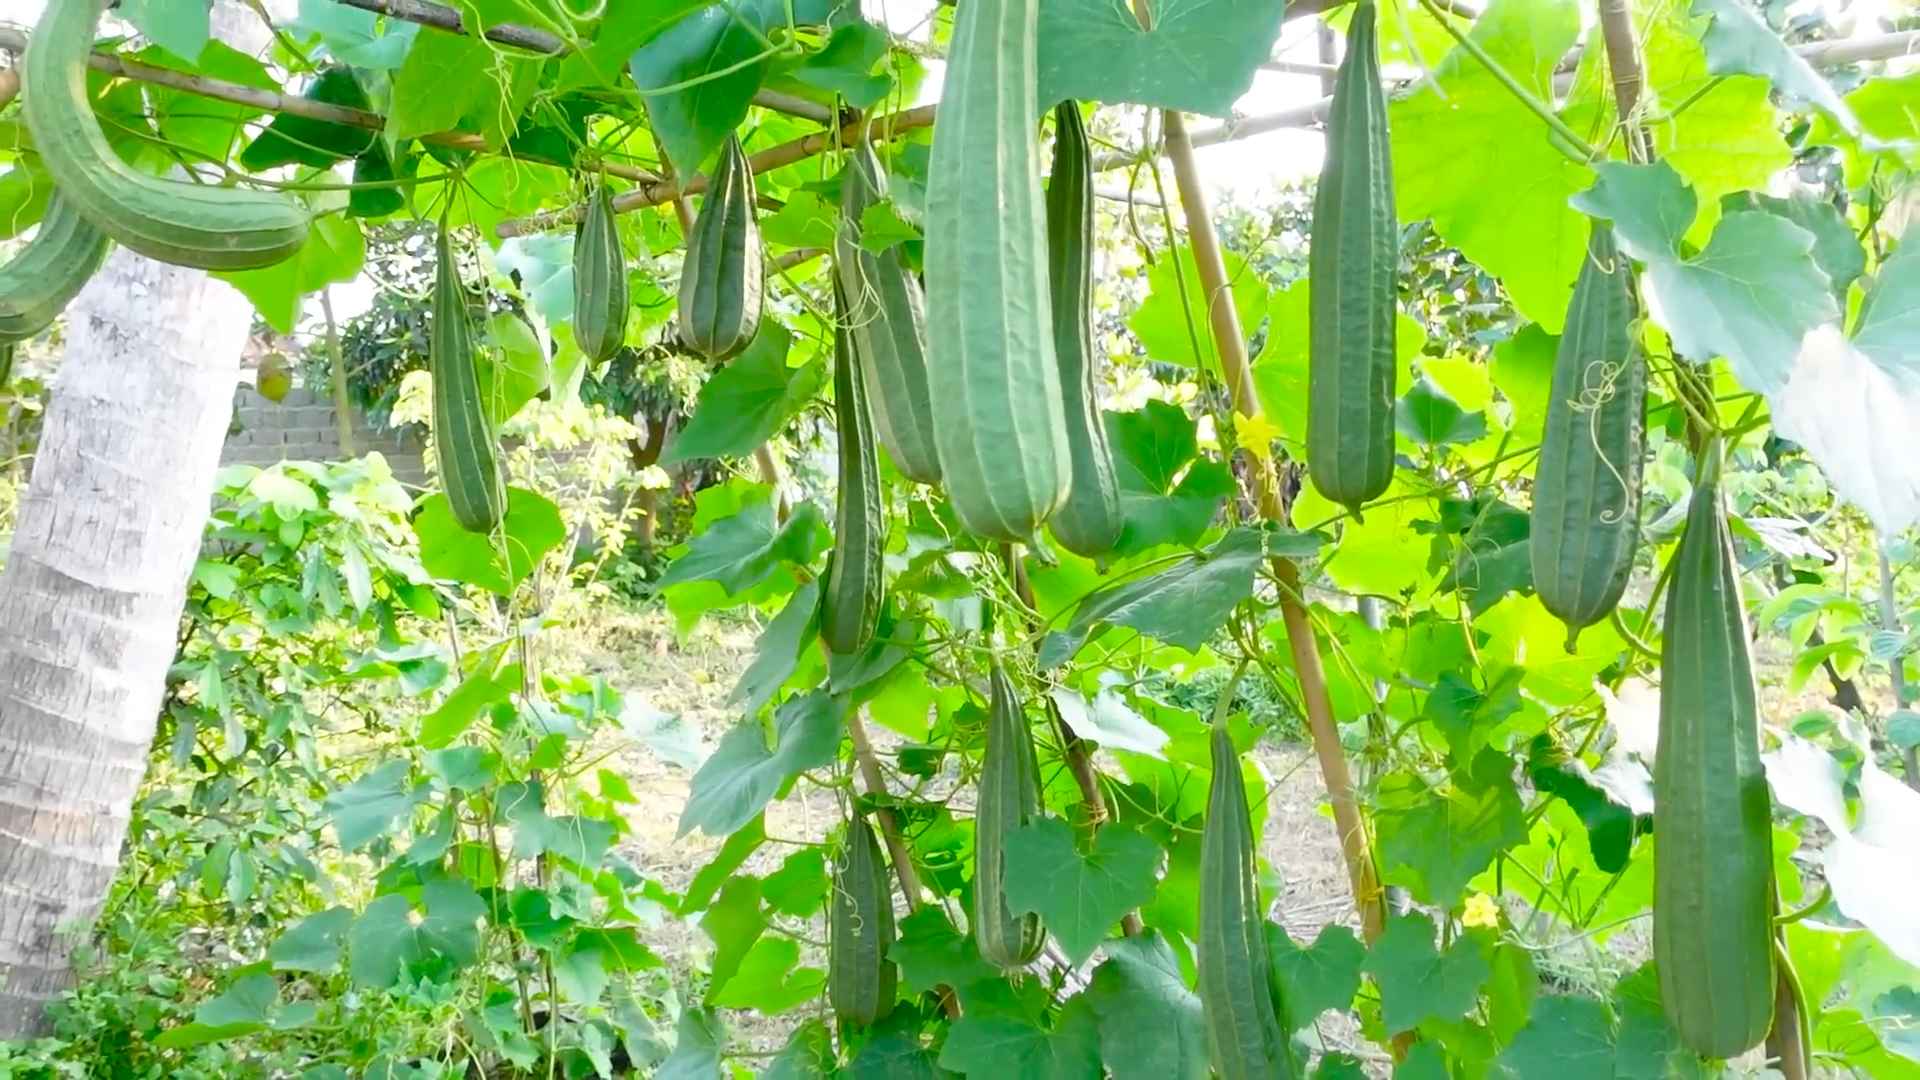
Growing angled luffa at home can seem like a daunting task, but trust me, it’s more rewarding than you might think! Imagine harvesting your own natural sponges, grown right in your backyard. Forget those synthetic scrubbers – we’re talking about a sustainable, eco-friendly alternative that’s both practical and beautiful.
The luffa, also known as the sponge gourd, has a rich history, particularly in Asian cultures where it’s been used for centuries not only as a cleaning tool but also in traditional medicine and even as a food source when young. Think of the generations who have relied on this versatile plant!
But why should you bother growing angled luffa at home? Well, besides the satisfaction of nurturing a plant from seed to sponge, you’ll be reducing your reliance on plastic products and contributing to a greener lifestyle. Plus, it’s a fantastic conversation starter! This DIY guide will provide you with simple, step-by-step instructions and insider tips to ensure a bountiful harvest. We’ll cover everything from seed starting to harvesting and curing your luffa sponges. Let’s get our hands dirty and embark on this exciting gardening adventure together!
Growing Angled Luffa at Home: A Comprehensive DIY Guide
Hey there, fellow gardening enthusiasts! Ever dreamt of growing your own natural sponges? Well, let me tell you, it’s totally doable, and incredibly rewarding! I’m going to walk you through everything you need to know to grow angled luffa (also known as Chinese okra or ridged gourd) right in your own backyard. It might seem a little intimidating at first, but trust me, with a little patience and these simple steps, you’ll be scrubbing away with your homegrown luffa in no time!
What You’ll Need:
Before we dive in, let’s gather our supplies. Here’s a list of everything you’ll need to successfully grow angled luffa:
* Luffa Seeds: You can find these online or at your local garden center. Make sure they are fresh for better germination.
* Seed Starting Trays or Pots: These will be used to start your seeds indoors.
* Seed Starting Mix: A light, well-draining mix is crucial for healthy seedlings.
* Larger Pots (if starting indoors): You’ll need these to transplant your seedlings into before moving them outdoors.
* Well-Draining Soil: Luffa loves rich, well-draining soil. Amend your garden soil with compost or aged manure.
* Compost or Aged Manure: This will enrich the soil and provide essential nutrients.
* Trellis or Support Structure: Luffa vines can grow quite long, so they need something to climb on. A sturdy trellis, fence, or even a pergola will work.
* Gardening Gloves: To protect your hands.
* Watering Can or Hose: For regular watering.
* Fertilizer (Optional): A balanced fertilizer can help boost growth, especially during fruiting.
* Sharp Knife or Pruning Shears: For harvesting.
* Clothes Pins or Twine: To help train the vines onto the trellis.
Starting Your Luffa Seeds:
Luffa has a long growing season, so starting seeds indoors is highly recommended, especially if you live in a cooler climate. I usually start mine about 6-8 weeks before the last expected frost.
1. Soak the Seeds: To improve germination, soak your luffa seeds in warm water for 24 hours before planting. This helps soften the hard outer shell. I usually put them in a small bowl on my kitchen counter.
2. Prepare Your Seed Starting Trays: Fill your seed starting trays or pots with seed starting mix. Moisten the mix thoroughly, but don’t let it get soggy.
3. Plant the Seeds: Plant the seeds about 1 inch deep in the soil. I usually plant two seeds per cell or pot, just in case one doesn’t germinate.
4. Provide Warmth and Moisture: Cover the trays with a clear plastic dome or plastic wrap to create a humid environment. Place them in a warm location, ideally around 70-80°F (21-27°C). A heat mat can be helpful if your home is cooler.
5. Wait for Germination: Germination usually takes about 1-3 weeks. Keep the soil consistently moist, but not waterlogged. Once the seedlings emerge, remove the plastic cover.
6. Provide Light: Once the seedlings have sprouted, they need plenty of light. Place them under grow lights or in a sunny window. If using a window, rotate the trays regularly to prevent the seedlings from leaning towards the light.
7. Thin the Seedlings (If Necessary): If both seeds in a cell germinate, thin them out by snipping off the weaker seedling at the soil line. This will give the stronger seedling more room to grow.
8. Transplant to Larger Pots (If Needed): If your seedlings outgrow their starting trays before it’s warm enough to plant them outdoors, transplant them into larger pots (4-6 inch diameter). Use a well-draining potting mix.
Preparing Your Garden Bed:
Luffa plants are heavy feeders, so preparing your garden bed properly is essential for a bountiful harvest.
1. Choose a Sunny Location: Luffa needs at least 6-8 hours of direct sunlight per day. Choose a location in your garden that receives plenty of sun.
2. Prepare the Soil: Luffa prefers well-draining soil that is rich in organic matter. Amend your garden soil with plenty of compost or aged manure. I usually dig in a generous amount, about 2-3 inches deep.
3. Install a Trellis or Support Structure: Luffa vines can grow up to 30 feet long, so they need a sturdy trellis or support structure to climb on. Make sure the trellis is strong enough to support the weight of the mature vines and fruits. I’ve used everything from a simple wooden trellis to a repurposed chain-link fence.
4. Space the Plants: If you’re planting multiple luffa plants, space them about 2-3 feet apart. This will give them enough room to grow and prevent overcrowding.
Transplanting Your Luffa Seedlings:
Once the danger of frost has passed and the soil has warmed up, it’s time to transplant your luffa seedlings into the garden.
1. Harden Off the Seedlings: Before transplanting, you need to harden off your seedlings. This means gradually exposing them to outdoor conditions over a period of 1-2 weeks. Start by placing them in a sheltered location outdoors for a few hours each day, gradually increasing the amount of time they spend outside.
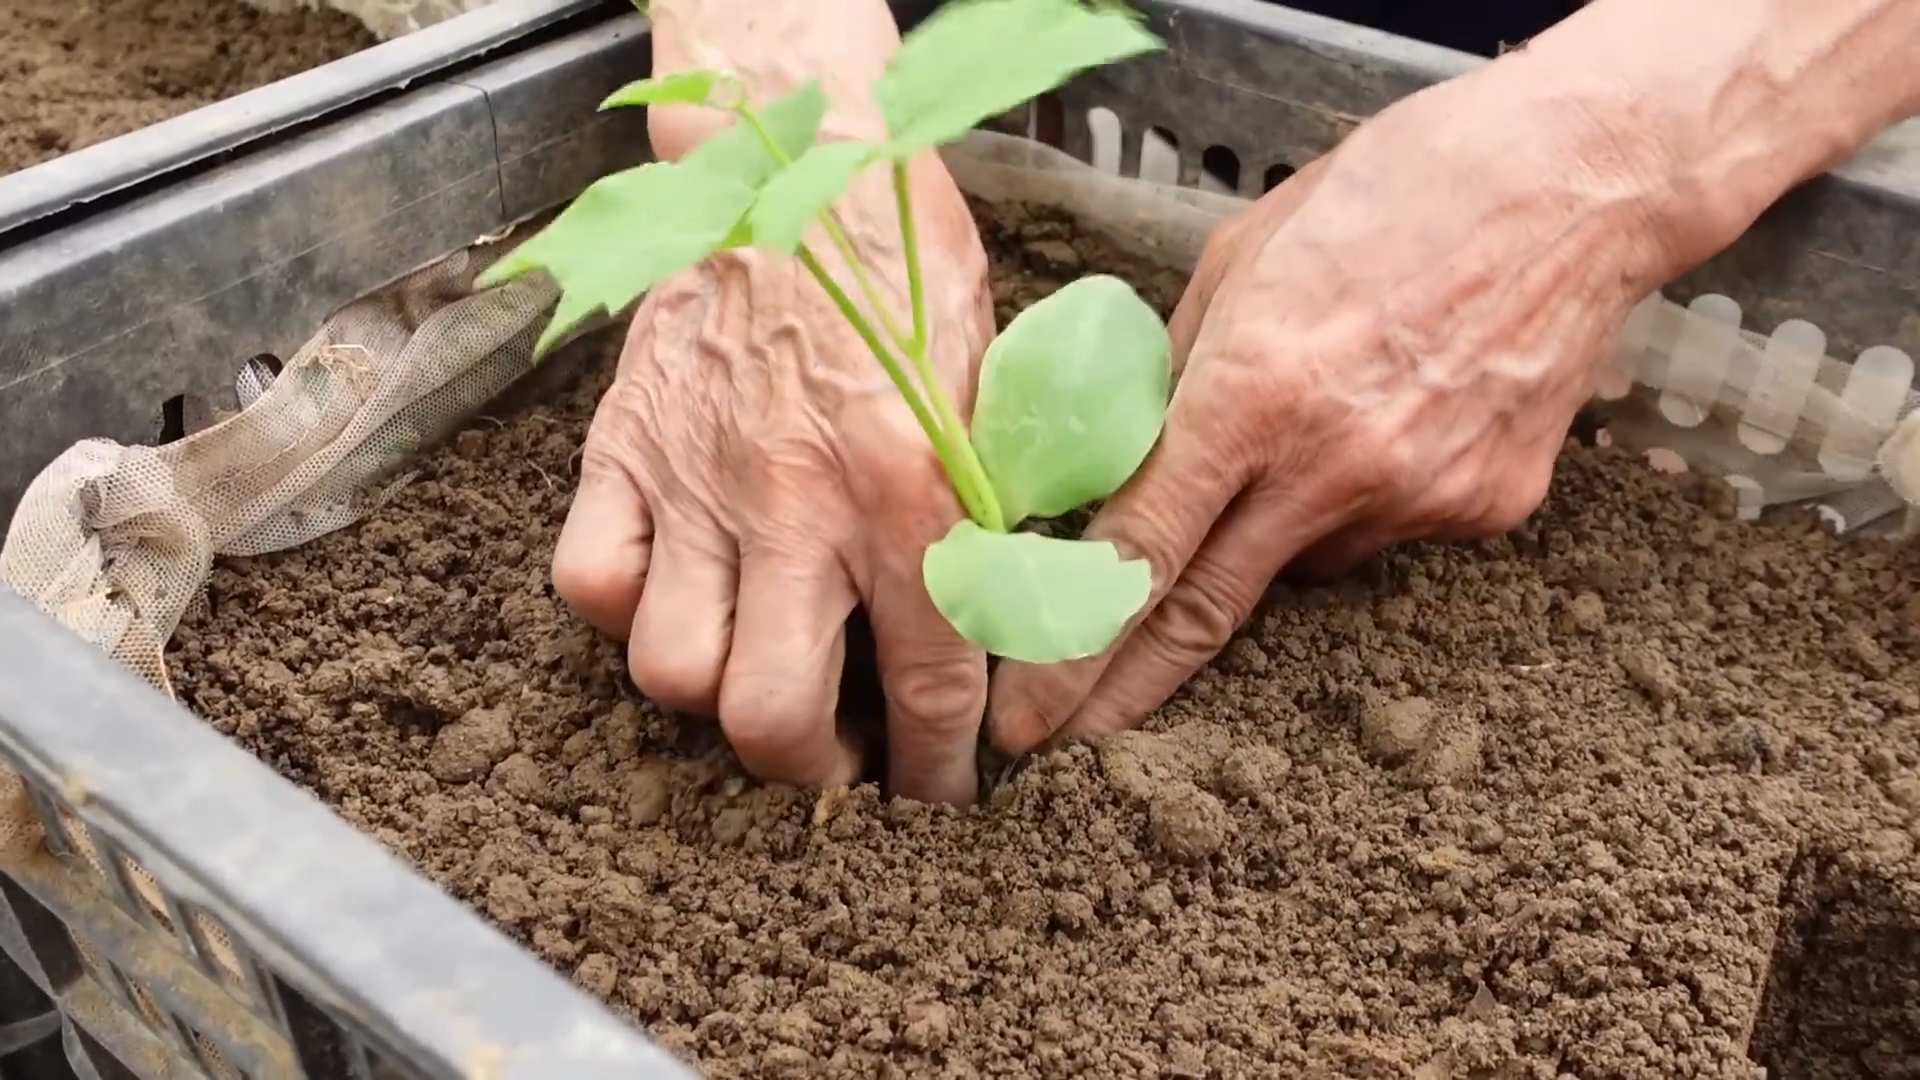
2. Transplant Carefully: Dig a hole that is slightly larger than the root ball of the seedling. Gently remove the seedling from its pot and place it in the hole. Backfill with soil and gently firm it around the base of the plant.
3. Water Thoroughly: Water the newly transplanted seedlings thoroughly. This will help settle the soil and encourage root growth.
4. Mulch Around the Plants: Apply a layer of mulch around the base of the plants. This will help retain moisture, suppress weeds, and regulate soil temperature. I like to use straw or wood chips.
Caring for Your Luffa Plants:
Once your luffa plants are in the ground, it’s important to provide them with proper care to ensure a healthy and productive harvest.
1. Water Regularly: Luffa plants need consistent moisture, especially during hot, dry weather. Water deeply and regularly, especially when the fruits are developing. I usually water them every other day, or more often if the soil is dry to the touch.
2. Fertilize (Optional): If you want to give your luffa plants an extra boost, you can fertilize them with a balanced fertilizer every few weeks. Follow the instructions on the fertilizer package. I usually use a liquid fertilizer diluted to half strength.
3. Train the Vines: As the luffa vines grow, you’ll need to train them to climb the trellis. Use clothes pins or twine to gently guide the vines onto the trellis.
4. Prune (Optional): Pruning can help improve air circulation and encourage fruit production. Remove any dead or yellowing leaves. You can also prune back the tips of the vines to encourage branching.
5. Watch Out for Pests and Diseases: Luffa plants can be susceptible to pests such as squash bugs and vine borers. Inspect your plants regularly and take action if you notice any signs of infestation. You can also protect your plants from diseases by providing good air circulation and avoiding overhead watering.
Harvesting Your Luffa Sponges:
Harvesting your luffa sponges is the most exciting part of the process!
1. Wait for Maturity: Luffa fruits are ready to harvest when they turn yellow or brown and the skin becomes dry and brittle. You should be able to feel the fibers inside when you squeeze the fruit gently.
2. Cut the Fruits: Use a sharp knife or pruning shears to cut the fruits from the vine. Leave a few inches of stem attached to the fruit.
3. Peel the Skin: To remove the skin, you can either soak the luffa in water for a few days or simply peel it off by hand. If soaking, the skin will soften and become easier to remove. I usually just peel it off, but it can be a bit messy!
4. Remove the Seeds: Once the skin is removed, shake out the seeds. You can save these seeds for planting next year.
5. Wash and Dry: Rinse the luffa sponge thoroughly with water to remove any remaining pulp or seeds. Then, let it dry completely in a well-ventilated area. I usually hang mine outside in the sun to dry.
6. Bleach (Optional): If you want to bleach your luffa sponge, you can soak it in a diluted bleach solution for a few minutes. This will
Conclusion
So, there you have it! Growing angled luffa at home isn’t just a gardening project; it’s an investment in sustainable living, a creative outlet, and a pathway to incredibly useful and beautiful sponges. Forget those mass-produced, often chemically treated sponges from the store. Imagine the satisfaction of exfoliating with a sponge you nurtured from seed to shower. The process, while requiring some patience and effort, is immensely rewarding, offering a connection to nature that’s often missing in our modern lives.
This DIY trick for cultivating your own angled luffa is a must-try for several reasons. First, you gain complete control over the growing process, ensuring your luffas are free from harmful pesticides and chemicals. Second, you’re contributing to a more sustainable lifestyle by reducing your reliance on commercially produced sponges, which often end up in landfills. Third, and perhaps most exciting, you get to witness the incredible transformation of a simple seed into a versatile and eco-friendly cleaning tool.
But the fun doesn’t stop there! Feel free to experiment with different growing techniques. Try companion planting with nitrogen-fixing legumes to enrich the soil naturally. Consider training your luffa vines along a trellis or pergola to create a stunning vertical garden. You can even let some of your luffas mature fully and save the seeds for future planting, ensuring a continuous supply of homemade sponges.
Variations abound! Once harvested, you can customize your luffa sponges to suit your specific needs. Cut them into different sizes and shapes for various cleaning tasks. Add essential oils for a fragrant and therapeutic exfoliating experience. You can even dye them with natural plant-based dyes for a pop of color in your bathroom. The possibilities are truly endless.
Don’t be intimidated by the prospect of growing angled luffa at home. With a little planning, patience, and the guidance provided in this article, you’ll be well on your way to harvesting your own supply of natural sponges. We encourage you to embrace this DIY project and experience the joy of creating something truly unique and sustainable.
We’re confident that you’ll find this DIY trick incredibly rewarding. So, grab your seeds, prepare your garden, and get ready to embark on a luffa-growing adventure! And most importantly, we want to hear about your experiences. Share your tips, tricks, and photos with us in the comments below. Let’s build a community of luffa enthusiasts and inspire others to embrace the beauty and benefits of growing their own sponges. Happy gardening!
Frequently Asked Questions (FAQ)
What is the best time to start growing angled luffa?
The ideal time to start growing angled luffa depends on your climate. Because luffa requires a long growing season (typically 150-200 days), it’s best to start seeds indoors 6-8 weeks before the last expected frost. This gives the seedlings a head start and ensures they have enough time to mature and produce fruit before the first frost of fall. If you live in a warmer climate with a longer growing season, you can direct sow the seeds outdoors after the last frost, once the soil has warmed up to at least 70°F (21°C). Remember to check your local weather forecasts and adjust your planting schedule accordingly.
How much space does an angled luffa vine need?
Angled luffa vines are vigorous growers and require ample space to thrive. Each vine can easily spread 10-15 feet (3-4.5 meters) or more. Therefore, it’s crucial to provide them with a sturdy trellis, fence, or other support structure to climb on. When planting, space the seedlings at least 2-3 feet (60-90 cm) apart to allow for adequate air circulation and prevent overcrowding. If you’re growing multiple rows of luffa, space the rows 4-6 feet (1.2-1.8 meters) apart. Adequate spacing is essential for healthy growth, optimal fruit production, and ease of harvesting.
What kind of soil is best for growing angled luffa?
Angled luffa thrives in well-drained, fertile soil that is rich in organic matter. Before planting, amend the soil with compost, aged manure, or other organic amendments to improve its structure, drainage, and nutrient content. Luffa prefers a slightly acidic to neutral soil pH, ideally between 6.0 and 7.0. You can test your soil pH using a soil testing kit and adjust it accordingly with lime (to raise the pH) or sulfur (to lower the pH). Good drainage is particularly important, as luffa roots are susceptible to rot in waterlogged conditions. If your soil is heavy clay, consider adding sand or perlite to improve drainage.
How often should I water my angled luffa plants?
Angled luffa plants require consistent watering, especially during hot, dry weather. Water deeply and regularly, ensuring the soil remains consistently moist but not waterlogged. The frequency of watering will depend on your climate, soil type, and the age of the plants. Young seedlings will need more frequent watering than established plants. As a general rule, water when the top inch of soil feels dry to the touch. Avoid overhead watering, as this can increase the risk of fungal diseases. Instead, water at the base of the plants, using a soaker hose or drip irrigation system. Mulching around the plants can also help to retain moisture and suppress weeds.
How do I know when my angled luffa is ready to harvest?
Knowing when to harvest your angled luffa is crucial for obtaining high-quality sponges. The ideal time to harvest is when the luffa fruit has turned yellow or brown and the skin has become dry and brittle. The fruit should feel lightweight and hollow when tapped. If you wait too long, the luffa will become overly fibrous and difficult to process. To harvest, simply cut the luffa fruit from the vine using a sharp knife or pruning shears. Leave a few inches of stem attached to the fruit.
What is the best way to process angled luffa into a sponge?
Processing angled luffa into a sponge is a relatively simple process. First, soak the harvested luffa fruit in water for several days to soften the skin. Once the skin is soft, you can peel it off easily by hand. After peeling, remove the seeds by shaking them out of the luffa. Rinse the luffa thoroughly to remove any remaining pulp or debris. Finally, allow the luffa to dry completely in a well-ventilated area. Once dry, you can cut the luffa into desired sizes and shapes for use as a sponge.
Can I eat angled luffa?
Yes, young angled luffa fruits are edible and can be used in a variety of culinary dishes. They have a mild, slightly sweet flavor and a tender texture. Young luffa can be stir-fried, steamed, or added to soups and stews. However, as the luffa matures, it becomes increasingly fibrous and less palatable. Therefore, it’s important to harvest the luffa when it is young and tender if you intend to eat it.
How can I prevent pests and diseases from affecting my angled luffa plants?
Angled luffa plants are generally resistant to pests and diseases, but they can occasionally be affected by problems such as squash bugs, aphids, and fungal diseases. To prevent these issues, practice good garden hygiene by removing weeds and debris from around the plants. Inspect your plants regularly for signs of pests or diseases and take action promptly if you notice any problems. You can use organic pest control methods, such as insecticidal soap or neem oil, to control pests. To prevent fungal diseases, ensure good air circulation around the plants and avoid overhead watering. If necessary, you can use a fungicide to control fungal infections.
How do I save angled luffa seeds for future planting?
Saving angled luffa seeds is a great way to ensure a continuous supply of sponges for years to come. To save seeds, allow a few luffa fruits to mature fully on the vine until they are completely dry and brown. Once the fruits are dry, harvest them and remove the seeds. Spread the seeds out on a tray to dry completely for several days. Store the dried seeds in an airtight container in a cool, dark, and dry place. Properly stored luffa seeds can remain viable for several years.
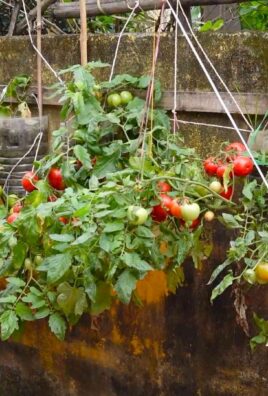
Can I grow angled luffa in containers?
Yes, you can grow angled luffa in containers, but you’ll need to choose a large container (at least 20 gallons) to accommodate the plant’s extensive root system. Use a well-draining potting mix that is rich in organic matter. Provide the container with a sturdy trellis or other support structure for the vine to climb on. Water regularly and fertilize every few weeks with a balanced fertilizer. Keep in mind that container-grown luffa plants may not produce as many fruits as those grown in the ground.
Leave a Comment