

Grow Watermelon at Home – sounds like a summer dream, right? I know, I know, you might be thinking, “Watermelons? In my backyard? Impossible!” But trust me, with a few clever tricks and a little DIY magic, you can be harvesting your own juicy, sweet watermelons before you know it.
For centuries, watermelons have been a symbol of summer abundance and refreshment. Originating in Africa, they’ve spread across the globe, becoming a beloved treat in countless cultures. Think about it – picnics, barbecues, and those iconic summer photos just wouldn’t be the same without a slice of watermelon! But why rely on the grocery store when you can cultivate your own little slice of summer paradise?
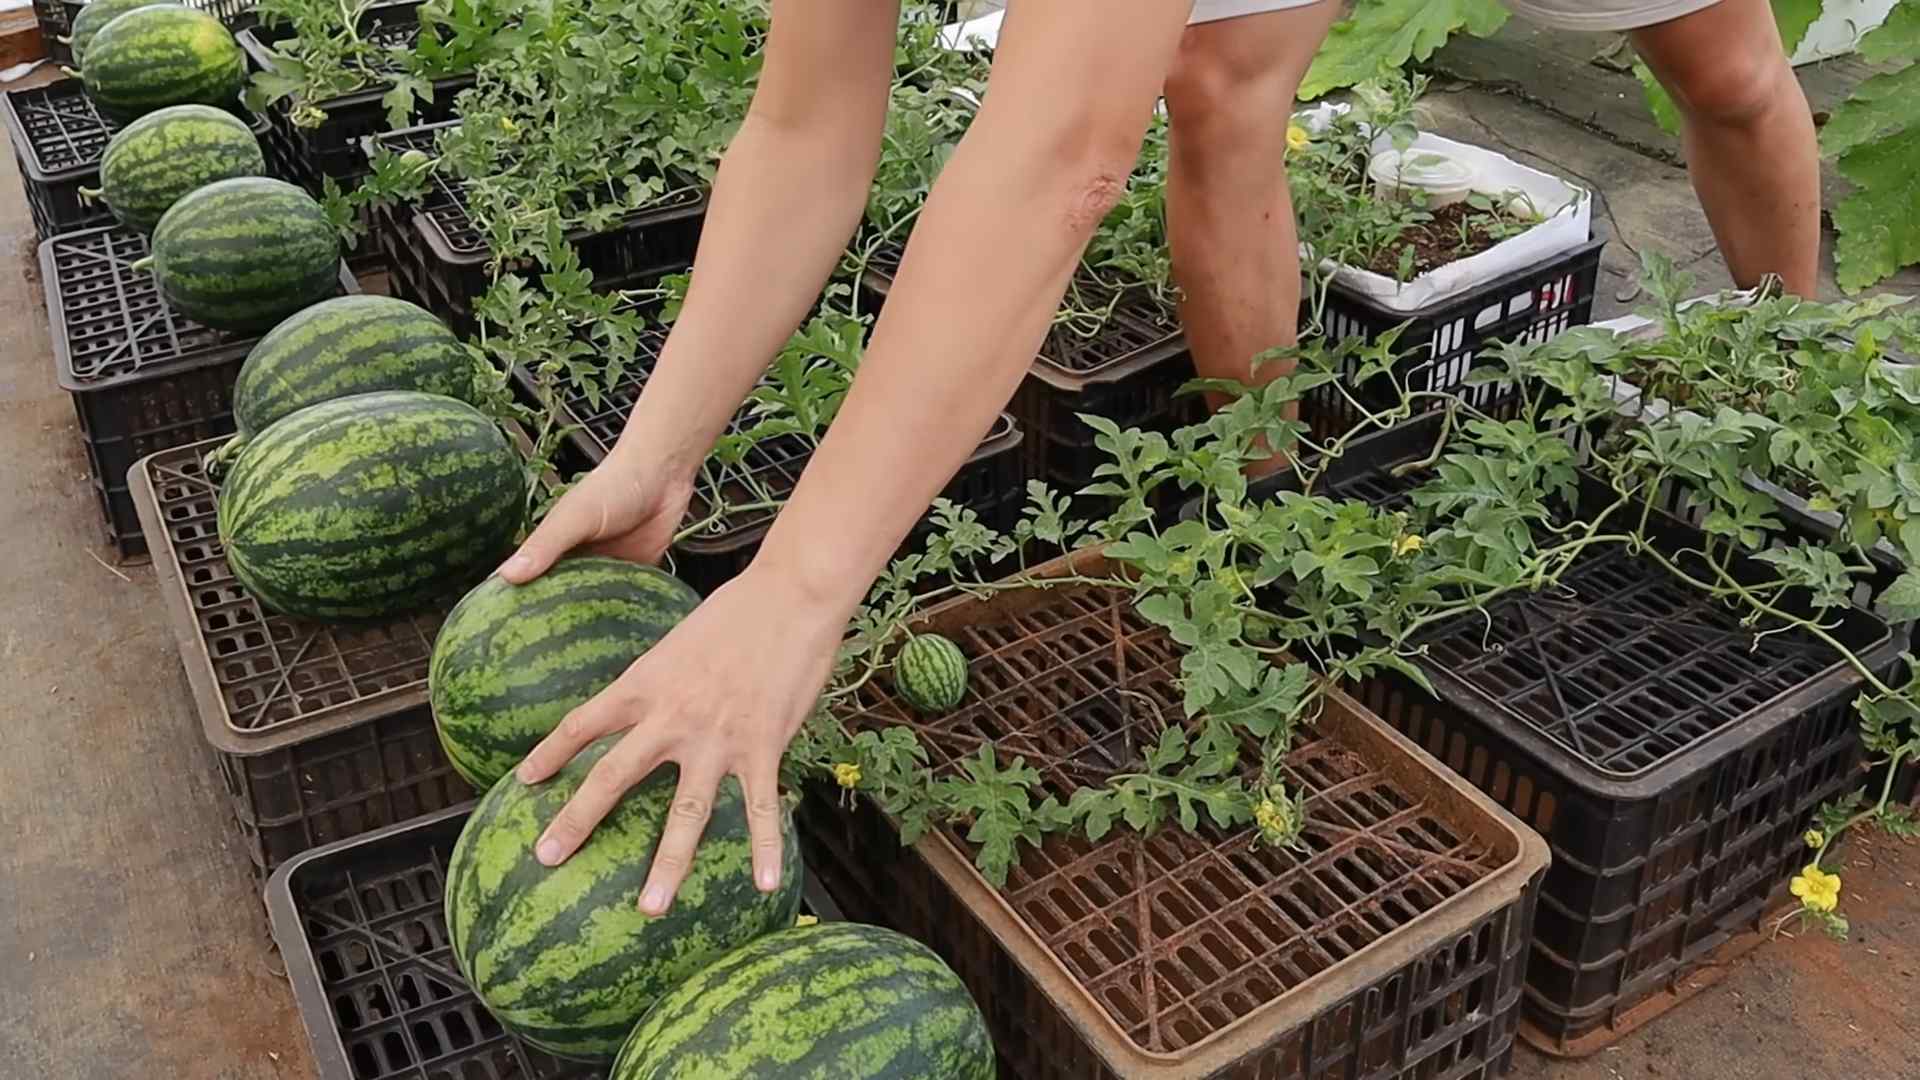
Let’s face it, store-bought watermelons can be a gamble. Sometimes they’re perfect, other times they’re bland and disappointing. That’s where this DIY guide comes in. I’m going to share some simple, yet effective, home gardening tricks that will empower you to grow watermelon at home successfully, even if you have limited space or experience. Imagine the satisfaction of biting into a watermelon you nurtured from seed to fruit! Plus, you’ll know exactly what went into growing it, ensuring a healthy and delicious treat for you and your family. So, grab your gardening gloves, and let’s get started on this exciting journey to homegrown watermelon goodness!
Grow Your Own Juicy Watermelons: A DIY Guide
Okay, watermelon lovers, gather ’round! I’m going to walk you through the surprisingly simple process of growing your own watermelons right at home. Forget those grocery store prices and bland flavors – homegrown watermelon is a whole different ballgame. Trust me, the satisfaction of biting into a watermelon you nurtured from a tiny seed is unmatched. Let’s get started!
Choosing the Right Watermelon Variety
Before we even think about planting, we need to pick the perfect watermelon variety for your climate and space. Not all watermelons are created equal! Some are better suited for shorter growing seasons, while others need a ton of room to sprawl.
* Consider your climate: If you live in a region with a short growing season (think northern climates), opt for faster-maturing varieties like ‘Sugar Baby’ (around 75 days to maturity) or ‘Bush Sugar Baby’ (perfect for smaller gardens). For longer, warmer climates, you have more options, including larger varieties like ‘Charleston Gray’ or ‘Crimson Sweet’.
* Think about space: Watermelons are vines, and they need room to spread. If you have a small garden or are growing in containers, bush varieties are your best bet. These compact plants produce smaller watermelons but take up significantly less space. Vining varieties need a lot of room – think at least 6-8 feet between plants.
* Flavor preferences: Do you prefer a super sweet, red-fleshed watermelon? Or maybe a slightly tangier, yellow-fleshed one? Research different varieties and read reviews to find one that suits your taste. Some popular choices include:
* ‘Sugar Baby’: Classic, sweet, and reliable.
* ‘Crimson Sweet’: Large, juicy, and disease-resistant.
* ‘Yellow Doll’: Yellow flesh, very sweet, and early maturing.
* ‘Black Diamond’: Large, dark green rind, and intensely sweet.
* ‘Moon and Stars’: Unique rind pattern, heirloom variety, and delicious flavor.
Starting Watermelon Seeds Indoors (Optional but Recommended)
While you can direct sow watermelon seeds, starting them indoors gives them a head start, especially in cooler climates. I highly recommend this method!
1. Gather your supplies: You’ll need:
* Watermelon seeds (of course!)
* Seed starting trays or small pots (peat pots are great because you can plant them directly into the ground, minimizing root disturbance)
* Seed starting mix (this is lighter and better draining than regular potting soil)
* A heat mat (optional, but it speeds up germination)
* A grow light (also optional, but it prevents leggy seedlings)
2. Sow the seeds: Fill your seed starting trays or pots with seed starting mix. Make a small hole (about 1/2 inch deep) in the center of each cell or pot. Place 2-3 seeds in each hole (this increases your chances of at least one seed germinating). Cover the seeds with soil and gently water.
3. Provide warmth and light: Place the seed starting trays on a heat mat (if using) and under a grow light (if using). If you don’t have a heat mat, a warm spot in your house will do. Keep the soil consistently moist, but not soggy.
4. Wait for germination: Watermelon seeds typically germinate in 5-10 days. Once the seedlings emerge, remove the heat mat and keep the grow light on for 14-16 hours per day.
5. Thin the seedlings: Once the seedlings have their first true leaves (the second set of leaves that appear after the initial seed leaves), thin them to one seedling per cell or pot. Choose the strongest, healthiest-looking seedling and snip off the others at the soil line. Don’t pull them out, as this can disturb the roots of the seedling you’re keeping.
6. Harden off the seedlings: About a week before you plan to transplant the seedlings outdoors, you need to “harden them off.” This means gradually exposing them to outdoor conditions so they can adjust to the sun, wind, and temperature changes. Start by placing the seedlings outdoors in a sheltered location for an hour or two each day, gradually increasing the amount of time they spend outside.
Preparing the Garden Bed
Watermelons are heavy feeders, meaning they need a lot of nutrients to thrive. Preparing the garden bed properly is crucial for a successful harvest.
1. Choose a sunny location: Watermelons need at least 6-8 hours of direct sunlight per day. Choose a spot in your garden that gets plenty of sun.
2. Test the soil: Watermelons prefer slightly acidic soil with a pH between 6.0 and 6.8. You can test your soil using a soil testing kit from your local garden center.
3. Amend the soil: Watermelons need well-draining soil that is rich in organic matter. Amend the soil with plenty of compost, aged manure, or other organic matter. This will improve drainage, add nutrients, and help the soil retain moisture.
4. Create mounds or rows: Watermelons grow best in raised mounds or rows. This helps with drainage and warms the soil more quickly. Create mounds or rows that are about 12 inches high and 3-4 feet wide.
5. Add fertilizer: Before planting, incorporate a slow-release fertilizer into the soil. Choose a fertilizer that is high in phosphorus and potassium, which are essential for fruit development. Follow the instructions on the fertilizer package.
Transplanting Watermelon Seedlings (or Direct Sowing)
Now for the exciting part – getting those watermelon plants into the ground!
1. Wait for warm weather: Watermelons are very sensitive to frost. Don’t transplant or direct sow until the soil temperature is consistently above 60°F (15°C). This is usually a few weeks after the last expected frost.
2. Transplant seedlings carefully: If you started your seeds indoors, gently remove the seedlings from their pots or trays. If you used peat pots, you can plant them directly into the ground. Otherwise, gently loosen the roots and plant the seedlings in the mounds or rows, spacing them according to the variety you’re growing (check the seed packet for recommendations).
3. Direct sow seeds (if not starting indoors): If you’re direct sowing, plant the seeds about 1 inch deep in the mounds or rows, spacing them according to the variety you’re growing. Plant several seeds in each spot and thin them to the strongest seedling once they emerge.
4. Water thoroughly: After transplanting or direct sowing, water the plants thoroughly. This will help them settle in and establish their roots.
5. Mulch around the plants: Mulch around the plants with straw, hay, or black plastic. Mulch helps to retain moisture, suppress weeds, and warm the soil. Black plastic mulch is particularly effective for warming the soil in cooler climates.
Caring for Your Watermelon Plants
Once your watermelon plants are in the ground, they need regular care to thrive.
1. Water regularly: Watermelons need consistent moisture, especially during fruit development. Water deeply and regularly, especially during dry spells. Aim for about 1-2 inches of water per week. Avoid overhead watering, as this can lead to fungal diseases. Drip irrigation is the best way to water watermelons.
2. Fertilize regularly: Watermelons are heavy feeders and need regular fertilization. Side-dress the plants with a balanced fertilizer every 2-3 weeks. You can also use a liquid fertilizer, such as fish emulsion or seaweed extract.
3. Control weeds: Weeds compete with watermelons for nutrients and water. Keep the garden bed free of weeds by hand-pulling or using a hoe. Be careful not to damage the watermelon roots when weeding.
4. Protect from pests and diseases: Watermelons are susceptible to several pests and diseases, including aphids, squash bugs, vine borers, and powdery mildew. Inspect your plants regularly for signs of pests or diseases. Use organic pest control methods, such as insecticidal soap or neem oil, to control pests. Use a fungicide to control fungal diseases.
5. Provide support (optional): If you’re growing vining watermelons, you may want to provide support for the vines. This can help to keep the fruits off the ground and prevent them from rotting. You can use a trellis, fence, or even just a pile of straw to support the vines.
Pollinating Watermelons
Watermelons need to be pollinated in order to produce fruit. They have separate male and female flowers on the same plant. The male flowers produce pollen, and the female flowers have a small, immature watermelon at the base.
1. Encourage pollinators: Attract pollinators to your garden by planting flowers that attract bees, butterflies, and other beneficial insects.
2. Hand-pollinate (if necessary): If you’re not seeing a lot
Conclusion
So, there you have it! Growing watermelons at home might seem daunting at first, but with a little planning, patience, and the right techniques, you can be harvesting your own juicy, sweet watermelons in no time. This DIY approach isn’t just about saving money; it’s about connecting with nature, understanding the growing process, and enjoying the unparalleled satisfaction of eating something you nurtured from seed to fruit. Forget the bland, mass-produced watermelons from the grocery store – imagine sinking your teeth into a homegrown watermelon bursting with flavor, knowing you cultivated it yourself.
This method is a must-try for several reasons. First, you have complete control over the growing environment, ensuring your watermelons are free from harmful pesticides and chemicals. Second, you can choose the specific variety of watermelon that best suits your taste and climate. Want a smaller, personal-sized watermelon? Go for a Sugar Baby. Craving a classic, large watermelon? Charleston Gray might be your best bet. The possibilities are endless! Third, and perhaps most importantly, growing your own watermelons is an incredibly rewarding experience.
Consider these variations to personalize your watermelon-growing journey. If you’re short on space, try growing watermelons vertically using a trellis. This not only saves space but also improves air circulation, reducing the risk of disease. You can also experiment with different soil amendments to enhance the flavor and sweetness of your watermelons. Adding compost or aged manure to the soil can provide essential nutrients and improve drainage. Another fun variation is to try growing different colored watermelons, such as yellow or orange varieties. These offer a unique visual appeal and a slightly different flavor profile.
Don’t be afraid to experiment and adapt these techniques to your specific growing conditions. Remember, gardening is a learning process, and every season brings new challenges and opportunities. The key is to be observant, patient, and willing to learn from your mistakes.
We wholeheartedly encourage you to try this DIY trick for growing watermelons at home. It’s an investment in your health, your well-being, and your connection to the natural world. Once you’ve tasted the difference between a store-bought watermelon and a homegrown one, you’ll never go back.
We’re eager to hear about your experiences! Share your photos, tips, and challenges in the comments below. Let’s create a community of watermelon growers and learn from each other. Happy growing! Let us know how your attempt to grow watermelon at home went!
Frequently Asked Questions (FAQ)
Q: What is the best time to start growing watermelons?
A: The best time to start growing watermelons depends on your climate. Watermelons are warm-season crops and require a long growing season of at least 70-90 days. In general, you should start seeds indoors about 6-8 weeks before the last expected frost. If you live in a warmer climate with a longer growing season, you can direct sow seeds outdoors after the danger of frost has passed and the soil temperature has reached at least 70°F (21°C).
Q: What kind of soil is best for growing watermelons?
A: Watermelons thrive in well-drained, sandy loam soil that is rich in organic matter. The soil pH should be between 6.0 and 6.8. Before planting, amend the soil with compost or aged manure to improve drainage and fertility. Avoid heavy clay soils, as they can retain too much moisture and lead to root rot. If you have clay soil, consider growing watermelons in raised beds or containers.
Q: How much sunlight do watermelons need?
A: Watermelons need at least 6-8 hours of direct sunlight per day to thrive. Choose a planting location that receives full sun throughout the day. Insufficient sunlight can result in smaller, less flavorful watermelons.
Q: How often should I water my watermelons?
A: Watermelons need consistent moisture, especially during fruit development. Water deeply and regularly, aiming for about 1-2 inches of water per week. Avoid overhead watering, as this can promote fungal diseases. Instead, water at the base of the plant or use a soaker hose. Reduce watering as the fruits begin to ripen to prevent them from cracking.
Q: How do I know when my watermelons are ripe?
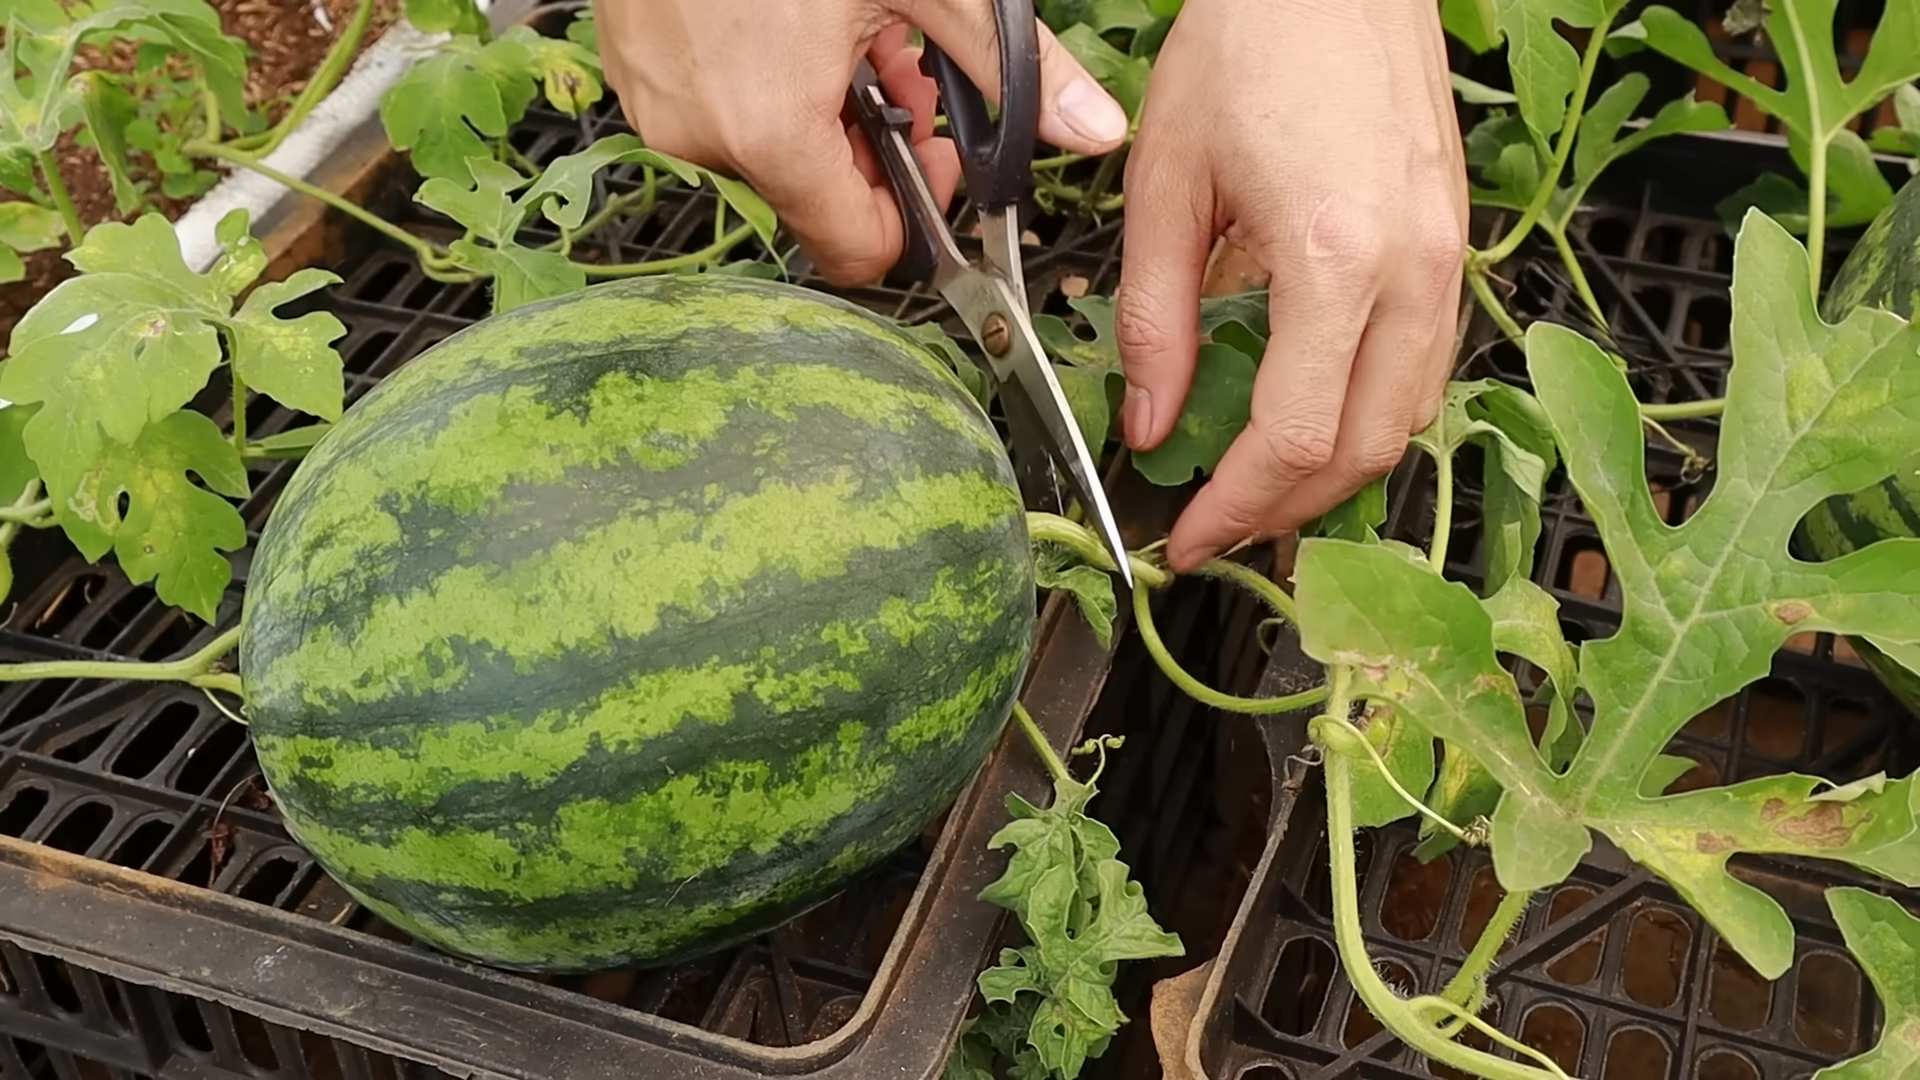
A: There are several indicators that a watermelon is ripe. First, the tendril closest to the fruit should turn brown and dry. Second, the underside of the watermelon (where it rests on the ground) should turn from white to a creamy yellow color. Third, when you thump the watermelon, it should sound hollow and deep. Finally, the skin should be dull rather than shiny.
Q: What are some common pests and diseases that affect watermelons?
A: Common pests that affect watermelons include aphids, squash bugs, and cucumber beetles. These pests can be controlled with insecticidal soap or neem oil. Common diseases include powdery mildew, fusarium wilt, and anthracnose. These diseases can be prevented by providing good air circulation, avoiding overhead watering, and using disease-resistant varieties.
Q: Can I grow watermelons in containers?
A: Yes, you can grow watermelons in containers, but you’ll need a large container (at least 20 gallons) and a strong trellis to support the vines. Choose a compact or bush variety of watermelon that is well-suited for container growing. Ensure the container has good drainage and use a high-quality potting mix. Water and fertilize regularly, as container-grown plants tend to dry out and deplete nutrients more quickly.
Q: How do I pollinate watermelons?
A: Watermelons require pollination to produce fruit. Bees are the primary pollinators, so encourage them to visit your garden by planting flowers nearby. If you’re not seeing enough bee activity, you can hand-pollinate the flowers. To hand-pollinate, use a small paintbrush to transfer pollen from the male flowers (which have a long, thin stem) to the female flowers (which have a small, immature watermelon at the base).
Q: What kind of fertilizer should I use for watermelons?
A: Watermelons benefit from regular fertilization. Use a balanced fertilizer (such as 10-10-10) at planting time, and then switch to a fertilizer that is higher in phosphorus and potassium during fruit development. Avoid over-fertilizing with nitrogen, as this can promote leafy growth at the expense of fruit production.
Q: How can I prevent my watermelons from cracking?
A: Watermelon cracking can be caused by inconsistent watering or rapid changes in soil moisture. To prevent cracking, water deeply and regularly, especially during fruit development. Avoid letting the soil dry out completely and then flooding it. Mulching around the plants can help to retain moisture and prevent soil temperature fluctuations. Also, reduce watering as the fruits begin to ripen.

Leave a Comment