

Grow Radish Small Space? Absolutely! Imagine harvesting crisp, peppery radishes from your own tiny garden patch, even if all you have is a balcony or a sunny windowsill. It’s easier than you think, and I’m here to show you how! For centuries, radishes have been a staple in gardens worldwide, prized for their quick growth and vibrant flavor. From ancient Egypt, where they were a common food, to modern-day salads, radishes have proven their versatility and resilience.
But let’s face it, not everyone has acres of land to dedicate to gardening. That’s where these clever DIY tricks and hacks come in. Maybe you’re short on space, time, or even gardening experience. Perhaps you’re tired of buying bland, store-bought radishes when you crave that fresh, homegrown taste. Whatever your reason, learning how to grow radish small space is a game-changer. I’ll guide you through simple, step-by-step methods to maximize your yield, choose the right varieties, and troubleshoot common problems. Get ready to enjoy a continuous supply of delicious radishes, all from your own little urban oasis!
Growing Radishes in Small Spaces: A DIY Guide
Hey there, fellow gardening enthusiasts! So, you’re itching to grow some fresh, peppery radishes but are short on space? Don’t worry, I’ve got you covered! Radishes are fantastic because they’re super fast-growing and don’t need a ton of room. I’m going to walk you through everything you need to know to cultivate a thriving radish patch, even if you only have a balcony, patio, or a tiny corner of your yard. Let’s get started!
Choosing the Right Radish Variety
First things first, let’s talk radishes! Not all radishes are created equal, especially when space is a concern. Some varieties are smaller and mature quicker, making them ideal for container gardening.
* Cherry Belle: This is a classic, round, bright red radish that’s ready to harvest in about 22 days. It’s a reliable choice and tastes great.
* French Breakfast: These are elongated, red radishes with a white tip. They have a milder flavor and mature in around 25 days.
* Easter Egg: A colorful mix of red, pink, purple, and white radishes. They’re fun to grow and mature in about 28 days.
* Sparkler: Similar to Cherry Belle, but with a small white tip. They’re quick to mature and have a crisp, mild flavor.
I personally love the Easter Egg variety because they add a pop of color to my garden and salads!
Preparing Your Container and Soil
Okay, now that we’ve picked our radish stars, let’s get their home ready! The right container and soil are crucial for happy radishes.
* Container Size: Radishes don’t need deep containers, but they do need enough space to spread out a bit. I recommend a container that’s at least 6 inches deep and 12 inches wide. A rectangular planter box works great, or even a large, wide pot.
* Drainage: This is super important! Make sure your container has drainage holes. Radishes don’t like soggy soil. If your container doesn’t have holes, you can drill some yourself.
* Soil: Use a well-draining potting mix. I like to use a mix of compost, peat moss, and perlite. This provides good drainage, aeration, and nutrients. Avoid using garden soil, as it can be too heavy and compact.
Step-by-Step Soil Preparation:
1. Gather your materials: You’ll need your container, potting mix, compost, peat moss, and perlite.
2. Mix the soil: In a large bucket or tub, combine equal parts of potting mix, compost, peat moss, and perlite. I usually go for a 1:1:1:1 ratio.
3. Moisten the soil: Add water to the mixture and mix thoroughly until it’s evenly moist, but not soggy. It should feel like a wrung-out sponge.
4. Fill the container: Fill your container with the soil mixture, leaving about an inch of space at the top.
Planting Your Radish Seeds
Alright, time to get those seeds in the ground! This is the fun part.
* Sowing Seeds: Radishes are direct-sow crops, meaning you plant the seeds directly into the container. No need to start them indoors.
* Spacing: Space the seeds about 1 inch apart and ½ inch deep. I like to use my finger to make small indentations in the soil.
* Covering Seeds: Gently cover the seeds with soil and lightly water the surface.
* Succession Planting: To enjoy a continuous harvest, plant a new batch of seeds every 1-2 weeks. This is called succession planting, and it’s a game-changer for small-space gardening!
Step-by-Step Planting Instructions:
1. Prepare the soil surface: Gently level the soil surface in your container.
2. Create indentations: Use your finger or a small tool to make small indentations about ½ inch deep and 1 inch apart.
3. Sow the seeds: Place one radish seed in each indentation.
4. Cover the seeds: Gently cover the seeds with soil.
5. Water gently: Use a watering can with a gentle rose attachment to water the soil. Avoid using a strong stream of water, as this can dislodge the seeds.
Caring for Your Radishes
Now that your radishes are planted, it’s time to give them some TLC!
* Watering: Keep the soil consistently moist, but not waterlogged. Water when the top inch of soil feels dry to the touch. I usually water every day or two, depending on the weather.
* Sunlight: Radishes need at least 6 hours of sunlight per day. Place your container in a sunny spot. If you don’t have enough sunlight, you can use a grow light.
* Thinning: Once the seedlings emerge, thin them to about 2 inches apart. This gives them enough room to grow. I know it feels sad to pull out seedlings, but it’s necessary for healthy radishes!
* Fertilizing: Radishes don’t need a lot of fertilizer. A light feeding with a balanced liquid fertilizer every 2-3 weeks is sufficient. I like to use a fish emulsion fertilizer.
* Weed Control: Keep the container free of weeds. Weeds can compete with radishes for nutrients and water.
Detailed Care Tips:
* Watering deeply: When you water, water deeply so that the water reaches the roots. This encourages strong root growth.
* Mulching: You can add a thin layer of mulch to the surface of the soil to help retain moisture and suppress weeds. I like to use straw or shredded leaves.
* Pest control: Radishes are generally pest-resistant, but they can be susceptible to flea beetles. If you see small holes in the leaves, you can use insecticidal soap to control them.
* Temperature: Radishes prefer cool weather. If you live in a hot climate, you can grow them in the spring or fall.
Harvesting Your Radishes
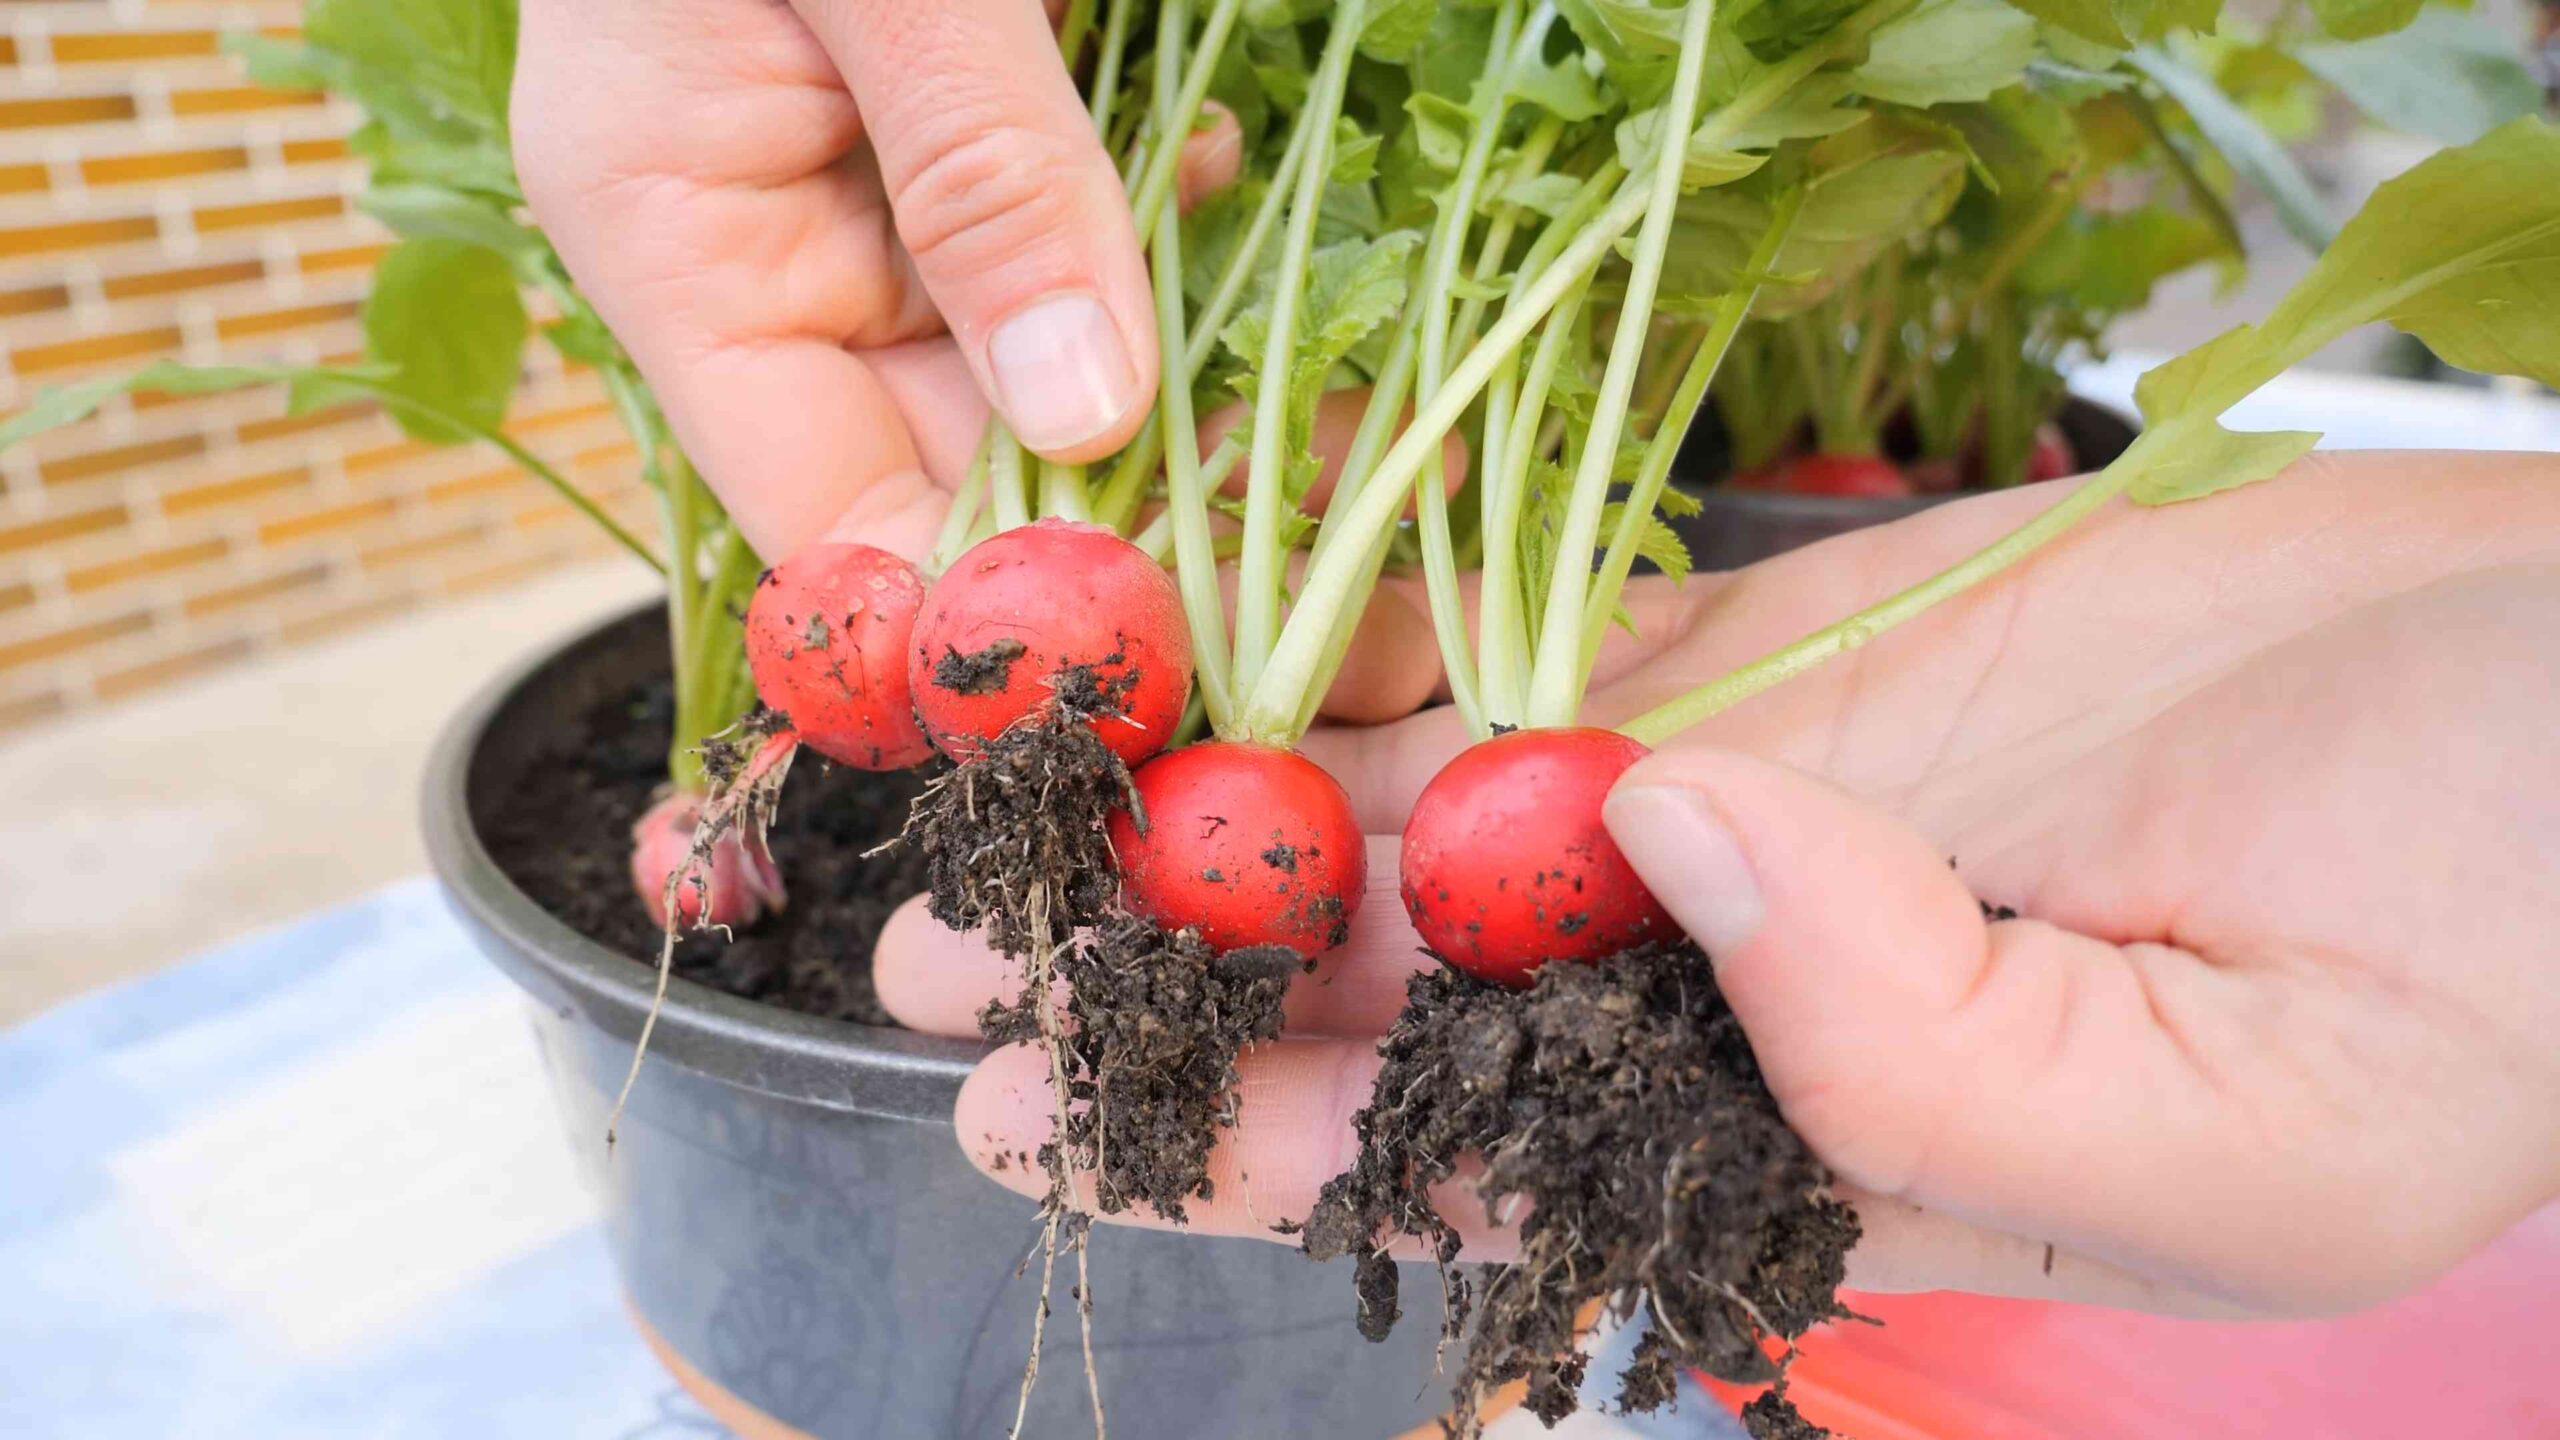
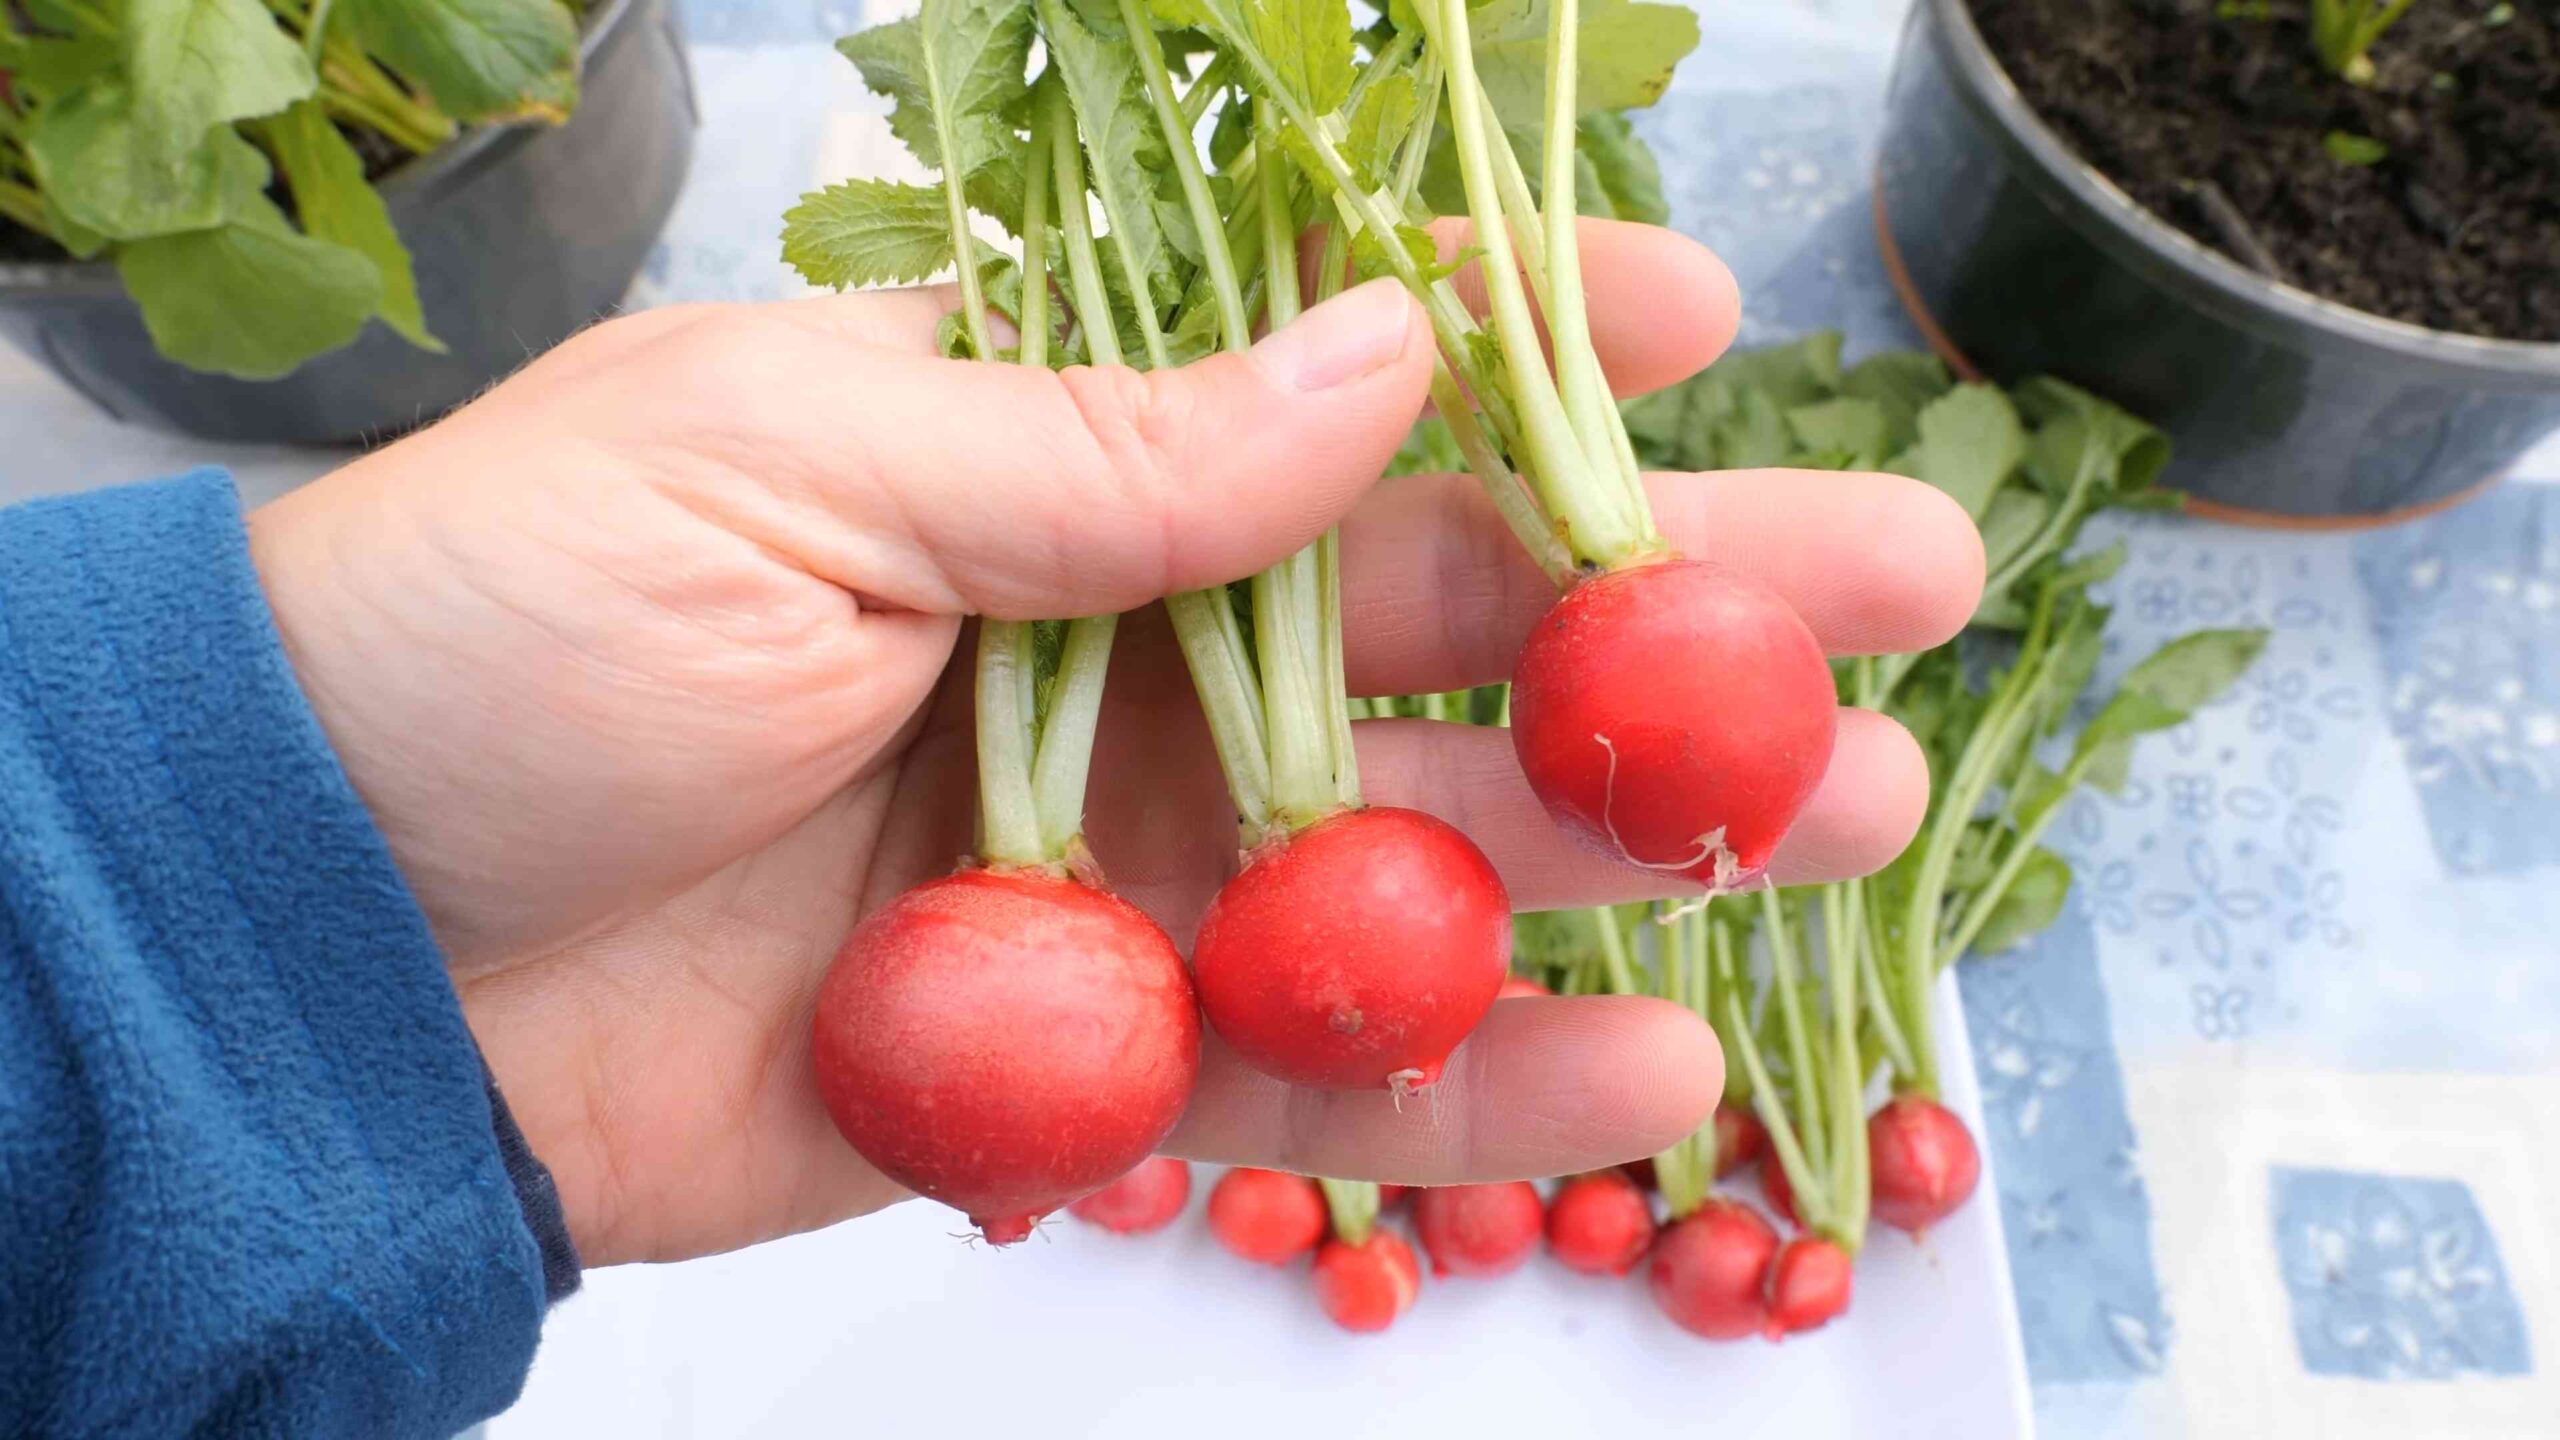
The moment you’ve been waiting for! Harvesting your radishes is the most rewarding part.
* Harvest Time: Radishes are ready to harvest when they reach the size of a marble or a golf ball, depending on the variety. Check the seed packet for specific maturity times.
* Harvesting Technique: Gently pull the radishes from the soil. If the soil is dry, you may need to loosen it with a trowel first.
* Storage: Remove the greens and store the radishes in a plastic bag in the refrigerator. They’ll keep for about a week. You can also eat the radish greens! They’re delicious in salads or stir-fries.
Harvesting Tips:
* Don’t wait too long: Radishes can become woody and bitter if they’re left in the ground too long.
* Harvest in the morning: Radishes are best harvested in the morning when they’re crisp and cool.
* Wash thoroughly: Wash the radishes thoroughly before eating.
Troubleshooting Common Problems
Even with the best care, you might encounter a few challenges. Here are some common problems and how to fix them:
* Radishes are small and stunted: This could be due to overcrowding, poor soil, or lack of sunlight. Thin the seedlings, amend the soil with compost, and make sure they’re getting enough sunlight.
* Radishes are woody and bitter: This is usually caused by leaving them in the ground too long or growing them in hot weather. Harvest them sooner and try growing them in the spring or fall.
* Radishes are splitting: This can be caused by inconsistent watering. Keep the soil consistently moist, but not waterlogged.
* Pests are eating the leaves: Use insecticidal soap to control pests like flea beetles.
Extending Your Radish Season
Want to enjoy radishes for even longer? Here are a few tips:
* Succession planting: As mentioned earlier, plant a new batch of seeds every 1-2 weeks.
* Cool weather: Radishes thrive in cool weather. Plant them in the spring or fall.
* Shade: In hot weather, provide some shade for your radishes.
* Cold frames: Use a cold frame to protect your radishes from frost in the fall and winter.
Enjoying Your Radish Harvest
Now that you’ve harvested your radishes, it’s time to enjoy them! Here are a few ideas:
* Salads: Slice radishes thinly and add them to salads for a peppery kick.
* Snacks: Eat radishes raw with a sprinkle of
Conclusion
So, there you have it! Growing radishes in small spaces is not only achievable but also incredibly rewarding. We’ve walked you through the simple steps, from choosing the right container and soil to ensuring adequate sunlight and consistent watering. But why should you bother with this DIY trick?
Firstly, it’s about accessibility. Fresh, crisp radishes, bursting with peppery flavor, are at your fingertips, regardless of whether you have a sprawling garden or just a sunny balcony. Imagine adding a vibrant crunch to your salads, tacos, or even enjoying them as a simple, healthy snack, all thanks to your own homegrown supply.
Secondly, it’s about control. You know exactly what goes into your radishes – no harmful pesticides or questionable fertilizers. You’re nurturing them from seed to harvest, ensuring the highest quality and freshest taste. This is especially important if you’re conscious about your food sources and prefer organic options.
Thirdly, it’s about the sheer joy of gardening. Even in a small space, the act of nurturing a plant from seed to harvest is incredibly therapeutic. Watching those tiny sprouts emerge and develop into vibrant radishes is a deeply satisfying experience. It’s a connection to nature that can be incredibly grounding, especially in our increasingly urbanized lives.
But don’t stop there! Experiment with different radish varieties. Try French Breakfast radishes for their mild flavor and elongated shape, or Watermelon radishes for their stunning pink interior. You can also explore companion planting. Radishes are known to deter pests from other plants, so consider planting them alongside carrots or lettuce.
Consider using vertical gardening techniques to maximize your small space. Stackable planters or hanging baskets can create a visually appealing and highly productive radish garden. You could even repurpose old containers like buckets or crates to add a rustic touch to your setup.
And finally, don’t forget the power of succession planting. Sow a new batch of radish seeds every couple of weeks to ensure a continuous harvest throughout the growing season. This way, you’ll always have fresh radishes on hand to enjoy.
Growing radishes in small spaces is a must-try for anyone looking to add fresh, healthy, and flavorful produce to their diet, regardless of their living situation. It’s a simple, affordable, and incredibly rewarding project that can bring a touch of nature into your home.
We encourage you to give this DIY trick a try. Start small, experiment with different techniques, and most importantly, have fun! And once you’ve harvested your first batch of homegrown radishes, we’d love to hear about your experience. Share your tips, tricks, and photos with us in the comments below. Let’s build a community of small-space radish growers!
Frequently Asked Questions (FAQ)
What is the best type of container to use for growing radishes in a small space?
The ideal container for growing radishes should be at least 6 inches deep to accommodate root development. Good drainage is crucial to prevent root rot. Terracotta pots, plastic containers, raised beds, and even repurposed items like buckets or crates can work well. Ensure the container has drainage holes. For small spaces, consider using long, narrow containers that can fit on a windowsill or balcony railing. Vertical gardening systems, such as stackable planters or hanging baskets, are also excellent options for maximizing space.
What kind of soil is best for growing radishes?
Radishes thrive in loose, well-draining soil that is rich in organic matter. A good potting mix specifically formulated for vegetables is an excellent choice. You can also create your own mix by combining equal parts of compost, peat moss (or coconut coir), and perlite or vermiculite. Avoid heavy clay soils, as they can hinder root development and lead to misshapen radishes. Before planting, amend the soil with compost or well-rotted manure to provide essential nutrients.
How much sunlight do radishes need?
Radishes require at least 6 hours of direct sunlight per day to grow properly. If you don’t have a sunny spot, you can supplement with grow lights. Place the lights about 6-12 inches above the plants and keep them on for 12-14 hours per day. Rotate the plants regularly to ensure even light exposure. Insufficient sunlight can result in leggy plants and small, underdeveloped radishes.
How often should I water my radishes?
Radishes need consistent moisture to grow quickly and develop crisp, flavorful roots. Water deeply whenever the top inch of soil feels dry to the touch. Avoid overwatering, as this can lead to root rot. During hot, dry weather, you may need to water more frequently. Mulching around the plants can help retain moisture and suppress weeds.
How long does it take for radishes to grow?
Radishes are one of the fastest-growing vegetables, typically maturing in just 3-4 weeks. The exact time will depend on the variety and growing conditions. Check the seed packet for specific information. You can start harvesting radishes as soon as they reach a usable size.
What are some common problems when growing radishes, and how can I prevent them?
Some common problems include root maggots, flea beetles, and fungal diseases. To prevent root maggots, cover the soil with row covers. Flea beetles can be controlled with insecticidal soap or neem oil. To prevent fungal diseases, ensure good air circulation and avoid overwatering. Rotate your crops each year to prevent soilborne diseases from building up.
Can I grow radishes indoors?
Yes, you can grow radishes indoors, provided you have adequate light and a suitable container. Choose a sunny windowsill or supplement with grow lights. Use a well-draining potting mix and water regularly. Indoor radishes may take slightly longer to mature than those grown outdoors.
What are some good companion plants for radishes?
Radishes are excellent companion plants for carrots, lettuce, spinach, and other leafy greens. They can help deter pests and improve soil health. Avoid planting radishes near hyssop, as it can inhibit their growth.
How do I know when my radishes are ready to harvest?
Radishes are ready to harvest when the roots are about 1 inch in diameter. Gently pull one radish from the soil to check its size. If it’s ready, harvest the rest. Overripe radishes can become woody and bitter.
Can I eat the radish greens?
Yes, radish greens are edible and nutritious. They have a peppery flavor similar to the roots. You can add them to salads, soups, or stir-fries. Harvest the greens when they are young and tender.
What are some different varieties of radishes I can try growing?
There are many different varieties of radishes to choose from, each with its own unique flavor, color, and shape. Some popular varieties include Cherry Belle, French Breakfast, Watermelon Radish, and Daikon. Experiment with different varieties to find your favorites.
How can I prevent my radishes from cracking?
Cracking can occur when radishes experience inconsistent watering. Ensure consistent moisture levels, especially during hot, dry weather. Mulching around the plants can help retain moisture and prevent cracking.
My radishes are all tops and no roots. What am I doing wrong?
This can be caused by several factors, including insufficient sunlight, overcrowding, and poor soil. Ensure your radishes are getting at least 6 hours of direct sunlight per day. Thin the seedlings to provide adequate spacing. Amend the soil with compost or well-rotted manure to provide essential nutrients.
Can I grow radishes in the winter?
Yes, you can grow radishes in the winter if you provide them with adequate protection from the cold. Grow them in a greenhouse, cold frame, or indoors under grow lights. Choose varieties that are specifically bred for winter growing.
How do I store harvested radishes?
To store harvested radishes, remove the greens and wash the roots. Store them in a plastic bag in the refrigerator for up to two weeks. You can also store them in a container of water in the refrigerator, changing the water every few days.
Leave a Comment