

Grow Pumpkins at Home, even if you think you don’t have the space! Have you ever dreamed of carving a pumpkin you grew yourself, or baking a delicious pumpkin pie from scratch using your own homegrown ingredients? It’s more achievable than you might think, and this DIY guide is here to show you how. Forget the grocery store pumpkins – we’re about to embark on a rewarding journey to cultivate these autumnal beauties right in your backyard, balcony, or even a sunny windowsill!
Pumpkins have a rich history, deeply intertwined with harvest festivals and traditions across many cultures. From their origins in Central America, where they were cultivated thousands of years ago, to their iconic status as symbols of Halloween in North America, pumpkins hold a special place in our hearts and celebrations. But beyond their decorative appeal, they’re also incredibly nutritious and versatile in the kitchen.
So, why should you learn to grow pumpkins at home? Well, for starters, it’s incredibly satisfying! There’s nothing quite like nurturing a tiny seed into a sprawling vine that yields a vibrant, orange pumpkin. Plus, you’ll have complete control over the growing process, ensuring your pumpkins are free from harmful pesticides and chemicals. In this article, I’ll share my favorite DIY tricks and hacks to help you successfully grow pumpkins, regardless of your gardening experience or space limitations. Let’s get started and turn your pumpkin dreams into a reality!
Growing Pumpkins at Home: A Comprehensive DIY Guide
Hey there, fellow gardening enthusiasts! Ever dreamt of carving your own homegrown pumpkin for Halloween or baking a delicious pumpkin pie with ingredients straight from your backyard? Well, you’ve come to the right place! I’m going to walk you through everything you need to know to successfully grow pumpkins at home, from seed to spooky centerpiece. Get ready to get your hands dirty!
Choosing Your Pumpkin Variety
Before we even think about planting, let’s talk pumpkins! There are so many varieties to choose from, each with its own unique size, shape, and flavor. Here’s a quick rundown of some popular options:
* **Jack O’Lantern:** The classic carving pumpkin! These are generally medium-sized and have a smooth, orange skin.
* **Sugar Pie:** Perfect for baking! These are smaller, sweeter, and have a denser flesh.
* **Giant Pumpkins (Atlantic Giant):** If you’re aiming for a prize-winning behemoth, this is the variety for you! Be warned, they require a lot of space and attention.
* **Mini Pumpkins (Jack Be Little, Baby Boo):** Adorable and perfect for decorations! These are small and come in various colors.
* **Specialty Pumpkins (Jarrahdale, Blue Doll):** These offer unique colors and textures, adding visual interest to your garden and fall displays.
Think about what you want to *do* with your pumpkins before you choose your variety. Baking? Carving? Decoration? This will help you narrow down your options.
Preparing Your Pumpkin Patch
Pumpkins are hungry plants, so soil preparation is key! They need plenty of sunlight, well-drained soil, and lots of nutrients.
* **Sunlight:** Pumpkins need at least 6-8 hours of direct sunlight per day. Choose a spot in your yard that gets plenty of sunshine.
* **Soil:** Pumpkins prefer well-drained soil that is rich in organic matter. If your soil is heavy clay or sandy, you’ll need to amend it.
* **Space:** Pumpkins need a lot of space to spread out. Each plant can easily take up 6-8 feet of space, so plan accordingly.
Step-by-Step Planting Guide
Now for the fun part: planting! You can either start your pumpkin seeds indoors or direct sow them in your garden. I prefer direct sowing, as it avoids transplant shock.
1. **Timing is Everything:** Pumpkins need a long growing season (90-120 days), so you’ll need to plant them after the last frost in your area. Check your local frost dates to determine the best time to plant. I usually aim for late May or early June.
2. **Prepare the Soil:** Before planting, amend your soil with plenty of compost or well-rotted manure. This will provide your pumpkins with the nutrients they need to thrive. Dig a hole that is about 1 inch deep.
3. **Planting the Seeds:** Plant 2-3 seeds per hill, spacing the hills about 2-3 feet apart. This ensures that at least one seed will germinate.
4. **Watering:** Water the seeds thoroughly after planting. Keep the soil consistently moist until the seedlings emerge.
5. **Thinning:** Once the seedlings have emerged and have a few true leaves, thin them to one plant per hill. Choose the strongest, healthiest seedling and snip off the others at the soil line. Don’t pull them out, as this can disturb the roots of the remaining seedling.
Caring for Your Pumpkin Plants
Once your pumpkin plants are established, it’s important to provide them with the care they need to grow big and strong.
* **Watering:** Pumpkins need consistent watering, especially during hot, dry weather. Water deeply and regularly, aiming for about 1 inch of water per week. Avoid watering the foliage, as this can lead to fungal diseases. I like to use a soaker hose or drip irrigation to water my pumpkins.
* **Fertilizing:** Pumpkins are heavy feeders, so you’ll need to fertilize them regularly. Use a balanced fertilizer (10-10-10) every few weeks. You can also side-dress your plants with compost or manure.
* **Weeding:** Keep your pumpkin patch free of weeds. Weeds compete with your pumpkin plants for water and nutrients. Hand-pull weeds carefully to avoid disturbing the pumpkin roots.
* **Pest Control:** Pumpkins can be susceptible to various pests, including squash bugs, squash vine borers, and cucumber beetles. Inspect your plants regularly for signs of pests and take action immediately. You can use organic pest control methods, such as insecticidal soap or neem oil. I also like to hand-pick pests off my plants whenever I see them.
* **Pollination:** Pumpkins are pollinated by bees and other insects. If you’re not seeing a lot of bees in your garden, you may need to hand-pollinate your pumpkins. To hand-pollinate, use a small paintbrush to transfer pollen from the male flowers to the female flowers. Male flowers have a long, thin stem, while female flowers have a small, immature pumpkin at the base.
Protecting Your Pumpkins
As your pumpkins grow, you’ll need to protect them from pests, diseases, and the elements.
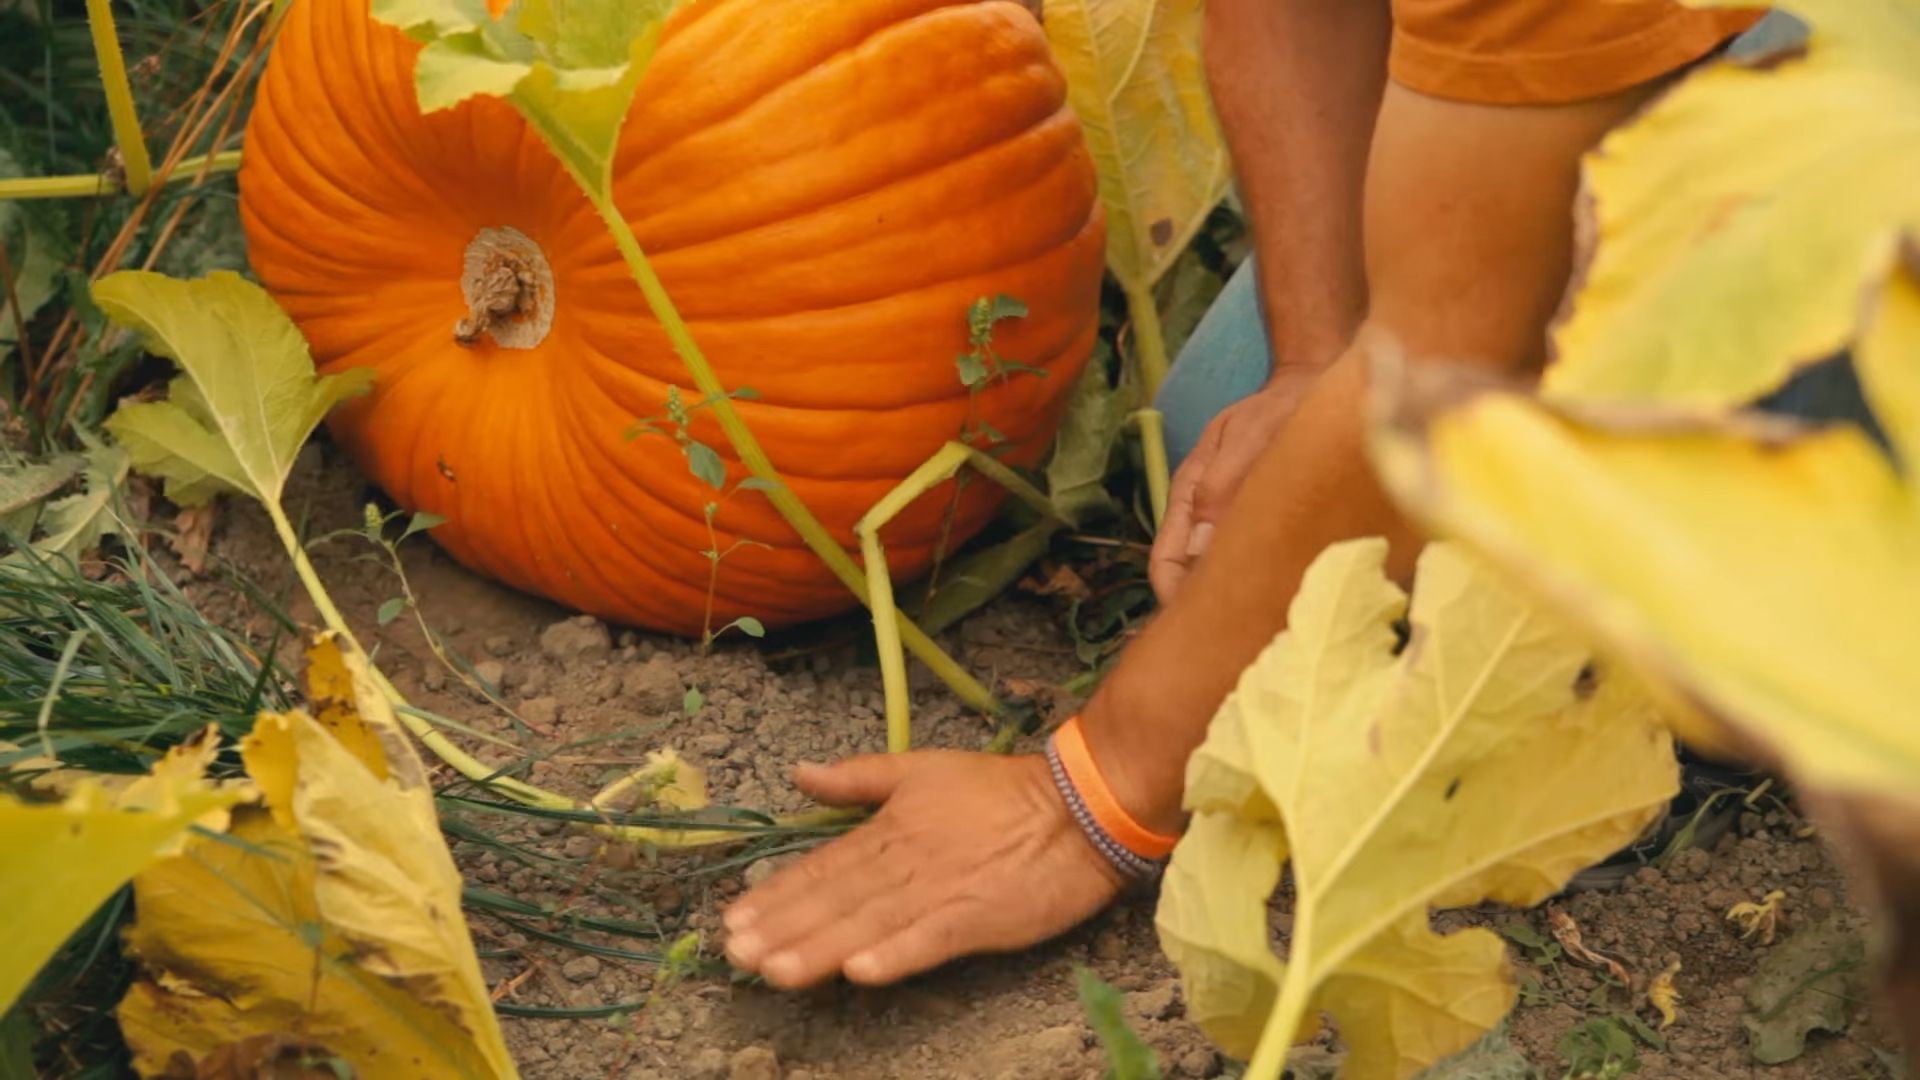
* **Elevate Your Pumpkins:** As your pumpkins get bigger, place them on a piece of cardboard or wood to prevent them from rotting. This will also protect them from pests and diseases.
* **Protect from Sunburn:** In hot climates, pumpkins can get sunburned. To protect them, you can drape them with a piece of cloth or shade them with a plant.
* **Protect from Frost:** If you’re expecting a frost, cover your pumpkins with a blanket or tarp. This will protect them from damage.
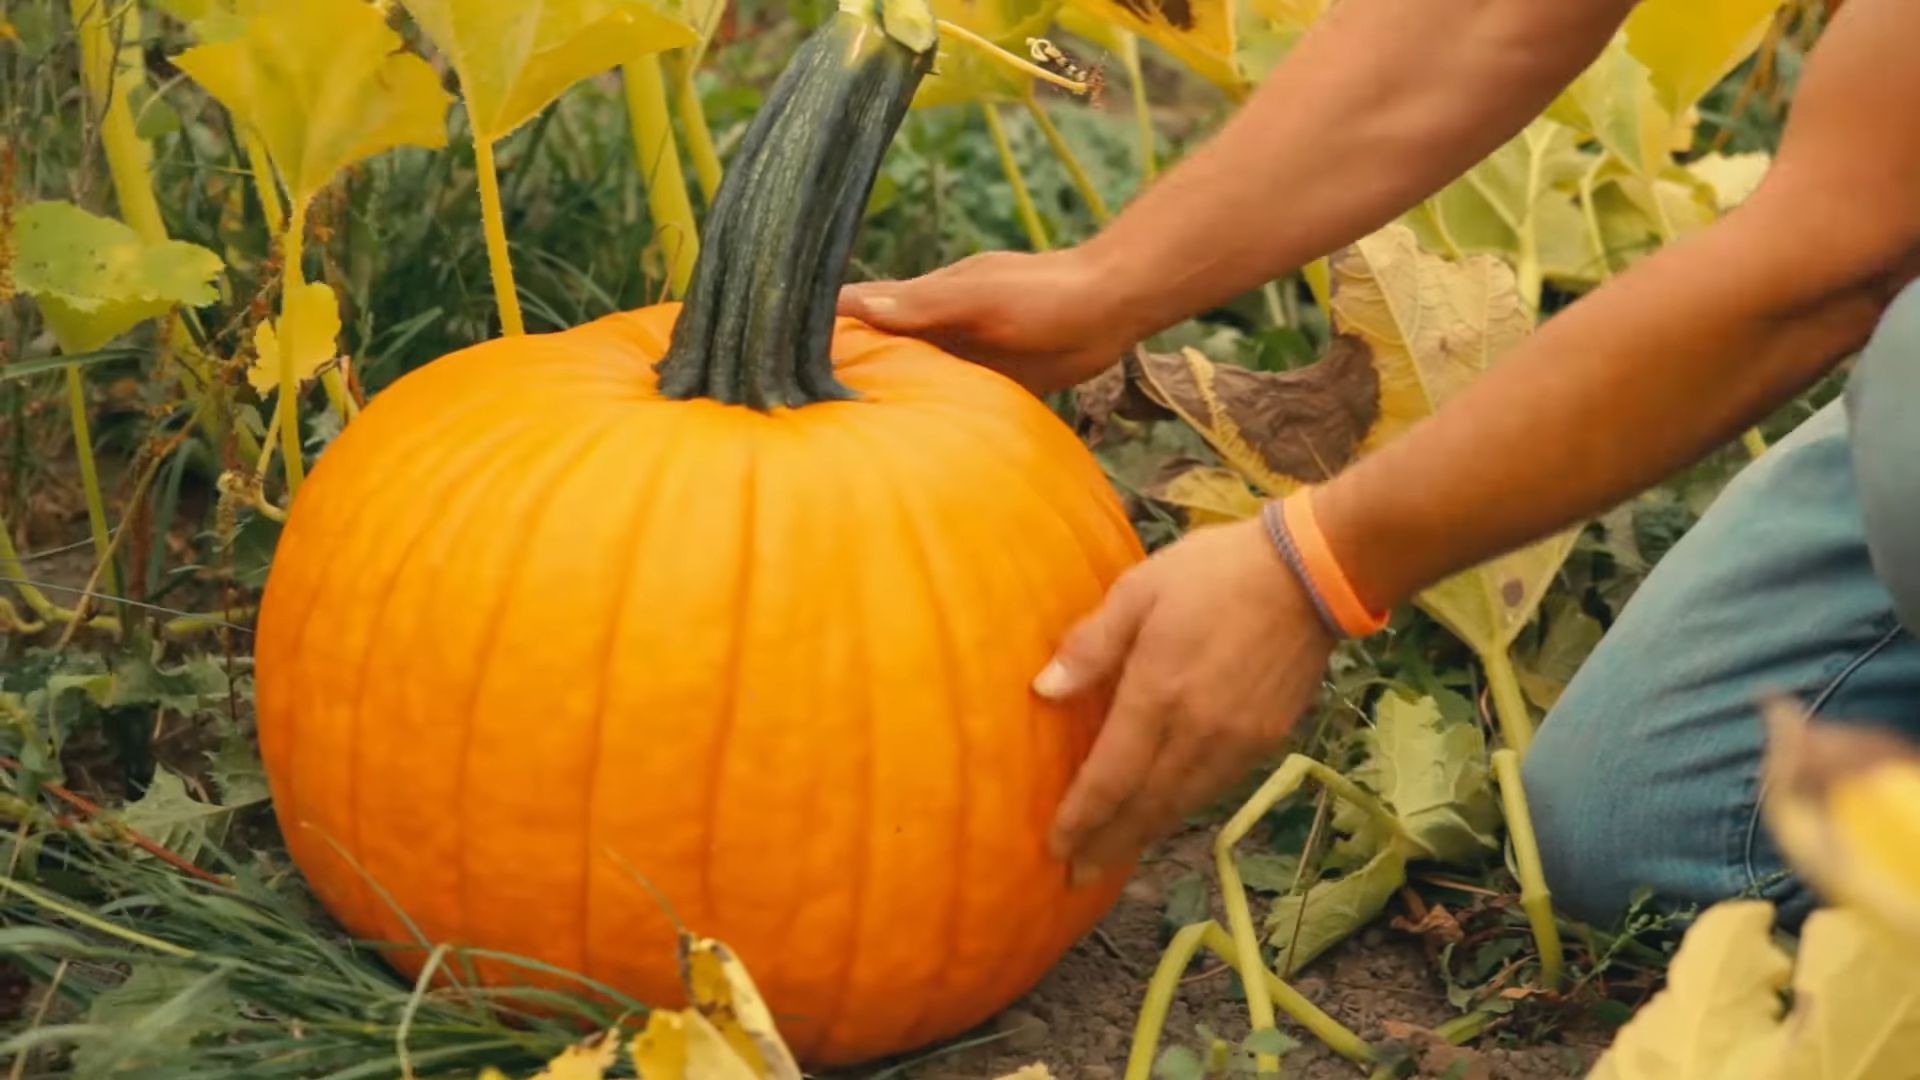
Harvesting Your Pumpkins
The moment we’ve all been waiting for! Knowing when to harvest your pumpkins is crucial for ensuring they are ripe and will store well.
1. **Check the Color:** The pumpkin should be a deep, solid color. The color will vary depending on the variety.
2. **Check the Stem:** The stem should be dry and hard. If the stem is still green, the pumpkin is not ripe.
3. **Knock on the Pumpkin:** The pumpkin should sound hollow when you knock on it.
4. **Harvest Carefully:** Use a sharp knife or pruning shears to cut the pumpkin from the vine, leaving about 4 inches of stem attached. Be careful not to damage the pumpkin.
Curing Your Pumpkins
Curing your pumpkins will help them last longer.
1. **Clean the Pumpkins:** Wipe the pumpkins clean with a damp cloth.
2. **Cure in a Warm, Dry Place:** Place the pumpkins in a warm, dry place with good air circulation for about 1-2 weeks. This will help the skin harden and prevent rot. I usually cure my pumpkins in my garage.
Storing Your Pumpkins
Once your pumpkins are cured, you can store them in a cool, dry place.
* **Temperature:** The ideal storage temperature for pumpkins is between 50-60 degrees Fahrenheit.
* **Humidity:** The humidity should be low.
* **Air Circulation:** Good air circulation is important to prevent rot.
* **Storage Location:** A basement, garage, or shed are good places to store pumpkins.
Troubleshooting Common Pumpkin Problems
Even with the best care, you may encounter some problems while growing pumpkins. Here are some common issues and how to address them:
* **Powdery Mildew:** This fungal disease causes a white, powdery coating on the leaves. To prevent powdery mildew, provide good air circulation and avoid watering the foliage. If you see signs of powdery mildew, treat your plants with a fungicide.
* **Squash Bugs:** These pests suck the sap from pumpkin plants, causing them to wilt and die. To control squash bugs, hand-pick them off your plants or use insecticidal soap.
* **Squash Vine Borers:** These pests bore into the stems of pumpkin plants, causing them to wilt and die. To prevent squash vine borers, wrap the stems of your plants with aluminum foil or netting. If you see signs of squash vine borers, you can try to remove them by slitting the stem and pulling them out.
* **Blossom End Rot:** This condition causes the blossom end of the pumpkin to rot. Blossom end rot is caused by a calcium deficiency. To prevent blossom end rot, amend your soil with calcium before planting and water your plants regularly.
Enjoying Your Homegrown Pumpkins
Congratulations! You’ve successfully grown pumpkins at home! Now it’s time to enjoy the fruits (or vegetables!) of your labor. Carve them, bake them, decorate with them – the possibilities are endless! I hope this guide has been helpful. Happy gardening!
Conclusion
So, there you have it! Growing pumpkins at home, while it might seem daunting at first, is entirely achievable and incredibly rewarding. This DIY trick, focusing on [specific trick mentioned in the article, e.g., companion planting with marigolds, or using a milk jug watering system], offers a simple yet effective way to boost your pumpkin yield and ensure healthier, more vibrant plants. It’s not just about getting bigger pumpkins; it’s about connecting with nature, understanding the growing process, and enjoying the fruits (or rather, vegetables!) of your labor.
Why is this a must-try? Because it addresses some of the most common challenges faced by home gardeners attempting to cultivate these autumnal giants. [Mention specific benefits of the trick, e.g., Companion planting naturally deters pests, reducing the need for harmful chemicals. The milk jug watering system provides consistent hydration directly to the roots, minimizing water waste and preventing fungal diseases]. These benefits translate to less work for you, healthier plants, and ultimately, a more bountiful harvest.
But don’t stop there! Feel free to experiment and adapt this DIY trick to suit your specific garden conditions and preferences. For instance, if you’re using the [example trick] companion planting method, try different varieties of marigolds or other beneficial flowers like nasturtiums to see which works best in your area. You could also explore using different types of organic mulch to further suppress weeds and retain moisture. If you’re using the milk jug watering system, consider adding a diluted liquid fertilizer to the water for an extra nutrient boost. Remember, gardening is all about learning and adapting!
We’re confident that this DIY trick will significantly improve your pumpkin-growing experience. Imagine the satisfaction of carving a pumpkin you grew yourself, knowing that you nurtured it from seed to magnificent gourd. The possibilities are endless, from pumpkin pies and soups to roasted pumpkin seeds and decorative displays.
Now, it’s your turn! We wholeheartedly encourage you to try this DIY trick for growing pumpkins at home. Don’t be afraid to get your hands dirty and embrace the process. And most importantly, we want to hear about your experience! Share your photos, tips, and stories in the comments below. Let’s create a community of pumpkin-growing enthusiasts and learn from each other’s successes and challenges. Happy gardening, and may your pumpkin patch be overflowing with orange goodness!
Frequently Asked Questions (FAQ)
Q: What is the best time to start growing pumpkins at home?
A: The ideal time to start growing pumpkins depends on your climate and the specific variety you’re planting. Generally, pumpkins require a long growing season of 90-120 days. In most regions, you’ll want to start seeds indoors about 3-4 weeks before the last expected frost. If you live in a warmer climate with a longer growing season, you can direct sow the seeds directly into the ground after the last frost. Check the seed packet for specific recommendations for your chosen pumpkin variety. Remember to consider the days to maturity when planning your planting schedule. Starting too early can lead to overgrown seedlings, while starting too late may result in smaller pumpkins or no pumpkins at all.
Q: What kind of soil is best for growing pumpkins?
A: Pumpkins thrive in well-drained, fertile soil that is rich in organic matter. The ideal soil pH is between 6.0 and 7.0. Before planting, amend your soil with compost, aged manure, or other organic materials to improve its structure and fertility. This will provide the necessary nutrients for healthy pumpkin growth. Avoid heavy clay soils that retain too much water, as this can lead to root rot. If you have clay soil, consider adding sand or other drainage-improving amendments. A soil test can help you determine the specific nutrient deficiencies in your soil and guide your amendment choices.
Q: How much sunlight do pumpkins need?
A: Pumpkins are sun-loving plants and require at least 6-8 hours of direct sunlight per day. Choose a planting location that receives ample sunlight throughout the day. Insufficient sunlight can result in stunted growth, reduced fruit production, and smaller pumpkins. If you live in a particularly hot climate, some afternoon shade may be beneficial to prevent the plants from overheating. Monitor your plants closely and adjust their location if necessary to ensure they are receiving adequate sunlight.
Q: How often should I water my pumpkin plants?
A: Pumpkins need consistent watering, especially during hot, dry weather. Water deeply and regularly, aiming to keep the soil consistently moist but not waterlogged. The frequency of watering will depend on your climate, soil type, and the size of your plants. As a general rule, water deeply once or twice a week, providing about 1-2 inches of water each time. Use a soaker hose or drip irrigation to deliver water directly to the roots, minimizing water waste and preventing fungal diseases. Avoid overhead watering, as this can promote the development of powdery mildew and other foliar diseases. Check the soil moisture regularly and adjust your watering schedule accordingly.
Q: What are some common pests and diseases that affect pumpkins, and how can I control them?
A: Pumpkins are susceptible to several pests and diseases, including squash bugs, squash vine borers, powdery mildew, and downy mildew. Squash bugs can be controlled by handpicking them off the plants or using insecticidal soap. Squash vine borers can be prevented by wrapping the base of the stems with aluminum foil or using row covers. Powdery mildew and downy mildew can be prevented by ensuring good air circulation, avoiding overhead watering, and using fungicides if necessary. Companion planting with marigolds can also help deter pests. Regularly inspect your plants for signs of pests or diseases and take action promptly to prevent them from spreading. Organic gardening practices, such as using compost tea and neem oil, can also help to control pests and diseases.
Q: How do I know when my pumpkins are ripe?
A: Pumpkins are typically ready to harvest when they have reached their mature color, the skin is hard and resistant to scratching, and the stem is dry and brown. The color will vary depending on the variety of pumpkin you are growing. Gently tap the pumpkin; a ripe pumpkin will sound hollow. Use pruning shears or a sharp knife to cut the pumpkin from the vine, leaving several inches of stem attached. Avoid lifting the pumpkin by the stem, as this can damage it and shorten its storage life. Cure the pumpkins in a warm, dry place for 1-2 weeks to harden the skin and improve their storage quality.
Leave a Comment