

Grow Okra at Home and unlock a world of culinary possibilities right in your backyard! Have you ever dreamed of plucking fresh, vibrant okra pods straight from the vine, ready to be transformed into a delicious gumbo or a crispy, Southern-fried delight? Well, dream no more! This DIY guide is your passport to cultivating this fascinating vegetable, even if you’re a complete beginner.
Okra, also known as “lady’s fingers,” boasts a rich history, originating in Ethiopia and making its way across continents to become a staple in cuisines worldwide. From the American South to West Africa and India, okra has been cherished for its unique flavor and nutritional benefits for centuries. It’s more than just a vegetable; it’s a cultural icon!
But why should you bother learning to grow okra at home? Simple: freshness, flavor, and control. Store-bought okra often lacks the vibrant taste of homegrown varieties. Plus, gardening offers a therapeutic escape from the daily grind, connecting you with nature and providing a sense of accomplishment. I’m here to show you how to bypass the grocery store and enjoy the satisfaction of harvesting your own delicious okra. This DIY guide will equip you with the knowledge and simple tricks to successfully cultivate okra, regardless of your gardening experience. Let’s get started!
Grow Your Own Delicious Okra: A Beginner’s Guide
Hey there, fellow gardening enthusiasts! I’m so excited to share my experience with growing okra at home. It’s surprisingly easy, and nothing beats the taste of fresh, homegrown okra. This guide will walk you through every step, from choosing the right variety to harvesting your bounty. Let’s get started!
Choosing the Right Okra Variety
Before you even think about planting, you need to pick the right okra variety for your climate and preferences. Here are a few popular options:
* Clemson Spineless: This is a classic choice, known for its smooth pods and high yields. It’s also relatively spineless, making harvesting a breeze.
* Emerald: Another spineless variety, Emerald produces dark green, tender pods. It’s a great option for those who prefer a milder flavor.
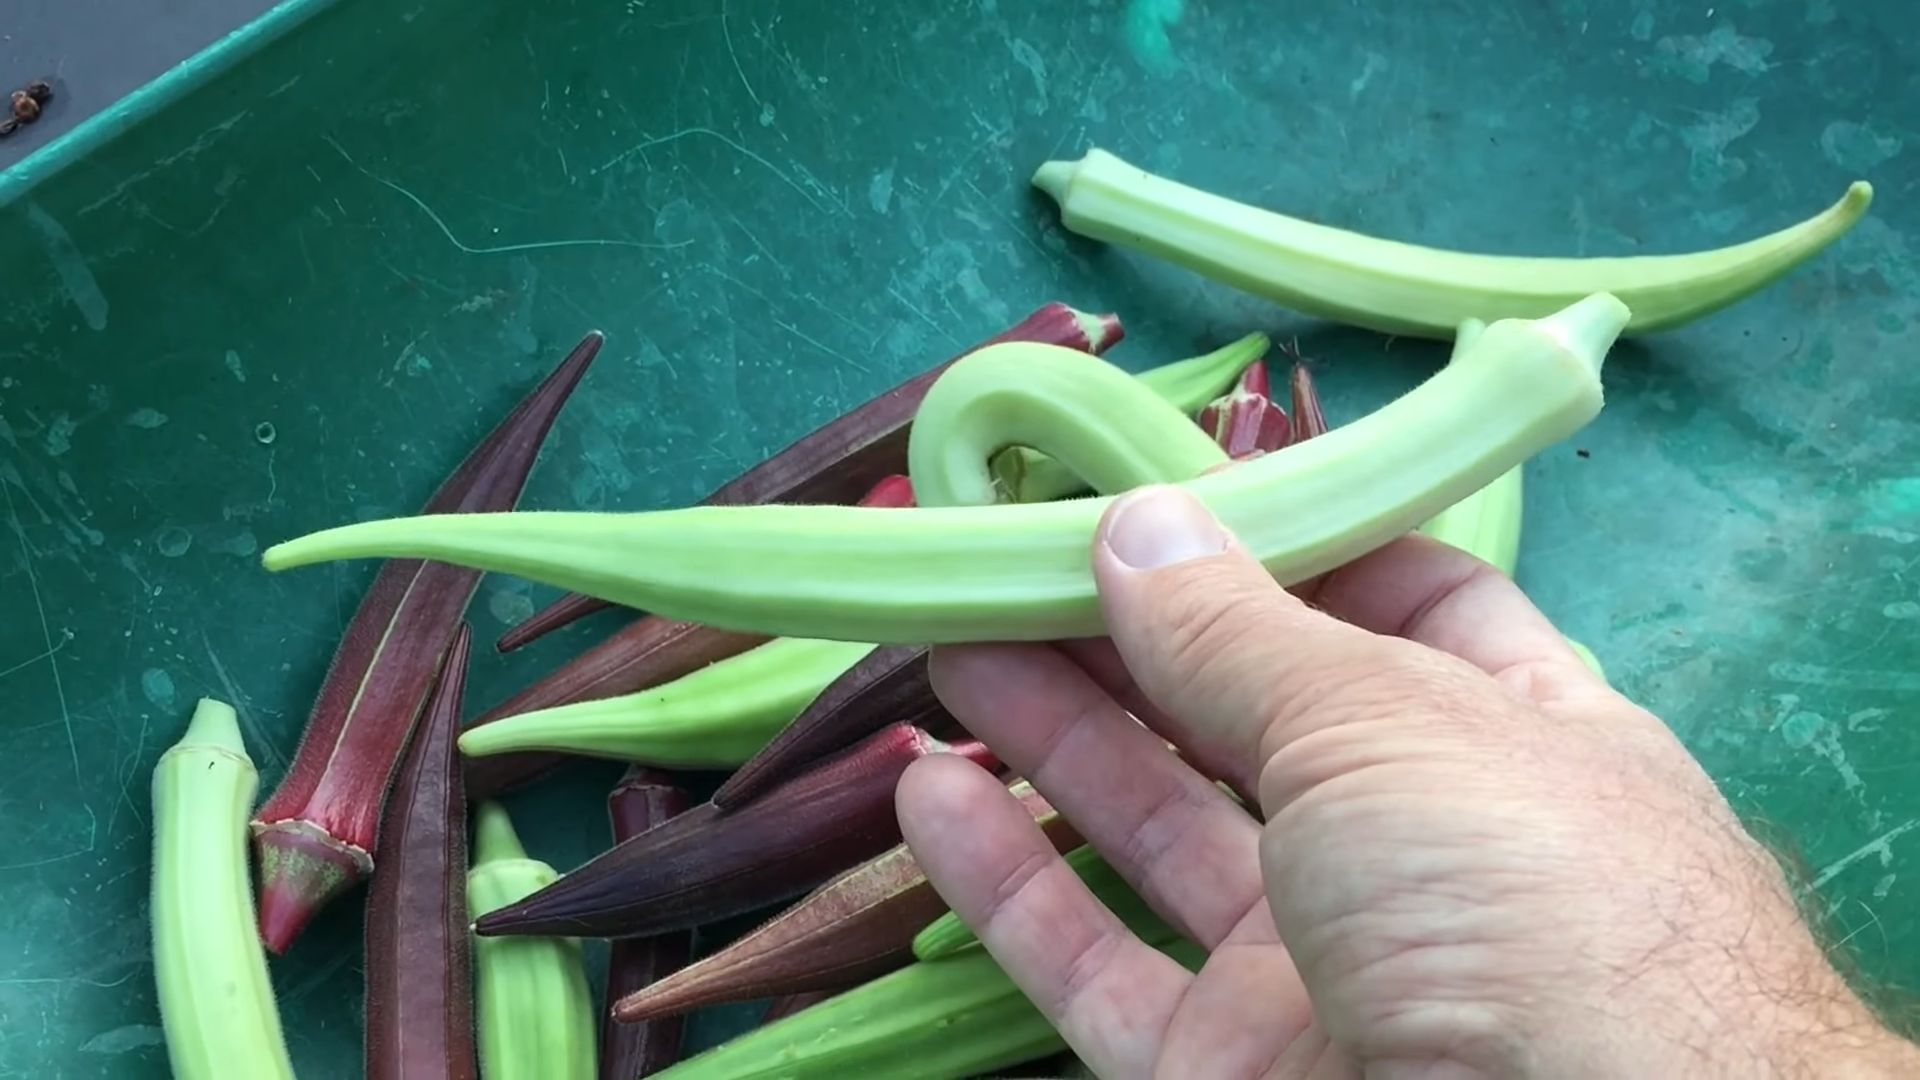
* Burgundy: If you’re looking for something a little different, Burgundy okra boasts beautiful red pods that turn green when cooked. It adds a pop of color to your garden!
* Annie Oakley II: A compact variety perfect for smaller gardens or containers. It produces high yields of tender pods.
Consider your local climate and growing season when making your choice. Okra thrives in warm weather, so make sure you have enough time for it to mature before the first frost.
Preparing Your Garden Bed
Okra needs plenty of sunshine and well-drained soil to flourish. Here’s how to prepare your garden bed:
* Sunlight: Choose a spot that gets at least 6-8 hours of direct sunlight per day.
* Soil: Okra prefers slightly acidic soil with a pH between 6.0 and 6.8. Amend your soil with compost or well-rotted manure to improve drainage and fertility.
* Weeding: Remove any weeds or grass from the planting area. Weeds compete with okra for nutrients and water.
* Tilling: Till the soil to a depth of at least 12 inches to loosen it up and improve drainage.
* Fertilizing: Incorporate a balanced fertilizer into the soil before planting. Look for a fertilizer with an NPK ratio of 10-10-10 or similar.
Planting Okra Seeds
Okra is best planted directly in the ground after the last frost. Here’s how to do it:
1. Timing: Wait until the soil has warmed up to at least 65°F (18°C) before planting. This is usually a few weeks after the last frost.
2. Soaking Seeds: Soak the okra seeds in water for 12-24 hours before planting. This will help them germinate faster.
3. Spacing: Plant the seeds about 1 inch deep and 6-12 inches apart in rows that are 3-4 feet apart.
4. Watering: Water the seeds thoroughly after planting. Keep the soil moist but not soggy until the seedlings emerge.
5. Thinning: Once the seedlings are a few inches tall, thin them to 12-18 inches apart. This will give them enough room to grow and produce pods.
Caring for Your Okra Plants
Okra is relatively low-maintenance, but here are a few things you can do to help your plants thrive:
* Watering: Water your okra plants regularly, especially during hot, dry weather. Aim for about 1 inch of water per week.
* Fertilizing: Fertilize your okra plants every 4-6 weeks with a balanced fertilizer.
* Weeding: Keep the area around your okra plants free of weeds.
* Mulching: Apply a layer of mulch around your okra plants to help retain moisture, suppress weeds, and regulate soil temperature.
* Pest Control: Keep an eye out for pests like aphids, flea beetles, and stink bugs. Treat infestations with insecticidal soap or neem oil.
* Pruning: You can prune the lower leaves of your okra plants to improve air circulation and prevent disease.
Harvesting Okra Pods
Harvesting okra at the right time is crucial for getting tender, flavorful pods.
1. Timing: Okra pods are typically ready to harvest 50-65 days after planting.
2. Size: Harvest the pods when they are 2-4 inches long. Larger pods tend to be tough and fibrous.
3. Method: Use a sharp knife or pruning shears to cut the pods from the plant. Be careful not to damage the plant.
4. Frequency: Harvest okra pods every 1-2 days. This will encourage the plant to produce more pods.
5. Handling: Wear gloves and long sleeves when harvesting okra, as the pods can be prickly and irritating to the skin.
Dealing with Common Okra Problems
Even with the best care, you might encounter some problems while growing okra. Here are a few common issues and how to address them:
* Yellowing Leaves: This can be caused by nutrient deficiencies, overwatering, or pests. Check the soil pH and nutrient levels, adjust your watering schedule, and treat any pest infestations.
* Stunted Growth: This can be caused by poor soil, lack of sunlight, or pests. Amend the soil with compost, ensure the plants are getting enough sunlight, and treat any pest infestations.
* Blossom End Rot: This is caused by calcium deficiency. Add calcium to the soil by incorporating bone meal or crushed eggshells.
* Pest Infestations: Aphids, flea beetles, and stink bugs can damage okra plants. Treat infestations with insecticidal soap or neem oil.
Growing Okra in Containers
If you don’t have a garden, you can still grow okra in containers! Here’s what you need to know:
* Container Size: Choose a container that is at least 12 inches in diameter and 12 inches deep.
* Potting Mix: Use a high-quality potting mix that drains well.
* Sunlight: Place the container in a spot that gets at least 6-8 hours of direct sunlight per day.
* Watering: Water the container regularly, especially during hot, dry weather.
* Fertilizing: Fertilize the container every 2-4 weeks with a balanced fertilizer.
Saving Okra Seeds
If you want to save seeds from your okra plants for next year, here’s how:
1. Selection: Allow a few pods to mature fully on the plant. These pods will become dry and brown.
2. Harvesting: Harvest the dry pods and remove the seeds.
3. Drying: Spread the seeds out on a tray and allow them to dry completely.
4. Storage: Store the dried seeds in an airtight container in a cool, dry place.
Enjoying Your Homegrown Okra
Now that you’ve harvested your okra, it’s time to enjoy it! Here are a few ideas:
* Fried Okra: A classic Southern dish. Slice the okra, dredge it in cornmeal, and fry it until golden brown.
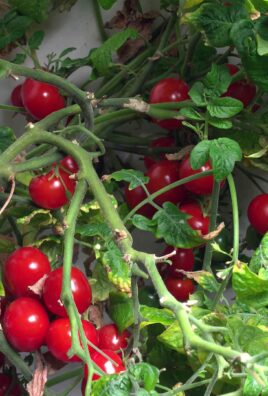
* Okra Gumbo: A hearty stew with okra, tomatoes, and other vegetables.
* Roasted Okra: Toss the okra with olive oil and spices and roast it in the oven until tender.
* Pickled Okra: A tangy and flavorful condiment.
Troubleshooting: My Okra Isn’t Producing Pods!
Sometimes, despite your best efforts, your okra plants might not produce as many pods as you’d hoped. Here are a few reasons why and what you can do:
* Lack of Sunlight: Okra needs at least 6-8 hours of direct sunlight daily. If your plants aren’t getting enough sun, they won’t produce well. Try moving them to a sunnier location or trimming back any surrounding plants that are blocking the light.
* Poor Soil: Okra needs well-drained, fertile soil. If your soil is compacted or lacking in nutrients, it can hinder pod production. Amend your soil with compost or well-rotted manure to improve its quality. A soil test can help you determine if there are any specific nutrient deficiencies.
* Overwatering or Underwatering: Both overwatering and underwatering can stress okra plants and reduce pod production. Water deeply but infrequently, allowing the soil to dry out slightly between waterings. Check the soil moisture regularly to ensure it’s not too wet or too dry.
* Nutrient Deficiency: Okra needs a balanced supply of nutrients to produce pods. A lack of phosphorus or potassium can be particularly detrimental. Fertilize your plants with a balanced fertilizer or one specifically formulated for fruiting vegetables.
* Pest Infestations: Pests like aphids, flea beetles, and stink bugs can suck the sap from okra plants, weakening them and reducing pod production. Inspect your plants regularly for

Conclusion
So, there you have it! Growing okra at home is not only achievable, but it’s also incredibly rewarding. Forget those bland, overpriced okra pods at the grocery store. Imagine stepping into your own backyard and harvesting plump, vibrant okra, bursting with flavor and freshness. This DIY approach puts you in complete control, allowing you to cultivate organic, healthy produce without breaking the bank.
Why is this a must-try? Because it’s more than just growing a vegetable; it’s about connecting with nature, understanding the food you eat, and enjoying the satisfaction of nurturing something from seed to table. Plus, fresh, homegrown okra tastes infinitely better than anything you can buy. The texture is firmer, the flavor is sweeter, and you know exactly where it came from.
But the benefits don’t stop there. Growing your own okra allows you to experiment with different varieties. Want something with a deep red hue? Try ‘Burgundy’ okra. Prefer a spineless variety for easier harvesting? ‘Clemson Spineless’ is a great choice. You can even explore different growing methods, such as container gardening for those with limited space, or companion planting to enhance growth and deter pests. Consider planting basil or marigolds nearby to naturally repel common okra pests.
And speaking of variations, don’t be afraid to get creative with your okra harvest! Beyond the classic fried okra, explore recipes for okra gumbo, pickled okra, roasted okra, or even okra chips. The possibilities are endless! You can also save seeds from your best-performing plants to ensure a continuous supply of homegrown okra year after year.
We wholeheartedly encourage you to give this DIY trick a try. It’s easier than you might think, and the rewards are well worth the effort. Start small, learn as you go, and don’t be afraid to experiment. Growing okra at home is a journey, and we’re confident that you’ll find it to be a fulfilling and delicious one.
Once you’ve harvested your first batch of homegrown okra, we’d love to hear about your experience! Share your tips, tricks, and favorite recipes in the comments below. Let’s build a community of okra enthusiasts and inspire others to embrace the joys of homegrown goodness. Happy gardening!
Frequently Asked Questions (FAQ)
1. What is the best time to plant okra?
Okra thrives in warm weather, so the best time to plant it is after the last frost when the soil has warmed up to at least 65°F (18°C). In most regions, this is typically in late spring or early summer. Planting too early in cool soil can lead to poor germination and stunted growth. If you live in a region with a short growing season, you can start okra seeds indoors 4-6 weeks before the last expected frost and transplant them outdoors once the weather warms up.
2. What kind of soil does okra need?
Okra prefers well-drained, fertile soil with a slightly acidic to neutral pH (6.0-7.0). Before planting, amend the soil with compost or well-rotted manure to improve drainage and nutrient content. Okra is a heavy feeder, so it benefits from soil rich in organic matter. Avoid planting okra in heavy clay soil, as this can lead to root rot. If you have clay soil, amend it with plenty of organic matter to improve drainage.
3. How much sunlight does okra need?
Okra needs at least 6-8 hours of direct sunlight per day to thrive. Choose a planting location that receives full sun throughout the day. Insufficient sunlight can result in weak, leggy plants with reduced yields. If you’re growing okra in containers, make sure to place them in a sunny spot.
4. How often should I water okra?
Okra needs consistent moisture, especially during hot, dry weather. Water deeply and regularly, aiming to keep the soil consistently moist but not waterlogged. Avoid overhead watering, as this can promote fungal diseases. Instead, water at the base of the plants. Mulching around the plants can help retain moisture and suppress weeds. During periods of heavy rain, you may need to reduce watering frequency.
5. How do I fertilize okra?
Okra is a heavy feeder and benefits from regular fertilization. Before planting, incorporate a balanced fertilizer into the soil. During the growing season, side-dress the plants with a nitrogen-rich fertilizer every 4-6 weeks. You can also use a liquid fertilizer, such as fish emulsion or seaweed extract, to provide a boost of nutrients. Avoid over-fertilizing, as this can lead to excessive foliage growth and reduced fruit production.
6. How do I harvest okra?
Okra pods are typically ready to harvest 50-65 days after planting. Harvest the pods when they are 2-4 inches long and still tender. Use a sharp knife or pruning shears to cut the pods from the plant. Harvest okra regularly, every 1-2 days, to encourage continuous production. Overripe okra pods become tough and fibrous. Wear gloves when harvesting okra, as the pods can be prickly and irritating to the skin.
7. What are some common pests and diseases that affect okra?
Okra can be susceptible to several pests and diseases, including aphids, flea beetles, corn earworms, and fungal diseases such as powdery mildew and root rot. To prevent pest and disease problems, practice good garden hygiene, such as removing weeds and debris, and providing adequate spacing between plants. You can also use organic pest control methods, such as insecticidal soap or neem oil, to control pests. To prevent fungal diseases, avoid overhead watering and ensure good air circulation around the plants.
8. Can I grow okra in containers?
Yes, okra can be successfully grown in containers, provided you choose a large enough container (at least 5 gallons) and use a well-draining potting mix. Make sure the container has drainage holes to prevent waterlogging. Place the container in a sunny location and water regularly. You may need to fertilize container-grown okra more frequently than okra grown in the ground.
9. How do I save okra seeds?
To save okra seeds, allow some of the pods to mature fully on the plant. The pods will become dry and brown. Once the pods are completely dry, harvest them and remove the seeds. Spread the seeds out on a tray to dry completely before storing them in an airtight container in a cool, dry place. Okra seeds can remain viable for several years if stored properly.
10. What are some good companion plants for okra?
Okra benefits from companion planting with certain herbs and vegetables. Basil, marigolds, and nasturtiums can help repel common okra pests. Legumes, such as beans and peas, can fix nitrogen in the soil, benefiting okra’s growth. Avoid planting okra near plants in the cabbage family, such as broccoli and cauliflower, as they can compete for nutrients.


Leave a Comment