

Grow Mustard Greens, and unlock a world of peppery flavor right in your backyard! Imagine stepping outside and harvesting fresh, vibrant greens for a zesty salad, a spicy stir-fry, or even a flavorful addition to your favorite soup. Forget those bland, pre-packaged greens from the grocery store – with a few simple tricks, you can cultivate your own thriving mustard green patch, bursting with nutrients and taste.
Mustard greens have a rich history, dating back thousands of years. Originating in the Himalayan region, they’ve been a staple in Asian, African, and Southern American cuisines for generations. Beyond their culinary appeal, these greens were also valued for their medicinal properties, believed to aid digestion and boost immunity. I think that’s pretty cool!
Why should you learn these DIY tricks for growing mustard greens? Well, for starters, it’s incredibly rewarding to nurture your own food from seed to table. Plus, growing your own ensures you know exactly what’s going into your greens – no harmful pesticides or hidden chemicals. But more importantly, mastering these simple hacks will save you money, reduce your environmental impact, and provide you with a constant supply of delicious, healthy greens. So, let’s dive in and discover the secrets to a bountiful mustard green harvest!
Grow Your Own Mustard Greens: A Beginner’s Guide
Hey there, fellow gardening enthusiasts! I’m so excited to share my experience with growing mustard greens. They’re incredibly easy to cultivate, packed with nutrients, and add a zesty kick to salads, stir-fries, and more. Plus, seeing those vibrant green leaves sprout from seeds you planted is just plain rewarding. Let’s dive into how you can grow your own delicious mustard greens!
Choosing Your Mustard Green Variety
First things first, let’s talk about variety. There are several types of mustard greens, each with its own unique flavor and texture. Here are a few popular options:
* Southern Giant Curled: This is a classic variety known for its large, frilly leaves and mild mustard flavor. It’s a great choice for beginners.
* Florida Broadleaf: As the name suggests, this variety has broad, smooth leaves and a slightly stronger, more pungent flavor.
* Red Giant: If you’re looking for something visually striking, Red Giant is the way to go. Its leaves are a beautiful deep purple-red and have a robust, spicy flavor.
* Osaka Purple: Similar to Red Giant, but with a slightly milder flavor. It’s also very ornamental.
* Mizuna: This Japanese mustard green has feathery, serrated leaves and a mild, peppery flavor. It’s a great addition to salads.
I personally love growing Southern Giant Curled because it’s so reliable and versatile. But feel free to experiment and find the variety that suits your taste!
Preparing for Planting
Before you start sowing seeds, there are a few things you need to consider:
* Timing: Mustard greens are cool-season crops, which means they thrive in cooler temperatures. The best time to plant them is in early spring or late summer/early fall. In spring, sow seeds 2-4 weeks before the last expected frost. For a fall harvest, plant 6-8 weeks before the first expected frost. I usually aim for a late August planting for a fall harvest.
* Location: Mustard greens need at least 4-6 hours of sunlight per day. Choose a spot in your garden that gets plenty of sun. They can tolerate some partial shade, especially in hotter climates.
* Soil: Mustard greens prefer well-drained soil that is rich in organic matter. Before planting, amend your soil with compost or well-rotted manure. This will improve drainage and provide essential nutrients. The ideal soil pH is between 6.0 and 7.5.
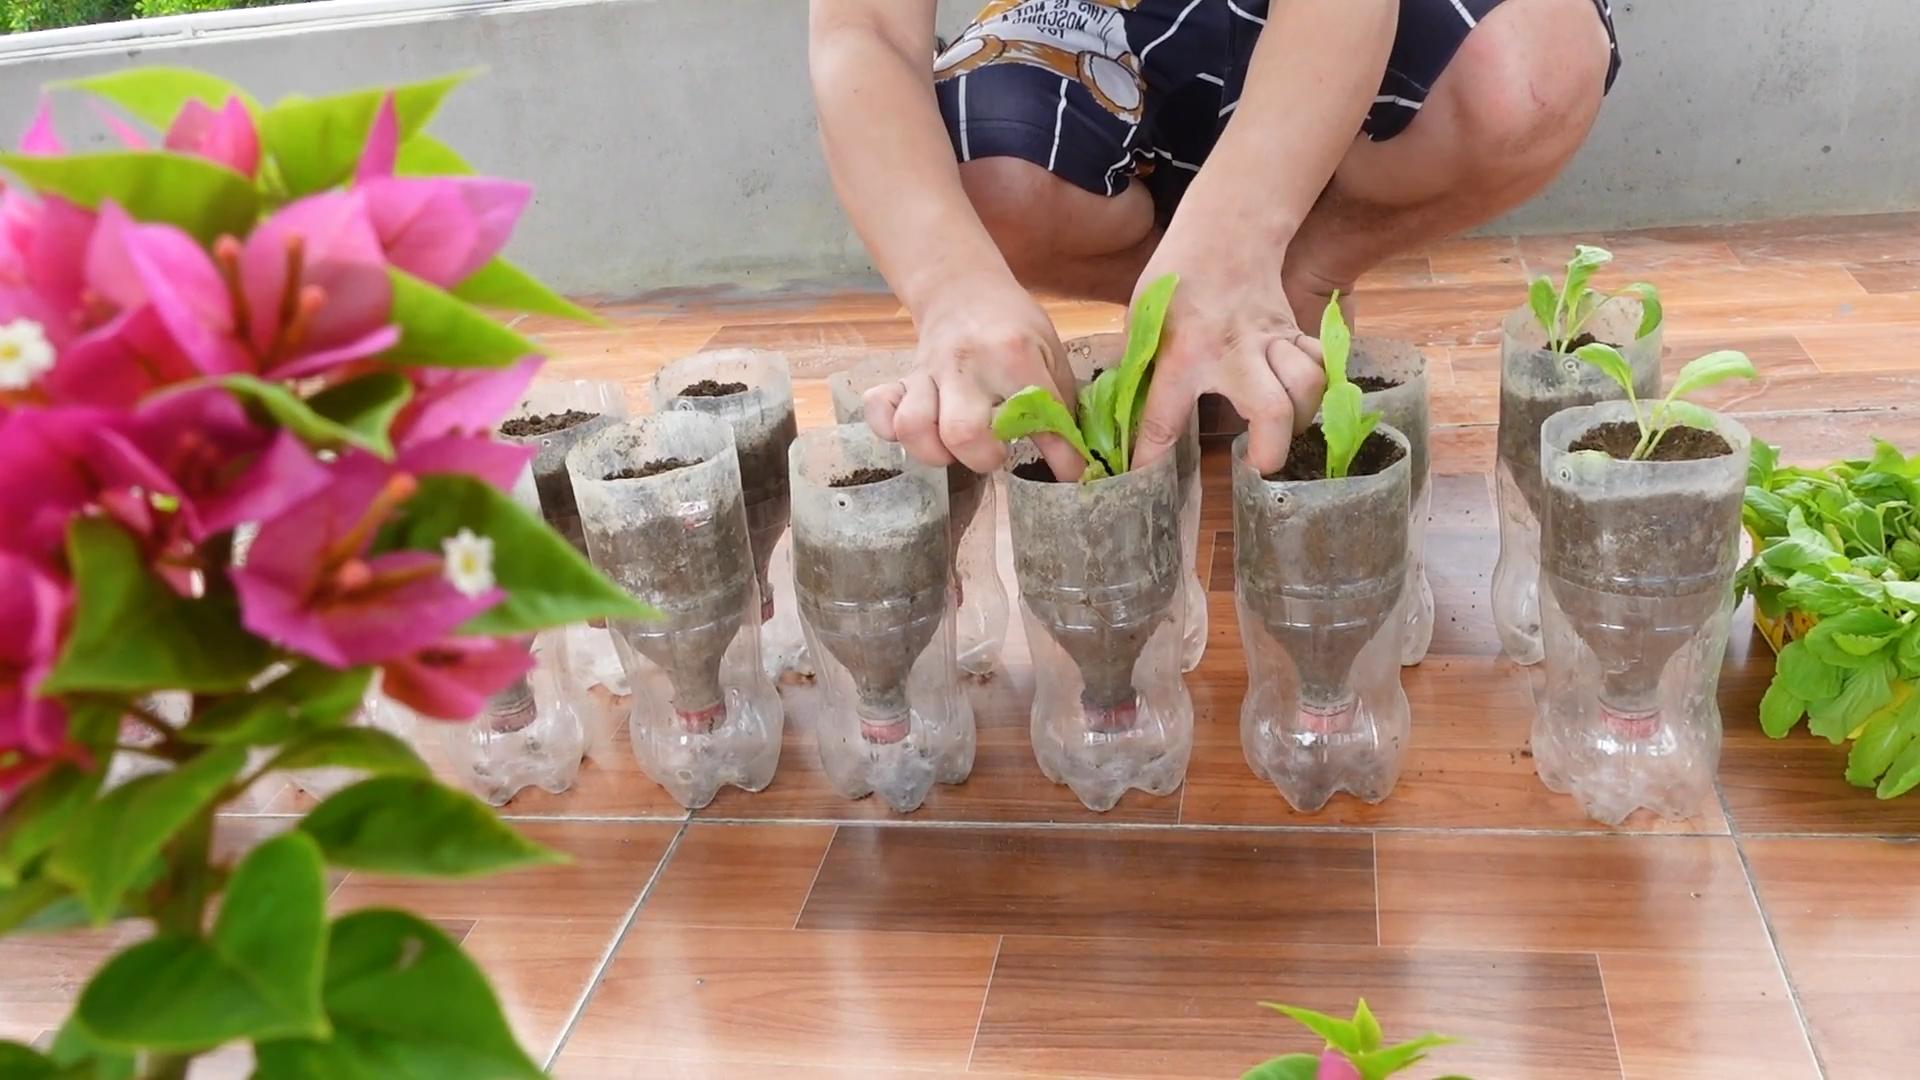
* Container Growing: If you don’t have a garden, you can easily grow mustard greens in containers. Choose a container that is at least 6 inches deep and has drainage holes. Use a good quality potting mix.
Planting Your Mustard Greens
Now for the fun part – planting! Here’s a step-by-step guide:
1. Prepare the soil: Whether you’re planting in the ground or in a container, make sure the soil is loose and free of any large clumps. Rake the soil surface smooth.
2. Sow the seeds: Mustard green seeds are tiny, so you don’t need to plant them very deep. Sow the seeds about ¼ inch deep and ½ inch apart. You can either sow them in rows or broadcast them over the soil surface.
3. Cover the seeds: Gently cover the seeds with a thin layer of soil.
4. Water thoroughly: Water the soil gently but thoroughly. You want to make sure the soil is moist but not waterlogged.
5. Keep the soil moist: Keep the soil consistently moist until the seeds germinate. This usually takes about 5-7 days. You can use a spray bottle to mist the soil if needed.
Caring for Your Mustard Greens
Once your mustard greens have sprouted, it’s important to provide them with proper care to ensure a healthy and abundant harvest.
* Thinning: When the seedlings are about 2 inches tall, thin them to about 3-4 inches apart. This will give them enough space to grow and prevent overcrowding. You can eat the thinnings! They’re delicious in salads.
* Watering: Mustard greens need consistent moisture, especially during hot weather. Water them regularly, especially when the top inch of soil feels dry. Avoid overwatering, as this can lead to root rot.
* Fertilizing: Mustard greens are heavy feeders, so they benefit from regular fertilization. You can use a balanced fertilizer or side-dress them with compost or well-rotted manure. I like to use a liquid seaweed fertilizer every few weeks.
* Weeding: Keep your mustard green patch free of weeds. Weeds compete with the mustard greens for nutrients and water. Hand-pull weeds carefully to avoid disturbing the roots of your mustard greens.
* Pest Control: Mustard greens are generally pest-resistant, but they can sometimes be attacked by aphids, flea beetles, or cabbage worms. Inspect your plants regularly for signs of pests. You can control aphids with a strong spray of water or insecticidal soap. Flea beetles can be controlled with row covers or diatomaceous earth. Cabbage worms can be hand-picked or controlled with Bacillus thuringiensis (Bt). I’ve found that companion planting with marigolds helps deter many pests.
* Bolting: Bolting is when the plant starts to produce flowers and seeds. This usually happens when the weather gets too hot. Bolting can make the leaves taste bitter. To prevent bolting, try to plant your mustard greens in a location that gets some afternoon shade. You can also harvest the leaves regularly to encourage new growth. If your mustard greens do start to bolt, you can still eat the leaves, but they may not taste as good.
Harvesting Your Mustard Greens
Harvesting is the most rewarding part of growing mustard greens! You can start harvesting the leaves when they are about 6-8 inches long.
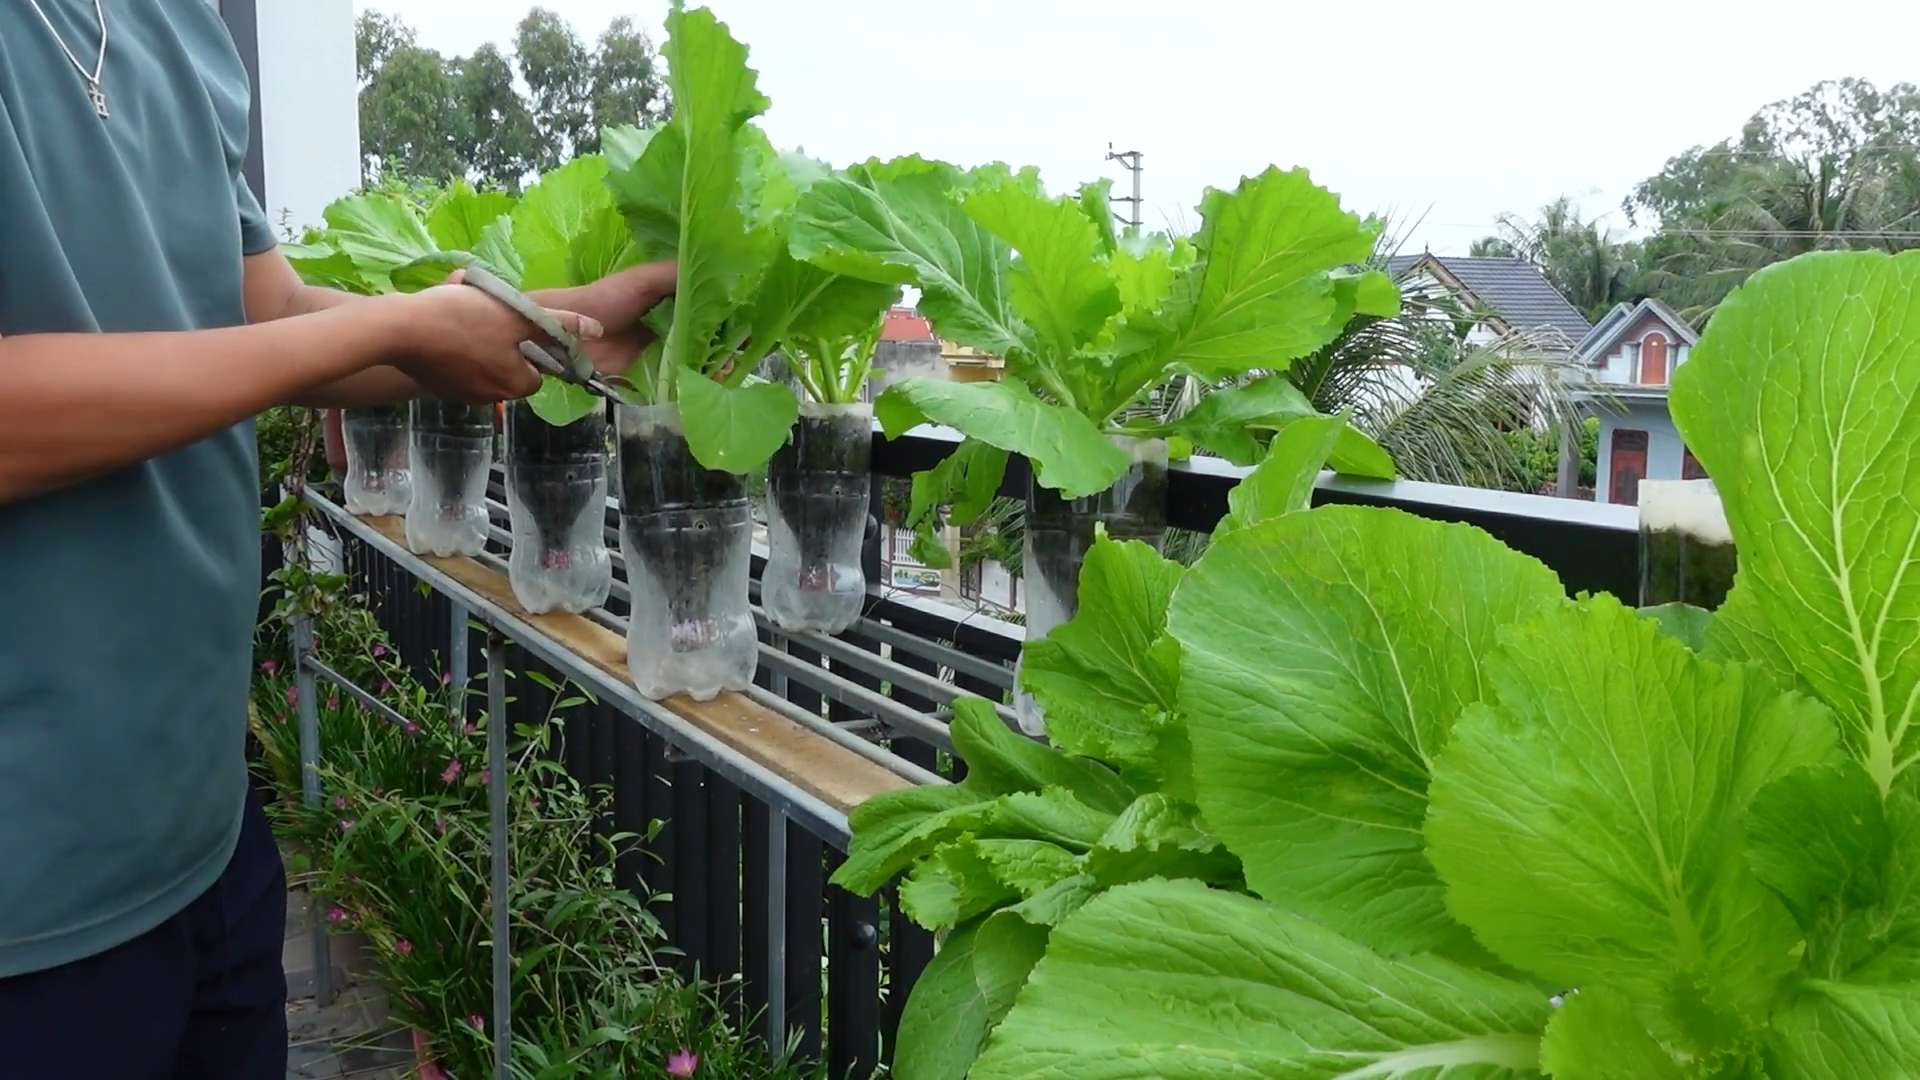
1. Cut the outer leaves: Use a sharp knife or scissors to cut the outer leaves, leaving the inner leaves to continue growing. This is called “cut-and-come-again” harvesting.
2. Harvest regularly: Harvest the leaves regularly to encourage new growth.
3. Wash the leaves: Wash the leaves thoroughly before eating them.
4. Store the leaves: Store the leaves in the refrigerator in a plastic bag or container. They will keep for about a week.
Using Your Mustard Greens
Mustard greens are incredibly versatile and can be used in a variety of dishes. Here are a few ideas:
* Salads: Add mustard greens to your salads for a zesty kick.
* Stir-fries: Stir-fry mustard greens with garlic, ginger, and soy sauce.
* Soups: Add mustard greens to soups and stews.
* Sautéed: Sauté mustard greens with olive oil, garlic, and lemon juice.
* Braised: Braise mustard greens with bacon or ham hocks.
* Smoothies: Add a handful of mustard greens to your smoothies for a nutritional boost.
I personally love to sauté mustard greens with garlic and a little bit of red pepper flakes. It’s a quick, easy, and delicious side dish.
Troubleshooting
Even with the best care, you might encounter some problems while growing mustard greens. Here are a few common issues and how to address them:
* Yellowing leaves: This could be a sign of nutrient deficiency. Try fertilizing your mustard greens with a balanced fertilizer.
* Holes in leaves: This could be caused by flea beetles or cabbage worms. Control these pests with row covers, diatomaceous earth, or Bacillus thuringiensis (Bt).
* Slow growth: This could be caused by poor soil, lack of sunlight, or insufficient watering. Make sure your mustard greens are planted in well-drained soil, get at least 4-6 hours of sunlight per day, and are watered regularly.
* Bitter taste: This could be caused by bolting. Try to prevent bolting by planting your mustard greens in a location that gets some afternoon shade and harvesting the leaves regularly.
Saving Seeds
If you want to save seeds from your mustard greens, allow a few plants to bolt and produce seed pods. Once the seed pods are dry and brown, harvest them and allow them to dry completely. Then, break open the pods and collect the seeds. Store the seeds in a cool, dry place. I usually save seeds from my best-performing plants to ensure a good crop the following year.
Growing mustard greens is a rewarding experience that anyone can enjoy. With a little bit of planning and care, you can have a bountiful harvest of fresh, delicious greens. So, get out there and start planting! Happy gardening!
Conclusion
So, there you have it! Growing your own mustard greens is not only surprisingly simple, but it’s also incredibly rewarding. From seed to salad, the entire process is a testament to the power of DIY and the joy of fresh, homegrown produce. Forget those wilted, overpriced greens at the grocery store. With a little effort and this easy trick, you can have a constant supply of peppery, nutritious mustard greens right at your fingertips.
Why is this DIY trick a must-try? Because it puts you in control. You control the quality of the soil, the amount of sunlight, and the absence of harmful pesticides. You know exactly where your food is coming from and what’s gone into it. Plus, the taste of freshly harvested mustard greens is simply unmatched. The vibrant flavor and crisp texture are a world away from anything you can buy pre-packaged.
But the benefits don’t stop there. Growing your own mustard greens is also a fantastic way to connect with nature, reduce your carbon footprint, and save money. It’s a sustainable and satisfying hobby that can bring a little bit of green into your life, no matter where you live.
Looking for variations? Absolutely! Experiment with different varieties of mustard greens. Some are milder, some are spicier, and some have beautiful frilly leaves. Try growing them in containers on your balcony, in raised beds in your garden, or even indoors under grow lights. You can also adjust the planting schedule to ensure a continuous harvest throughout the growing season. Consider companion planting with other vegetables like radishes or carrots to deter pests and improve soil health. You can also add some organic fertilizer to the soil for better growth.
Don’t be afraid to experiment and find what works best for you. The beauty of DIY is that it’s all about learning and adapting.
Ready to take the plunge? We wholeheartedly encourage you to try this DIY trick for growing mustard greens. It’s easier than you think, and the rewards are well worth the effort. Imagine the satisfaction of serving a salad made with greens you grew yourself, or adding a handful of fresh mustard greens to your favorite stir-fry.
We’re confident that you’ll be amazed at how easy and enjoyable it is to grow your own mustard greens. And we can’t wait to hear about your experience! Share your photos, tips, and stories in the comments below. Let’s build a community of mustard green growers and inspire others to embrace the joy of DIY gardening. Let us know what kind of soil you used, what kind of fertilizer you used, and how long it took for your mustard greens to grow.
So, grab some seeds, get your hands dirty, and get ready to enjoy the delicious taste of homegrown mustard greens. Happy gardening!
Frequently Asked Questions (FAQ)
What are the best conditions for growing mustard greens?
Mustard greens thrive in cool weather, ideally with temperatures between 60°F and 75°F (15°C and 24°C). They prefer full sun, but can tolerate partial shade, especially in hotter climates. The soil should be well-draining and rich in organic matter. A slightly acidic to neutral pH (around 6.0 to 7.0) is ideal. Make sure to water them regularly, especially during dry periods, to keep the soil consistently moist but not waterlogged.
How long does it take for mustard greens to grow?
Mustard greens are relatively fast-growing. You can typically harvest baby greens in about 3-4 weeks after planting. For mature leaves, it usually takes around 40-50 days. The exact time will depend on the variety of mustard greens, the growing conditions, and the time of year. Warmer temperatures can speed up growth, but also make the leaves more pungent.
What are some common pests and diseases that affect mustard greens?
Common pests include aphids, flea beetles, cabbage worms, and slugs. You can control aphids with insecticidal soap or by introducing beneficial insects like ladybugs. Flea beetles can be deterred with row covers or by dusting the plants with diatomaceous earth. Cabbage worms can be handpicked or controlled with Bacillus thuringiensis (Bt). Slugs can be trapped with beer traps or by using copper tape around the garden bed.
Common diseases include downy mildew, white rust, and leaf spot. To prevent these diseases, ensure good air circulation, avoid overhead watering, and remove any infected leaves promptly. Crop rotation can also help to prevent soilborne diseases.
Can I grow mustard greens in containers?
Yes, mustard greens are well-suited for container gardening. Choose a container that is at least 6-8 inches deep and has good drainage. Use a high-quality potting mix that is rich in organic matter. Place the container in a sunny location and water regularly. You may need to fertilize the plants more frequently when growing in containers, as nutrients can leach out more quickly.
How do I harvest mustard greens?
You can harvest mustard greens at any stage of growth, depending on your preference. For baby greens, simply snip off the leaves when they are a few inches tall. For mature leaves, harvest the outer leaves first, leaving the inner leaves to continue growing. This will allow you to have a continuous harvest over several weeks. Use a sharp knife or scissors to avoid damaging the plant.
Are mustard greens nutritious?
Yes, mustard greens are packed with nutrients. They are an excellent source of vitamins A, C, and K, as well as folate, calcium, and fiber. They also contain antioxidants and glucosinolates, which have been linked to various health benefits. Eating mustard greens can help boost your immune system, improve bone health, and protect against chronic diseases.
Can I eat the stems of mustard greens?
Yes, the stems of mustard greens are edible, but they can be a bit tough. It’s best to cook them longer than the leaves to soften them up. You can chop them finely and add them to stir-fries, soups, or stews. Some people also pickle the stems for a tangy treat.
How do I store mustard greens after harvesting?
To store mustard greens, wash them thoroughly and dry them well. Wrap them in a paper towel and place them in a plastic bag in the refrigerator. They will typically last for about 3-5 days. You can also freeze mustard greens for longer storage. Blanch them in boiling water for a few minutes, then cool them in ice water. Drain them well and pack them into freezer bags or containers.
What are some ways to use mustard greens in cooking?
Mustard greens can be used in a variety of dishes. They can be eaten raw in salads, added to stir-fries, sautéed with garlic and olive oil, or used in soups and stews. They pair well with other vegetables like onions, garlic, and potatoes, as well as meats like pork and chicken. Their peppery flavor adds a unique twist to any dish.
Can I grow mustard greens indoors?
Yes, you can grow mustard greens indoors, especially if you have a sunny windowsill or grow lights. Use a well-draining potting mix and water regularly. You may need to supplement with artificial light to ensure that the plants get enough light. Choose a compact variety of mustard greens that is well-suited for indoor growing.
Leave a Comment