

Grow Mibuna Cabbage at Home and unlock a world of fresh, peppery greens right outside your door! Have you ever dreamed of snipping vibrant, flavorful leaves for your salad just moments before serving? This isn’t just a fantasy; it’s a deliciously achievable reality with Mibuna cabbage! This DIY guide will show you how to cultivate this Japanese mustard green in your own backyard, balcony, or even on a sunny windowsill.
Mibuna, with its elegant, slender leaves, boasts a rich history in Japanese cuisine, particularly in Kyoto, where it has been cultivated for centuries. It’s more than just a vegetable; it’s a culinary tradition! But you don’t need to travel to Japan to enjoy its unique flavor. I’m here to tell you that growing your own Mibuna is surprisingly easy, even if you’re a beginner gardener.
Why should you embark on this Mibuna-growing adventure? Well, for starters, it’s incredibly rewarding to nurture your own food. Plus, store-bought greens often lack the freshness and vibrancy of homegrown produce. And let’s be honest, who doesn’t love the idea of saving money while enjoying healthier, tastier meals? This DIY project will empower you to grow Mibuna Cabbage at Home, ensuring a constant supply of fresh, organic greens for your table. So, grab your gardening gloves, and let’s get started!
Grow Your Own Mibuna Cabbage: A Simple DIY Guide
Hey there, fellow gardening enthusiasts! Ever wanted to try growing something a little different in your garden? Mibuna cabbage might just be the perfect choice! It’s a delicious, easy-to-grow leafy green that adds a peppery kick to salads, stir-fries, and more. I’ve been growing it for a few seasons now, and I’m excited to share my tips and tricks with you. Let’s get started!
What is Mibuna Cabbage?
Mibuna (Brassica rapa var. laciniifolia) is a Japanese mustard green with a mild, slightly peppery flavor. It’s incredibly versatile in the kitchen and super easy to cultivate, even if you’re a beginner gardener. Unlike head-forming cabbages, Mibuna grows in a loose bunch of slender, dark green leaves, making it perfect for cut-and-come-again harvesting.
Why Grow Mibuna?
* Fast Growing: You can harvest Mibuna in as little as 30-40 days.
* Cut-and-Come-Again: Harvest leaves as needed, and the plant will keep producing.
* Cold Hardy: Mibuna tolerates light frosts, making it ideal for spring and fall gardens.
* Nutritious: It’s packed with vitamins and minerals.
* Delicious: Adds a unique peppery flavor to your dishes.
* Pest Resistant: Generally less susceptible to pests than other brassicas.
Materials You’ll Need
Before we dive into the growing process, let’s gather everything you’ll need. Don’t worry, it’s a pretty short list!
* Mibuna seeds
* Seed starting trays or small pots (if starting indoors)
* Potting mix (for starting indoors)
* Garden soil or raised bed
* Compost or other organic matter
* Watering can or hose
* Gardening gloves (optional, but recommended)
* Fertilizer (optional, but can boost growth)
* Row covers (optional, for pest protection)
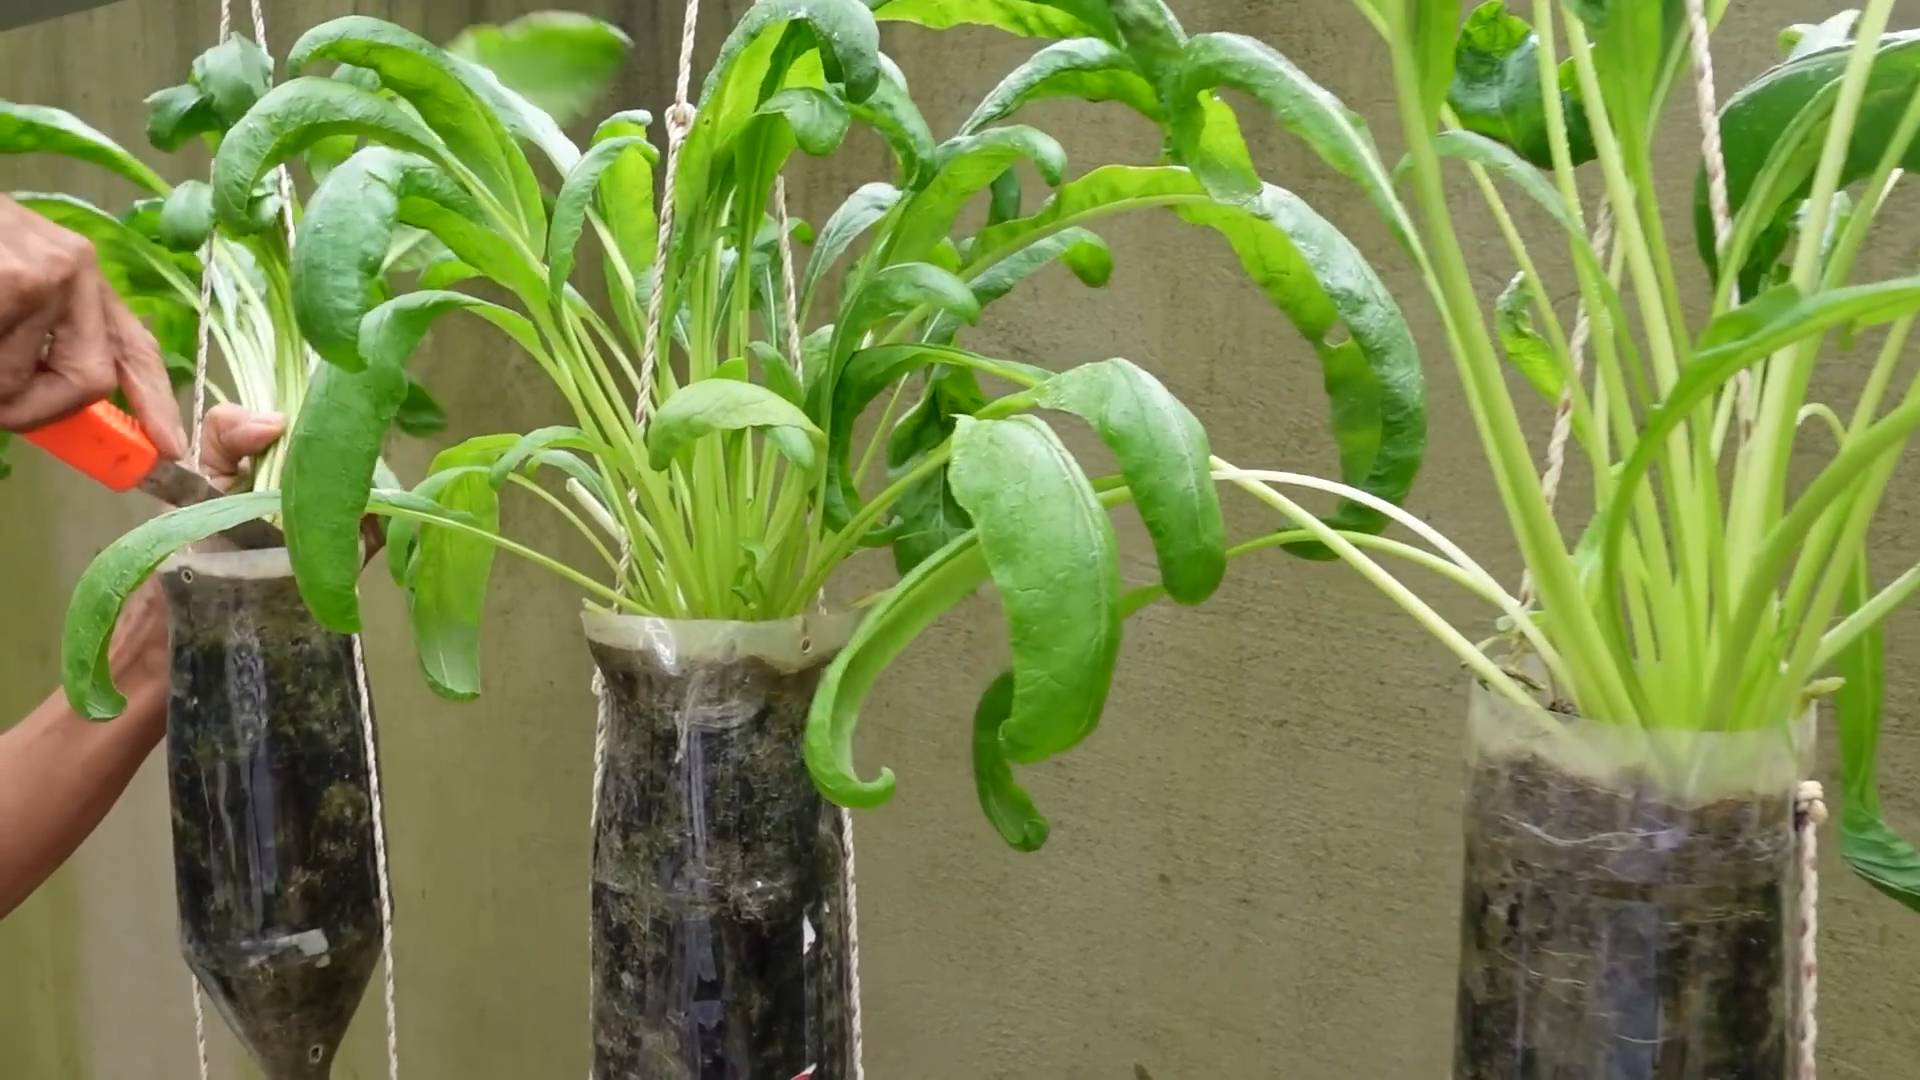
Starting Mibuna Seeds
You can either direct sow Mibuna seeds in your garden or start them indoors. I prefer starting them indoors, especially for early spring or late fall plantings, as it gives them a head start.
Starting Seeds Indoors
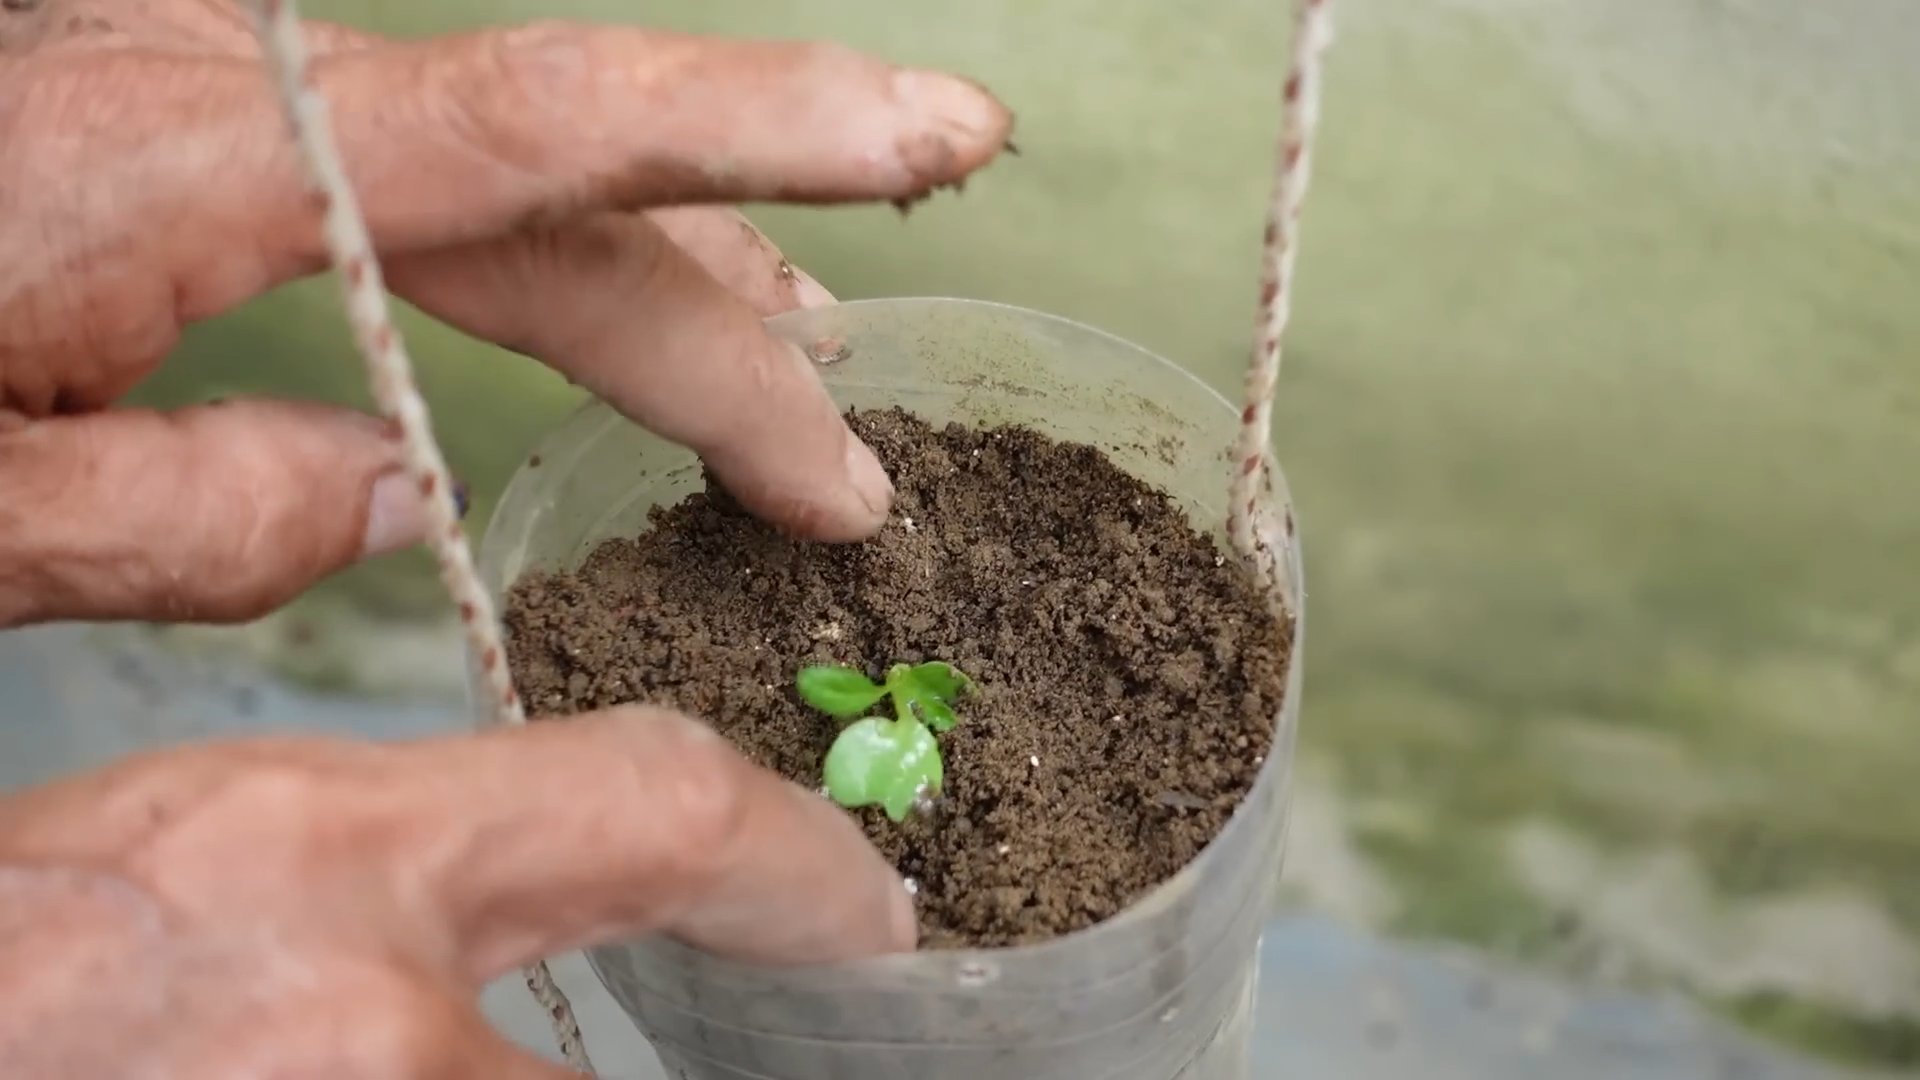
1. Prepare Your Seed Starting Trays: Fill your seed starting trays or small pots with a good quality potting mix. Gently press down the soil to create a firm surface.
2. Sow the Seeds: Sprinkle 2-3 Mibuna seeds in each cell or pot. Mibuna seeds are tiny, so don’t bury them too deep. A depth of about 1/4 inch is perfect.
3. Water Gently: Use a spray bottle or watering can with a gentle nozzle to moisten the soil. Avoid overwatering, as this can lead to damping off.
4. Provide Light: Place the trays or pots in a bright location, such as a sunny windowsill or under grow lights. Mibuna seeds need light to germinate. If using a windowsill, rotate the trays regularly to ensure even growth.
5. Maintain Moisture: Keep the soil consistently moist but not soggy. Check the soil daily and water as needed.
6. Thin Seedlings (If Necessary): Once the seedlings have developed their first true leaves (the leaves that look like miniature Mibuna leaves), thin them to one seedling per cell or pot. Snip off the weaker seedlings at the soil line with scissors.
7. Harden Off Seedlings: Before transplanting the seedlings outdoors, you’ll need to harden them off. This process gradually acclimates them to outdoor conditions. Start by placing the trays or pots outdoors in a sheltered location for a few hours each day, gradually increasing the amount of time they spend outside over the course of a week.
Direct Sowing Seeds Outdoors
1. Prepare the Soil: Choose a location in your garden that receives at least 4-6 hours of sunlight per day. Mibuna prefers well-drained soil that is rich in organic matter. Amend the soil with compost or other organic matter to improve its fertility and drainage.
2. Sow the Seeds: Sow the Mibuna seeds directly into the soil, spacing them about 1-2 inches apart. Cover the seeds with a thin layer of soil (about 1/4 inch).
3. Water Gently: Water the soil gently to moisten it. Avoid washing away the seeds.
4. Keep the Soil Moist: Keep the soil consistently moist until the seeds germinate. This may require watering daily, especially in dry weather.
5. Thin Seedlings: Once the seedlings have emerged and are large enough to handle, thin them to about 6-8 inches apart. This will give them enough room to grow and prevent overcrowding.
Transplanting Mibuna Seedlings (If Starting Indoors)
Once your seedlings have been hardened off and are about 3-4 inches tall, they’re ready to be transplanted into your garden.
1. Prepare the Planting Area: Choose a location in your garden that receives at least 4-6 hours of sunlight per day. Mibuna prefers well-drained soil that is rich in organic matter. Amend the soil with compost or other organic matter to improve its fertility and drainage.
2. Dig Holes: Dig holes that are slightly larger than the root balls of the seedlings, spacing them about 6-8 inches apart.
3. Gently Remove Seedlings: Carefully remove the seedlings from their trays or pots, being careful not to damage the roots.
4. Place Seedlings in Holes: Place each seedling in a hole and gently backfill with soil.
5. Water Thoroughly: Water the seedlings thoroughly after transplanting.
6. Mulch (Optional): Apply a layer of mulch around the seedlings to help retain moisture and suppress weeds.
Caring for Your Mibuna Plants
Mibuna is relatively low-maintenance, but here are a few tips to keep your plants healthy and productive:
* Watering: Water regularly, especially during dry periods. Mibuna prefers consistently moist soil. Aim for about 1 inch of water per week.
* Fertilizing (Optional): If your soil is poor, you can fertilize your Mibuna plants with a balanced fertilizer every few weeks. Follow the instructions on the fertilizer package. I personally like using a liquid seaweed fertilizer diluted in water.
* Weeding: Keep the area around your Mibuna plants free of weeds. Weeds compete with the plants for nutrients and water.
* Pest Control: Mibuna is generally pest-resistant, but it can be susceptible to aphids, flea beetles, and cabbage worms. Inspect your plants regularly for pests and take action if necessary. You can use insecticidal soap, neem oil, or row covers to control pests. I’ve found that row covers are particularly effective at preventing pest problems.
* Bolting: Mibuna can bolt (go to seed) in hot weather. To prevent bolting, provide shade during the hottest part of the day or plant Mibuna in a location that receives afternoon shade.
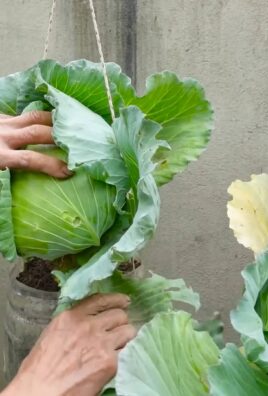
Harvesting Mibuna
One of the best things about Mibuna is that you can start harvesting it as soon as the leaves are large enough to eat.
1. Cut-and-Come-Again Harvesting: Use scissors or a knife to cut the outer leaves of the plant, leaving the inner leaves to continue growing. This is called cut-and-come-again harvesting, and it allows you to harvest Mibuna repeatedly over a long period.
2. Harvesting the Whole Plant: If you prefer, you can harvest the entire plant at once. Simply cut the plant off at the base.
3. Harvesting Time: You can harvest Mibuna at any time of day, but I find that the leaves are crisper and more flavorful if harvested in the morning.
4. Storage: Store harvested Mibuna leaves in the refrigerator in a plastic bag or container. They will keep for several days.
Using Mibuna in the Kitchen
Mibuna is incredibly versatile in the kitchen. Here are a few ideas for using it:
* Salads: Add Mibuna to salads for a peppery kick.
* Stir-Fries: Use Mibuna in stir-fries for a quick and easy side dish.
* Soups: Add Mibuna to soups for a boost of flavor and nutrients.
* Sandwiches: Use Mibuna as a leafy green in sandwiches and wraps.
* Pesto: Make Mibuna pesto for a unique and flavorful sauce.
* Smoothies: Add a handful of Mibuna to your smoothies for a healthy boost.
Troubleshooting
Even with the best care
Conclusion
So, there you have it! Growing Mibuna cabbage at home is not only achievable, but it’s also a deeply rewarding experience that connects you directly to your food source. Forget those wilted, overpriced greens at the supermarket. Imagine stepping into your garden or onto your balcony and harvesting fresh, peppery Mibuna whenever you need it. The vibrant green leaves, bursting with flavor, will elevate your salads, stir-fries, and soups to a whole new level.
This isn’t just about saving money; it’s about embracing a more sustainable and healthier lifestyle. You control the growing environment, ensuring your Mibuna is free from harmful pesticides and herbicides. Plus, the satisfaction of nurturing a plant from seed to table is unparalleled.
But the benefits don’t stop there. Growing your own Mibuna allows for endless experimentation. Try different varieties of Mibuna to discover your favorite flavor profile. Some are milder, while others pack a more intense peppery punch. You can also experiment with companion planting, pairing your Mibuna with herbs like dill or chamomile to deter pests and enhance growth. Consider succession planting, sowing seeds every few weeks, to ensure a continuous harvest throughout the growing season.
Don’t be intimidated if you’re a beginner gardener. Mibuna is a relatively easy crop to grow, even in small spaces. With a little patience and attention, you’ll be enjoying homegrown Mibuna in no time. Start small, perhaps with a single container, and gradually expand your operation as you gain confidence.
We encourage you to take the plunge and try growing Mibuna cabbage at home. It’s a simple, satisfying, and delicious way to connect with nature and enhance your culinary creations. And most importantly, don’t be afraid to experiment and have fun!
Once you’ve harvested your first batch of homegrown Mibuna, we’d love to hear about your experience. Share your tips, tricks, and favorite recipes in the comments below. Let’s build a community of Mibuna enthusiasts and inspire others to embrace the joys of homegrown goodness. What are you waiting for? Get planting!
Frequently Asked Questions (FAQ)
What exactly is Mibuna cabbage, and what does it taste like?
Mibuna is a Japanese mustard green, closely related to other brassicas like kale and collard greens. However, it has a distinct flavor profile that sets it apart. The taste is often described as peppery, slightly tangy, and with a hint of mustard. The intensity of the peppery flavor can vary depending on the variety and growing conditions. Younger leaves tend to be milder, while more mature leaves develop a stronger, more pronounced flavor. Mibuna is incredibly versatile in the kitchen and can be used raw in salads, lightly sautéed, added to soups and stews, or even pickled. Its unique flavor adds a delightful kick to any dish.
Is Mibuna cabbage difficult to grow for beginners?
No, Mibuna is generally considered an easy vegetable to grow, even for beginner gardeners. It’s relatively low-maintenance and adaptable to various growing conditions. It thrives in cool weather and can tolerate partial shade, making it a good choice for gardens that don’t receive full sun. The seeds germinate quickly, and the plants grow rapidly, providing a relatively quick harvest. The key to success is providing well-draining soil, consistent moisture, and protection from pests. With a little attention, even novice gardeners can enjoy a bountiful harvest of homegrown Mibuna.
What are the best growing conditions for Mibuna cabbage?
Mibuna thrives in cool weather, ideally between 50°F and 70°F (10°C and 21°C). It prefers well-draining soil that is rich in organic matter. A slightly acidic to neutral soil pH (around 6.0 to 7.0) is ideal. While Mibuna can tolerate partial shade, it will produce the best growth and flavor in full sun (at least 6 hours of direct sunlight per day). Consistent moisture is crucial, especially during hot and dry periods. Water deeply and regularly, but avoid overwatering, which can lead to root rot. Mulching around the plants can help retain moisture and suppress weeds.
How long does it take to grow Mibuna cabbage from seed?
Mibuna is a fast-growing vegetable. Seeds typically germinate within 5 to 7 days. You can expect to harvest your first leaves in as little as 3 to 4 weeks after sowing. For larger, more mature leaves, allow the plants to grow for 6 to 8 weeks. Succession planting, sowing seeds every few weeks, will ensure a continuous harvest throughout the growing season.
What are some common pests and diseases that affect Mibuna cabbage, and how can I prevent them?
While Mibuna is relatively pest-resistant, it can be susceptible to certain pests and diseases, including aphids, flea beetles, cabbage worms, and downy mildew. To prevent these problems, practice good garden hygiene. Remove any weeds or debris that can harbor pests and diseases. Use row covers to protect young plants from insects. Inspect your plants regularly for signs of infestation or disease and take action promptly. Organic pest control methods, such as insecticidal soap or neem oil, can be effective against aphids and flea beetles. Ensure good air circulation to prevent downy mildew.
Can I grow Mibuna cabbage in containers?
Yes, Mibuna is well-suited for container gardening. Choose a container that is at least 6 inches deep and wide to allow for adequate root growth. Use a well-draining potting mix that is rich in organic matter. Place the container in a sunny location that receives at least 6 hours of direct sunlight per day. Water regularly, especially during hot and dry periods. Fertilize every few weeks with a balanced liquid fertilizer. Container-grown Mibuna may require more frequent watering and fertilization than plants grown in the ground.
How do I harvest Mibuna cabbage?
You can harvest Mibuna leaves at any stage of growth, depending on your preference. For baby greens, harvest when the leaves are about 3 to 4 inches long. For larger, more mature leaves, allow them to grow to 6 to 8 inches. To harvest, simply cut the leaves at the base of the plant with a sharp knife or scissors. You can harvest individual leaves as needed, or you can harvest the entire plant at once. If you harvest individual leaves, the plant will continue to produce new growth.
How should I store harvested Mibuna cabbage?
Freshly harvested Mibuna leaves are best used immediately. However, you can store them in the refrigerator for up to a week. To store, wash the leaves thoroughly and pat them dry. Wrap them in a damp paper towel and place them in a plastic bag or container. Store in the crisper drawer of your refrigerator.
What are some creative ways to use Mibuna cabbage in my cooking?
Mibuna is incredibly versatile in the kitchen. It can be used raw in salads, adding a peppery kick to your favorite greens. It’s also delicious lightly sautéed with garlic and olive oil. Add it to stir-fries, soups, and stews for a boost of flavor and nutrients. Mibuna can also be pickled or fermented. Try adding it to your favorite Asian-inspired dishes, such as ramen or udon. Its unique flavor pairs well with a variety of ingredients, including ginger, soy sauce, sesame oil, and chili peppers. Don’t be afraid to experiment and discover your own favorite ways to use Mibuna in your cooking.
Leave a Comment