

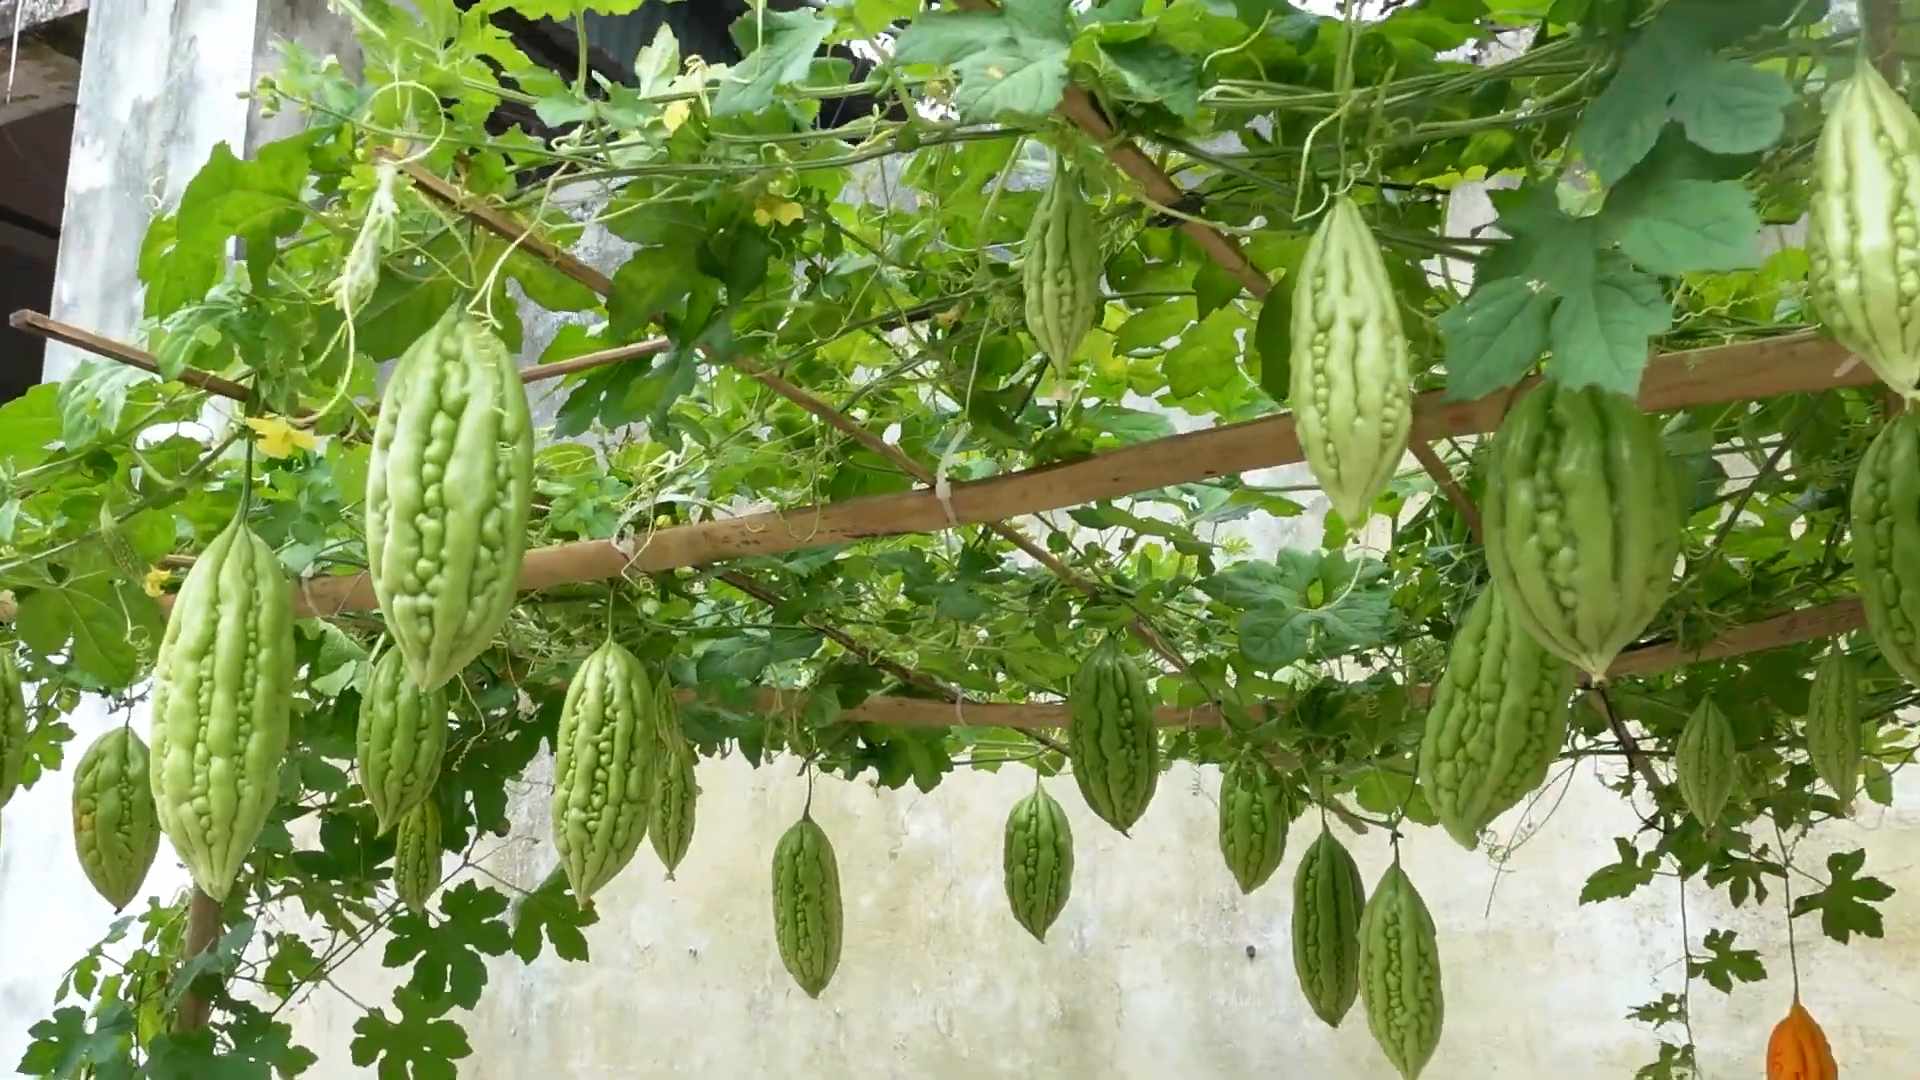
Grow Bitter Gourd Easily and unlock a world of homegrown goodness! Have you ever dreamed of harvesting your own vibrant, slightly bitter, and incredibly healthy bitter gourds right from your backyard? Well, stop dreaming and start doing! This DIY guide is your secret weapon to cultivating thriving bitter gourd vines, even if you think you have a brown thumb.
Bitter gourd, also known as karela, isn’t just a vegetable; it’s a culinary and medicinal staple with a rich history, especially in Asian cultures. For centuries, it’s been celebrated for its health benefits, from aiding digestion to regulating blood sugar. But let’s be honest, buying it from the store can be expensive, and you never quite know how fresh it is. That’s where the magic of home gardening comes in!
I know what you might be thinking: “Gardening is hard!” But trust me, growing bitter gourd doesn’t have to be a daunting task. This article is packed with simple, effective DIY tricks and hacks that will empower you to grow bitter gourd easily and successfully. We’ll cover everything from seed starting and soil preparation to trellising and pest control, all explained in a way that’s easy to understand and implement. So, get ready to roll up your sleeves, get your hands dirty, and enjoy the satisfaction of harvesting your very own bitter gourds!
Grow Bitter Gourd Like a Pro: My Foolproof DIY Guide
Hey there, fellow gardening enthusiasts! I’m so excited to share my tried-and-true method for growing bitter gourd (also known as bitter melon or karela) right in your own backyard. Trust me, even if you think you have a “brown thumb,” you can totally nail this! I’ve simplified the process into easy-to-follow steps, so let’s get started.
What You’ll Need: The Essential Supplies
Before we dive in, let’s gather all the necessary materials. Having everything ready beforehand will make the whole process smoother and more enjoyable.
* Bitter Gourd Seeds: Choose a variety that suits your climate and taste preferences. I personally love the long, green varieties, but there are also shorter, thicker ones.
* Seed Starting Trays or Small Pots: These are perfect for getting your seeds off to a strong start indoors.
* Seed Starting Mix: This lightweight, sterile mix is designed to promote healthy germination.
* Larger Pots (if starting indoors): You’ll need these to transplant your seedlings into before moving them outdoors. Aim for at least 5-gallon pots.
* Well-Draining Soil: Bitter gourd thrives in rich, well-draining soil. You can amend your garden soil with compost or aged manure.
* Compost or Aged Manure: This will provide essential nutrients for your plants.
* Trellis or Support Structure: Bitter gourd vines need something to climb on. A trellis, fence, or even a sturdy bamboo structure will work wonders.
* Gardening Gloves: Protect your hands from dirt and potential irritants.
* Watering Can or Hose: For regular watering.
* Fertilizer (Optional): A balanced fertilizer can boost growth and fruit production. I prefer organic options like fish emulsion or seaweed extract.
* Pruning Shears: For trimming and shaping your vines.
* Mulch: To help retain moisture and suppress weeds. Straw, wood chips, or even shredded leaves work great.
Phase 1: Starting Your Seeds (Indoor or Outdoor)
You have two options here: starting your seeds indoors for a head start or directly sowing them outdoors. I usually prefer starting indoors, especially if I live in an area with a shorter growing season.
Starting Seeds Indoors:
1. Soak the Seeds: Before planting, soak your bitter gourd seeds in warm water for 24 hours. This helps soften the hard outer shell and encourages germination.
2. Prepare the Seed Starting Trays: Fill your seed starting trays or small pots with seed starting mix. Moisten the mix thoroughly, but don’t let it become waterlogged.
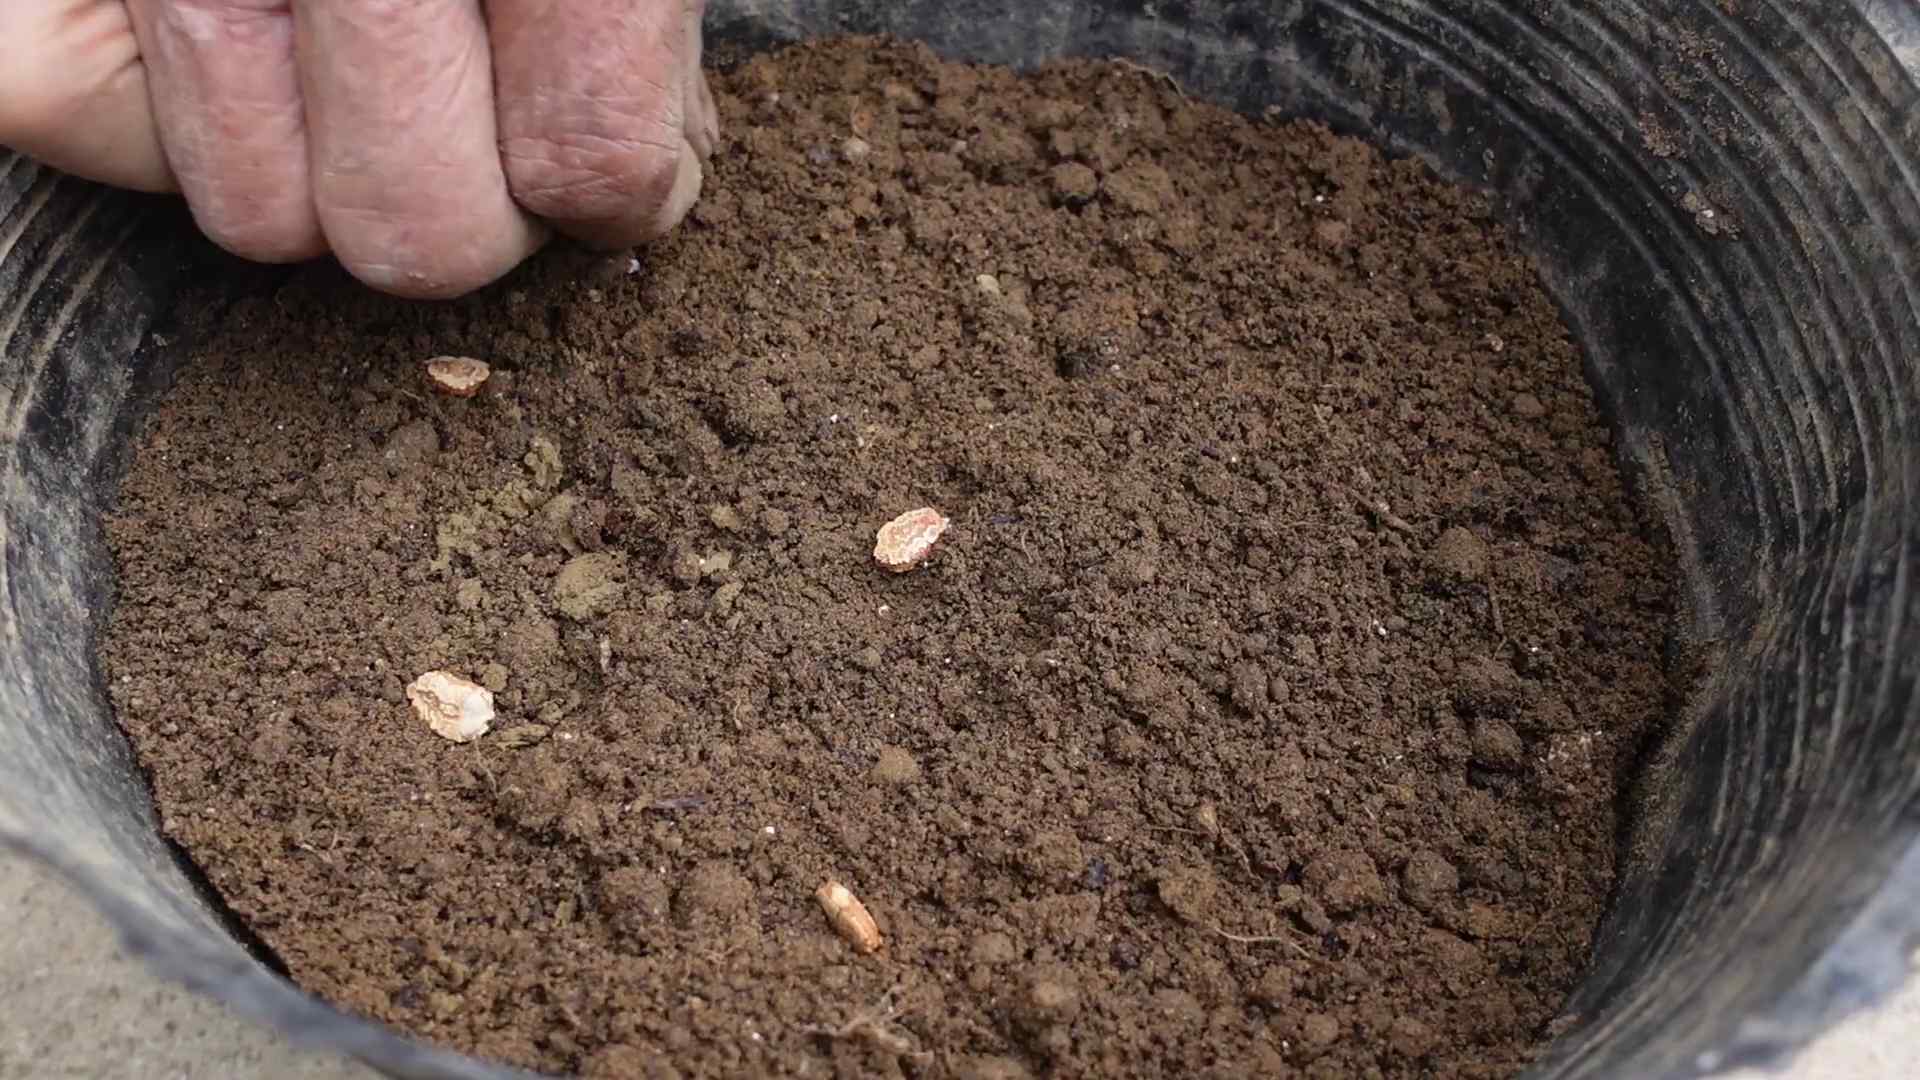
3. Plant the Seeds: Make a small hole (about 1/2 inch deep) in the center of each cell or pot. Place one seed in each hole and gently cover it with soil.
4. Water Gently: Water the seeds gently using a spray bottle or watering can with a fine rose. Avoid disturbing the soil.
5. Provide Warmth and Light: Place the trays in a warm location (around 70-80°F) with plenty of indirect sunlight. A sunny windowsill or a grow light works well.
6. Keep the Soil Moist: Check the soil moisture daily and water as needed to keep it consistently moist but not soggy.
7. Transplant Seedlings: Once your seedlings have developed a few sets of true leaves (usually after 2-3 weeks), they’re ready to be transplanted into larger pots. Gently remove the seedlings from the trays and transplant them into 5-gallon pots filled with well-draining soil.
Direct Sowing Seeds Outdoors:
1. Prepare the Soil: Choose a sunny spot in your garden with well-draining soil. Amend the soil with compost or aged manure to improve its fertility.
2. Create Planting Holes: Make small holes (about 1/2 inch deep) in the soil, spacing them about 2-3 feet apart.
3. Plant the Seeds: Place 2-3 seeds in each hole to increase the chances of germination. Cover the seeds with soil and gently water.
4. Keep the Soil Moist: Water the soil regularly to keep it consistently moist until the seeds germinate.
5. Thin Seedlings: Once the seedlings emerge, thin them out, leaving only the strongest seedling in each spot.
Phase 2: Transplanting and Setting Up Support
Whether you started your seeds indoors or directly sowed them, the next crucial step is providing the right support for your growing vines.
1. Harden Off Seedlings (if starting indoors): Before transplanting your indoor-grown seedlings outdoors, you need to “harden them off.” This process gradually acclimates them to the outdoor environment. Start by placing the seedlings outdoors in a sheltered location for a few hours each day, gradually increasing the amount of time they spend outside over the course of a week.
2. Choose a Sunny Location: Bitter gourd needs at least 6-8 hours of sunlight per day to thrive. Select a spot in your garden that receives plenty of sunshine.
3. Prepare the Planting Area: Dig a hole that is slightly larger than the root ball of your seedling. Amend the soil in the hole with compost or aged manure.
4. Transplant Carefully: Gently remove the seedling from its pot and place it in the hole. Make sure the top of the root ball is level with the surrounding soil. Fill in the hole with soil and gently pat it down.
5. Water Thoroughly: Water the newly transplanted seedling thoroughly to help it settle in.
6. Install a Trellis or Support Structure: Bitter gourd vines can grow quite long, so they need a sturdy support structure to climb on. Install a trellis, fence, or bamboo structure near your plants. Make sure the structure is strong enough to support the weight of the mature vines and fruits. I’ve used everything from repurposed tomato cages to elaborate wooden trellises – get creative!
7. Guide the Vines: As the vines grow, gently guide them onto the trellis or support structure. You may need to tie them loosely to the structure using soft twine or plant ties.
Phase 3: Ongoing Care and Maintenance
Now that your bitter gourd plants are in the ground and have support, it’s time to focus on providing them with the care they need to flourish.
1. Water Regularly: Bitter gourd needs consistent moisture, especially during hot, dry weather. Water deeply whenever the top inch of soil feels dry to the touch. Avoid overwatering, as this can lead to root rot.
2. Fertilize (Optional): If you want to boost growth and fruit production, you can fertilize your plants every few weeks with a balanced fertilizer. I prefer organic options like fish emulsion or seaweed extract. Follow the instructions on the fertilizer label.
3. Mulch: Apply a layer of mulch around your plants to help retain moisture, suppress weeds, and regulate soil temperature.
4. Prune the Vines: Pruning can help improve air circulation and encourage fruit production. Remove any dead, damaged, or diseased leaves and stems. You can also prune the tips of the vines to encourage branching.
5. Pest and Disease Control: Keep an eye out for common pests like aphids, spider mites, and squash bugs. You can control these pests with insecticidal soap or neem oil. Bitter gourd can also be susceptible to fungal diseases like powdery mildew. Prevent these diseases by providing good air circulation and avoiding overhead watering. If you notice any signs of disease, treat your plants with a fungicide.
6. Hand Pollination (If Necessary): Bitter gourd plants have separate male and female flowers. If you’re not seeing a lot of fruit set, you may need to hand-pollinate the flowers. To do this, use a small paintbrush to transfer pollen from the male flowers to the female flowers. The female flowers have a small, immature fruit at the base.
Phase 4: Harvesting Your Bitter Gourd
The moment you’ve been waiting for! Harvesting your own homegrown bitter gourd is incredibly rewarding.
1. Harvest Time: Bitter gourd is typically ready to harvest about 2-3 months after planting. The fruits should be firm and green, with a slightly waxy coating.
2. Harvesting Technique: Use a sharp knife or pruning shears to cut the fruits from the vine. Leave a small piece of stem attached to the fruit.
3. Harvest Regularly: Harvest your bitter gourd regularly to encourage continued fruit production. Overripe fruits will turn yellow or orange and become very bitter.
4. Storage: Store your harvested bitter gourd in the refrigerator for up to a week.
Tips and Tricks for Success
* Improve Pollination: Attract pollinators to your garden by planting flowering herbs and vegetables nearby.
* Companion Planting: Plant basil, marigolds, or nasturtiums near your bitter gourd to deter pests.
Conclusion
So, there you have it! Growing bitter gourd doesn’t have to be a daunting task. By implementing this simple yet effective DIY trick, you’re not just planting seeds; you’re cultivating a thriving vine that will reward you with a bounty of nutritious and delicious gourds. This method, focusing on enhanced germination and early growth support, significantly increases your chances of success, even if you’re a novice gardener.
The beauty of this DIY approach lies in its adaptability. Feel free to experiment with different types of organic fertilizers to find what works best for your soil. Consider using companion planting techniques, such as intercropping with beans or marigolds, to further enhance growth and deter pests. You can also adjust the size and material of your initial growing containers based on your available space and resources. Remember, gardening is a journey of continuous learning and adaptation.
This method is a must-try because it addresses the common challenges faced when growing bitter gourd, such as poor germination rates and vulnerability to early pests. By providing a protected and nutrient-rich environment in the initial stages, you’re giving your bitter gourd plants the best possible start. This translates to stronger, healthier vines, increased yields, and ultimately, a more rewarding gardening experience.
Don’t just take our word for it – give this DIY trick a try and witness the difference for yourself. We’re confident that you’ll be amazed by the results. And once you’ve harvested your first batch of homegrown bitter gourd, we encourage you to share your experience with us and the wider gardening community. Post photos of your thriving vines, share your tips and variations, and let’s collectively learn and grow together. Your success story could inspire others to embark on their own bitter gourd growing adventure! Remember, the key to successful gardening is experimentation and sharing knowledge. So, get your hands dirty, embrace the process, and enjoy the fruits (or rather, vegetables) of your labor. Happy gardening!
Frequently Asked Questions (FAQs)
What exactly makes this DIY trick so effective for growing bitter gourd?
This DIY trick is effective because it tackles the two biggest hurdles in bitter gourd cultivation: poor germination and vulnerability during the seedling stage. Soaking the seeds enhances germination rates by softening the hard outer shell, allowing moisture to penetrate more easily. The initial indoor growing period provides a protected environment, shielding the delicate seedlings from harsh weather conditions, pests, and diseases. Furthermore, the use of nutrient-rich soil or compost in the starting containers gives the seedlings a strong nutritional foundation, promoting vigorous growth from the outset. This head start significantly increases the chances of a successful harvest.
Can I use any type of container for starting the bitter gourd seeds?
While you can technically use any container with drainage holes, we recommend using biodegradable pots or seedling trays. Biodegradable pots, such as those made from peat moss or coconut coir, are particularly beneficial because they can be directly planted into the ground, minimizing root disturbance during transplanting. This reduces transplant shock and allows the bitter gourd plants to continue growing without interruption. If using plastic containers, ensure they are thoroughly cleaned and disinfected to prevent the spread of diseases. Also, make sure the containers are deep enough to accommodate the developing root system.
How often should I water the bitter gourd seedlings during the indoor growing period?
Watering frequency depends on several factors, including the type of container, the soil mix, and the ambient temperature. As a general rule, water the seedlings when the top inch of soil feels dry to the touch. Avoid overwatering, as this can lead to root rot. Ensure that the containers have adequate drainage to prevent waterlogging. A good way to check is to lift the container; if it feels light, it’s likely time to water. When watering, do so gently to avoid disturbing the delicate seedlings.
What kind of fertilizer should I use for my bitter gourd plants?
Bitter gourd plants are heavy feeders and benefit from regular fertilization. During the initial growing stages, a balanced fertilizer with equal parts nitrogen, phosphorus, and potassium (e.g., 10-10-10) is recommended. As the plants mature and begin to flower and fruit, switch to a fertilizer with a higher phosphorus content to promote fruit development. Organic options, such as compost tea, fish emulsion, and bone meal, are also excellent choices. Apply fertilizer according to the manufacturer’s instructions, and avoid over-fertilizing, as this can damage the plants.
How do I know when my bitter gourd is ready to harvest?
Bitter gourds are typically ready to harvest about 8-12 weeks after planting. The exact timing depends on the variety and growing conditions. Look for fruits that are firm, have a vibrant green color (or the color specific to your chosen variety), and are of the desired size. Avoid harvesting fruits that are overly ripe, as they will become bitter and tough. Use a sharp knife or pruning shears to cut the fruit from the vine, leaving a small portion of the stem attached.
My bitter gourd plant is producing flowers but no fruit. What could be the problem?
There are several reasons why your bitter gourd plant might be producing flowers but no fruit. One common issue is a lack of pollination. Bitter gourd plants have separate male and female flowers, and pollination is required for fruit set. You can encourage pollination by hand-pollinating the flowers, using a small paintbrush to transfer pollen from the male flowers to the female flowers. Other potential causes include nutrient deficiencies, insufficient sunlight, and extreme temperatures. Ensure that your plants are receiving adequate sunlight, water, and fertilizer, and protect them from extreme weather conditions.
Are there any common pests or diseases that affect bitter gourd plants, and how can I prevent them?
Yes, bitter gourd plants can be susceptible to various pests and diseases, including aphids, spider mites, fruit flies, and powdery mildew. To prevent these problems, practice good garden hygiene, such as removing weeds and debris from around the plants. Encourage beneficial insects, such as ladybugs and lacewings, which prey on aphids and other pests. Use organic pest control methods, such as neem oil or insecticidal soap, to control infestations. To prevent powdery mildew, ensure good air circulation around the plants and avoid overhead watering.
Can I grow bitter gourd in containers if I don’t have a garden?
Absolutely! Bitter gourd can be successfully grown in containers, provided you choose a large enough container (at least 15-20 gallons) and provide adequate support for the vines to climb. Use a well-draining potting mix and ensure that the container receives at least 6-8 hours of sunlight per day. Water and fertilize regularly, and provide a trellis or other support structure for the vines to climb. Container-grown bitter gourd plants may require more frequent watering and fertilization than those grown in the ground.
What are some creative ways to use homegrown bitter gourd in cooking?
Homegrown bitter gourd can be used in a variety of delicious and nutritious dishes. It can be stir-fried, stuffed, curried, or even juiced. To reduce the bitterness, soak the sliced bitter gourd in salted water for about 30 minutes before cooking. Some popular bitter gourd recipes include bitter gourd fry, stuffed bitter gourd, and bitter gourd curry. You can also add bitter gourd to soups and stews for a healthy and flavorful boost. Experiment with different recipes and find your favorite way to enjoy this versatile vegetable.
How can I save seeds from my homegrown bitter gourd for future planting?
Saving seeds from your homegrown bitter gourd is a great way to ensure a continuous supply of this nutritious vegetable. Allow a few fruits to fully mature on the vine, until they turn yellow or orange and the seeds inside become dark brown or black. Remove the seeds from the fruit, wash them thoroughly, and spread them out on a paper towel to dry completely. Once the seeds are dry, store them in an airtight container in a cool, dark, and dry place. Properly stored bitter gourd seeds can remain viable for several years.

Leave a Comment