

Grow Bitter Gourd Easily and unlock the secrets to a thriving, homegrown harvest! Have you ever dreamt of plucking fresh, vibrant bitter gourds straight from your own backyard? It might sound intimidating, but I’m here to tell you that with a few clever tricks and DIY hacks, you can absolutely achieve this, even if you’re a beginner gardener.
Bitter gourd, also known as karela, isn’t just a vegetable; it’s a culinary staple with a rich history deeply rooted in Asian and African cultures. For centuries, it’s been celebrated not only for its unique, slightly bitter flavor but also for its impressive health benefits. From traditional medicine to modern cuisine, the bitter gourd holds a special place.
But let’s be honest, growing bitter gourd can sometimes feel like a challenge. Many gardeners struggle with germination, pest control, and getting those beautiful, elongated fruits to actually, well, *grow*! That’s where these DIY tricks come in. I’m going to share simple, effective methods that will help you overcome common hurdles and grow bitter gourd easily, ensuring a bountiful yield. Imagine the satisfaction of serving up a delicious, homegrown karela dish, knowing you nurtured it from seed to table. Let’s get started!
Grow Bitter Gourd Like a Pro: My Foolproof DIY Guide
Hey there, fellow gardening enthusiasts! Are you ready to tackle a slightly challenging, yet incredibly rewarding, vegetable? I’m talking about bitter gourd, also known as bitter melon or karela. Don’t let the name scare you! With the right approach, you can cultivate a thriving bitter gourd vine right in your own backyard. I’ve learned a few tricks over the years, and I’m excited to share my step-by-step guide to help you grow bitter gourd easily and successfully.
Choosing the Right Variety and Starting Seeds
First things first, let’s talk about selecting the right bitter gourd variety. There are several types, differing in size, shape, and bitterness level. Some popular choices include:
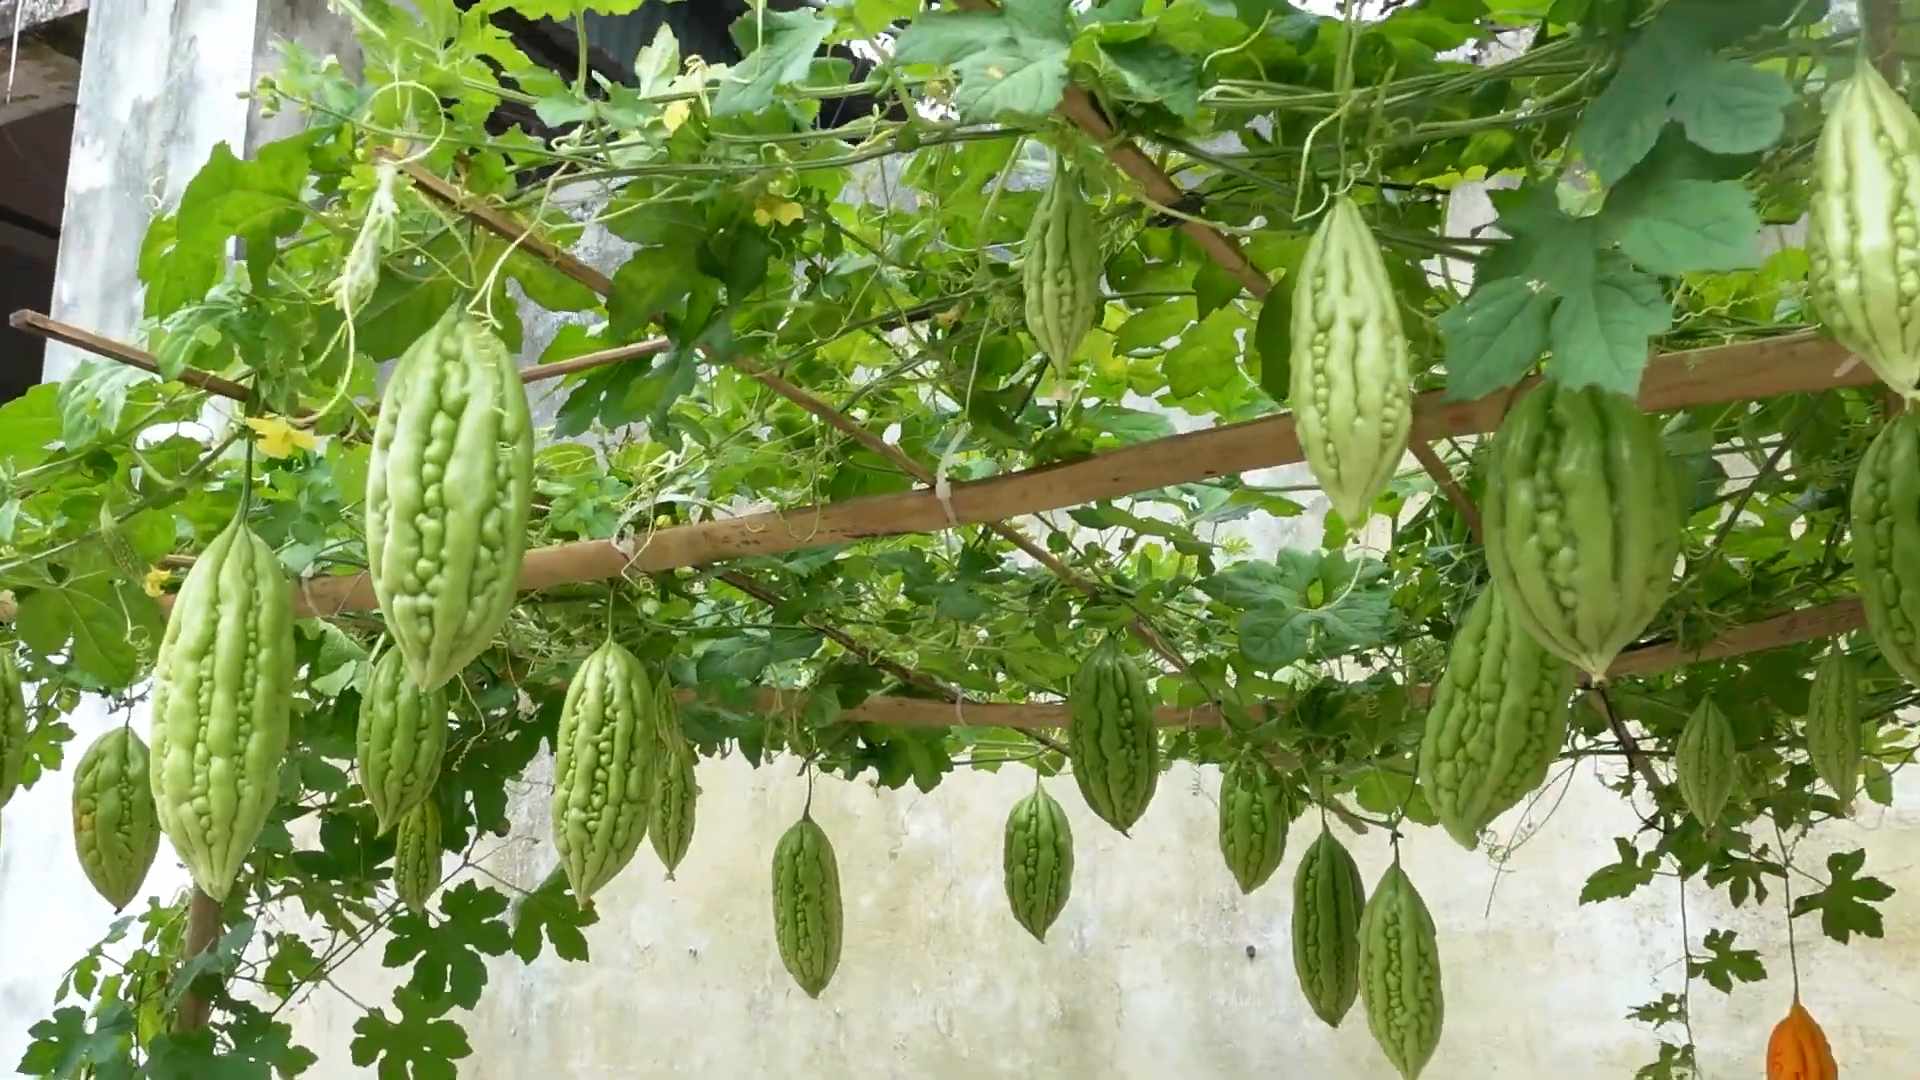
* Long Green: A common variety, known for its elongated shape and moderate bitterness.
* White Bitter Gourd: Milder in flavor compared to the green varieties.
* Chinese Bitter Gourd: Typically shorter and thicker than the long green variety.
* Hybrid Varieties: Often bred for disease resistance and higher yields.
I personally prefer the Long Green variety because it’s readily available and offers a good balance of flavor and productivity. Once you’ve chosen your variety, it’s time to start the seeds.
Here’s how I do it:
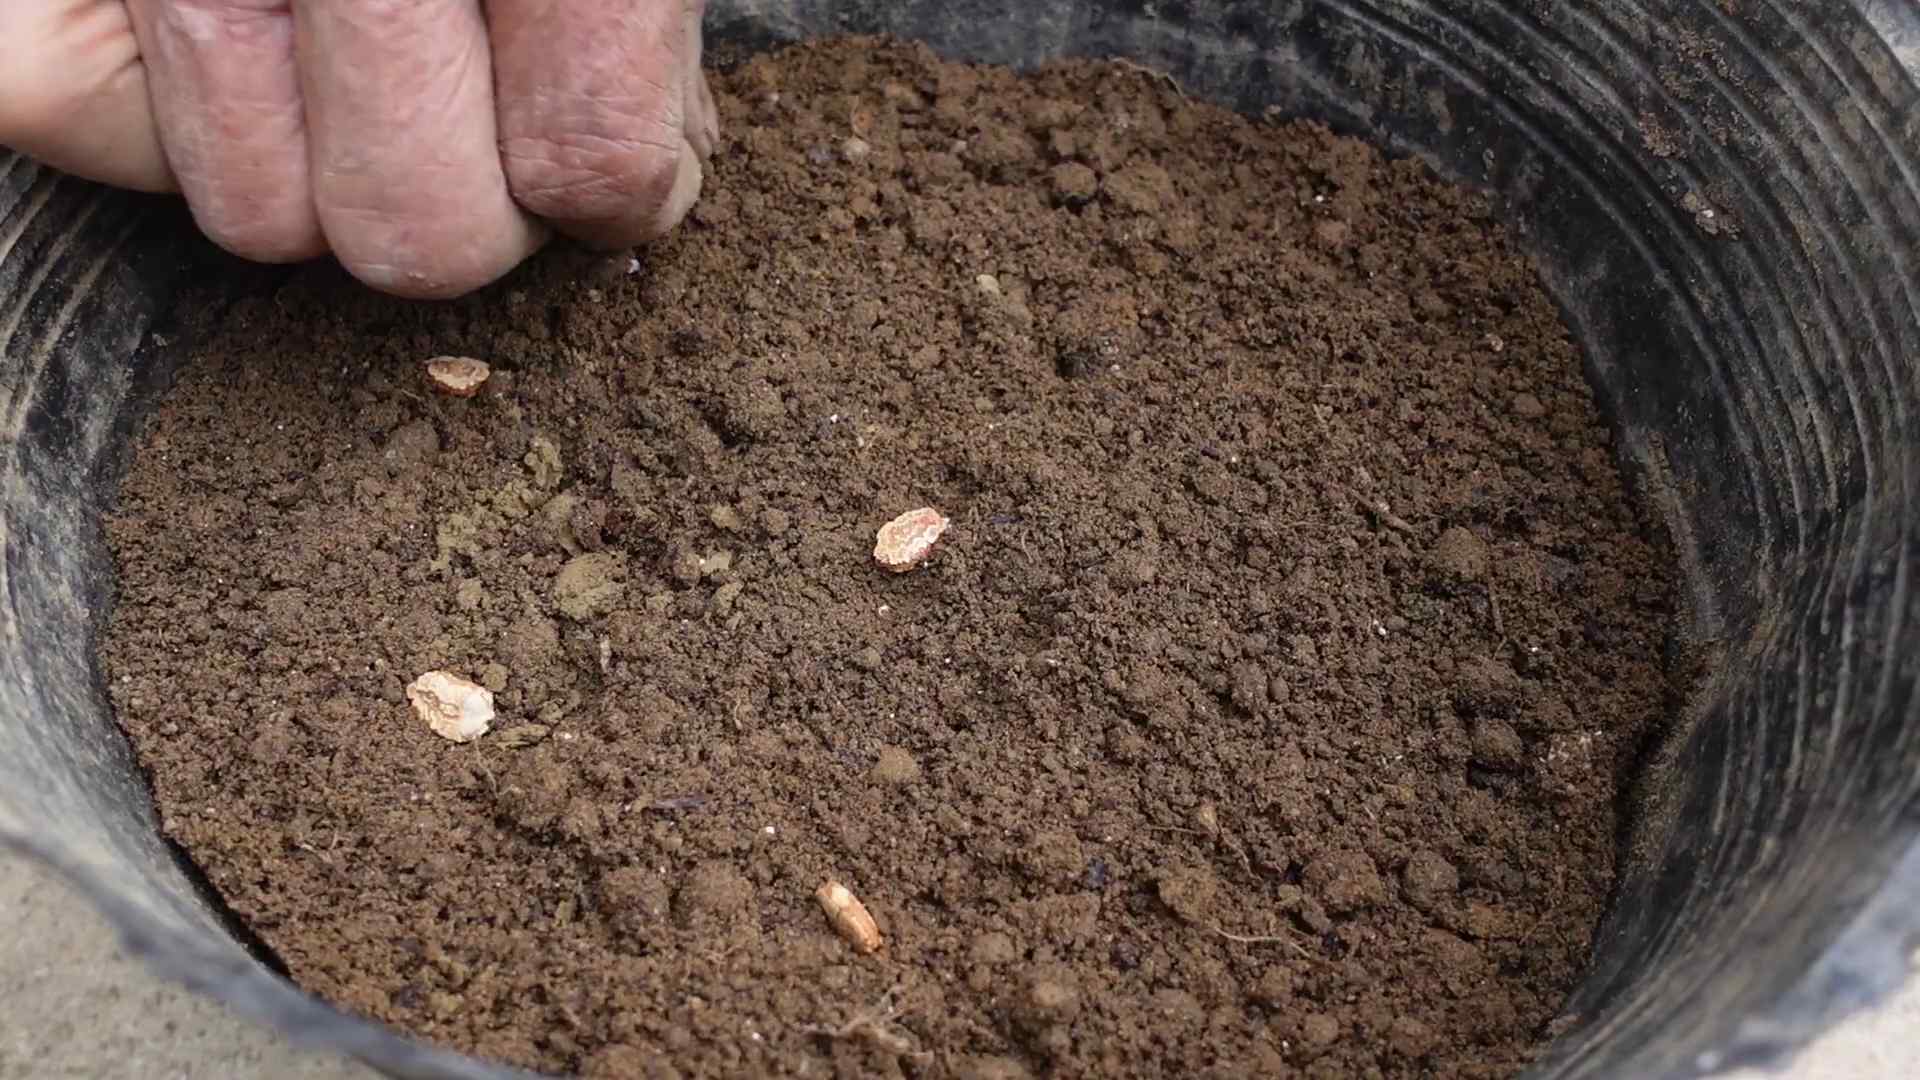
1. Soaking the Seeds: Bitter gourd seeds have a tough outer shell, so soaking them helps to soften it and improve germination. I usually soak my seeds in lukewarm water for 24 hours. This gives them a head start.
2. Scarifying the Seeds (Optional but Recommended): To further enhance germination, you can gently scarify the seeds. This involves lightly scratching the seed coat with sandpaper or a knife. Be careful not to damage the inner part of the seed! I find this step significantly increases the germination rate.
3. Preparing the Seed Starting Mix: Use a well-draining seed starting mix. I like to make my own by combining equal parts of peat moss, perlite, and vermiculite. This provides good aeration and moisture retention.
4. Sowing the Seeds: Fill small pots or seed trays with the seed starting mix. Sow the seeds about 1/2 inch deep. I usually plant 2-3 seeds per pot to increase the chances of at least one germinating.
5. Providing Warmth and Moisture: Bitter gourd seeds need warmth to germinate. I place my seed trays on a heat mat or in a warm location. Keep the soil consistently moist, but not waterlogged. A spray bottle is perfect for this.
6. Waiting for Germination: Germination usually takes about 7-14 days. Once the seedlings emerge, provide them with plenty of light. A sunny windowsill or grow lights work well.
Preparing the Garden Bed and Transplanting Seedlings
While your seedlings are growing, it’s time to prepare the garden bed. Bitter gourd needs a sunny location with well-drained soil.
Here’s my approach:
1. Choosing the Right Location: Select a spot that receives at least 6-8 hours of direct sunlight per day.
2. Soil Preparation: Bitter gourd thrives in fertile, well-drained soil. Amend the soil with plenty of compost or well-rotted manure. This will improve soil structure and provide essential nutrients. I usually dig in about 2-3 inches of compost.
3. Building a Trellis or Support System: Bitter gourd is a climbing vine, so it needs a trellis or other support system to grow on. You can use a sturdy trellis, fence, or even a bamboo structure. I’ve had success with a simple A-frame trellis made from wooden poles. Make sure it’s strong enough to support the weight of the mature vine and fruits.
4. Transplanting the Seedlings: Once the seedlings have developed a few true leaves and the weather is warm enough (no danger of frost), it’s time to transplant them into the garden. I usually wait until the seedlings are about 4-6 inches tall.
5. Hardening Off: Before transplanting, harden off the seedlings by gradually exposing them to outdoor conditions for a week. This will help them adjust to the sun, wind, and temperature changes.
6. Planting Distance: Space the seedlings about 2-3 feet apart along the trellis.
7. Watering After Transplanting: Water the seedlings thoroughly after transplanting.
Caring for Your Bitter Gourd Vine
Now that your bitter gourd vine is established, it’s time to provide the care it needs to thrive.
Here’s what I do:
1. Watering: Bitter gourd needs consistent moisture, especially during hot weather. Water deeply and regularly, especially when the fruits are developing. I usually water every other day, or more often if the soil is dry to the touch.
2. Fertilizing: Feed your bitter gourd vine with a balanced fertilizer every 2-3 weeks. I like to use a liquid fertilizer diluted to half strength. You can also use a slow-release granular fertilizer.
3. Pruning: Pruning can help to improve air circulation and encourage fruit production. Remove any dead or yellowing leaves. You can also prune the side shoots to encourage the main vine to grow upwards.
4. Pest and Disease Control: Bitter gourd can be susceptible to certain pests and diseases, such as aphids, spider mites, and powdery mildew. Inspect your plants regularly and take action if you notice any problems. I prefer to use organic pest control methods, such as insecticidal soap or neem oil. For powdery mildew, I use a baking soda solution (1 teaspoon baking soda per quart of water).
5. Pollination: Bitter gourd flowers are usually pollinated by insects. However, if you’re not seeing many fruits, you can hand-pollinate the flowers. Use a small paintbrush to transfer pollen from the male flowers to the female flowers. Female flowers have a small fruit behind the flower, while male flowers do not.
Harvesting and Enjoying Your Bitter Gourd
The moment you’ve been waiting for! Harvesting your own homegrown bitter gourd is incredibly satisfying.
Here’s how I do it:
1. Harvesting Time: Bitter gourd is usually ready to harvest about 2-3 months after planting. The fruits should be firm and green. The size will depend on the variety you’re growing.
2. Harvesting Technique: Use a sharp knife or pruners to cut the fruits from the vine. Be careful not to damage the vine.
3. Taste Test: The bitterness of the fruit increases as it ripens, so harvest them when they are still relatively young and green for a milder flavor.
4. Storage: Bitter gourd can be stored in the refrigerator for up to a week.
5. Culinary Uses: Bitter gourd can be used in a variety of dishes. It’s often stir-fried, curried, or stuffed. To reduce the bitterness, you can soak the sliced gourd in salted water for about 30 minutes before cooking. I personally love it stir-fried with onions, garlic, and a touch of soy sauce.
Troubleshooting Common Problems
Even with the best care, you might encounter some challenges along the way. Here are a few common problems and how I address them:
* Poor Germination: If your seeds aren’t germinating well, try scarifying them and ensuring they have adequate warmth and moisture.
* Yellowing Leaves: Yellowing leaves can be a sign of nutrient deficiency or overwatering. Adjust your watering and fertilizing accordingly.
* Lack of Fruit Production: This could be due to poor pollination or insufficient sunlight. Try hand-pollinating the flowers and make sure your vine is getting enough sun.
* Pest Infestations: Regularly inspect your plants for pests and take action promptly.
* Disease Problems: Ensure good air circulation and avoid overwatering to prevent fungal diseases.
Tips and Tricks for Success
Here are a few extra tips and tricks I’ve learned over the years:
* Companion Planting: Plant basil, marigolds, or nasturtiums near your bitter gourd to deter pests.
* Succession Planting: Plant new seeds every few weeks to ensure a continuous harvest throughout the growing season.
* Saving Seeds: If you want to save seeds for next year, allow a few fruits to fully ripen on the vine. The seeds will turn brown and hard.
* Soil Testing: Test your soil to determine its pH and nutrient levels. This will help you to amend the soil appropriately.
* Observation: Pay close attention to your plants and learn to recognize the signs of stress or disease.
Growing bitter gourd can be a rewarding experience. With a little patience and effort, you can enjoy fresh, homegrown bitter gourd right from your own garden. Happy gardening!
Conclusion
So, there you have it! Growing bitter gourd doesn’t have to be a daunting task. By implementing this simple yet effective DIY trick, you’re setting yourself up for a bountiful harvest of this nutritious and versatile vegetable. We’ve shown you how to create the ideal environment for your bitter gourd vines to thrive, maximizing sunlight exposure and air circulation, which are crucial for healthy growth and abundant fruit production.
This method isn’t just about convenience; it’s about empowering you to take control of your food source and enjoy the satisfaction of growing your own produce. Imagine the pride you’ll feel serving up a delicious bitter gourd dish made with ingredients you nurtured from seed to table. Plus, you’ll be reducing your reliance on store-bought vegetables, often laden with pesticides and transported long distances.
But the benefits don’t stop there. This DIY approach is also incredibly adaptable. Feel free to experiment with different climbing structures, such as trellises made from bamboo, repurposed fencing, or even sturdy netting. You can also adjust the spacing between your plants based on the specific variety of bitter gourd you’re growing. Some varieties are more compact, while others are vigorous climbers that require ample room to spread.
Consider companion planting to further enhance your bitter gourd garden. Marigolds can help deter pests, while basil can improve the flavor of the fruit. Experiment with different combinations to find what works best for your local climate and soil conditions.
Don’t be afraid to get creative with your bitter gourd recipes, too! While it’s often stir-fried or used in curries, bitter gourd can also be juiced, pickled, or even stuffed. Explore different culinary traditions and discover new ways to enjoy this unique vegetable.
The key to success with this DIY trick is consistency and observation. Regularly check your plants for signs of pests or diseases, and adjust your watering and fertilizing schedule as needed. Remember, every garden is different, so what works for one person may not work for another. Be patient, persistent, and willing to learn from your mistakes.
We are confident that this DIY method will significantly improve your success rate when you grow bitter gourd easily. It’s a game-changer for both novice and experienced gardeners alike.
Now, it’s your turn! We encourage you to try this DIY trick and share your experiences with us. Post photos of your thriving bitter gourd vines on social media using #GrowBitterGourdEasily and tag us so we can see your amazing results. Let’s build a community of passionate gardeners who are dedicated to growing their own healthy and delicious food. We can’t wait to see what you create!
Frequently Asked Questions (FAQ)
What type of soil is best for growing bitter gourd?
Bitter gourd thrives in well-drained, fertile soil that is rich in organic matter. A slightly acidic to neutral pH (6.0 to 7.0) is ideal. Before planting, amend your soil with compost, aged manure, or other organic amendments to improve drainage and fertility. If your soil is heavy clay, consider adding sand or perlite to improve drainage.
How much sunlight does bitter gourd need?
Bitter gourd requires at least 6-8 hours of direct sunlight per day to thrive. Choose a planting location that receives ample sunlight throughout the day. If you live in a hot climate, providing some afternoon shade can help prevent the leaves from scorching.
How often should I water my bitter gourd plants?
Water your bitter gourd plants regularly, especially during hot, dry weather. Aim to keep the soil consistently moist but not waterlogged. Water deeply at the base of the plants, avoiding wetting the foliage, which can increase the risk of fungal diseases. A good rule of thumb is to water when the top inch of soil feels dry to the touch.
What kind of fertilizer should I use for bitter gourd?
Bitter gourd benefits from regular fertilization throughout the growing season. Use a balanced fertilizer with equal amounts of nitrogen, phosphorus, and potassium (e.g., 10-10-10) at planting time. Once the plants start to flower and produce fruit, switch to a fertilizer that is higher in phosphorus and potassium to promote fruit development. You can also supplement with organic fertilizers such as compost tea or fish emulsion.
How do I prevent pests and diseases from affecting my bitter gourd plants?
Regularly inspect your plants for signs of pests or diseases. Common pests that affect bitter gourd include aphids, spider mites, and squash bugs. Control these pests with insecticidal soap, neem oil, or by handpicking them off the plants. Fungal diseases such as powdery mildew and downy mildew can also be a problem. Prevent these diseases by providing good air circulation, avoiding overhead watering, and applying a fungicide if necessary.
When is the best time to plant bitter gourd?
Bitter gourd is a warm-season crop that requires warm temperatures to germinate and grow. In most regions, the best time to plant bitter gourd is in the spring, after the last frost. You can start seeds indoors 4-6 weeks before the last frost and transplant them outdoors once the weather has warmed up. Alternatively, you can direct sow seeds outdoors once the soil temperature reaches at least 70°F (21°C).
How long does it take for bitter gourd to mature?
Bitter gourd typically takes 60-90 days to mature after planting. The exact time will depend on the variety, growing conditions, and climate. You can harvest the fruits when they are still green and slightly immature, or you can wait until they turn yellow or orange. The flavor of the fruit will become more bitter as it matures.
Can I grow bitter gourd in containers?
Yes, bitter gourd can be grown in containers, but you will need to choose a large container (at least 10 gallons) to accommodate the plant’s root system. Use a well-draining potting mix and provide a trellis or other support for the vines to climb. Container-grown bitter gourd may require more frequent watering and fertilization than plants grown in the ground.
How do I harvest bitter gourd?
Harvest bitter gourd when the fruits are firm and green, before they start to turn yellow or orange. Use a sharp knife or pruners to cut the fruits from the vine, leaving a short stem attached. Handle the fruits carefully to avoid bruising them.
What are some ways to cook with bitter gourd?
Bitter gourd can be cooked in a variety of ways, including stir-frying, boiling, steaming, baking, and grilling. It is often used in curries, soups, and stews. To reduce the bitterness of the fruit, you can soak it in salted water for 30 minutes before cooking. You can also remove the seeds and pith, which are the most bitter parts of the fruit.
How can I save seeds from my bitter gourd plants?
To save seeds from your bitter gourd plants, allow the fruits to fully mature on the vine until they turn yellow or orange. Once the fruits are ripe, harvest them and remove the seeds. Wash the seeds thoroughly and spread them out on a paper towel to dry completely. Store the dried seeds in an airtight container in a cool, dark place.
Is bitter gourd good for my health?
Yes, bitter gourd is a very healthy vegetable. It is low in calories and high in vitamins, minerals, and antioxidants. It has been shown to have numerous health benefits, including lowering blood sugar levels, improving cholesterol levels, and boosting the immune system. It is also a good source of fiber, which can help with digestion and weight management.
What are some different varieties of bitter gourd?
There are many different varieties of bitter gourd available, each with its own unique characteristics. Some popular varieties include:
* Chinese bitter gourd: This variety has a long, slender shape and a smooth, light green skin.
* Indian bitter gourd: This variety has a shorter, thicker shape and a bumpy, dark green skin.
* Taiwanese bitter gourd: This variety has a medium-sized, oval shape and a light green skin with ridges.
* White bitter gourd: This variety has a white or pale green skin and a milder flavor than other varieties.
Experiment with different varieties to find the ones that you enjoy the most.
What if my bitter gourd isn’t producing fruit?
There are several reasons why your bitter gourd might not be producing fruit. It could be due to a lack of pollination, insufficient sunlight, inadequate watering, or nutrient deficiencies. Ensure your plants are getting enough sunlight and water, and fertilize them regularly with a balanced fertilizer. You can also try hand-pollinating the flowers to improve fruit set. If you’re still having trouble, consult with a local gardening expert for advice.
Leave a Comment