

Grow Aloe Vera from Leaf: Unlock the Secrets to Effortless Propagation!
Have you ever admired the soothing, healing properties of Aloe Vera and wished you could have an endless supply right at your fingertips? I know I have! Forget constantly buying new plants; I’m going to show you how to grow Aloe Vera from leaf, a surprisingly simple and rewarding DIY project.
Aloe Vera has a rich history, dating back thousands of years to ancient Egypt, where it was known as the “plant of immortality.” Cleopatra herself was said to use it for its beauty benefits! Today, this succulent is prized worldwide for its medicinal and cosmetic uses, from soothing sunburns to moisturizing skin. But what if I told you that propagating this wonder plant was easier than you think?
Many people struggle with keeping their Aloe Vera plants thriving, often unaware that they can easily create new plants from a single leaf. This DIY trick not only saves you money but also allows you to share the gift of Aloe Vera with friends and family. Plus, it’s incredibly satisfying to watch a new plant emerge from something you nurtured yourself. So, ditch the expensive store-bought gels and let’s dive into the step-by-step guide on how to grow Aloe Vera from leaf and create your own personal Aloe Vera oasis!
Growing Aloe Vera from a Single Leaf: A DIY Guide
Hey there, plant enthusiasts! Ever wondered if you could magically conjure a whole new Aloe Vera plant from just a single leaf? Well, guess what? You totally can! It’s not exactly instant gratification, but with a little patience and the right technique, you can propagate Aloe Vera from a leaf cutting. I’m going to walk you through the whole process, step-by-step, so you can expand your Aloe Vera family without spending a dime.
What You’ll Need
Before we dive in, let’s gather our supplies. Here’s what you’ll need to successfully propagate Aloe Vera from a leaf:
* A Healthy Aloe Vera Plant: This is the most important ingredient! You’ll need a mature Aloe Vera plant to take a leaf cutting from.
* A Sharp, Clean Knife or Pruning Shears: Sterilize your cutting tool with rubbing alcohol to prevent infection.
* Rooting Hormone (Optional): While not strictly necessary, rooting hormone can significantly increase your chances of success.
* Well-Draining Potting Mix: A cactus or succulent mix is ideal. Regular potting soil retains too much moisture and can lead to rot.
* A Small Pot with Drainage Holes: Choose a pot that’s just slightly larger than the base of your leaf cutting.
* A Spray Bottle with Water: For lightly misting the soil.
* A Warm, Bright Location: Indirect sunlight is best. Avoid direct sunlight, which can scorch the leaf.
* Patience: This process takes time, so don’t get discouraged if you don’t see results immediately!
Choosing the Right Leaf
Not all leaves are created equal when it comes to propagation. Here’s what to look for:
* Mature Leaves: Select a leaf that’s at least 6 inches long and relatively thick. Younger, smaller leaves are less likely to root successfully.
* Healthy Leaves: Choose a leaf that’s firm, plump, and free from blemishes, spots, or signs of damage.
* Outer Leaves: The outer leaves of the plant are generally the most mature and have the best chance of rooting.
Taking the Leaf Cutting
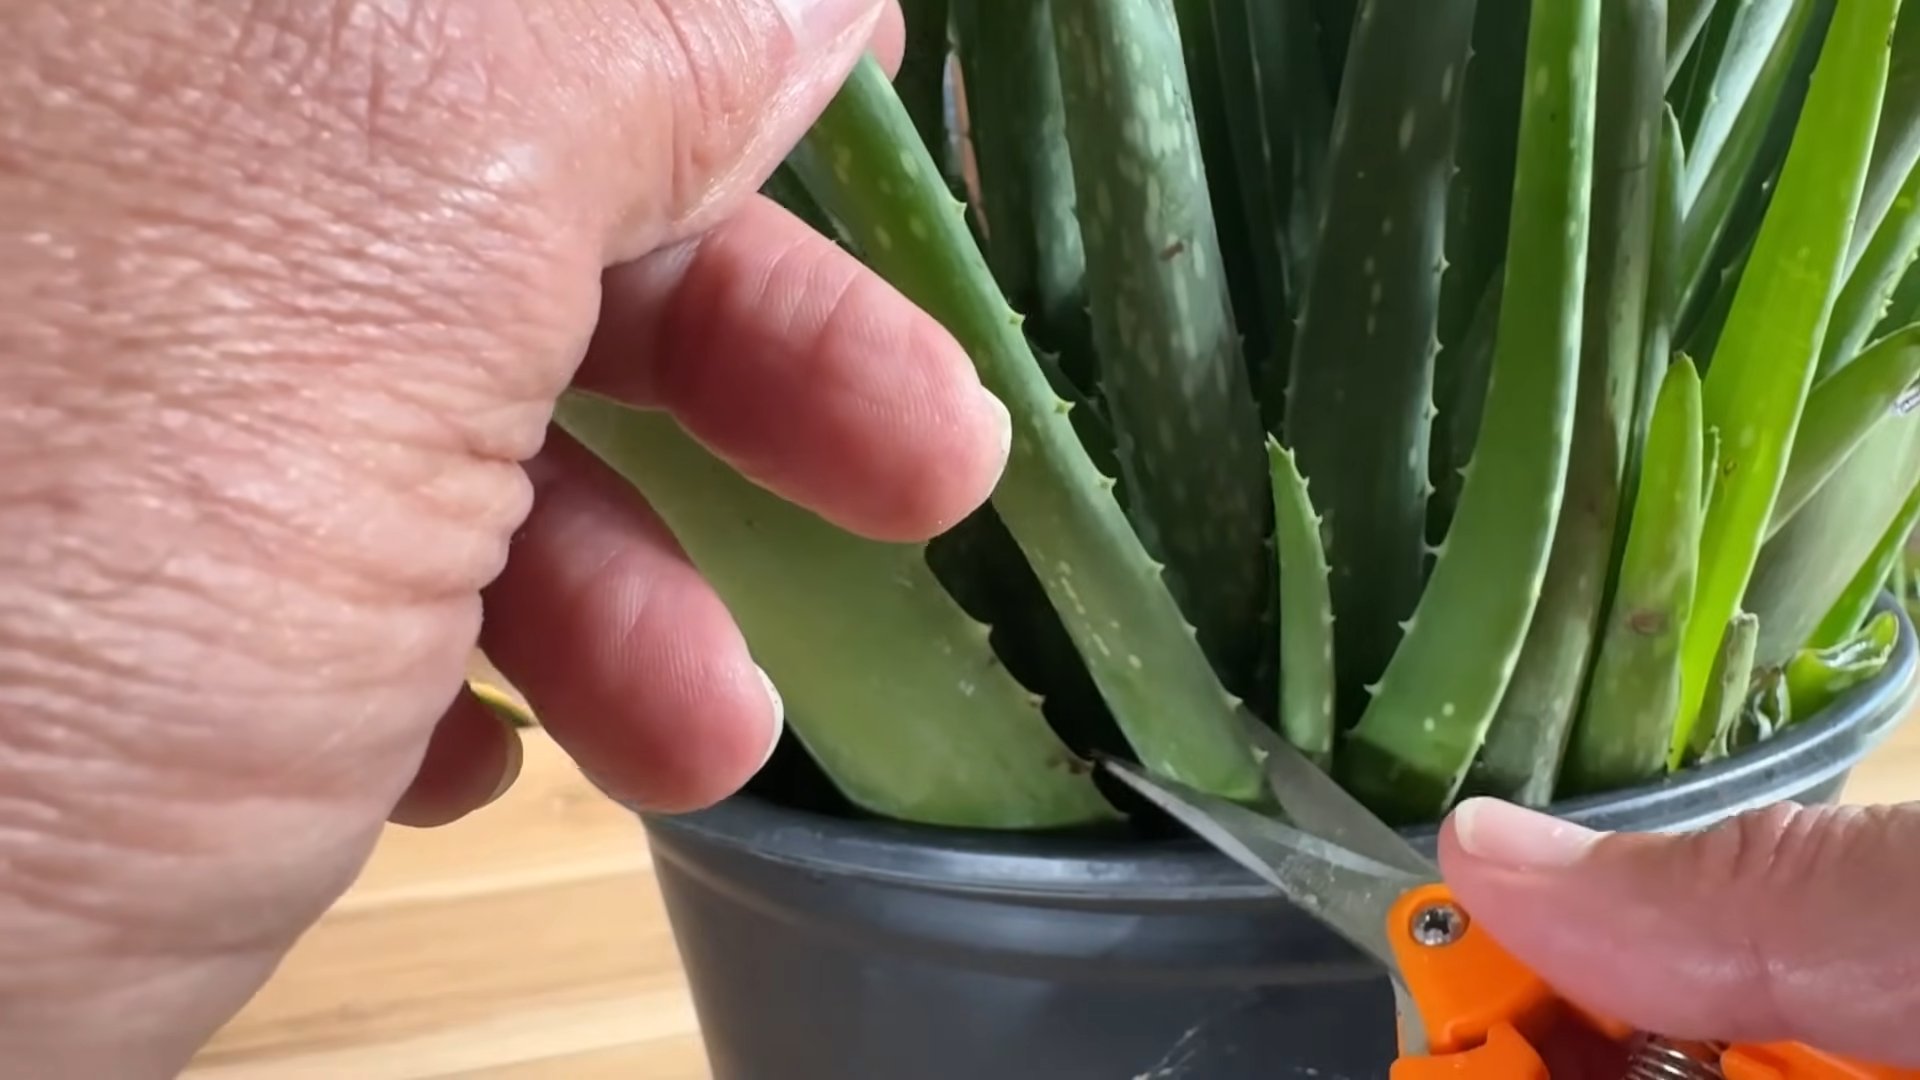
Okay, let’s get to the cutting! This is a crucial step, so pay close attention.
1. Sterilize Your Cutting Tool: Wipe your knife or pruning shears with rubbing alcohol to kill any bacteria or fungi.
2. Make a Clean Cut: Carefully cut the leaf from the base of the plant, as close to the stem as possible. Aim for a clean, straight cut.
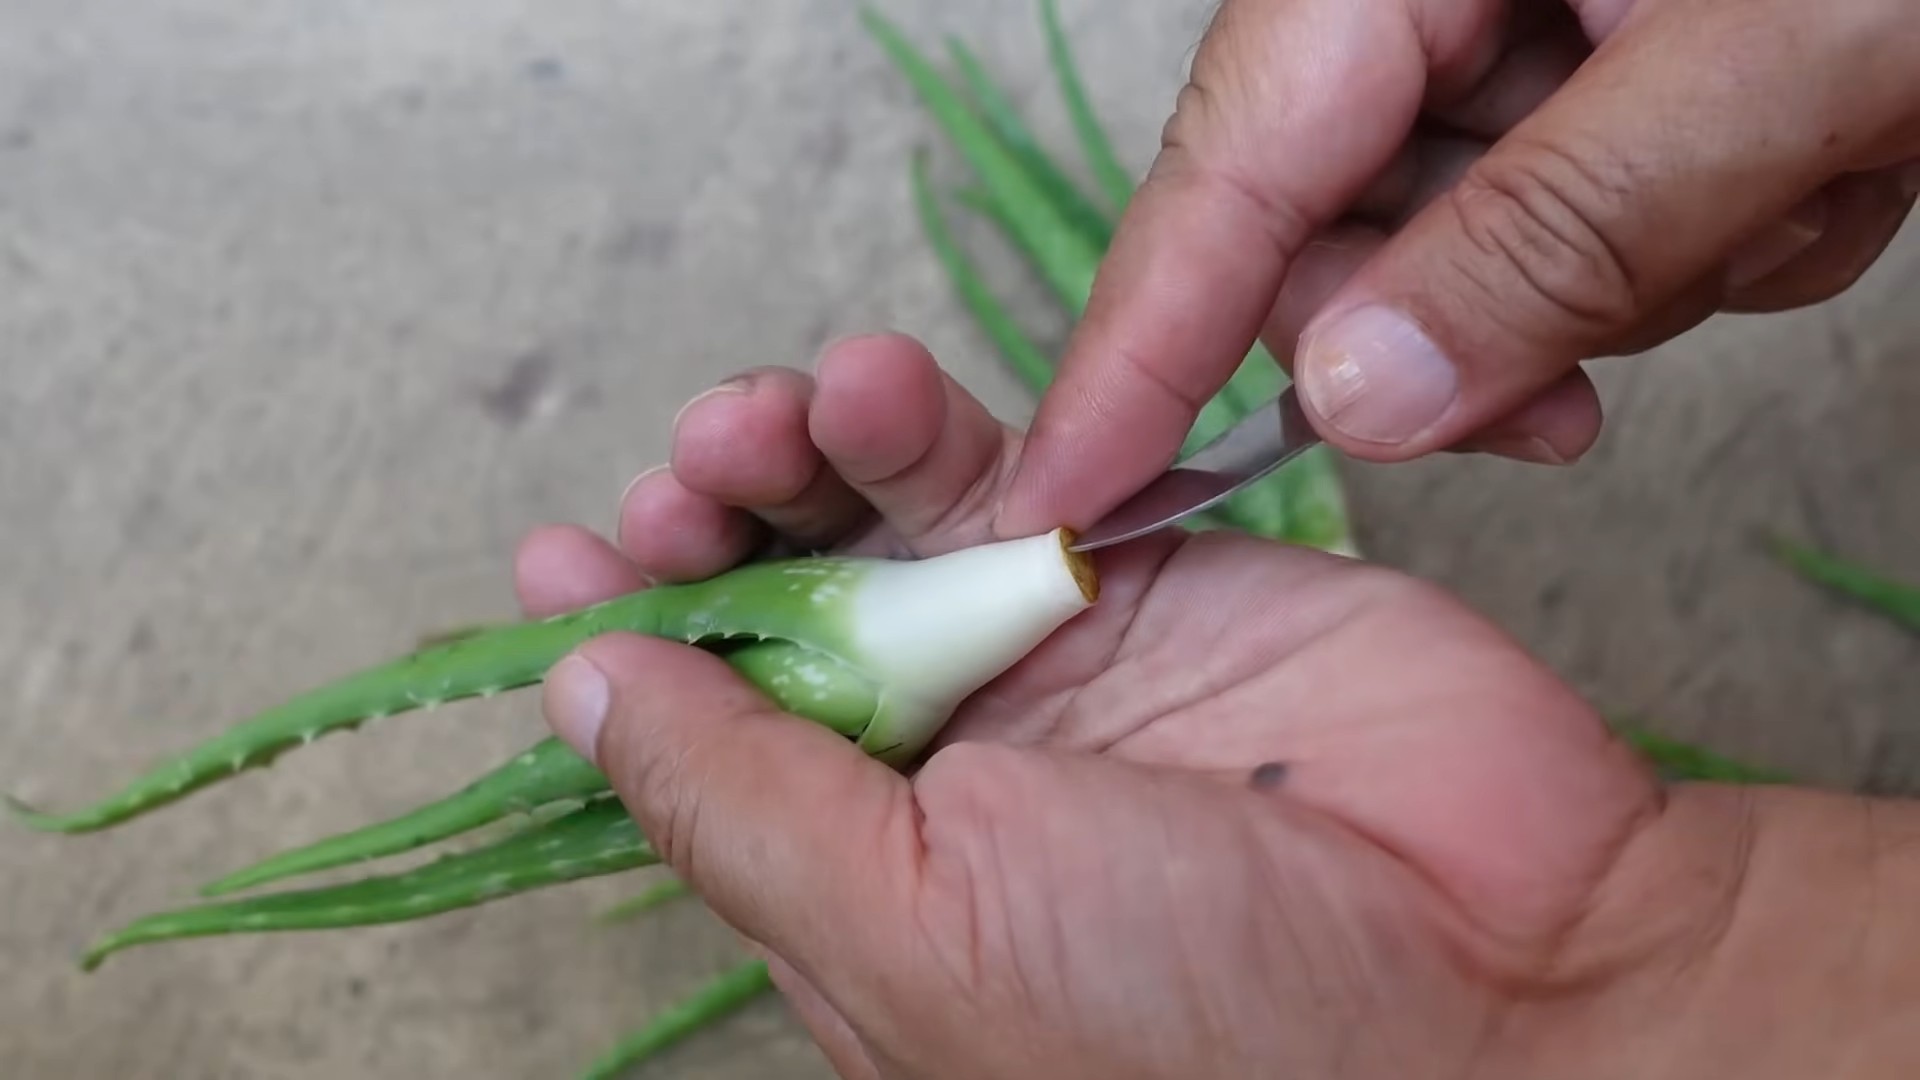
3. Let the Cut End Callous Over: This is super important! Place the leaf cutting in a dry, shaded area for 3-7 days, or until the cut end forms a callous. This prevents rot. The callous should be dry and slightly hardened.
Planting the Leaf Cutting
Now that our leaf has calloused over, it’s time to plant it!
1. Prepare Your Pot: Fill your pot with well-draining potting mix, leaving about an inch of space at the top.
2. Apply Rooting Hormone (Optional): If you’re using rooting hormone, dip the calloused end of the leaf cutting into the powder. Tap off any excess.
3. Plant the Cutting: Insert the calloused end of the leaf cutting into the potting mix, burying it about 1-2 inches deep. You can use a small stick or pencil to create a hole in the soil first to avoid damaging the leaf.
4. Water Lightly: Gently mist the soil with water. Avoid overwatering, as this can lead to rot. The soil should be slightly moist, but not soggy.
5. Provide Support (Optional): If the leaf is wobbly, you can use small stakes or pebbles to support it until it develops roots.
Caring for Your Leaf Cutting
This is where the patience comes in! Here’s how to care for your leaf cutting while it’s developing roots:
1. Location: Place the pot in a warm, bright location with indirect sunlight. Avoid direct sunlight, which can scorch the leaf.
2. Watering: Water sparingly. Allow the soil to dry out completely between waterings. Overwatering is the biggest enemy of Aloe Vera propagation. I usually mist the soil every week or two, depending on the humidity.
3. Humidity: Aloe Vera prefers relatively low humidity. Avoid placing the pot in a humid environment, such as a bathroom.
4. Temperature: Maintain a temperature between 65-80°F (18-27°C).
5. Patience: It can take several weeks or even months for the leaf cutting to develop roots. Don’t get discouraged if you don’t see results immediately.
Signs of Rooting
How will you know if your leaf cutting has successfully rooted? Here are a few signs to look for:
* Resistance: Gently tug on the leaf. If it feels firmly anchored in the soil, it has likely developed roots.
* New Growth: You may see new growth emerging from the base of the leaf. This is a sure sign that your cutting has rooted.
* Overall Health: The leaf should remain firm and healthy-looking. If it starts to shrivel or rot, it may not have rooted successfully.
Transplanting Your New Aloe Vera Plant
Once your leaf cutting has developed a strong root system and shows signs of new growth, it’s time to transplant it into a larger pot.
1. Choose a Larger Pot: Select a pot that’s slightly larger than the current pot. Make sure it has drainage holes.
2. Prepare the Potting Mix: Fill the new pot with well-draining potting mix.
3. Carefully Remove the Plant: Gently remove the rooted leaf cutting from its current pot. Be careful not to damage the roots.
4. Plant the Aloe Vera: Place the Aloe Vera plant in the center of the new pot and fill in around it with potting mix.
5. Water Thoroughly: Water the plant thoroughly after transplanting.
6. Care for Your New Plant: Continue to care for your new Aloe Vera plant as you would any other Aloe Vera plant. Provide it with plenty of sunlight, water sparingly, and fertilize it occasionally.
Troubleshooting
Sometimes, things don’t go according to plan. Here are a few common problems you might encounter and how to fix them:
* Rotting: If the leaf cutting starts to rot, it’s likely due to overwatering. Remove the rotting leaf immediately and start over with a fresh cutting. Make sure to let the cut end callous over properly before planting.
* Shriveling: If the leaf cutting starts to shrivel, it may not be getting enough moisture. Mist the soil more frequently, but be careful not to overwater.
* No Rooting: If the leaf cutting doesn’t develop roots after several months, it may not be viable. Try again with a different leaf cutting, and consider using rooting hormone.
Why This Method Can Be Tricky
Okay, let’s be real. Growing Aloe Vera from a leaf, while possible, isn’t the *most* reliable method. Here’s why:
* No Guarantee of Roots: Unlike some other succulents, Aloe Vera leaves don’t always readily produce roots. It’s a bit of a gamble.
* High Risk of Rot: Aloe Vera is prone to rot, especially when propagated from a leaf. Overwatering is a common culprit.
* Slow Process: It can take a long time for a leaf cutting to develop roots, and even longer for it to grow into a mature plant.
Alternative Propagation Methods
If you’re looking for a more reliable way to propagate Aloe Vera, consider these alternative methods:
* Offsets (Pups): Aloe Vera plants often produce small offsets, or “pups,” around their base. These pups can be easily separated from the mother plant and transplanted into their own pots. This is the easiest and most common method.
* Seeds: You can also grow Aloe Vera from seeds, but this is a much slower and more challenging process.
Final Thoughts
While propagating Aloe Vera from a leaf can be a bit tricky, it’s definitely worth a try if you’re feeling adventurous! Just remember to be patient, avoid overwatering, and provide your leaf cutting with the right conditions. And if it doesn’t work out, don’t worry! There are plenty of other ways to propagate Aloe Vera. Happy planting!
Conclusion
So, there you have it! Growing aloe vera from a leaf might seem like a horticultural gamble, but with a little patience and the right approach, you can successfully propagate these amazing succulents and enjoy their numerous benefits. This DIY trick isn’t just about saving money; it’s about connecting with nature, understanding the life cycle of plants, and experiencing the satisfaction of nurturing something from a single leaf into a thriving plant.
Why is this a must-try? Because aloe vera is more than just a pretty plant. It’s a powerhouse of healing properties, a natural air purifier, and a low-maintenance addition to any home. Imagine having a readily available source of soothing gel for sunburns, minor cuts, and skin irritations, all thanks to your own green thumb. Plus, propagating aloe vera from a leaf is a fantastic way to expand your collection and share the gift of this incredible plant with friends and family.
Don’t be afraid to experiment! While we’ve outlined a proven method, there are always variations you can try. Some gardeners have success using rooting hormone to encourage faster root development. Others prefer different types of potting mix, such as a blend of perlite, vermiculite, and coconut coir. You could even try propagating multiple leaves at once to increase your chances of success. Remember to always use a clean, sharp knife when cutting the leaf to prevent infection.
Consider the size of the container you use for planting. Smaller containers are ideal for initial propagation, but as your aloe vera plant grows, you’ll need to transplant it into a larger pot to accommodate its expanding root system. Choose a pot with good drainage to prevent root rot, a common problem with succulents.
Another variation to consider is the environment in which you place your leaf cuttings. While indirect sunlight is generally recommended, you might find that your aloe vera leaves thrive in slightly brighter or shadier conditions, depending on your local climate. Observe your cuttings closely and adjust their environment as needed.
The key to success with this DIY trick is patience. It can take several weeks, or even months, for roots to develop. Don’t be discouraged if you don’t see results immediately. Just keep the soil lightly moist and provide the right conditions, and eventually, you’ll be rewarded with a new aloe vera plant.
We wholeheartedly encourage you to give this DIY trick a try. It’s a rewarding and educational experience that will not only enhance your gardening skills but also provide you with a valuable resource for natural healing and well-being. Once you’ve successfully propagated your own aloe vera plant from a leaf, we’d love to hear about your experience! Share your tips, tricks, and photos in the comments below. Let’s build a community of aloe vera enthusiasts and learn from each other’s successes and challenges. Let’s all learn how to grow aloe vera from leaf.
Frequently Asked Questions (FAQ)
1. Is it really possible to grow aloe vera from a leaf?
Yes, it is absolutely possible to grow aloe vera from a leaf, although it’s not always guaranteed. Unlike some plants that readily root from leaf cuttings, aloe vera requires a specific approach and a bit more patience. The key is to allow the cut end of the leaf to callous over before planting it in well-draining soil. This prevents rot and allows the leaf to focus its energy on developing roots. While seed propagation is also an option, growing from a leaf cutting is a faster way to get a new plant that is a clone of the parent.
2. What kind of aloe vera leaf should I use for propagation?
Choose a healthy, mature leaf from a well-established aloe vera plant. The leaf should be plump, firm, and free from any signs of damage or disease. Avoid using leaves that are too young or too old, as they may not have the energy reserves needed to develop roots. A leaf that is at least 6-8 inches long is generally a good size for propagation. The bigger the leaf, the more energy it has to produce roots.
3. How long does it take for aloe vera leaves to root?
Rooting time can vary depending on several factors, including the temperature, humidity, and the health of the leaf. Generally, it can take anywhere from 4 to 8 weeks for roots to start developing. Be patient and avoid disturbing the leaf too much during this time. You can gently tug on the leaf after a few weeks to see if it has rooted. If you feel resistance, it means roots have formed.
4. What type of soil is best for propagating aloe vera leaves?
Aloe vera requires well-draining soil to prevent root rot. A cactus or succulent potting mix is ideal, as it typically contains a blend of ingredients like perlite, vermiculite, and sand, which promote drainage. You can also create your own potting mix by combining equal parts of potting soil, perlite, and coarse sand. Avoid using heavy, clay-based soils, as they retain too much moisture and can lead to root rot.
5. How often should I water the aloe vera leaf cutting?
Water sparingly during the rooting process. Overwatering is a common mistake that can lead to rot. Allow the soil to dry out completely between waterings. When you do water, moisten the soil lightly, but avoid getting the leaf wet. Once the roots have developed, you can gradually increase the watering frequency, but still allow the soil to dry out between waterings.
6. What kind of light does the aloe vera leaf cutting need?
Aloe vera leaves need bright, indirect sunlight to thrive. Avoid placing the cutting in direct sunlight, as this can scorch the leaf. A location near a window that receives filtered sunlight is ideal. If you don’t have access to natural light, you can use a grow light to provide supplemental lighting.
7. Can I use rooting hormone to help the aloe vera leaf root faster?
Yes, using rooting hormone can help to speed up the rooting process and increase the chances of success. Dip the cut end of the leaf in rooting hormone powder before planting it in the soil. Rooting hormone contains auxins, which are plant hormones that stimulate root development.
8. What if my aloe vera leaf cutting starts to rot?
If your aloe vera leaf cutting starts to rot, it’s important to take action immediately to prevent the rot from spreading. Remove the affected leaf from the soil and discard it. Inspect the remaining leaves for any signs of rot. If the rot is limited to a small area, you can try cutting away the affected tissue with a clean, sharp knife. Allow the cut end to callous over again before replanting it in fresh, well-draining soil.
9. How do I know when the aloe vera plant is ready to be transplanted?
Once the aloe vera plant has developed a healthy root system and new growth is visible, it’s ready to be transplanted into a larger pot. Choose a pot that is slightly larger than the current pot and fill it with well-draining potting mix. Gently remove the aloe vera plant from its current pot and place it in the new pot. Water thoroughly and place the plant in a location with bright, indirect sunlight.
10. What are some common problems when growing aloe vera from a leaf, and how can I fix them?
Some common problems include:
* **Rotting:** Prevent this by using well-draining soil, allowing the cut end to callous over before planting, and avoiding overwatering.
* **Lack of root development:** Ensure the leaf is healthy, provide bright, indirect sunlight, and consider using rooting hormone.
* **Leaf discoloration:** This can be caused by too much direct sunlight or underwatering. Adjust the plant’s location or watering schedule accordingly.
* **Pests:** Aloe vera can be susceptible to pests like mealybugs and scale. Inspect your plants regularly and treat any infestations promptly with insecticidal soap or neem oil.

Leave a Comment