

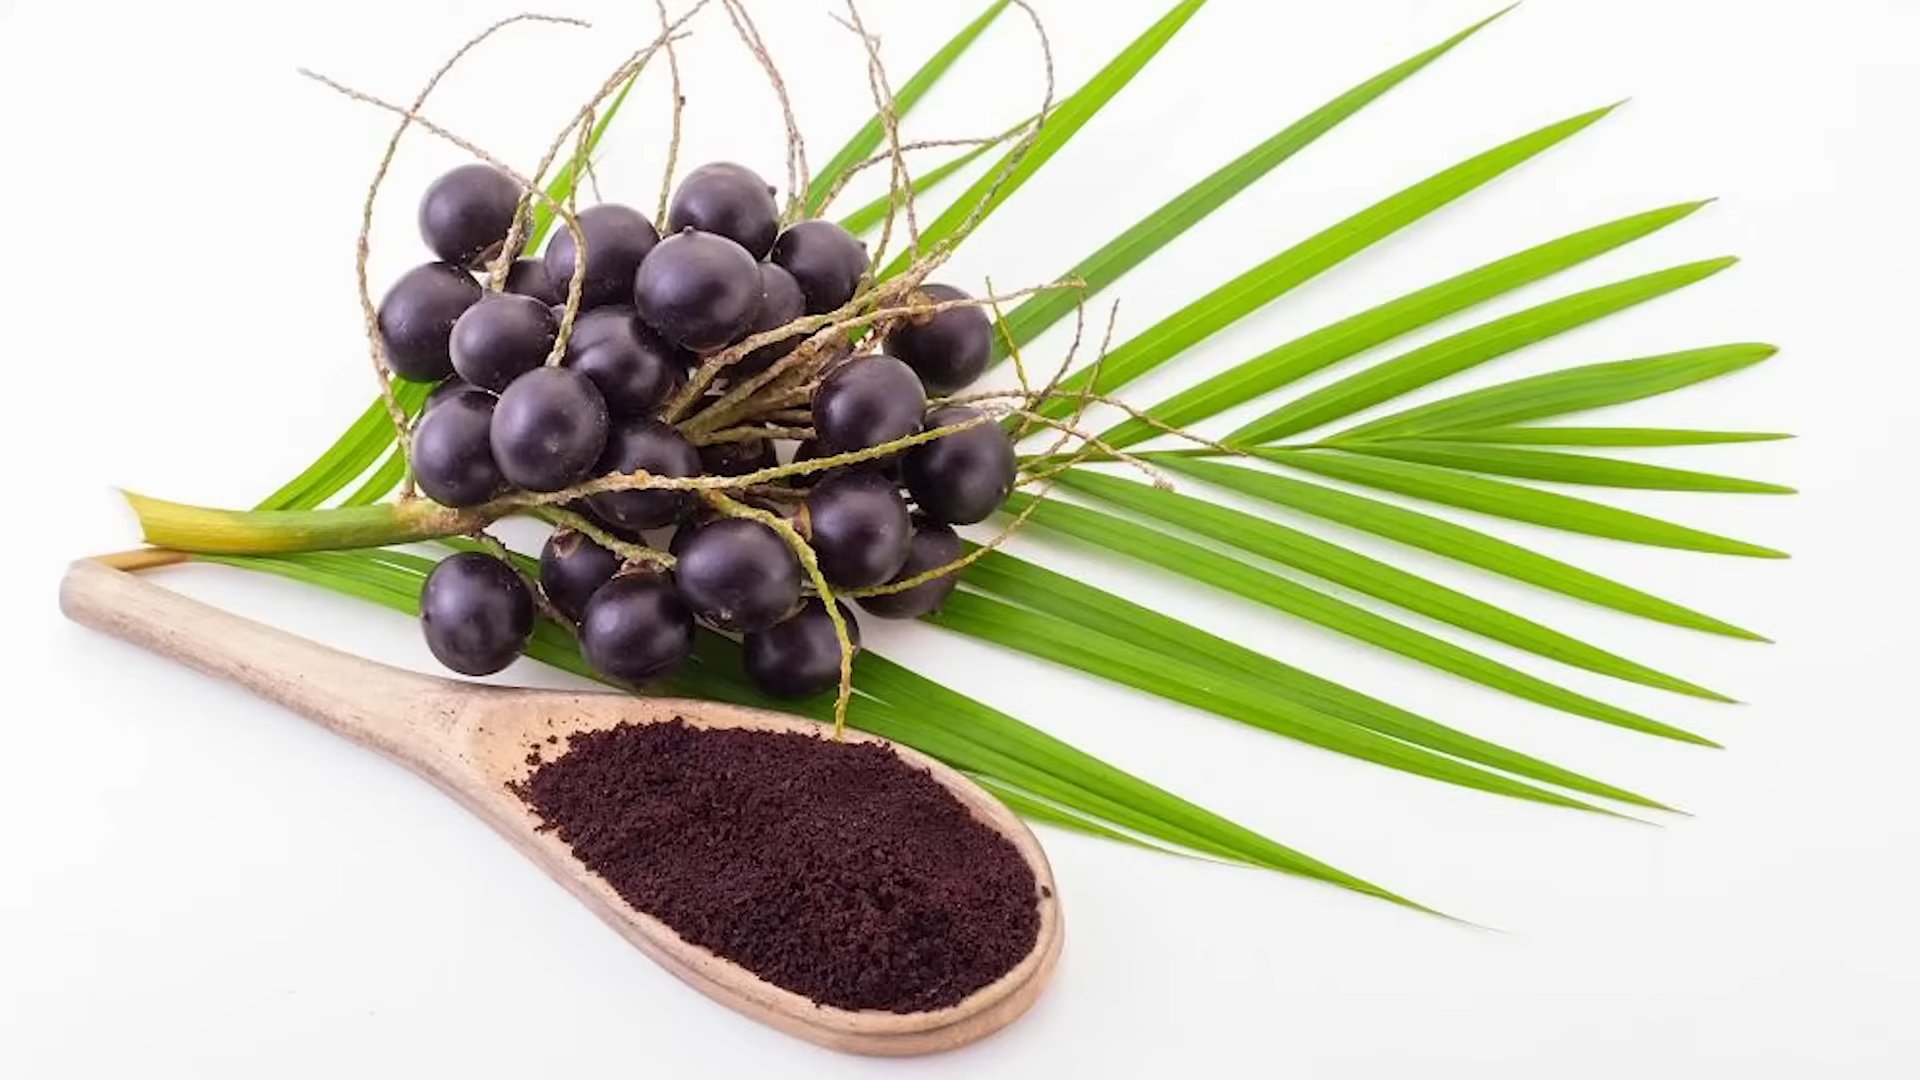
Grow Acai Berries? Absolutely! Imagine stepping into your backyard and harvesting your own antioxidant-rich superfood. It sounds like a tropical dream, right? Well, it can be your reality! For centuries, indigenous communities in the Amazon rainforest have revered the Acai berry, not just for its nutritional power, but also for its vital role in their culture and sustenance. Now, you can bring a piece of that ancient tradition to your own home.
While cultivating Acai berries might seem daunting, especially if you don’t live in the tropics, I’m here to show you some clever DIY tricks and hacks that can significantly increase your chances of success. Let’s face it, store-bought Acai can be expensive and sometimes lacks the freshness we crave. By learning how to grow Acai Berries yourself, you’ll not only save money but also gain the satisfaction of nurturing your own healthy, delicious treat. This article will guide you through the essential steps, from selecting the right variety to creating the perfect growing environment, ensuring you can enjoy the benefits of this amazing fruit right from your own garden. Get ready to unleash your inner gardener and embark on this exciting journey!
Growing Acai Berries at Home: A Comprehensive DIY Guide
Okay, so you want to grow your own acai berries? Awesome! It’s a bit of a challenge, especially if you don’t live in a tropical climate, but definitely achievable with some dedication and the right setup. I’m going to walk you through everything you need to know to give your acai palm the best chance of thriving.
Understanding Acai’s Needs
Before we dive into the nitty-gritty, let’s talk about what acai palms ( *Euterpe oleracea*) need to be happy. These guys are native to the Amazon rainforest, so they crave warmth, humidity, and plenty of water. Think steamy jungle vibes!
* Climate: Acai palms are happiest in USDA zones 10-11. If you live outside of these zones, you’ll need to grow them in a container and bring them indoors during the colder months.
* Sunlight: They prefer partial shade, especially when young. Direct, intense sunlight can scorch their leaves. As they mature, they can tolerate more sun.
* Water: Consistent moisture is key. They don’t like to dry out, but they also don’t want to be waterlogged.
* Soil: Well-draining, slightly acidic soil is ideal.
* Humidity: High humidity is a must. Think 60% or higher.
* Space: Acai palms can grow quite tall (up to 50-100 feet in their natural habitat!), so consider this when choosing a location or container.
Sourcing Your Acai Palm
You have a couple of options here: starting from seed or buying a young plant.
* From Seed: This is the more challenging and time-consuming route. Acai seeds can be difficult to germinate, and it can take several years for a seedling to mature enough to produce fruit. However, it’s also the most rewarding! You can find acai seeds online from reputable sources.
* Young Plant: This is the easier and faster option. You can often find young acai palms at nurseries specializing in tropical plants. Make sure the plant looks healthy, with vibrant green leaves and no signs of pests or diseases.
Step-by-Step Guide: Growing Acai from Seed
If you’re feeling adventurous, let’s try growing acai from seed!
Phase 1: Seed Preparation and Germination
1. Soak the Seeds: Soak the acai seeds in warm water for 24-48 hours. This helps to soften the hard outer shell and encourages germination. Change the water every 12 hours.
2. Scarify the Seeds (Optional but Recommended): Gently scarify the seeds by lightly sanding or nicking the outer shell with a knife. Be careful not to damage the inner seed. This helps water penetrate the seed coat more easily.
3. Prepare the Germination Medium: Use a well-draining seed starting mix. A mixture of peat moss, perlite, and vermiculite works well. Moisten the mix thoroughly.
4. Sow the Seeds: Plant the seeds about 1 inch deep in the germination medium. You can use individual small pots or a seed starting tray.
5. Create a Humid Environment: Cover the pots or tray with a clear plastic dome or plastic wrap to create a humid environment. This is crucial for germination.
6. Provide Warmth: Place the pots or tray in a warm location, ideally between 80-85°F (27-29°C). A heat mat can be helpful.
7. Monitor and Water: Keep the germination medium consistently moist, but not waterlogged. Check the seeds regularly for signs of germination. This can take anywhere from a few weeks to several months. Be patient!
8. Ventilate Regularly: Once you see seedlings emerge, gradually increase ventilation by removing the plastic dome or wrap for a few hours each day. This helps to prevent fungal diseases.
Phase 2: Seedling Care
1. Provide Adequate Light: Once the seedlings have emerged, provide them with bright, indirect light. Avoid direct sunlight, which can scorch their delicate leaves. A grow light can be helpful if you don’t have enough natural light.
2. Water Regularly: Keep the soil consistently moist, but not waterlogged. Water when the top inch of soil feels dry to the touch.
3. Fertilize Sparingly: Start fertilizing the seedlings with a diluted liquid fertilizer formulated for palms or tropical plants. Follow the instructions on the fertilizer label. Fertilize every 2-4 weeks during the growing season (spring and summer).
4. Repot as Needed: As the seedlings grow, repot them into larger containers. Choose pots that are slightly larger than the current ones. Use a well-draining potting mix.
5. Maintain Humidity: Continue to maintain high humidity around the seedlings. You can use a humidifier, mist them regularly, or place them on a pebble tray filled with water.
Step-by-Step Guide: Caring for a Young Acai Plant
If you opted for a young plant, here’s how to keep it happy and healthy:
1. Choose the Right Pot: Select a pot that is large enough to accommodate the plant’s root system. A pot that is at least 12-14 inches in diameter is a good starting point. Make sure the pot has drainage holes.
2. Use Well-Draining Soil: Use a well-draining potting mix formulated for palms or tropical plants. You can also amend regular potting mix with perlite and vermiculite to improve drainage.
3. Planting: Gently remove the acai palm from its nursery pot. Loosen any circling roots. Place the plant in the center of the new pot and fill in around the roots with potting mix. Water thoroughly.
4. Location, Location, Location: Place the pot in a location that receives bright, indirect light. Avoid direct sunlight, especially during the hottest part of the day. If you’re growing the plant indoors, a south-facing window with a sheer curtain is ideal.
5. Watering: Water the acai palm regularly, keeping the soil consistently moist but not waterlogged. Water when the top inch of soil feels dry to the touch.
6. Fertilizing: Fertilize the acai palm with a balanced liquid fertilizer formulated for palms or tropical plants. Follow the instructions on the fertilizer label. Fertilize every 2-4 weeks during the growing season (spring and summer). Reduce or stop fertilizing during the fall and winter.
7. Humidity: Acai palms thrive in high humidity. If you live in a dry climate, you’ll need to take steps to increase humidity around the plant. You can use a humidifier, mist the plant regularly, or place it on a pebble tray filled with water. Grouping plants together can also help to increase humidity.
8. Pruning: Prune away any dead or damaged leaves. You can also prune to shape the plant, but acai palms generally don’t require much pruning.
9. Pest and Disease Control: Keep an eye out for pests such as spider mites, mealybugs, and scale. Treat any infestations promptly with insecticidal soap or neem oil. Acai palms are also susceptible to fungal diseases, so make sure to provide good air circulation and avoid overwatering.
10. Repotting: As the acai palm grows, you’ll need to repot it into a larger container. Repot every 1-2 years, or when the plant becomes root-bound.
Overwintering Your Acai Palm (If Necessary)
If you live in a climate with cold winters, you’ll need to bring your acai palm indoors before the first frost.
1. Acclimatize the Plant: Gradually acclimatize the plant to indoor conditions by bringing it indoors for a few hours each day, gradually increasing the amount of time it spends indoors.
2. Choose a Suitable Location: Place the plant in a bright, sunny location indoors. A south-facing window is ideal.
3. Maintain Humidity: Indoor air can be very dry during the winter, so it’s important to maintain high humidity around the plant. Use a humidifier, mist the plant regularly, or place it on a pebble tray filled with water.
4. Water Sparingly: Water the plant less frequently during the winter, as it will not be growing as actively. Allow the soil to dry out slightly between waterings.
5. Avoid Drafts: Keep the plant away from drafts, as cold drafts can damage the leaves.
6. Monitor for Pests: Check the plant regularly for pests, as indoor plants are more susceptible to infestations.
Harvesting Acai Berries (Eventually!)
Okay, this is the part we’re all waiting for! It can take several years for an acai palm to mature enough to produce fruit, even in ideal
Conclusion
So, there you have it! Growing your own acai berries might seem like a tropical dream, but with the right approach and a little patience, it’s entirely achievable, even if you’re not living in the Amazon rainforest. This DIY trick isn’t just about saving money; it’s about connecting with nature, understanding the journey of your food from seed to table, and enjoying the unparalleled freshness of homegrown produce. Imagine the satisfaction of harvesting your own acai berries and blending them into a vibrant smoothie, knowing exactly where they came from and how they were grown.
This method is a must-try because it empowers you to control the entire process, from selecting the best quality seeds or seedlings to nurturing them with organic practices. You’ll avoid the preservatives and additives often found in commercially processed acai products, ensuring you’re getting the purest, most nutrient-rich berries possible. Plus, it’s a fantastic learning experience that can be shared with family and friends, fostering a deeper appreciation for the environment and sustainable living.
But don’t stop there! Experiment with different growing mediums to see what works best in your specific climate. Try incorporating companion planting techniques to naturally deter pests and enhance growth. Consider using rainwater harvesting to provide your acai plants with the purest form of hydration. And if you’re feeling adventurous, explore different varieties of acai to discover your favorite flavor profile.
Remember, growing acai berries is a journey, not a destination. There will be challenges along the way, but the rewards are well worth the effort. The vibrant color, the unique flavor, and the incredible health benefits of acai berries make them a truly special addition to any diet.
We wholeheartedly encourage you to give this DIY trick a try. Whether you’re a seasoned gardener or a complete beginner, the process of growing your own acai berries is both rewarding and educational. And most importantly, don’t forget to share your experiences with us! We’d love to hear about your successes, your challenges, and any tips or tricks you’ve discovered along the way. Your insights can help others embark on their own acai-growing adventures. Let’s build a community of acai enthusiasts, sharing knowledge and celebrating the joy of homegrown goodness. So, grab your seeds or seedlings, get your hands dirty, and start growing your own delicious and nutritious acai berries today!
Frequently Asked Questions (FAQ)
What are the ideal climate conditions for growing acai berries?
Acai palms thrive in warm, humid climates, ideally with temperatures ranging from 70°F to 90°F (21°C to 32°C). They require consistent moisture and cannot tolerate frost. If you live in a cooler climate, you can still grow acai in a greenhouse or indoors, providing supplemental heat and humidity as needed. Ensure adequate ventilation to prevent fungal diseases.
How long does it take to grow acai berries from seed?
Growing acai from seed can be a lengthy process. Germination can take several months, and it may take 3-5 years for the plant to mature and produce fruit. Starting with a young seedling from a reputable nursery can significantly shorten the time to harvest. Be patient and provide consistent care, and you’ll eventually be rewarded with your own homegrown acai berries.
What type of soil is best for acai palms?
Acai palms prefer well-draining, slightly acidic soil with a pH between 5.5 and 6.5. A mixture of peat moss, perlite, and compost works well to provide the necessary nutrients and drainage. Avoid heavy clay soils, as they can become waterlogged and lead to root rot. Regularly amend the soil with organic matter to maintain its fertility and structure.
How much sunlight do acai palms need?
Acai palms require bright, indirect sunlight. While they can tolerate some direct sunlight, especially in the morning, prolonged exposure to intense sun can scorch their leaves. If growing indoors, place your acai palm near a sunny window or supplement with grow lights. Ensure the plant receives at least 6-8 hours of light per day.
How often should I water my acai palm?
Acai palms require consistent moisture but should not be overwatered. Water deeply when the top inch of soil feels dry to the touch. Ensure the pot has adequate drainage to prevent waterlogging. During the growing season (spring and summer), you may need to water more frequently. Reduce watering during the dormant season (fall and winter).
What are some common pests and diseases that affect acai palms?
Common pests that can affect acai palms include spider mites, aphids, and scale insects. Regularly inspect your plants for signs of infestation and treat promptly with insecticidal soap or neem oil. Fungal diseases, such as root rot and leaf spot, can also be a problem, especially in humid environments. Ensure good air circulation and avoid overwatering to prevent these diseases.
Can I grow acai berries in a container?
Yes, you can grow acai berries in a container, especially if you live in a cooler climate. Choose a large container with good drainage and use a well-draining potting mix. Be prepared to repot the plant as it grows, eventually moving it to a very large container or tub. Container-grown acai palms may require more frequent watering and fertilization than those grown in the ground.
What kind of fertilizer should I use for acai palms?
Acai palms benefit from regular fertilization with a balanced fertilizer that is high in nitrogen, phosphorus, and potassium (NPK). Look for a fertilizer specifically formulated for palms or tropical plants. Fertilize every 2-3 months during the growing season, following the instructions on the fertilizer label. Avoid over-fertilizing, as this can damage the plant.
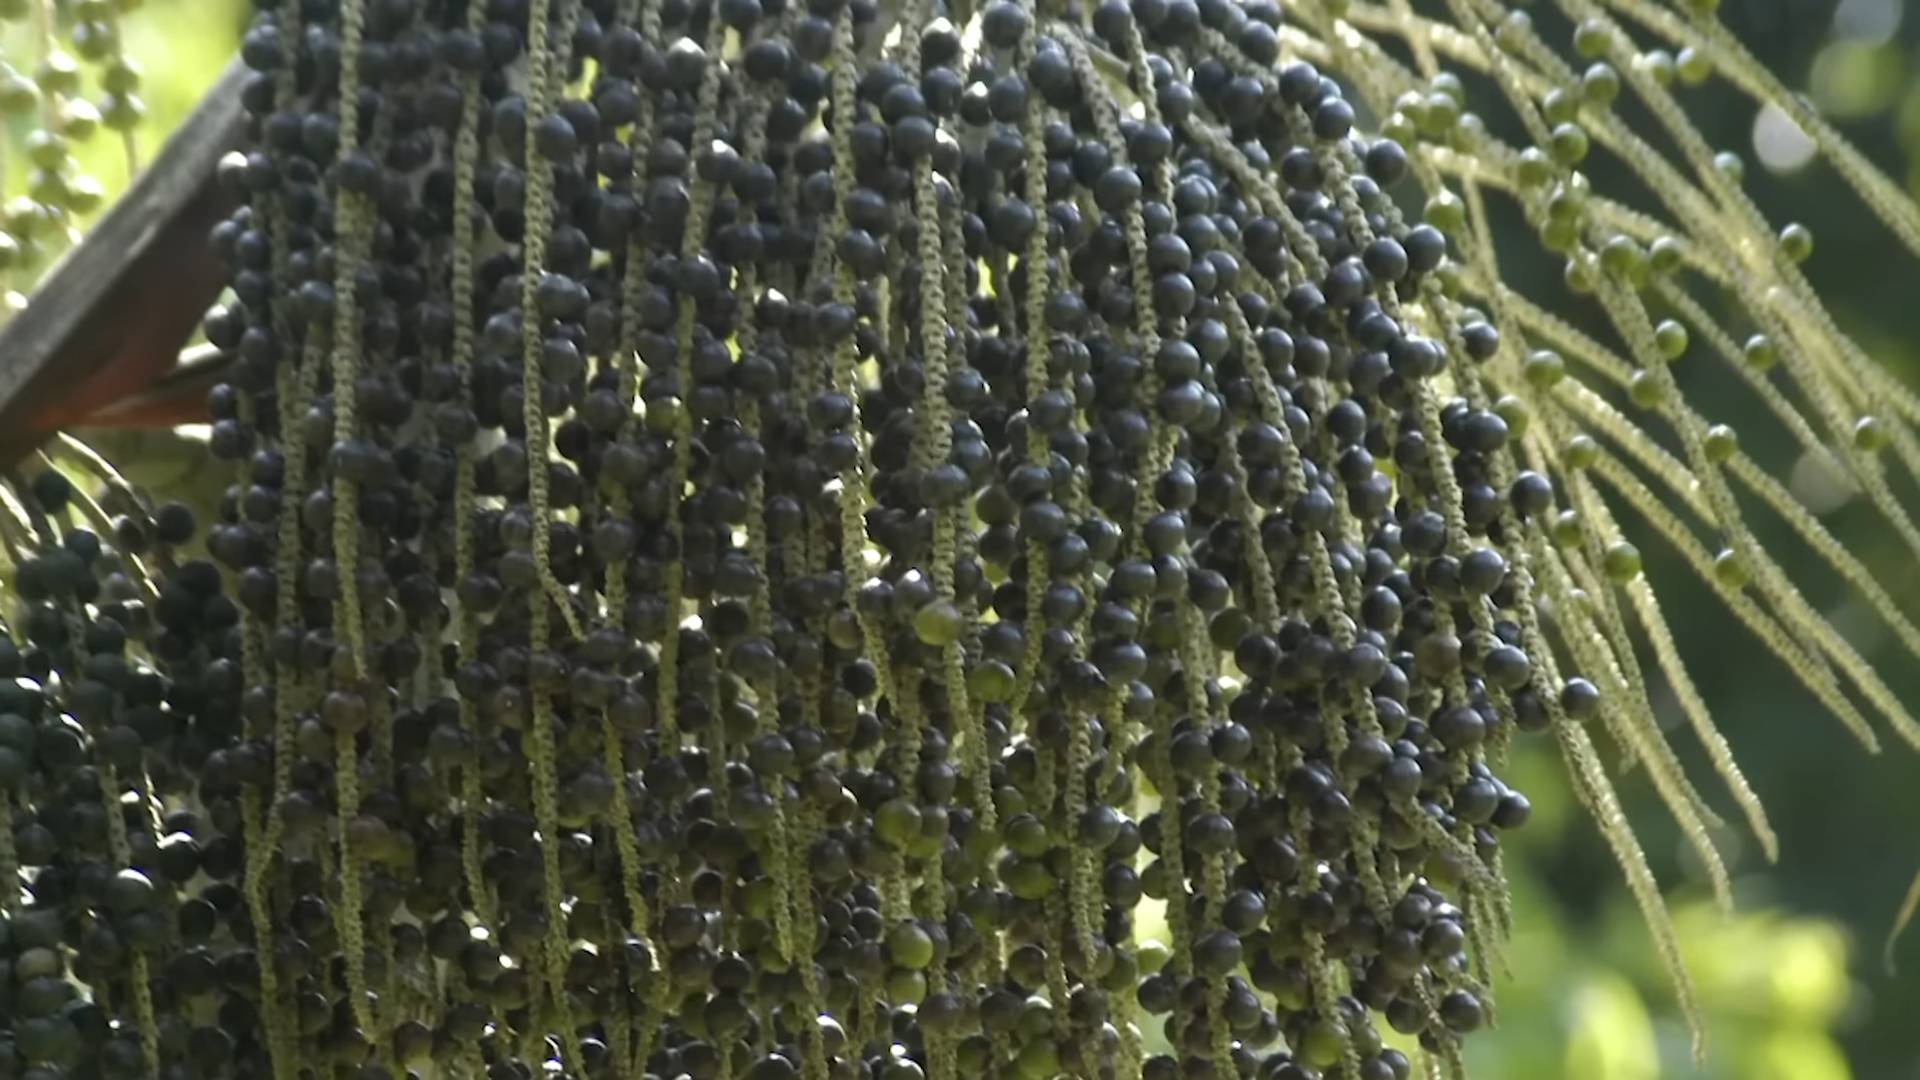
How do I harvest acai berries?
Acai berries grow in clusters on the palm. They are typically harvested when they turn a deep purple color. Use a sharp knife or pruning shears to cut the entire cluster from the palm. The berries are highly perishable and should be processed or frozen soon after harvesting.
Are acai berries safe to eat raw?
Acai berries are not typically eaten raw. They have a large seed and a thin layer of pulp. The pulp is traditionally soaked in water to soften it, then mashed and strained to separate the pulp from the seed. The resulting pulp is then used to make smoothies, juices, and other dishes.
Where can I find acai seeds or seedlings?
Acai seeds and seedlings can be found online from reputable nurseries specializing in tropical plants. Be sure to choose a reliable source to ensure you are getting healthy, viable plants. You may also be able to find acai plants at local nurseries or garden centers, especially in warmer climates.
What are the health benefits of acai berries?
Acai berries are rich in antioxidants, which can help protect your body against damage from free radicals. They are also a good source of fiber, healthy fats, and other nutrients. Some studies have suggested that acai berries may have anti-inflammatory properties and may help improve heart health and cognitive function.
How can I use my homegrown acai berries?
There are many ways to use your homegrown acai berries. The most common way is to blend them into smoothies or juices. You can also use them to make acai bowls, desserts, and other dishes. Acai pulp can also be frozen for later use.
What if my acai palm doesn’t produce fruit?
There are several reasons why your acai palm may not be producing fruit. It may be too young, as it can take several years for acai palms to mature and bear fruit. It may also be due to inadequate sunlight, water, or nutrients. Ensure your plant is receiving the proper care and be patient. If you’re still not seeing fruit after several years, you may want to consult with a local gardening expert.
Is growing acai berries organically possible?
Absolutely! Growing acai berries organically is not only possible but also highly recommended. Use organic fertilizers, compost, and pest control methods to ensure your plants are healthy and free from harmful chemicals. This will result in the purest, most nutritious acai berries possible.
Leave a Comment