

Fast kitchen deep cleaning hacks – sounds like a dream, right? I know, the kitchen can quickly become the most chaotic room in the house. Between splattered sauces, lingering odors, and that ever-growing pile of dishes, it’s easy to feel overwhelmed. But what if I told you that a sparkling clean kitchen doesn’t have to involve an entire weekend of scrubbing?
For generations, a clean and organized kitchen has been the heart of the home, a place where families gather, memories are made, and delicious meals are created. Think about it – from grandma’s meticulously kept pantry to the bustling kitchens of professional chefs, cleanliness has always been a cornerstone of culinary excellence and family well-being. But let’s be honest, in today’s fast-paced world, who has the time for those old-fashioned, time-consuming cleaning rituals?
That’s where these fast kitchen deep cleaning hacks come in! I’m going to share some of my favorite DIY tricks that will help you tackle even the toughest kitchen messes in a fraction of the time. We’re talking about simple, effective solutions using everyday ingredients you probably already have in your pantry. Forget spending hours scrubbing – with these tips, you can reclaim your kitchen and enjoy a clean, inviting space without sacrificing your precious free time. Ready to transform your kitchen into a sparkling haven? Let’s get started!
Fast Kitchen Deep Cleaning Hacks: My Go-To Guide!
Okay, let’s be honest, deep cleaning the kitchen is nobody’s favorite chore. But a sparkling clean kitchen makes cooking and eating so much more enjoyable! I’ve spent years perfecting my routine to get a deep clean done quickly and efficiently. Here are my tried-and-true hacks to get your kitchen gleaming in no time.
Phase 1: Prepping for Battle (and Saving Time!)
Before you even think about scrubbing, a little prep work goes a long way. This is where we lay the groundwork for a super-efficient clean.
- Gather Your Supplies: Nothing is worse than running back and forth for supplies. I keep a cleaning caddy stocked with everything I need:
- All-purpose cleaner
- Dish soap
- Glass cleaner
- Baking soda
- White vinegar
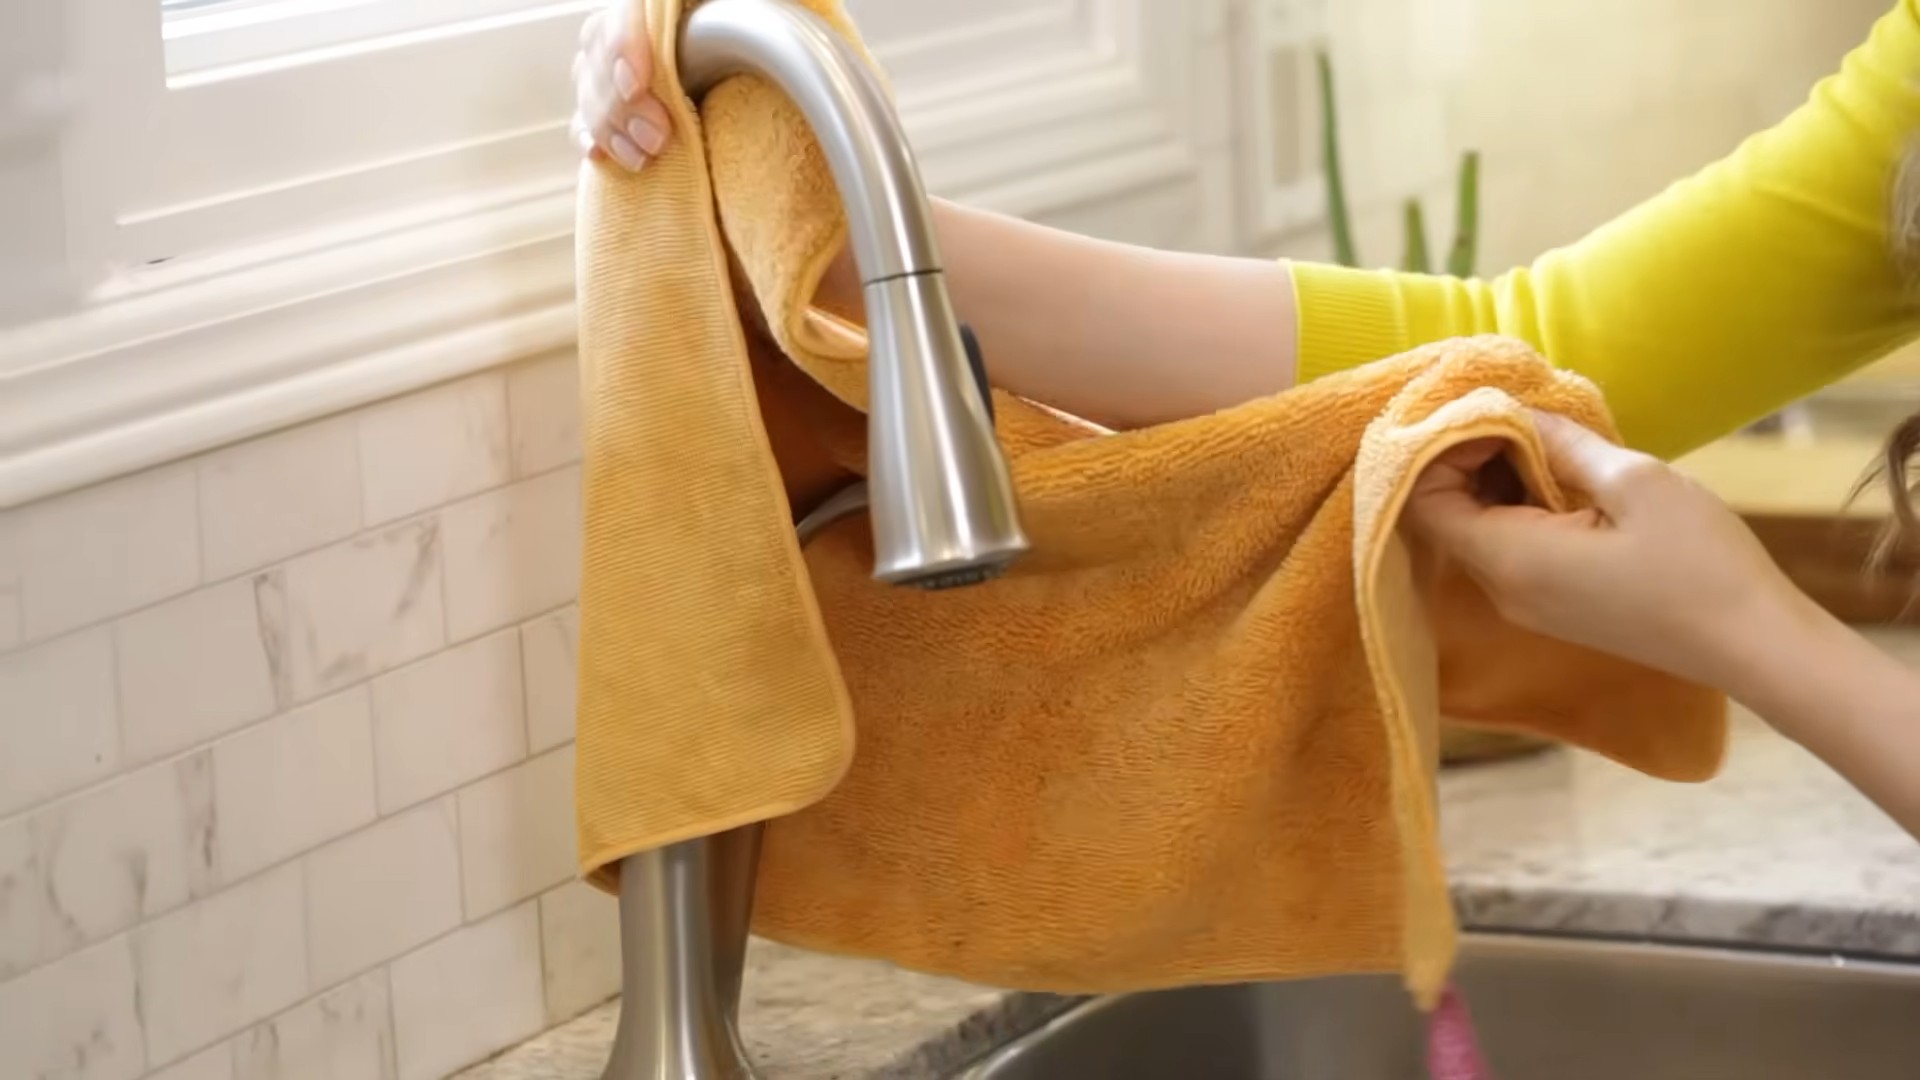
- Microfiber cloths (lots of them!)
- Scrub brushes (different sizes)
- Sponges
- Rubber gloves
- Trash bags
- Paper towels (for the really gross stuff)
- Old toothbrush (for those hard-to-reach spots)
- Magic Eraser
- Clear the Decks: Remove everything from your countertops – appliances, utensils, spice racks, everything! This gives you a clear surface to work on and prevents you from just moving dirt around.
- Empty the Sink and Dishwasher: Start with a clean slate. Get those dishes out of the way!
- Open Windows: Fresh air is your friend! It helps ventilate the kitchen and gets rid of strong cleaning smells.
Phase 2: Tackling the Big Guns: Appliances
Appliances are often the dirtiest part of the kitchen, so let’s tackle them first.
1. Oven Cleaning Powerhouse
My oven cleaning hack is a game-changer. Forget harsh chemicals!
- Remove Oven Racks: Soak them in hot, soapy water in the sink or bathtub.
- Baking Soda Paste: Mix ½ cup of baking soda with a few tablespoons of water to form a paste.
- Coat the Oven: Spread the paste all over the inside of your oven, avoiding the heating elements.
- Let it Sit: Leave the paste on overnight (or for at least 12 hours). This is key!
- Wipe it Away: The next day, use a damp cloth to wipe away the baking soda paste. It should lift away the grime easily.
- Vinegar Spray: Spray the inside of the oven with white vinegar. This will react with any remaining baking soda and help loosen any stubborn spots.
- Final Wipe Down: Wipe the oven clean with a damp cloth.
- Clean the Racks: Scrub the oven racks with a scrub brush and rinse them thoroughly.
- Dry and Replace: Dry the racks and place them back in the oven.
2. Microwave Magic
Cleaning the microwave can be surprisingly easy.
- Lemon Steam Clean: Fill a microwave-safe bowl with 1 cup of water and add the juice of one lemon (or a few lemon slices).
- Microwave for 5 Minutes: Microwave the mixture on high for 5 minutes. The steam will loosen the grime.
- Let it Sit: Let the bowl sit in the microwave for another 5 minutes without opening the door.
- Wipe Clean: Carefully remove the bowl (it will be hot!) and wipe the inside of the microwave clean with a damp cloth. The grime should wipe away easily.
- Clean the Turntable: Remove the turntable and wash it in hot, soapy water.
- Dry and Replace: Dry the turntable and place it back in the microwave.
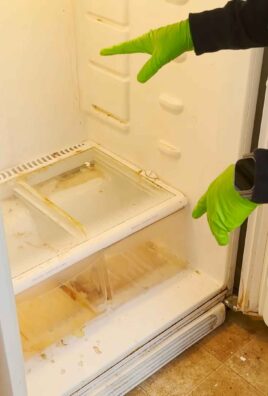
3. Refrigerator Refresh
A clean fridge is a happy fridge!
- Empty the Fridge: Remove all food items from the refrigerator. Check expiration dates and toss anything that’s past its prime.
- Remove Shelves and Drawers: Take out all removable shelves and drawers.
- Wash Shelves and Drawers: Wash the shelves and drawers in hot, soapy water. Rinse them thoroughly and let them air dry.
- Wipe Down the Interior: Wipe down the inside of the refrigerator with a solution of warm water and baking soda (about 1 tablespoon of baking soda per quart of water). This will help neutralize odors.
- Clean Door Seals: Don’t forget to clean the door seals with a damp cloth. These can get grimy!
- Dry and Replace: Dry the shelves and drawers and place them back in the refrigerator.
- Restock the Fridge: Put the food items back in the refrigerator, organizing them as you go.
4. Dishwasher Detox
Even the dishwasher needs a good cleaning!
- Remove Food Debris: Check the drain and remove any food debris.
- Vinegar Wash: Place a dishwasher-safe cup filled with 1 cup of white vinegar on the top rack of the empty dishwasher.
- Run a Hot Cycle: Run the dishwasher on a hot cycle. The vinegar will help remove grease and grime.
- Baking Soda Refresh: Sprinkle 1 cup of baking soda on the bottom of the dishwasher.
- Run a Short Cycle: Run a short cycle. The baking soda will help freshen the dishwasher.
- Clean the Exterior: Wipe down the exterior of the dishwasher with a damp cloth.
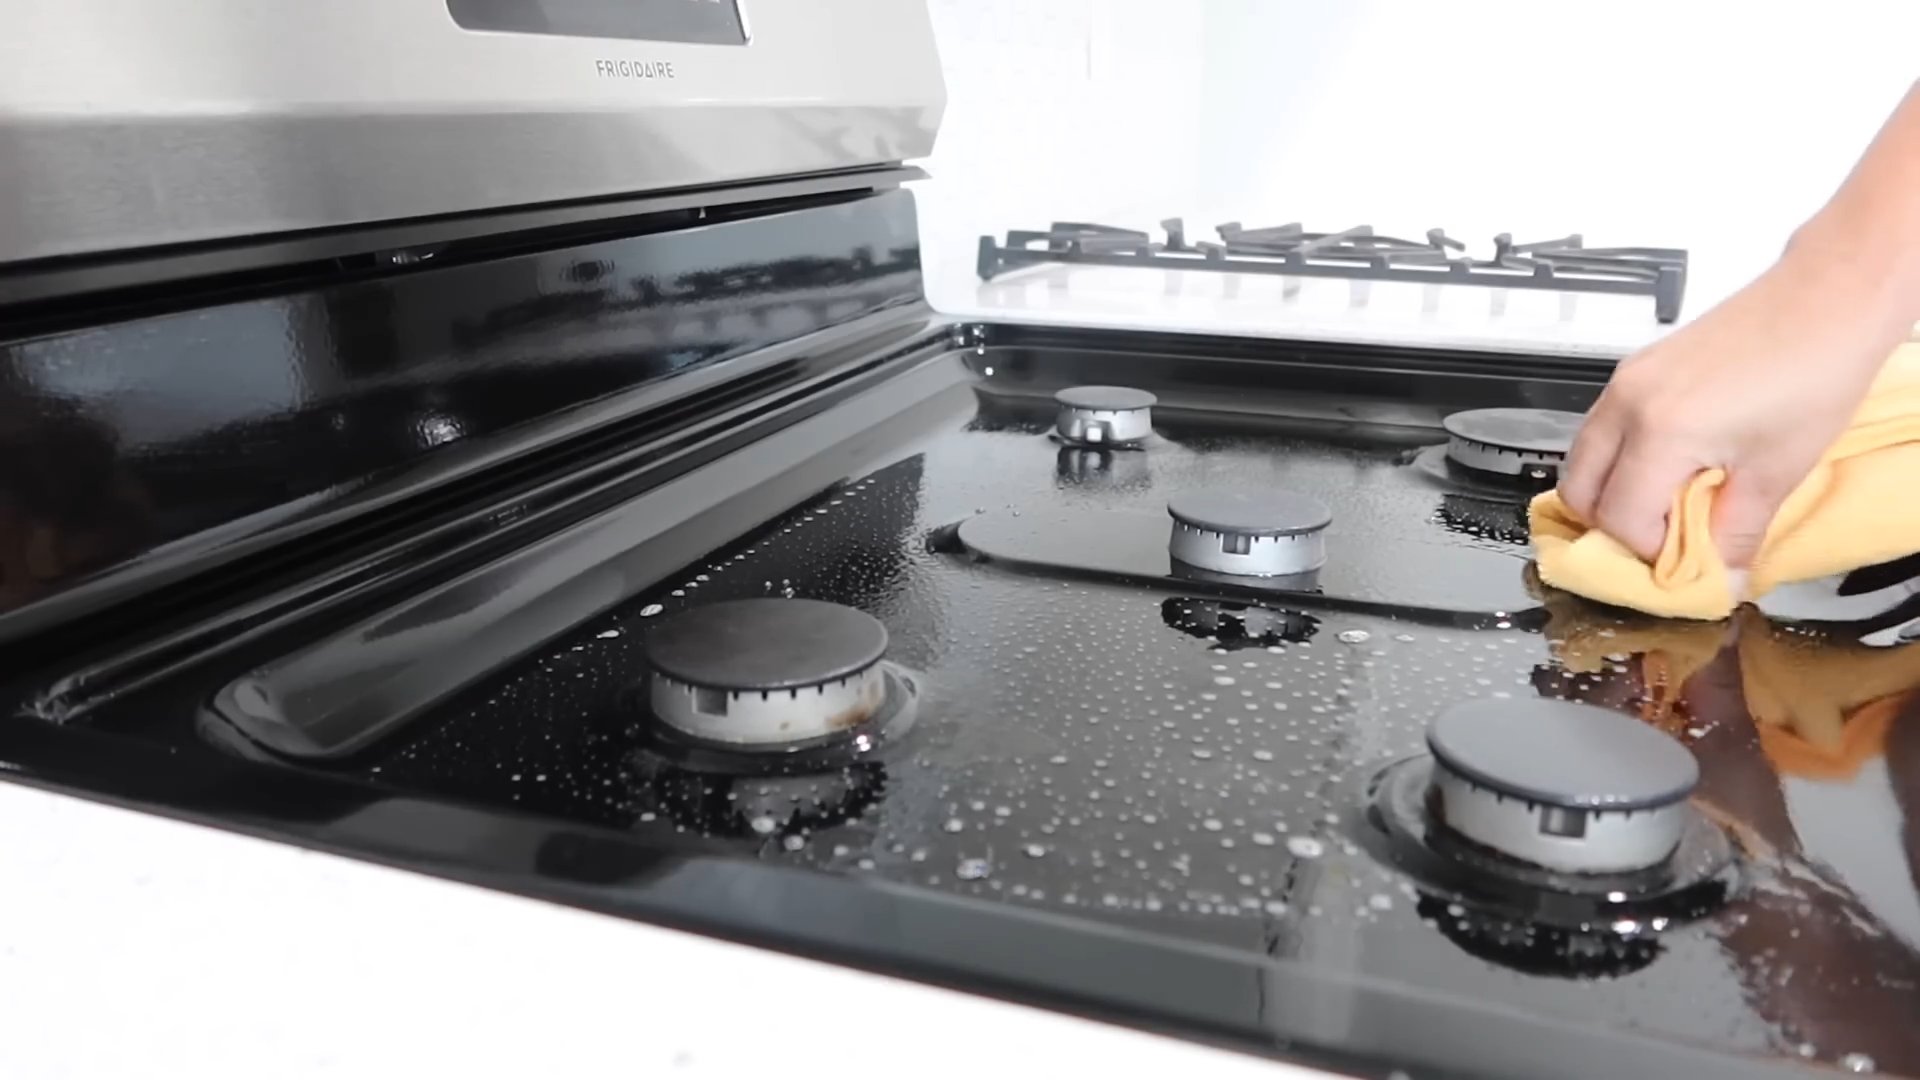
Phase 3: Countertops, Sink, and Backsplash Blitz
Now that the appliances are sparkling, let’s move on to the countertops, sink, and backsplash.
1. Countertop Cleanse
The method depends on your countertop material.
- Granite/Quartz: Use a pH-neutral cleaner specifically designed for granite or quartz. Avoid harsh chemicals like bleach or ammonia.
- Laminate: Use an all-purpose cleaner or a solution of warm water and dish soap.
- Wood: Use a wood cleaner or a solution of warm water and dish soap. Be sure to dry the surface thoroughly after cleaning.
- Spray and Wipe: Spray the countertop with your chosen cleaner and let it sit for a few minutes.
- Scrub (if needed): If there are any stubborn stains, use a scrub brush or sponge to gently scrub the surface.
- Wipe Clean: Wipe the countertop clean with a damp cloth.
- Dry Thoroughly: Dry the countertop with a clean, dry cloth.
2. Sink Scrub
A sparkling sink makes a huge difference!
- Stainless Steel: Sprinkle baking soda in the sink and scrub with a damp sponge. Rinse thoroughly. For extra shine, use a stainless steel cleaner.
- Porcelain: Use a mild abrasive cleaner or a solution of baking soda and water. Avoid harsh chemicals that can damage the finish.
- Rinse the Sink: Rinse the sink with water to remove any loose debris.
- Apply Cleaner: Apply your chosen cleaner to the sink.
- Scrub Thoroughly: Scrub the sink thoroughly with a sponge or scrub brush, paying attention to the drain and faucet.
- Rinse Again: Rinse the sink thoroughly with water.
- Dry and Shine: Dry the sink with a clean, dry cloth. For stainless steel sinks, use a stainless steel cleaner to add shine.
3. Backsplash Brilliance
Don’t forget the backsplash!
- Spray with Cleaner: Spray the backsplash with an all-purpose cleaner or a solution of warm water and dish soap.
- Let it Sit: Let the cleaner sit for a few minutes to loosen the grime.
- Wipe Clean: Wipe the backsplash clean with a damp cloth.
- Dry Thoroughly: Dry the backsplash with a clean, dry cloth.
- Grout Cleaning (if needed): If the grout is stained, use a grout cleaner or a solution of baking soda and water. Apply the cleaner to the grout and let it sit for a few minutes. Scrub the grout with a grout brush and rinse thoroughly.
Phase 4: Floors and Finishing Touches
Almost there! Let’s finish strong with the floors and those often-overlooked details.
1. Floor Focus
The type of floor determines the best
Conclusion
So, there you have it! These fast kitchen deep cleaning hacks aren’t just about making your kitchen sparkle; they’re about reclaiming your time and creating a healthier, more enjoyable cooking space. We’ve all been there – staring at a greasy stovetop or a grimy microwave, dreading the hours of scrubbing ahead. But with these simple, effective techniques, you can transform your kitchen from a source of stress into a source of pride, and all without sacrificing your entire weekend.
The beauty of these hacks lies in their adaptability. Feel free to experiment with different cleaning solutions based on what you have on hand. For instance, if you’re out of vinegar, a lemon juice and water mixture can work wonders on hard water stains. If you prefer a more natural approach, consider using baking soda and essential oils for added cleaning power and a pleasant scent. Lavender, tea tree, and lemon essential oils are all known for their antibacterial and antifungal properties, making them excellent additions to your cleaning arsenal.
Don’t underestimate the power of preventative maintenance either. Wiping up spills immediately, regularly cleaning your microwave after each use, and giving your stovetop a quick once-over after cooking can significantly reduce the need for deep cleaning in the long run. Think of it as a little investment in your future self – a few minutes of effort now can save you hours of scrubbing later.
These fast kitchen deep cleaning hacks are more than just a set of instructions; they’re a gateway to a cleaner, more organized, and more enjoyable kitchen experience. They’re about empowering you to take control of your cleaning routine and create a space that you love to spend time in.
We truly believe that these tips will revolutionize your kitchen cleaning routine. But the real test is in the trying! We wholeheartedly encourage you to put these fast kitchen deep cleaning hacks to the test. See which ones work best for you, adapt them to your specific needs, and discover the joy of a sparkling clean kitchen without the overwhelming effort.
And most importantly, we want to hear about your experiences! Share your before-and-after photos, your favorite variations, and any other tips or tricks you’ve discovered along the way. Let’s create a community of clean kitchen enthusiasts, sharing our knowledge and inspiring each other to maintain a healthy and happy home. Head over to the comments section and tell us all about your kitchen cleaning adventures! Your insights could be exactly what someone else needs to transform their own kitchen cleaning routine. So, grab your cleaning supplies, put on some music, and get ready to experience the satisfaction of a beautifully clean kitchen, thanks to these fast kitchen deep cleaning hacks!
FAQ
What if I don’t have all the ingredients listed in the cleaning solutions?
That’s perfectly fine! The beauty of these fast kitchen deep cleaning hacks is their flexibility. Many of the ingredients can be substituted with similar alternatives. For example, if you don’t have white vinegar, lemon juice can be used as a substitute for descaling and removing hard water stains. Baking soda can often be replaced with washing soda for a stronger cleaning action. The key is to understand the purpose of each ingredient and find a suitable alternative that serves the same function. If a recipe calls for a specific essential oil and you don’t have it, you can either omit it or substitute it with another essential oil that has similar cleaning properties, such as tea tree or eucalyptus. Always test any new cleaning solution in an inconspicuous area first to ensure it doesn’t damage the surface.
How often should I perform these deep cleaning tasks?
The frequency of deep cleaning depends on how often you use your kitchen and how messy things tend to get. As a general guideline, aim to deep clean your oven, microwave, and stovetop at least once a month. However, if you cook frequently or tend to make a lot of mess, you might need to do it more often. Tasks like cleaning the sink, wiping down countertops, and sweeping the floor should be done daily or every other day to prevent buildup and maintain a clean and hygienic environment. Remember, preventative maintenance is key! The more often you perform small cleaning tasks, the less often you’ll need to do a full deep clean.
Are these cleaning solutions safe for all kitchen surfaces?
While most of these cleaning solutions are safe for a wide range of kitchen surfaces, it’s always a good idea to test them in an inconspicuous area first, especially on delicate surfaces like granite, marble, or stainless steel. Avoid using abrasive cleaners or scouring pads on these surfaces, as they can scratch or damage them. For wooden surfaces, use a gentle cleaner specifically designed for wood and avoid excessive moisture. Always read the manufacturer’s instructions for your appliances and surfaces to ensure you’re using the appropriate cleaning methods.
Can I use these cleaning solutions if I have pets or small children?
When using any cleaning solution, it’s important to take precautions to protect your pets and children. Keep them away from the area while you’re cleaning and ensure that all surfaces are thoroughly rinsed and dried before they come into contact with them. Store all cleaning supplies out of reach of children and pets. If you’re concerned about the potential toxicity of certain ingredients, opt for natural cleaning solutions like vinegar, baking soda, and lemon juice, which are generally considered safe. You can also find pet-friendly and child-safe cleaning products at most stores.
What’s the best way to get rid of stubborn grease stains?
Stubborn grease stains can be a challenge, but with the right approach, they can be removed effectively. Start by applying a degreasing agent, such as dish soap or a mixture of baking soda and water, to the stain. Let it sit for several minutes to allow the grease to loosen. Then, scrub the area with a non-abrasive sponge or cloth. For particularly stubborn stains, you can try using a paste of baking soda and vinegar. The fizzing action helps to break down the grease. You can also use a commercial degreaser, but be sure to follow the manufacturer’s instructions carefully. After scrubbing, rinse the area thoroughly with water and dry it with a clean cloth.
How can I prevent my kitchen from getting so dirty in the first place?
Prevention is always better than cure! There are several things you can do to prevent your kitchen from getting too dirty. Wipe up spills immediately to prevent them from drying and becoming difficult to remove. Clean your microwave after each use to prevent food splatters from hardening. Regularly clean your stovetop after cooking to remove grease and food residue. Sweep or vacuum the floor regularly to remove crumbs and debris. Use a range hood while cooking to vent steam and grease. Store food properly to prevent spills and leaks. By incorporating these simple habits into your daily routine, you can significantly reduce the amount of time and effort required for deep cleaning.
What are some eco-friendly alternatives to traditional cleaning products?
There are many eco-friendly alternatives to traditional cleaning products that are just as effective and much better for the environment. Vinegar, baking soda, lemon juice, and essential oils are all excellent natural cleaning agents. You can also find a wide range of eco-friendly cleaning products at most stores, which are made with plant-based ingredients and biodegradable formulas. When choosing cleaning products, look for those that are labeled as “eco-friendly,” “natural,” or “biodegradable.” Avoid products that contain harsh chemicals, such as bleach, ammonia, and phosphates. By switching to eco-friendly cleaning products, you can reduce your environmental impact and create a healthier home for yourself and your family.


Leave a Comment