

Eggshell bioplastic bowl DIY: Ever wondered what to do with all those leftover eggshells after your Sunday brunch? Don’t toss them! I’m about to show you how to transform them into something surprisingly useful and eco-friendly: a beautiful and functional bioplastic bowl.
For centuries, resourceful individuals have found ways to repurpose materials, long before “upcycling” became a buzzword. Think of ancient civilizations using clay and natural fibers to create vessels – this Eggshell bioplastic bowl DIY project taps into that same spirit of ingenuity and resourcefulness. It’s a modern twist on a time-honored tradition of making the most of what we have.
In today’s world, where sustainability is more important than ever, finding ways to reduce our reliance on plastic is crucial. This DIY project offers a fantastic alternative to store-bought plastic containers, allowing you to create something unique and personalized while minimizing your environmental impact. Plus, it’s a fun and rewarding project that anyone can tackle, regardless of their crafting experience. I’ll guide you through each step, ensuring you create a stunning and sustainable bowl you’ll be proud to display and use.
DIY Eggshell Bioplastic Bowl: A Sustainable and Fun Project!
Hey everyone! I’m super excited to share this awesome DIY project with you: making a bioplastic bowl from eggshells! It’s a fantastic way to recycle those leftover eggshells and create something beautiful and functional. Plus, it’s a great conversation starter about sustainability and the potential of bioplastics. Let’s dive in!
Materials You’ll Need:
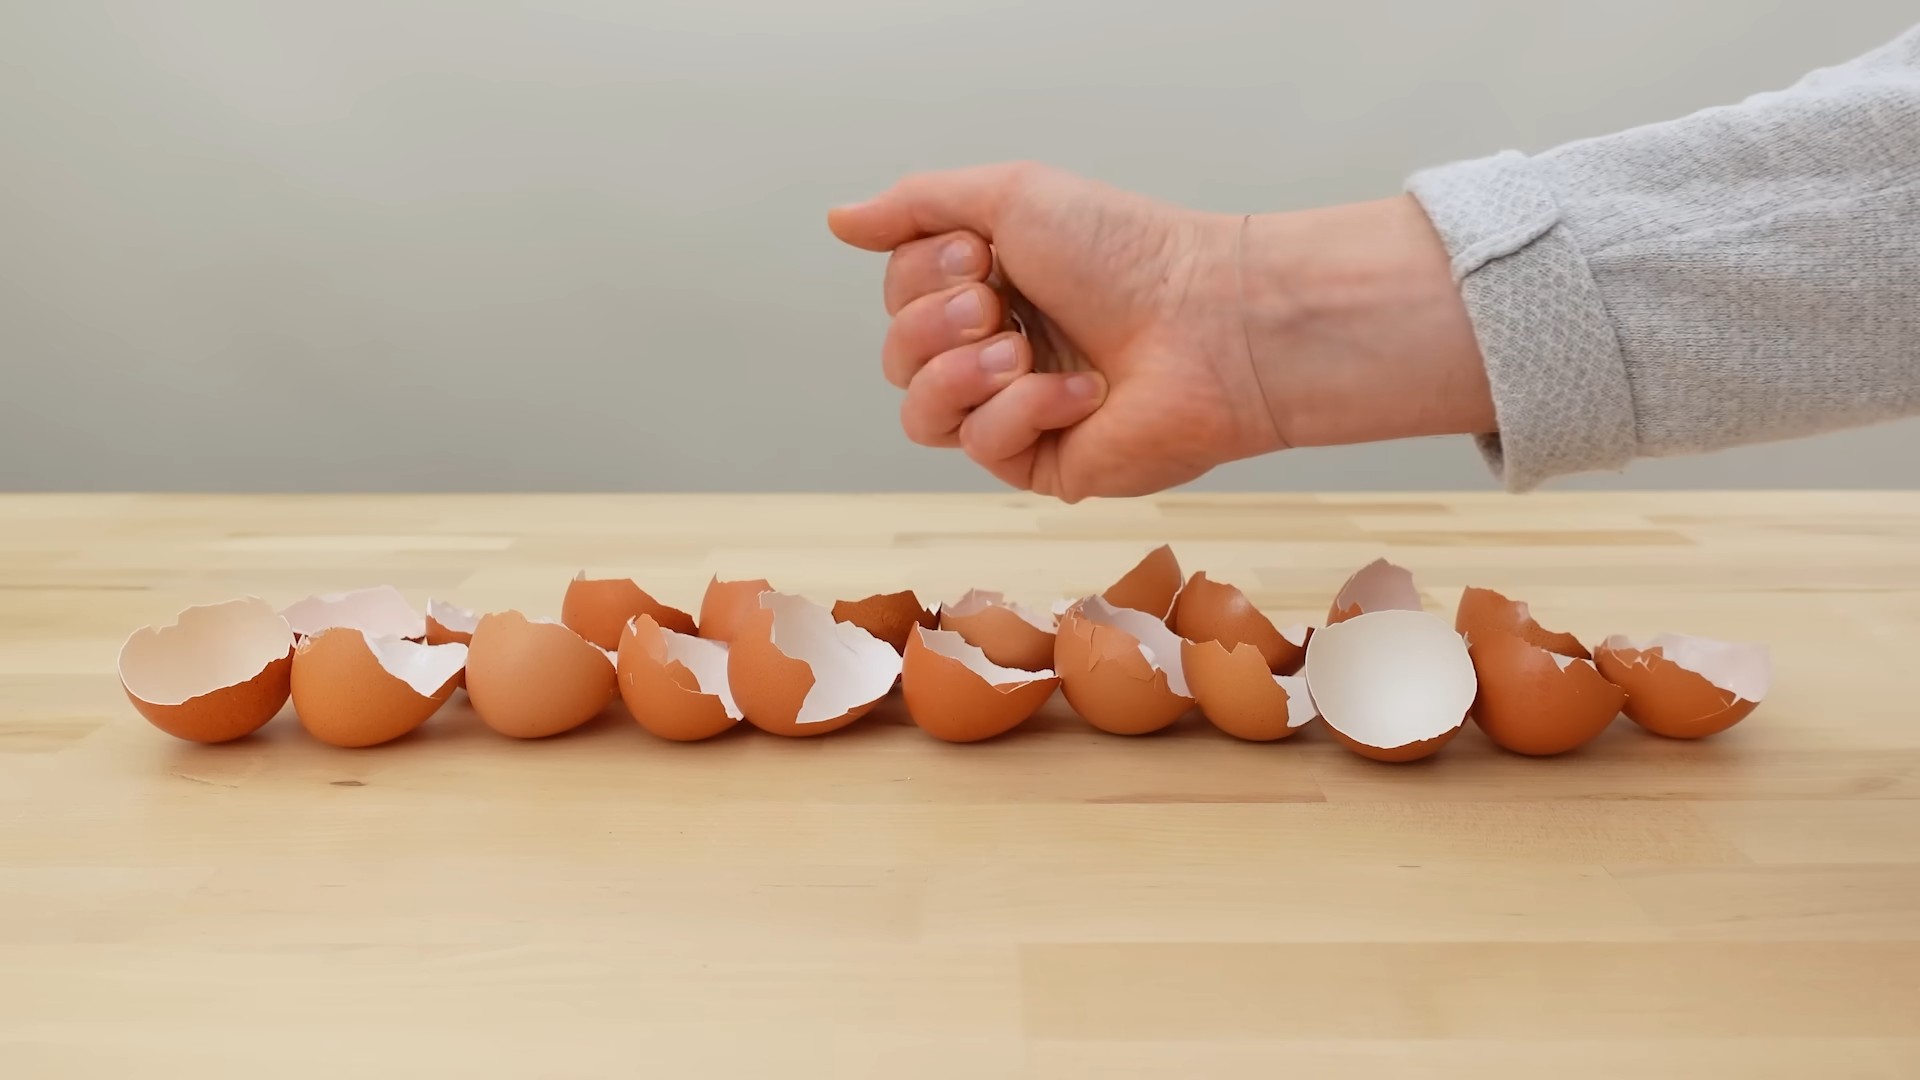
* A LOT of eggshells (aim for at least 30-40, depending on the size of the bowl you want)
* White vinegar
* Distilled water
* Glycerin (available at most pharmacies or online)
* Cornstarch
* A blender or food processor
* A saucepan
* A silicone bowl or mold (heat-resistant is best)
* Sandpaper (various grits: 120, 220, 400)
* Optional: Natural dyes (beet juice, turmeric, spinach juice, etc.)
* Optional: Beeswax or carnauba wax for polishing
Preparing the Eggshells: The Foundation of Our Bowl
This is arguably the most important step, so let’s get it right!
1. Clean the Eggshells Thoroughly: After cracking your eggs, rinse the shells immediately under running water to remove any remaining egg white or yolk. This is crucial to prevent any unpleasant smells later on. I usually collect them in a container in the fridge until I have enough for a project.
2. Remove the Membrane: This is a bit tedious, but trust me, it’s worth it. The membrane inside the eggshell can affect the texture and strength of the bioplastic. You can peel it off with your fingers or use a small knife. Soaking the shells in warm water for a few minutes can make this process easier.
3. Sanitize the Eggshells: To ensure our bioplastic is safe and free from bacteria, we need to sanitize the eggshells. There are two methods you can use:
* Boiling: Place the cleaned eggshells in a pot of boiling water for about 10 minutes. This will kill any lingering bacteria.
* Baking: Spread the cleaned eggshells on a baking sheet and bake them in a preheated oven at 200°F (93°C) for about 15-20 minutes.
4. Dry the Eggshells Completely: After sanitizing, let the eggshells dry completely. You can air dry them or use a low setting on your oven. Make sure they are bone dry before moving on to the next step.
5. Grind the Eggshells into a Fine Powder: This is where your blender or food processor comes in. Place the dried eggshells into the blender and grind them into a fine powder. The finer the powder, the smoother your bioplastic will be. You might need to do this in batches to avoid overloading your blender. I usually pulse it a few times and then run it continuously until I get a consistent powder.
Creating the Bioplastic Mixture: The Magic Happens Here!
Now for the fun part – turning that eggshell powder into bioplastic!
1. Combine the Eggshell Powder and Vinegar: In a saucepan, combine 1 cup of eggshell powder with ½ cup of white vinegar. The vinegar will help break down the calcium carbonate in the eggshells, making them more pliable.
2. Add Distilled Water and Glycerin: Add ¼ cup of distilled water and 2 tablespoons of glycerin to the mixture. Glycerin acts as a plasticizer, making the bioplastic more flexible and less brittle.
3. Add Cornstarch: Add 1 tablespoon of cornstarch to the mixture. Cornstarch helps to bind the ingredients together and adds strength to the bioplastic.
4. Heat and Stir the Mixture: Place the saucepan over medium heat and stir continuously with a spatula. The mixture will start to thicken as it heats up. Be patient and keep stirring to prevent burning.
5. Cook Until a Dough-Like Consistency is Achieved: Continue cooking and stirring until the mixture reaches a dough-like consistency, similar to mashed potatoes. This usually takes about 5-10 minutes. The mixture should be smooth and easily moldable.
6. Optional: Add Natural Dyes: If you want to add color to your bioplastic, now is the time! Add a few drops of your chosen natural dye and stir well to distribute the color evenly. Remember, a little goes a long way!
Molding and Shaping Your Bowl: Giving it Form
Time to give our bioplastic some shape!
1. Prepare Your Silicone Bowl or Mold: Make sure your silicone bowl or mold is clean and dry. You can lightly grease it with a bit of coconut oil or vegetable oil to prevent the bioplastic from sticking.
2. Transfer the Bioplastic Mixture to the Mold: Carefully transfer the hot bioplastic mixture to the prepared mold. Use a spatula to spread it evenly and press it firmly into the mold.
3. Remove Air Bubbles: Gently tap the mold on a flat surface to release any trapped air bubbles. This will help ensure a smooth and even surface on your finished bowl.
4. Let it Dry and Harden: Allow the bioplastic to dry and harden completely. This can take anywhere from 24 to 48 hours, depending on the thickness of the bowl and the humidity in your environment. I usually leave it in a well-ventilated area to speed up the drying process.
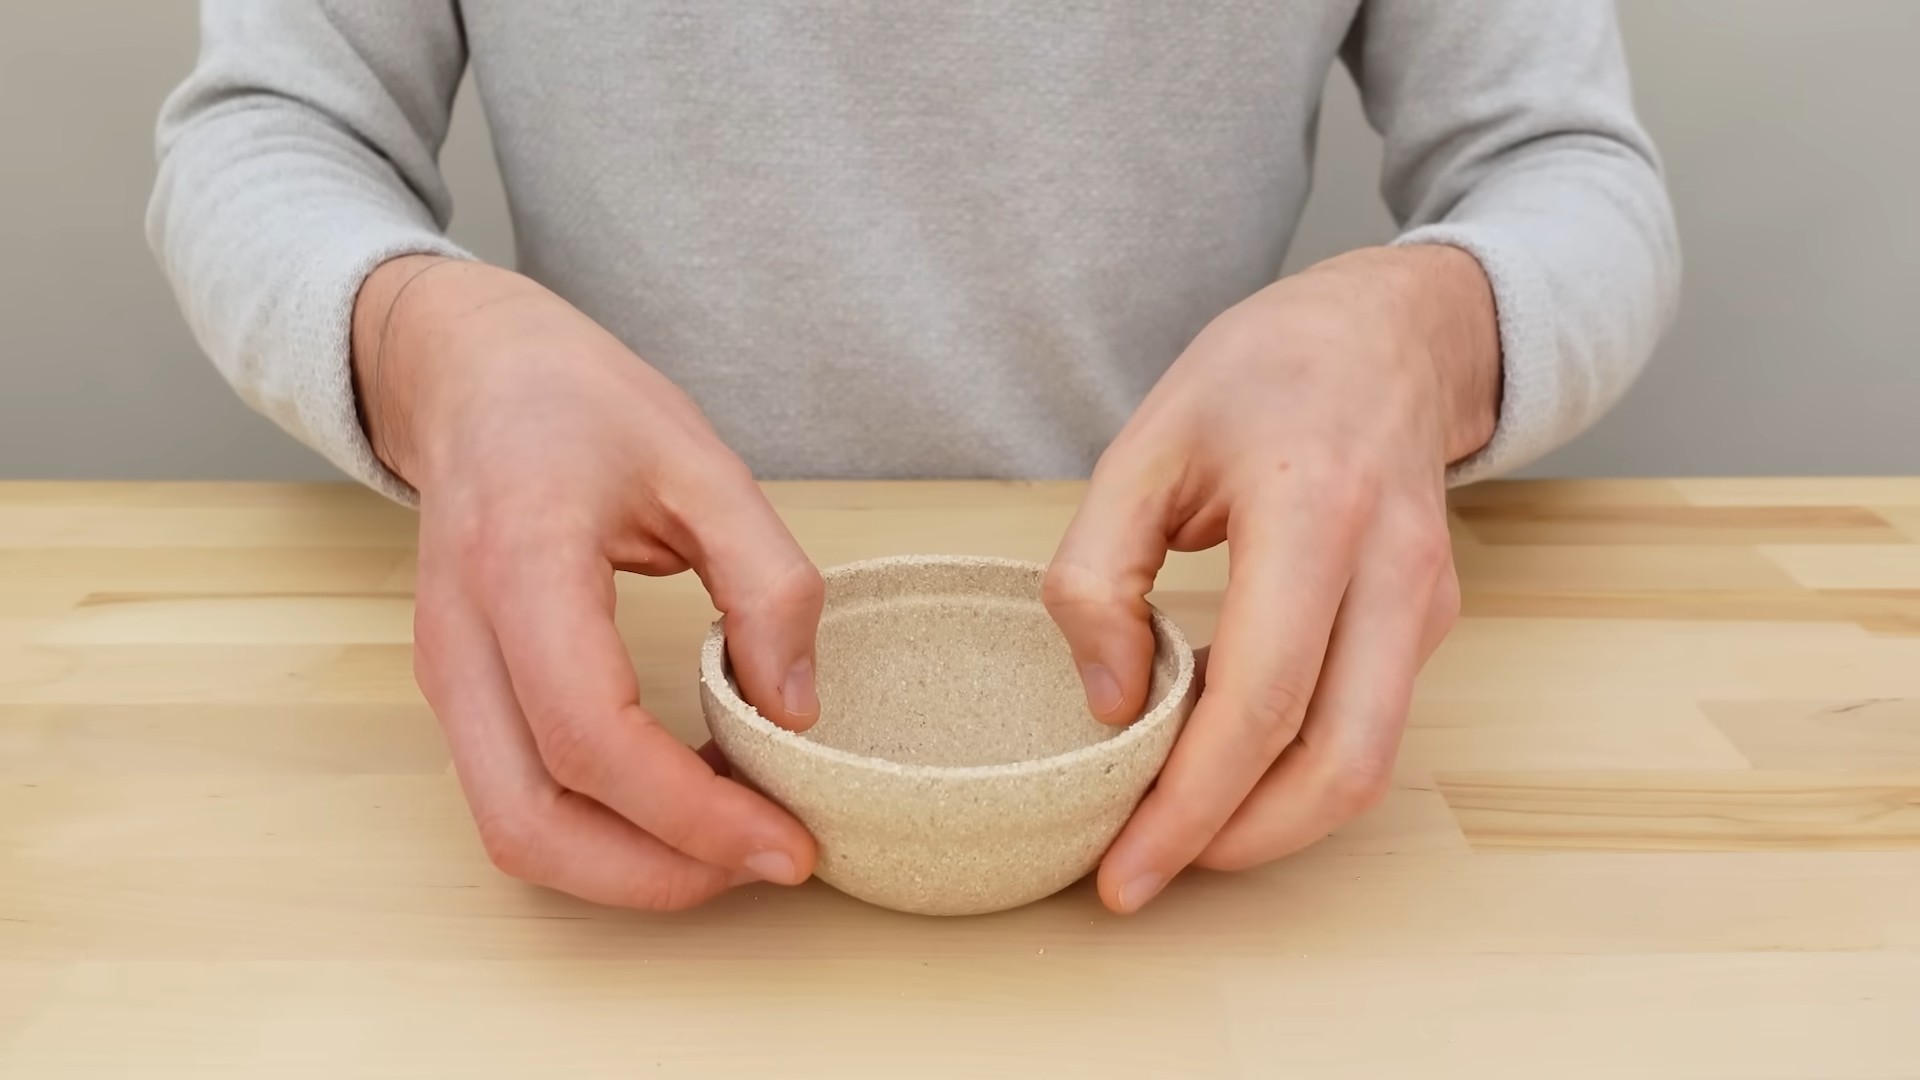
5. Remove the Bowl from the Mold: Once the bioplastic is completely dry and hardened, carefully remove the bowl from the mold. If it’s sticking, gently flex the mold to loosen it.
Sanding and Finishing: Polishing Your Masterpiece
Almost there! Now we’ll smooth out any imperfections and give our bowl a professional finish.
1. Sand the Bowl: Use sandpaper to smooth out any rough edges or imperfections on the surface of the bowl. Start with a coarser grit (120) and gradually move to finer grits (220, 400) for a smoother finish. Be patient and take your time.
2. Clean the Bowl: After sanding, wipe the bowl clean with a damp cloth to remove any sanding dust.
3. Optional: Polish with Beeswax or Carnauba Wax: For a glossy finish, you can polish the bowl with beeswax or carnauba wax. Apply a small amount of wax to a soft cloth and rub it onto the surface of the bowl in a circular motion. Buff the bowl with a clean cloth to remove any excess wax.
Important Considerations and Tips:
* Eggshell Quality: The quality of your eggshells will affect the final product. Use fresh, clean eggshells for the best results.
* Vinegar Type: White vinegar works best for this project. Avoid using other types of vinegar, as they may contain impurities that can affect the bioplastic.
* Glycerin Alternatives: If you don’t have glycerin, you can try using honey or corn syrup as a plasticizer, but the results may vary.
* Drying Time: The drying time will depend on the thickness of the bowl and the humidity in your environment. Be patient and allow the bioplastic to dry completely before removing it from the mold.
* Durability: This bioplastic bowl is not as durable as traditional plastic bowls. It’s best suited for dry goods or decorative purposes. Avoid using it for liquids or heavy items.
* Experimentation: Don’t be afraid to experiment with different colors, shapes, and textures. This is a fun and creative project, so let your imagination run wild!
* Storage: Store your bioplastic bowl in a cool, dry place away from direct sunlight.
* Safety First: Always supervise children when working with hot materials.
Troubleshooting:
* Bioplastic is too brittle: Add more glycerin to the mixture.
* Bioplastic is too sticky: Add more cornstarch to the mixture.
* Bioplastic is cracking: Make sure the eggshells are completely dry before grinding them into a powder. Also, ensure the bioplastic dries slowly and evenly.
* Uneven color: Make sure to stir the dye thoroughly into the mixture.
I hope you enjoyed this DIY tutorial! I can’t wait to see what you create. Remember to share your creations with me! Happy crafting!
Conclusion
So, there you have it! Transforming humble eggshells into a durable, biodegradable bioplastic bowl is not just a fun craft project; it’s a small step towards a more sustainable lifestyle. We’ve walked you through the process, highlighting the simplicity and accessibility of this ingenious DIY trick. But why should you actually try it?
First and foremost, it’s an incredibly satisfying way to repurpose waste. Instead of tossing those eggshells into the trash, contributing to landfill overflow, you’re giving them a new life as a functional and aesthetically pleasing object. Think about the impact if everyone started diverting their eggshells!
Second, this project is surprisingly educational. It’s a fantastic way to learn about bioplastics, the properties of calcium carbonate, and the potential for sustainable materials. It’s a great activity to do with kids, sparking their curiosity about science and environmental responsibility.
Third, the resulting bowl is genuinely useful. While it might not be suitable for holding hot liquids or extremely heavy items, it’s perfect for storing small trinkets, holding dry snacks, organizing jewelry, or even serving as a charming plant pot for succulents. Its unique texture and natural color add a touch of rustic elegance to any space.
But the beauty of this DIY project lies in its adaptability. Feel free to experiment with variations! Try adding natural pigments like beetroot juice or turmeric powder to the eggshell mixture to create bowls in different colors. You could also incorporate dried flowers or herbs for added texture and visual appeal. Consider using different molds to create bowls of varying shapes and sizes. The possibilities are truly endless!
For a more durable finish, you can experiment with different types of natural sealants. Beeswax or carnauba wax can provide a protective layer, making the bowl more resistant to moisture. Just be sure to use food-safe sealants if you plan on using the bowl for food storage.
Don’t be afraid to get creative with the decoration! Once the bowl is dry, you can paint it with acrylics, decoupage it with paper cutouts, or even carve intricate designs into the surface. Let your imagination run wild and create a truly unique piece of art.
We understand that embarking on a new DIY project can sometimes feel daunting. But trust us, this one is worth the effort. It’s a simple, rewarding, and environmentally friendly way to create something beautiful and useful from something that would otherwise be discarded.
We wholeheartedly encourage you to try this eggshell bioplastic bowl DIY project. It’s a fantastic way to reduce waste, learn something new, and create a unique piece of art for your home. And most importantly, we want to hear about your experience! Share your creations with us on social media using #EggshellBioplasticBowlDIY. We can’t wait to see what you come up with! Let’s inspire each other to embrace sustainable living, one eggshell at a time.
Frequently Asked Questions
What kind of glue should I use?
The best type of glue to use for this project is a non-toxic, water-based glue like PVA glue (also known as school glue or white glue). Avoid using solvent-based glues, as they can release harmful fumes and may not be biodegradable. Make sure the glue dries clear for the best aesthetic result. You can also experiment with natural glues made from flour and water, but these may not provide as strong a bond.
How long does it take for the bowl to dry completely?
Drying time can vary depending on the humidity and temperature of your environment, as well as the thickness of the eggshell mixture. Generally, it takes at least 24-48 hours for the bowl to dry completely. To ensure thorough drying, place the bowl in a well-ventilated area and avoid direct sunlight, which can cause cracking. You can also use a dehumidifier to speed up the drying process. Before removing the bowl from the mold, make sure it feels completely dry and hard to the touch.
Is the bowl food-safe?
While the eggshell bioplastic bowl is made from natural materials, it’s generally not recommended for storing or serving wet or oily foods unless you use a food-safe sealant. The porous nature of the eggshell mixture can harbor bacteria, and the glue may not be food-grade. If you plan on using the bowl for food, make sure to thoroughly clean and sanitize it before each use, and consider applying a food-safe sealant like beeswax or carnauba wax. However, it’s best to use it for dry snacks or non-food items to ensure safety and hygiene.
How durable is the eggshell bioplastic bowl?
The durability of the bowl depends on the thickness of the eggshell mixture and the quality of the glue used. While it’s surprisingly strong, it’s not as durable as traditional plastic or ceramic bowls. Avoid dropping it or subjecting it to heavy weight, as it can crack or break. It’s best suited for holding lightweight items like jewelry, keys, or small trinkets. With proper care, it can last for a long time.
Can I add color to the eggshell mixture?
Yes, you can definitely add color to the eggshell mixture! Natural pigments like beetroot juice, turmeric powder, or spinach juice can be used to create different shades. You can also use food coloring, but be aware that it may not be as vibrant or long-lasting as natural pigments. Add the pigment to the eggshell mixture before applying it to the mold, and mix thoroughly to ensure even distribution of color. Experiment with different combinations to create unique and beautiful bowls.
What if my bowl cracks during the drying process?
Cracking can occur if the eggshell mixture dries too quickly or if it’s not evenly distributed in the mold. If you notice cracks forming, try gently pressing them together while the mixture is still damp. You can also apply a thin layer of fresh eggshell mixture to fill in the cracks. To prevent cracking, ensure that the bowl dries slowly and evenly in a well-ventilated area. Avoid direct sunlight or heat, which can cause the mixture to dry too quickly.
How do I clean the eggshell bioplastic bowl?
To clean the bowl, gently wipe it with a damp cloth. Avoid using harsh chemicals or abrasive cleaners, as they can damage the surface. If necessary, you can use a mild soap and water solution. Make sure to dry the bowl thoroughly after cleaning to prevent moisture buildup. If you’ve applied a sealant, follow the manufacturer’s instructions for cleaning.
Can I use this bioplastic for other projects?
Absolutely! The eggshell bioplastic mixture can be used for a variety of other craft projects. You can use it to create small sculptures, decorative ornaments, or even jewelry. Experiment with different molds and techniques to explore the possibilities. Just remember that the durability and water resistance of the material may limit its applications.
Where can I find more inspiration for eggshell bioplastic projects?
There are many online resources where you can find inspiration for eggshell bioplastic projects. Search on platforms like Pinterest, YouTube, and Instructables for tutorials, ideas, and tips. You can also join online communities and forums dedicated to sustainable crafts and DIY projects to connect with other enthusiasts and share your creations.

Leave a Comment