

Dusting tips and tricks – are you tired of battling dust bunnies that seem to multiply overnight? I know I am! It feels like the moment you finish dusting, another layer settles right back down. But don’t despair, fellow clean-freaks! This isn’t just a modern annoyance; keeping our homes dust-free has been a concern for centuries.
Think back to ancient civilizations, where sweeping and rudimentary cleaning methods were essential for hygiene and preventing the spread of disease. While we’ve come a long way from feather dusters and simple brooms, the struggle against dust remains a constant. But I’m here to share some game-changing dusting tips and tricks that will make your life easier and your home cleaner.
In this article, I’ll reveal some simple yet effective DIY hacks that will not only remove dust but also help prevent it from accumulating so quickly. From creating your own anti-static dusting spray to mastering the art of microfiber cloth techniques, I’ve got you covered. These aren’t just quick fixes; they’re strategies to reclaim your weekends and enjoy a dust-free haven. So, grab your cleaning supplies, and let’s dive in!
DIY Dusting Like a Pro: Tips, Tricks, and Hacks for a Sparkling Home
Okay, let’s face it, dusting is nobody’s favorite chore. But a dust-free home is a happier, healthier home. I’m going to share all my secrets for tackling dust effectively and efficiently, so you can spend less time cleaning and more time enjoying your space. Get ready to say goodbye to those pesky dust bunnies!
Understanding Your Enemy: The Nature of Dust
Before we dive into the how-to, let’s understand what we’re up against. Dust isn’t just dirt; it’s a complex mix of:
* Dead skin cells: Yep, that’s you and your family shedding.
* Pet dander: Furry friends contribute a lot!
* Pollen: Especially during allergy season.
* Dust mites and their droppings: Eww, I know.
* Textile fibers: From clothes, carpets, and upholstery.
* Dirt and soil: Tracked in from outside.
* Insect parts: Gross, but true.
* Cooking residue: Especially if you fry a lot.
Knowing what dust is made of helps us choose the right tools and techniques.
Essential Dusting Tools: My Arsenal
Having the right tools makes all the difference. Here’s what I keep in my dusting kit:
* Microfiber cloths: These are my absolute go-to. They trap dust instead of just pushing it around. I prefer having a few different sizes and colors to avoid cross-contamination between rooms.
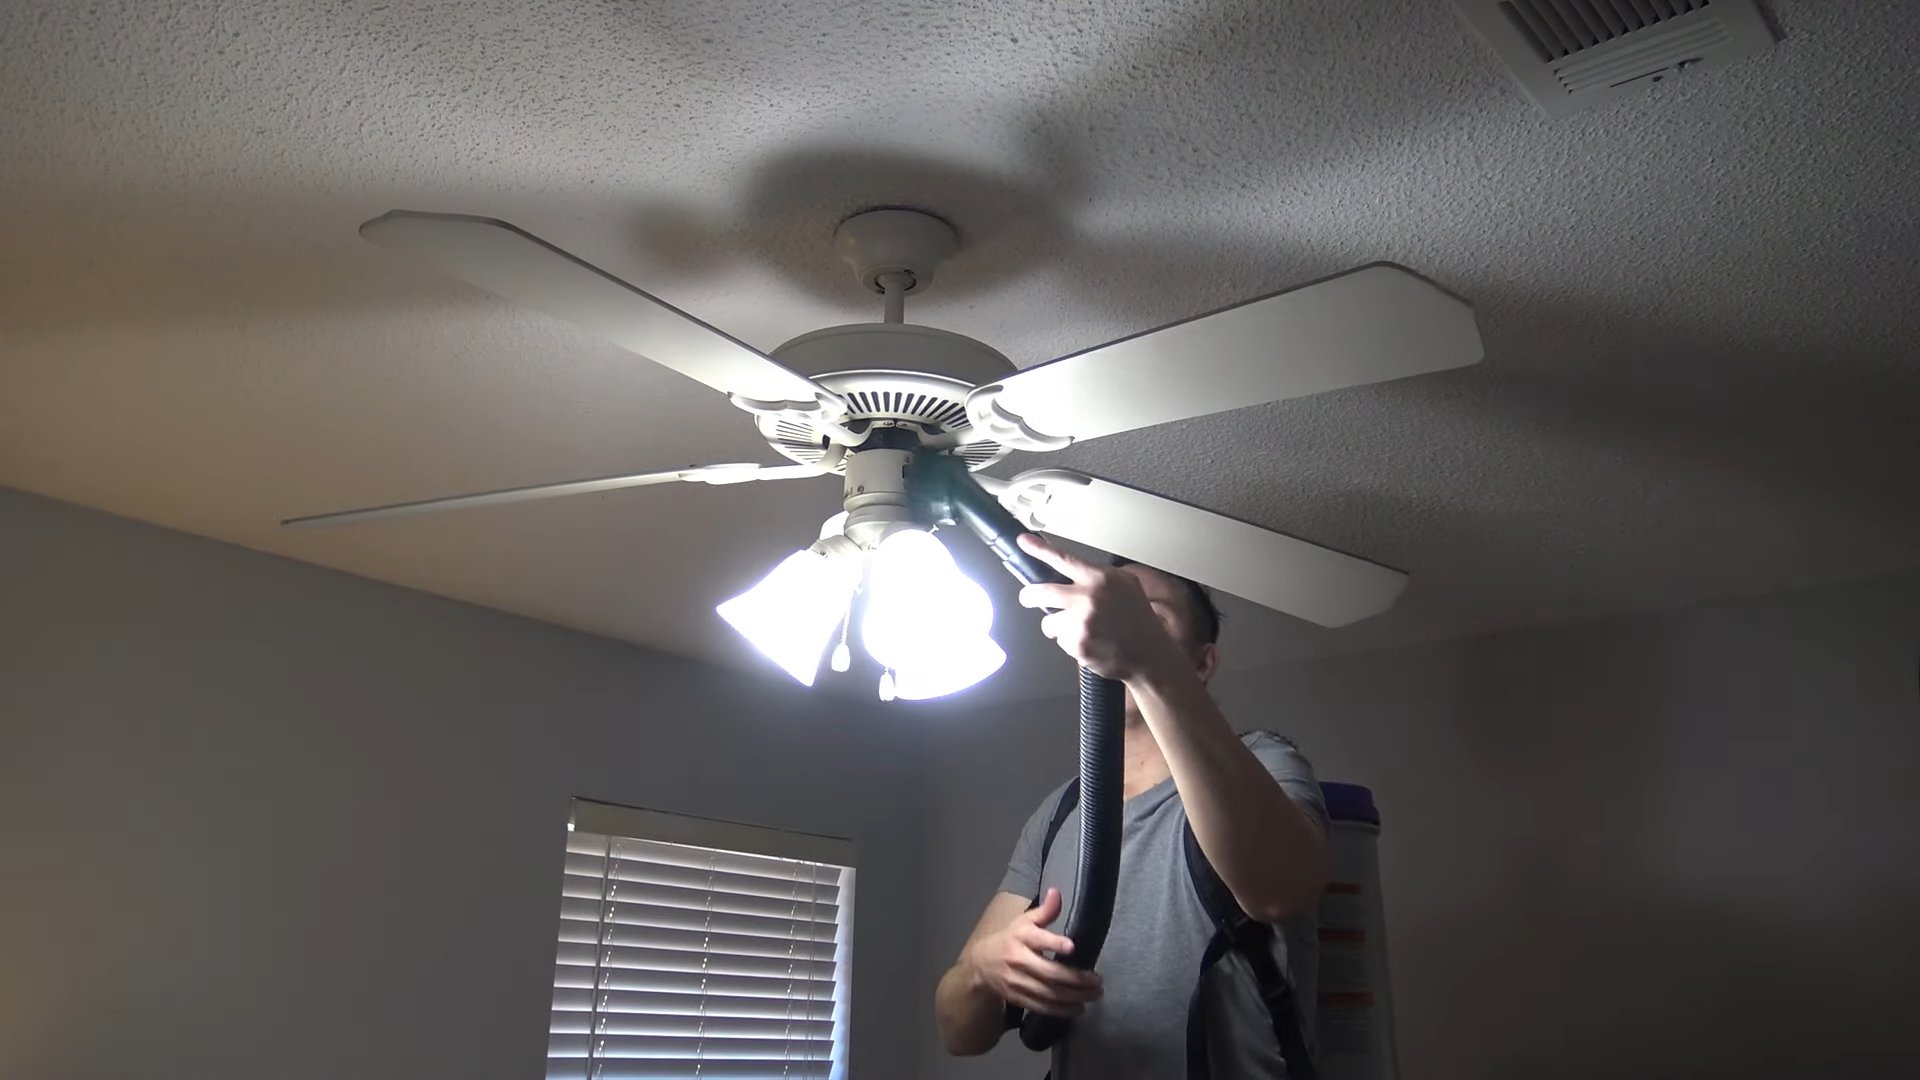
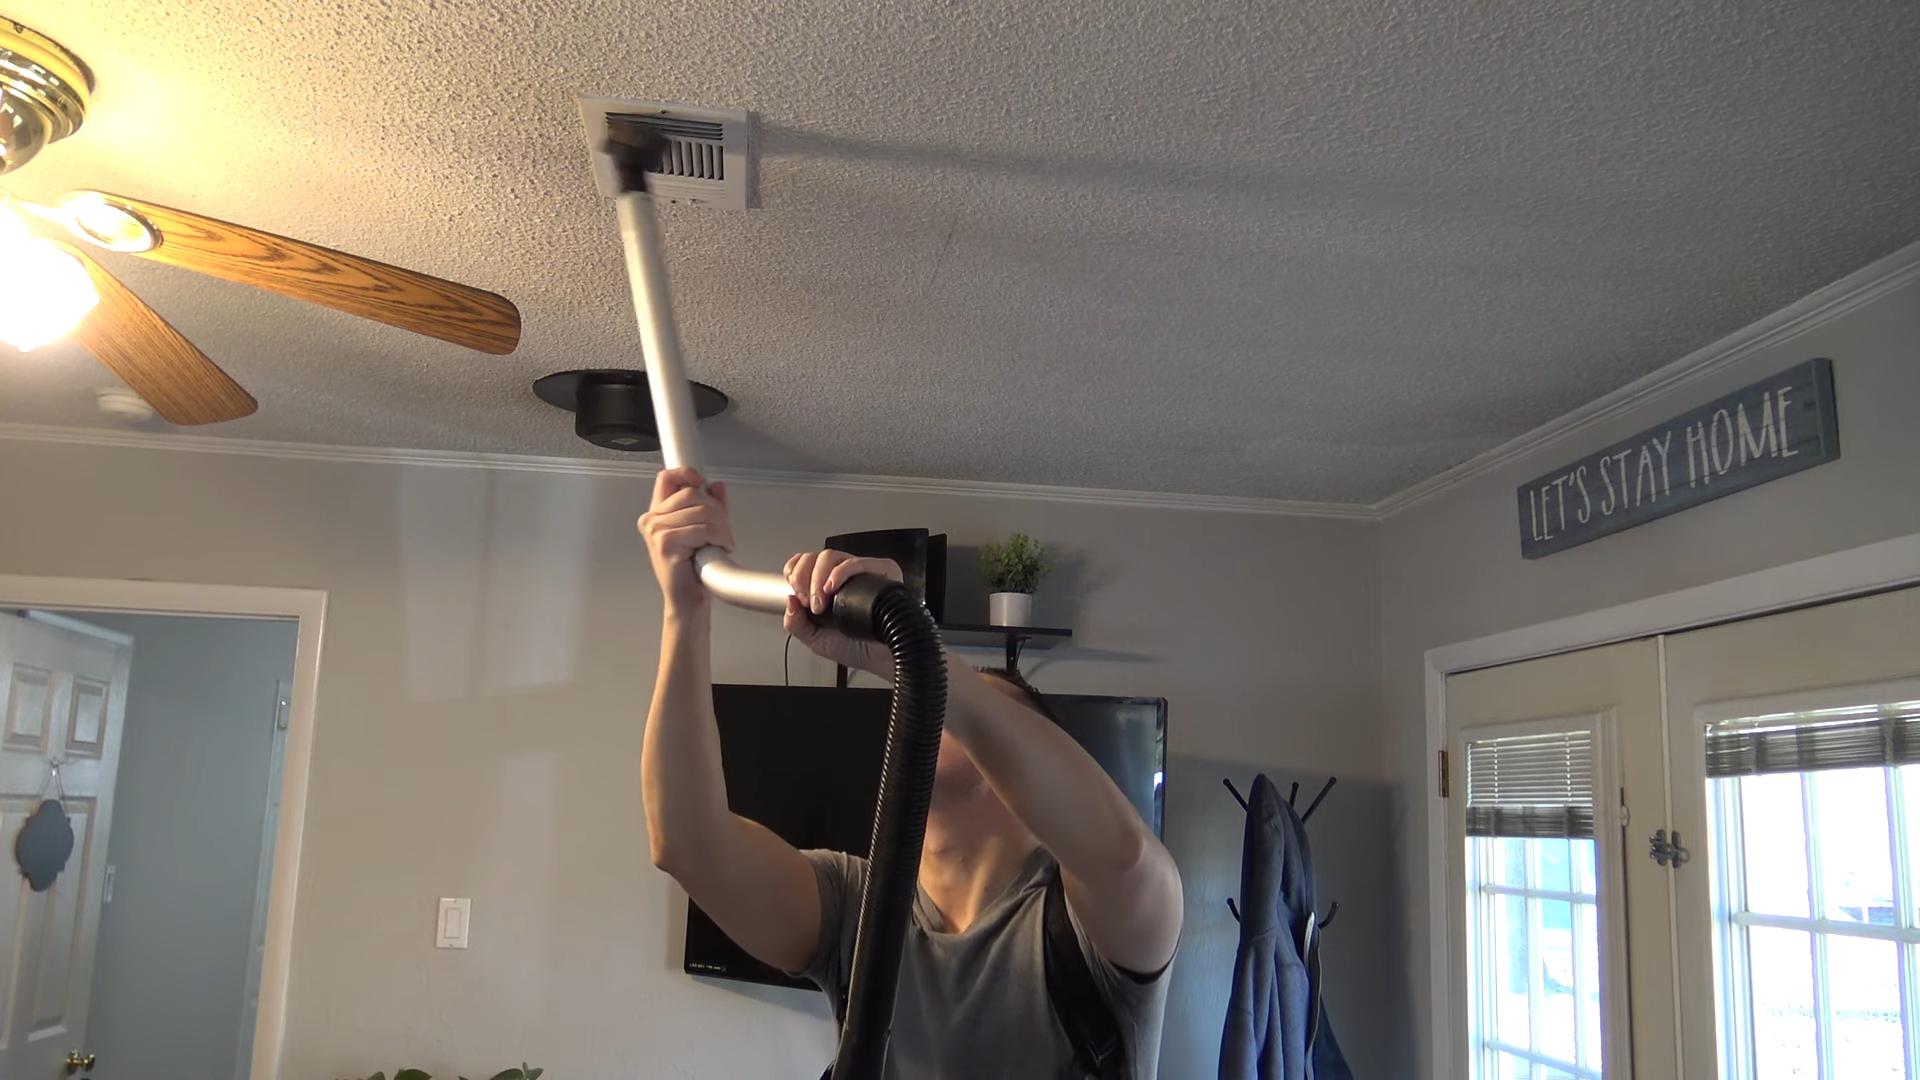
* Extendable duster: Perfect for reaching high ceilings, ceiling fans, and light fixtures. Look for one with a microfiber or feather duster head.
* Vacuum cleaner with attachments: A must for upholstery, carpets, and hard-to-reach areas. I love using the brush attachment for delicate surfaces.
* Soft-bristled brush: Ideal for cleaning intricate details on furniture, lamps, and picture frames. An old toothbrush works great too!
* Cotton swabs: For getting into tiny crevices and corners.
* Spray bottle with dusting solution: I’ll share my favorite DIY recipe below.
* Furniture polish: For wood furniture, to protect and shine.
* Old socks: Sounds weird, but they’re great for dusting blinds and baseboards.
* Magic Eraser: For stubborn marks on walls and baseboards.
Step-by-Step Dusting Guide: My Proven Method
Here’s my tried-and-true method for dusting every room in the house. Remember to work from top to bottom, so dust falls onto surfaces you haven’t cleaned yet.
1. Prepare the Room:
* Open windows for ventilation (weather permitting).
* Turn off ceiling fans to prevent dust from swirling around.
* Cover furniture with sheets if you’re doing a deep clean.
* Gather your supplies and put on some music!
2. High Places First:
* Ceiling Fans: Use an extendable duster to clean the blades. I like to use a pillowcase to trap the dust as it falls. Simply slide the pillowcase over each blade, then wipe. This prevents dust from raining down on you.
* Light Fixtures: Dust chandeliers, pendant lights, and recessed lighting with an extendable duster or a microfiber cloth. Be careful not to break anything! For glass fixtures, you can use a glass cleaner.
* Crown Molding and Trim: Use an extendable duster or a microfiber cloth to wipe down crown molding, trim, and other high surfaces.
3. Walls and Surfaces:
* Walls: Use a microfiber cloth attached to a broom or mop handle to dust walls. For textured walls, a soft-bristled brush works best. If you have any stubborn marks, try a Magic Eraser.
* Shelves: Remove everything from shelves and dust them thoroughly with a microfiber cloth. Don’t forget to dust the items you removed before putting them back.
* Picture Frames and Mirrors: Dust picture frames with a soft-bristled brush or a microfiber cloth. Clean mirrors with a glass cleaner.
* Electronics: Unplug electronics before dusting. Use a microfiber cloth to wipe down screens, keyboards, and other surfaces. For hard-to-reach areas, use a can of compressed air.
4. Furniture:
* Upholstered Furniture: Vacuum upholstery with the brush attachment to remove dust and debris. For stains, use an upholstery cleaner.
* Wood Furniture: Dust wood furniture with a microfiber cloth. Apply furniture polish to protect and shine the wood.
* Leather Furniture: Dust leather furniture with a microfiber cloth. Use a leather conditioner to keep the leather soft and supple.
5. Floors:
* Hardwood Floors: Sweep or vacuum hardwood floors to remove dust and debris. Mop with a hardwood floor cleaner.
* Tile Floors: Sweep or vacuum tile floors to remove dust and debris. Mop with a tile floor cleaner.
* Carpets and Rugs: Vacuum carpets and rugs thoroughly to remove dust and debris. For stains, use a carpet cleaner.
6. Finishing Touches:
* Empty the vacuum cleaner bag or canister.
* Wash your microfiber cloths.
* Open windows to air out the room.
Specific Areas, Specific Solutions: Dusting Deep Dives
Let’s tackle some of those tricky areas that often get overlooked.
Dusting Blinds: A Painless Process
Blinds are dust magnets! Here’s how I clean them:
1. Close the blinds: Tilt the slats so they’re closed in one direction.
2. Dust with a microfiber cloth or old sock: Wipe each slat individually. For stubborn dust, dampen the cloth slightly.
3. Flip the blinds: Tilt the slats in the opposite direction and repeat.
4. Vacuum (optional): Use the brush attachment on your vacuum to remove any remaining dust.
Tackling Baseboards: No More Bending Over!
Baseboards are often forgotten, but they collect a lot of dust.
1. Vacuum: Use the brush attachment to remove loose dust and debris.
2. Wipe with a damp cloth: Use a damp microfiber cloth to wipe down the baseboards. For stubborn marks, use a Magic Eraser.
3. Use an old toothbrush: For cleaning the corners and crevices.
Electronics: A Delicate Dance
Electronics attract dust like crazy, and you need to be careful not to damage them.
1. Unplug everything: Safety first!
2. Use a microfiber cloth: Gently wipe down screens, keyboards, and other surfaces.
3. Compressed air: Use compressed air to blow dust out of hard-to-reach areas, like keyboards and vents.
4. Avoid liquids: Never spray liquids directly onto electronics. If you need to dampen the cloth, do so sparingly.
Plants: Keeping Them Happy and Dust-Free
Dust can block sunlight and hinder plant growth.
1. Wipe leaves with a damp cloth: Gently wipe each leaf with a damp microfiber cloth.
2. Use a soft-bristled brush: For plants with delicate leaves, use a soft-bristled brush to remove dust.
3. Rinse under the faucet: For plants with sturdy leaves, you can rinse them under the faucet. Be sure to let them dry completely before putting them back in their pots.
DIY Dusting Solutions: Save Money and Go Green
You don’t need expensive cleaning products to dust effectively. Here are a few of my favorite DIY dusting solutions:
* Vinegar and Water: Mix equal parts white vinegar and water in a spray bottle. This is a great all-purpose dusting solution.
* Lemon Juice and Olive Oil: Mix 1/4 cup lemon juice with 1/2 cup olive oil in a spray bottle. This is a great furniture polish.
* Essential Oils: Add a few drops of your favorite essential oil to your dusting solution for a pleasant scent. Lavender, lemon, and eucalyptus are all great choices.
Preventing Dust Buildup: Long-Term Strategies
The best way to deal with dust is to prevent it from accumulating in the first place. Here are a few tips:
* Use doormats: Place doormats at all entrances to trap dirt and debris before they enter your home.
* Change your air filters regularly: Dirty air filters can circulate dust throughout your home. Change them every 1-3 months.
* Wash bedding frequently: Bedding is a major source of dust mites. Wash your sheets, pillowcases, and blankets at least once a week.
Conclusion
So, there you have it! Mastering the art of dusting doesn’t have to be a chore filled with sneezing and frustration. By incorporating these simple yet effective DIY dusting tricks into your cleaning routine, you’ll not only achieve a cleaner, healthier home but also save money and reduce your reliance on harsh chemicals. We’ve explored methods that tackle everything from delicate surfaces to hard-to-reach corners, ensuring a thorough clean every time.
The beauty of these DIY dusting solutions lies in their adaptability. Feel free to experiment with different essential oils in your dusting spray to create a scent that uplifts your mood and complements your home’s ambiance. For instance, lavender and chamomile offer calming properties, while citrus oils provide an energizing boost. You can also adjust the ratios of vinegar and water in your cleaning solutions to suit the specific needs of your surfaces. Remember to always test any new solution on an inconspicuous area first to ensure it doesn’t cause any damage or discoloration.
Consider using microfiber cloths in various colors to designate them for specific areas of your home. This prevents cross-contamination and ensures that you’re not spreading dust and grime from one room to another. For example, you could use blue cloths for bathrooms, green cloths for kitchens, and yellow cloths for living areas.
Furthermore, don’t underestimate the power of preventative measures. Regularly vacuuming carpets and rugs, changing air filters, and decluttering surfaces can significantly reduce the amount of dust that accumulates in your home. A little bit of prevention goes a long way in making your dusting efforts more effective and less frequent.
We truly believe that these DIY dusting tips and tricks will revolutionize your cleaning routine. They are cost-effective, environmentally friendly, and incredibly easy to implement. But don’t just take our word for it – we encourage you to try them out for yourself!
Once you’ve experienced the satisfaction of a dust-free home achieved through these simple methods, we’d love to hear about your experience. Share your successes, challenges, and any variations you’ve discovered in the comments below. Your insights could help other readers refine their dusting techniques and achieve even better results. Let’s create a community of clean-home enthusiasts who are passionate about sharing their knowledge and empowering others to create healthier, happier living spaces.
Remember, a clean home is a happy home, and with these DIY dusting solutions, you’re well on your way to achieving both! So, grab your microfiber cloths, mix up your favorite dusting spray, and get ready to transform your home into a dust-free sanctuary. Happy dusting!
Frequently Asked Questions (FAQ)
1. Are these DIY dusting solutions safe for all surfaces?
While most of the DIY dusting solutions mentioned are generally safe for a wide range of surfaces, it’s always crucial to test them on an inconspicuous area first. This is especially important for delicate or antique furniture, as well as surfaces with a special finish. For example, vinegar, while a great cleaning agent, can be too acidic for certain types of stone or wood. Always dilute vinegar properly and avoid using it on surfaces that are known to be sensitive to acids. When in doubt, consult the manufacturer’s instructions or a professional cleaner.
2. How often should I dust my home?
The frequency of dusting depends on several factors, including the number of people and pets living in your home, the presence of allergies, and the overall cleanliness of your environment. As a general guideline, dusting once or twice a week is sufficient for most homes. However, if you have pets, allergies, or live in a dusty area, you may need to dust more frequently. Pay attention to areas that tend to accumulate dust quickly, such as shelves, furniture surfaces, and window sills. Regular dusting not only improves the appearance of your home but also helps to reduce allergens and improve air quality.
3. What’s the best type of cloth to use for dusting?
Microfiber cloths are widely considered the best choice for dusting due to their exceptional ability to trap and lift dust particles without scratching surfaces. Unlike traditional cotton cloths, microfiber cloths have a unique weave that creates a larger surface area, allowing them to pick up more dust and dirt. They are also lint-free, which means you won’t be leaving behind any unwanted residue. When choosing microfiber cloths, look for high-quality options that are soft and absorbent. Avoid using cloths that are too rough or abrasive, as they could potentially damage delicate surfaces.
4. Can I use essential oils in my dusting spray?
Yes, you can definitely add essential oils to your DIY dusting spray for a pleasant scent and added benefits. Many essential oils have antibacterial, antiviral, and antifungal properties, which can help to further sanitize your home while you dust. Some popular choices for dusting sprays include lavender, lemon, tea tree, and eucalyptus. When using essential oils, be sure to dilute them properly with water and a carrier oil, such as olive oil or almond oil. A general guideline is to use 10-15 drops of essential oil per cup of water. Always test the spray on an inconspicuous area first to ensure that the essential oils don’t damage or discolor the surface.
5. How do I dust hard-to-reach areas?
Dusting hard-to-reach areas, such as ceiling fans, high shelves, and baseboards, can be challenging, but there are several tools and techniques that can make the job easier. For ceiling fans, use a special ceiling fan duster with a long handle to reach the blades without having to climb on a ladder. For high shelves, use a duster with an extendable handle or a vacuum cleaner with a brush attachment. For baseboards, use a microfiber cloth attached to a mop or broom handle. You can also use a crevice tool attachment on your vacuum cleaner to reach tight spaces and corners. Remember to work from top to bottom to avoid redistributing dust onto already cleaned surfaces.
6. How do I prevent dust from accumulating in my home?
Preventing dust from accumulating in your home is an ongoing process that involves several strategies. Regularly vacuuming carpets and rugs, changing air filters, and decluttering surfaces are all effective ways to reduce the amount of dust that enters and settles in your home. Consider using air purifiers to filter out dust and allergens from the air. Keep windows and doors closed as much as possible, especially during windy days. When cleaning, use a damp cloth or mop to trap dust instead of sweeping, which can stir up dust particles and redistribute them into the air. By implementing these preventative measures, you can significantly reduce the amount of dusting required and maintain a cleaner, healthier home.
7. What is the best way to dust electronics?
Dusting electronics requires a gentle approach to avoid damaging sensitive components. Always turn off and unplug the electronic device before dusting. Use a soft, dry microfiber cloth to gently wipe the screen, keyboard, and other surfaces. Avoid using liquid cleaners or sprays directly on electronics, as they can seep into the device and cause damage. For hard-to-reach areas, such as the crevices of a keyboard, use a can of compressed air to blow away dust and debris. You can also use a small brush to gently remove dust from vents and ports. Regular dusting of electronics not only improves their appearance but also helps to prevent overheating and prolong their lifespan.
8. Can I use these DIY dusting solutions if I have allergies?
If you have allergies, it’s important to choose DIY dusting solutions that are gentle and non-irritating. Avoid using harsh chemicals or strong fragrances, as they can trigger allergic reactions. Opt for natural ingredients, such as vinegar, water, and essential oils, which are less likely to cause irritation. When dusting, wear a mask and gloves to protect yourself from dust and allergens. Consider using an air purifier to filter out dust and allergens from the air. If you experience any allergic symptoms, such as sneezing, coughing, or skin irritation, discontinue use of the DIY dusting solution and consult with a doctor or allergist.
9. How do I clean my microfiber cloths after dusting?
Cleaning your microfiber cloths after dusting is essential to maintain their effectiveness and prevent the spread of dust and grime. After each use, rinse the cloth thoroughly with warm water and a mild detergent. For heavily soiled cloths, you can wash them in the washing machine with similar colors. Avoid using fabric softeners or bleach, as they can damage the fibers and reduce their absorbency. Tumble dry on low heat or air dry. Store clean microfiber cloths in a dry, dust-free place. With proper care, your microfiber cloths will last for a long time and continue to provide effective dusting results.

Leave a Comment