

DIY Upcycled Gift Bag Art: Transform trash into treasure and unleash your inner artist! Ever feel guilty tossing those beautiful gift bags after a celebration? I know I do! They’re often too pretty to simply discard, but end up cluttering drawers. Well, fret no more! This article is your ultimate guide to creating stunning, personalized artwork using those very gift bags.
The concept of repurposing materials isn’t new. Throughout history, resourceful individuals have found creative ways to breathe new life into discarded items. From ancient civilizations crafting tools from broken pottery to modern-day artists creating sculptures from recycled plastic, the spirit of upcycling has always been a testament to human ingenuity and resourcefulness.
In today’s world, where sustainability is more important than ever, learning to upcycle is not just a fun hobby, it’s a responsible choice. This DIY upcycled gift bag art project is a fantastic way to reduce waste, express your creativity, and add a unique, personal touch to your home decor. Plus, it’s a budget-friendly alternative to buying expensive art! I’ll show you simple techniques to transform those paper treasures into eye-catching pieces that will impress your friends and family. Let’s get started and turn those gift bags into masterpieces!
DIY Upcycled Gift Bag Art: Turning Trash into Treasure
Hey there, fellow crafters! Ever feel guilty tossing those beautiful gift bags after a birthday or holiday? I know I do! They’re often too pretty to just throw away. So, I’ve come up with a super fun and easy way to give them a new life: turning them into stunning wall art! This project is not only eco-friendly but also a fantastic way to personalize your space with unique pieces that reflect your style. Plus, it’s a great way to use up those extra craft supplies you’ve been hoarding (we all have them!).
Materials You’ll Need
Before we dive in, let’s gather our supplies. Don’t worry, you probably already have most of these lying around!
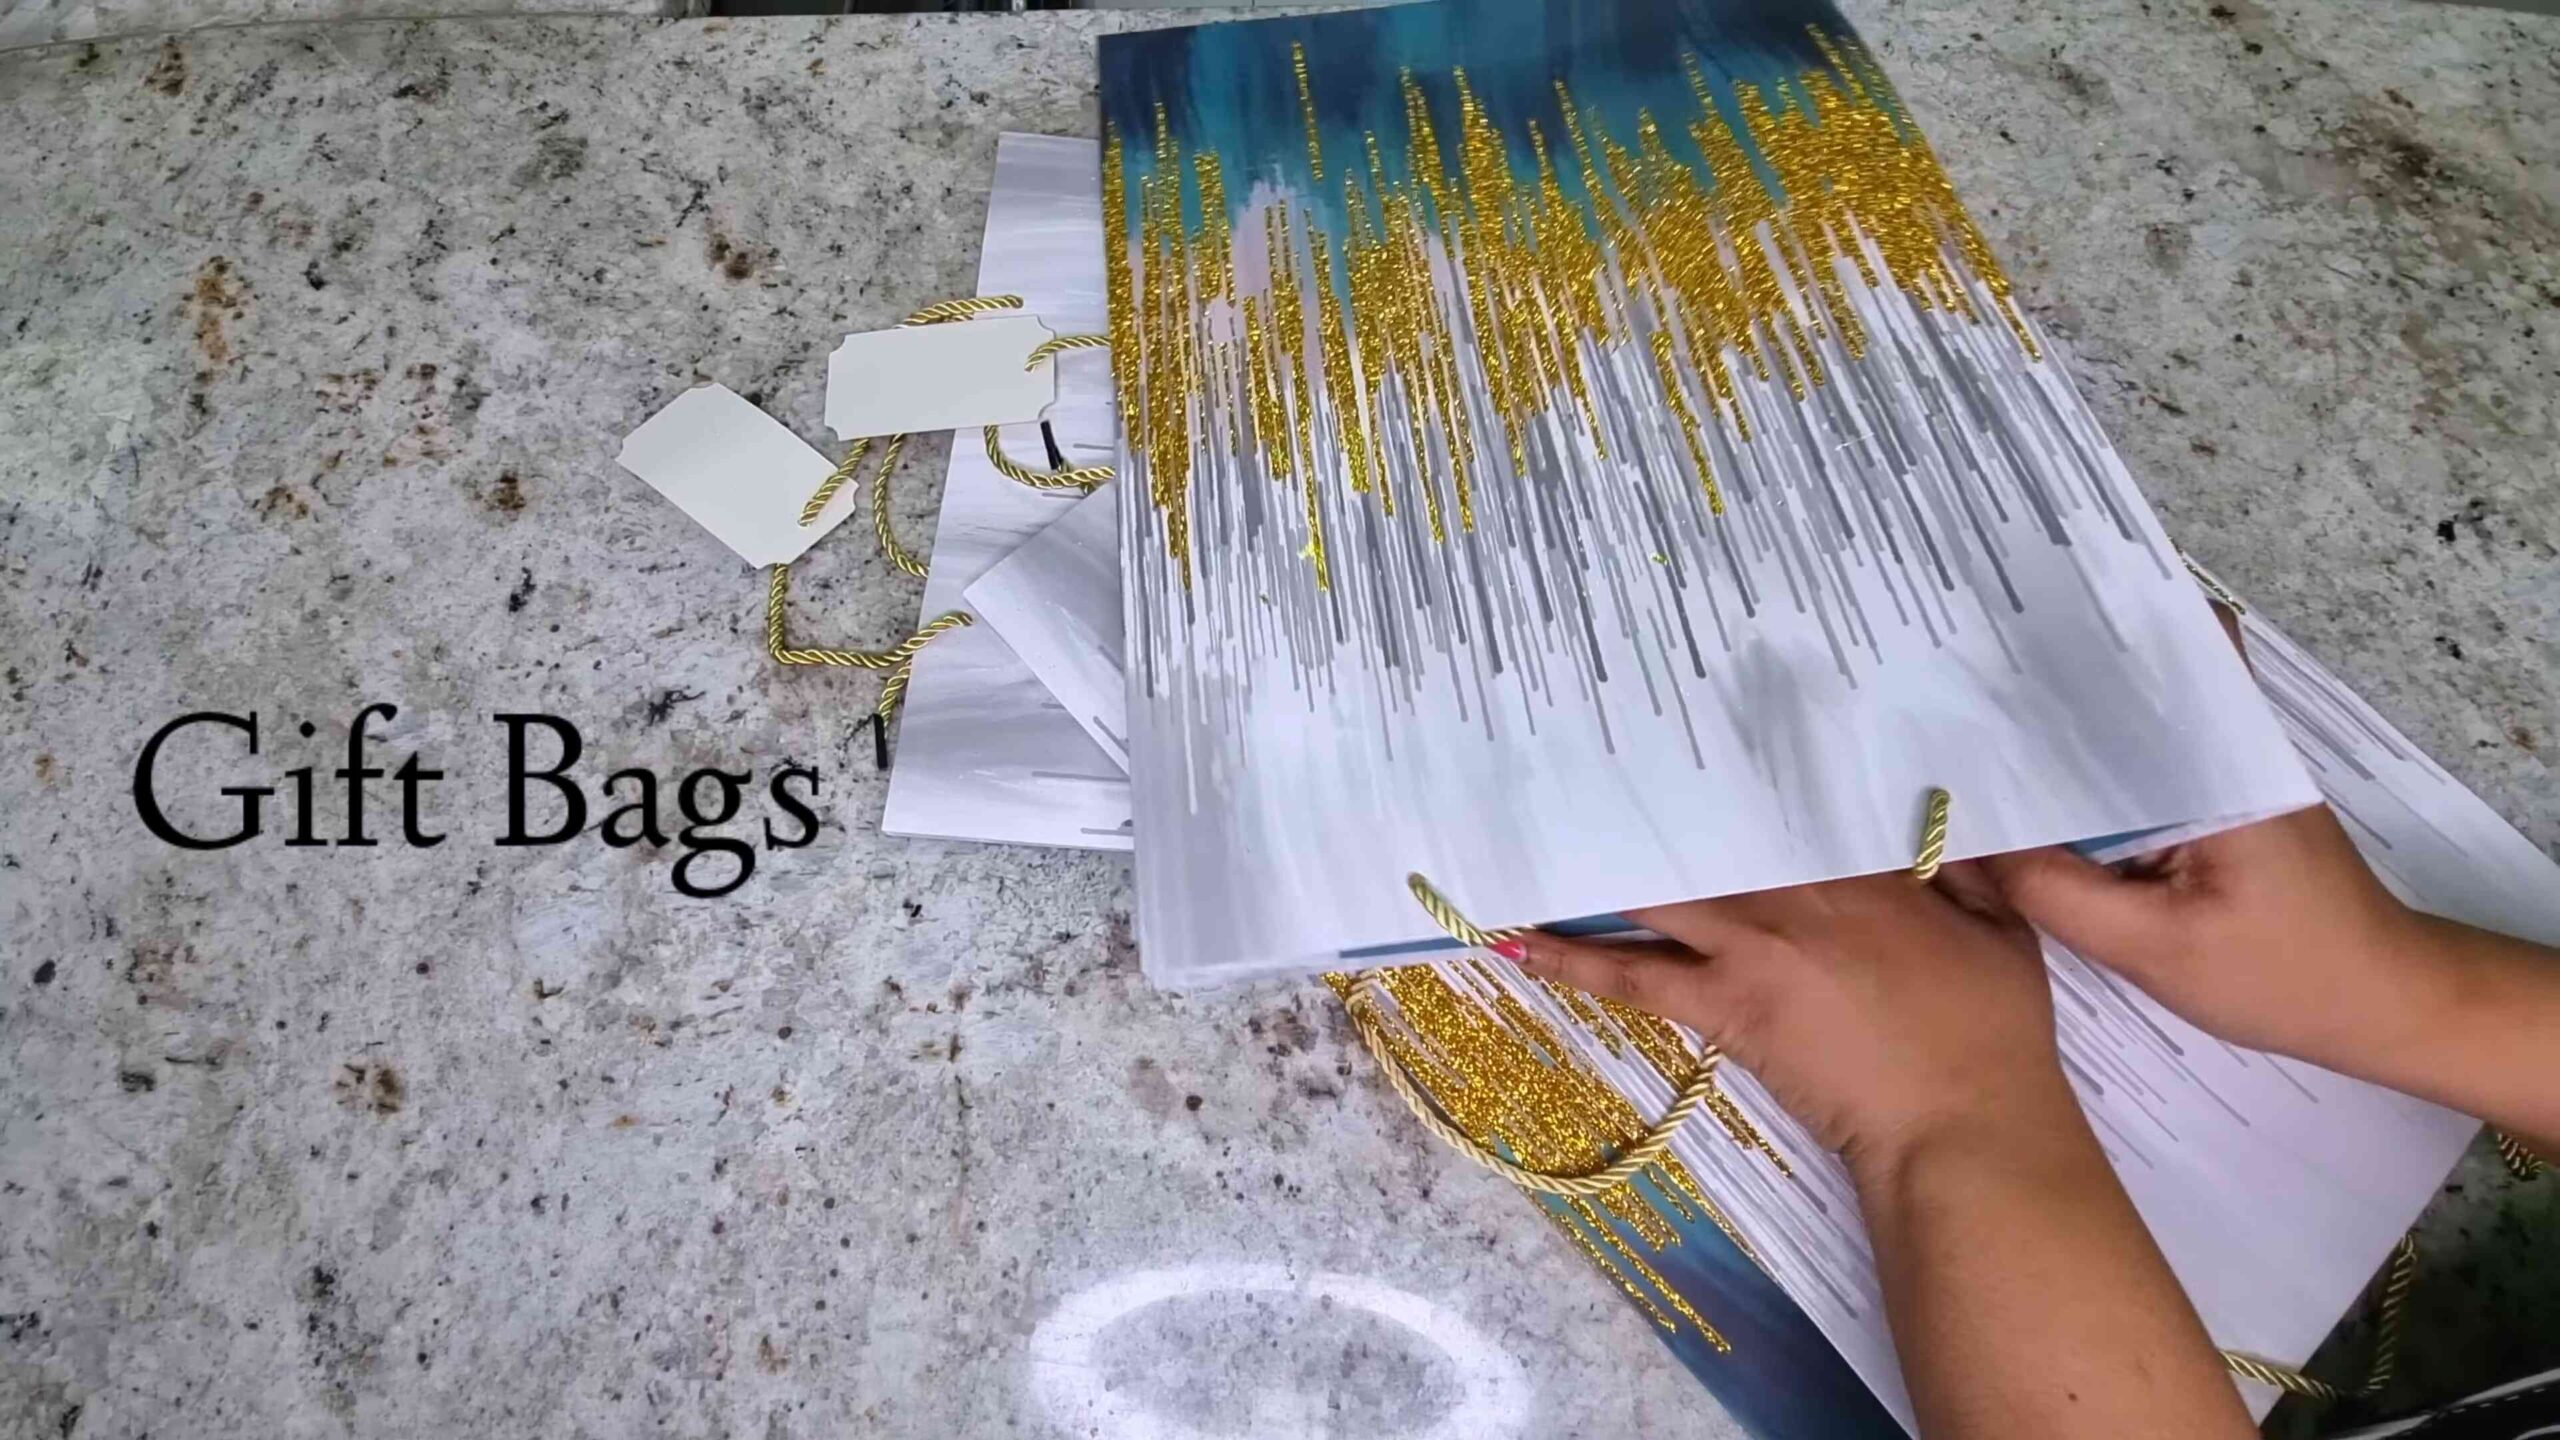
* Gift Bags: The star of the show! Choose bags with interesting patterns, colors, or textures. The sturdier the bag, the better.
* Canvas or Stretched Frame: This will be our base. You can find these at any craft store in various sizes. I personally love using square canvases for a modern look.
* Scissors or Craft Knife: For cutting the gift bags. A craft knife with a self-healing mat is ideal for precise cuts, but scissors work just fine too.
* Mod Podge or Decoupage Glue: This will adhere the gift bag pieces to the canvas. Mod Podge comes in different finishes (matte, gloss, satin), so choose the one you like best.
* Paintbrush or Foam Brush: For applying the Mod Podge. Foam brushes are great for a smooth, even finish.
* Ruler or Straight Edge: To help with measuring and cutting straight lines.
* Pencil: For marking guidelines on the gift bag.
* Optional:
* Acrylic Paints: To add extra details or color to your artwork.
* Glitter: Because who doesn’t love a little sparkle?
* Embellishments: Buttons, beads, ribbons, anything goes!
* Sealant: To protect your finished artwork.
Preparing the Gift Bags
This is where the fun begins! We’re going to deconstruct those gift bags and get them ready for their artistic transformation.
1. Flatten the Gift Bag: Carefully unfold the gift bag and flatten it out on a flat surface. Remove any handles or ribbons. I usually save the handles and ribbons for other craft projects – nothing goes to waste!
2. Cut Out Desired Sections: Examine the gift bag and decide which parts you want to use for your artwork. Maybe you love a particular pattern, a logo, or a specific image. Use your scissors or craft knife to carefully cut out these sections.
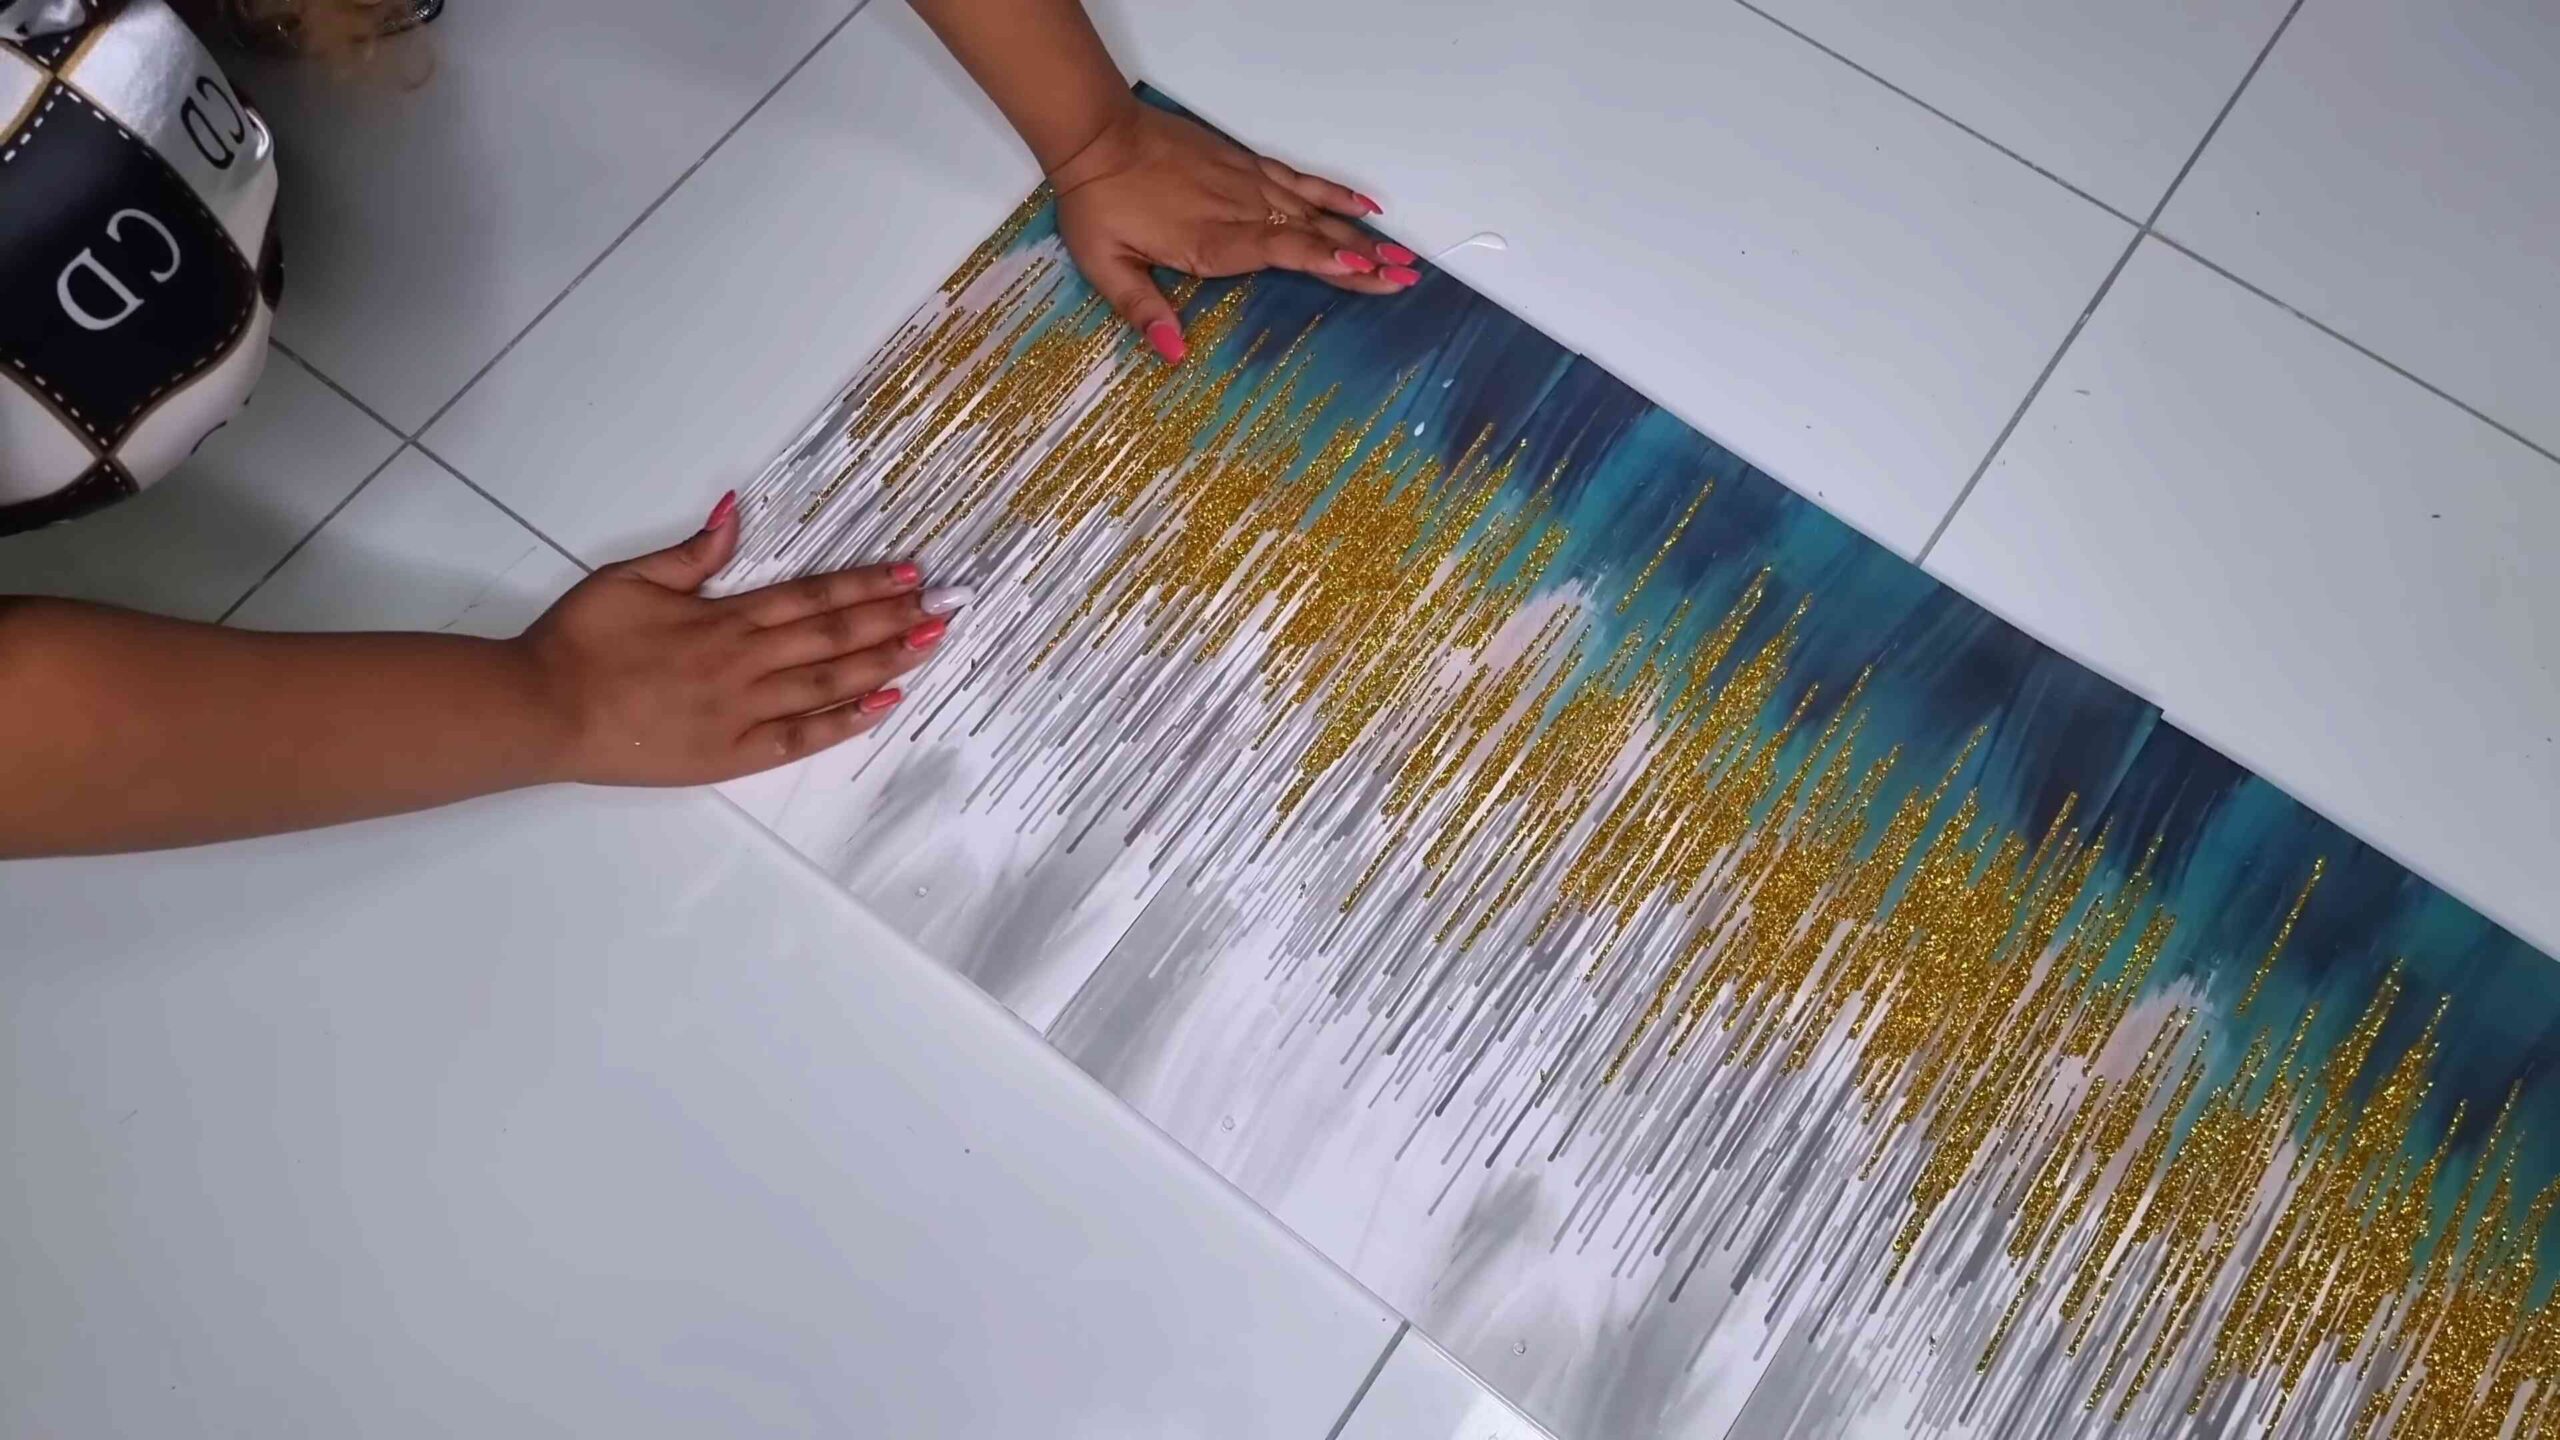
3. Consider the Composition: Before you start gluing, play around with the placement of your cut-out pieces on the canvas. This will give you a good idea of how your final artwork will look. Think about layering, overlapping, and creating a balanced composition. I often take a photo of different arrangements to help me decide.
4. Cut into Shapes (Optional): If you want to get really creative, you can cut the gift bag pieces into different shapes. Triangles, squares, circles – the possibilities are endless! This is a great way to add visual interest and texture to your artwork.
Creating Your Masterpiece
Now for the main event! We’re going to transform those gift bag pieces into a stunning work of art.
1. Apply Mod Podge to the Canvas: Using your paintbrush or foam brush, apply a thin, even layer of Mod Podge to a small section of the canvas. Work in small sections to prevent the Mod Podge from drying out before you can apply the gift bag pieces.
2. Adhere the Gift Bag Pieces: Carefully place a cut-out gift bag piece onto the Mod Podge-covered section of the canvas. Gently smooth it out with your fingers or a brayer to remove any air bubbles and ensure it adheres properly.
3. Repeat the Process: Continue applying Mod Podge and adhering gift bag pieces, working your way across the canvas. Overlap the pieces slightly to create a layered effect. Don’t be afraid to experiment with different arrangements and textures.
4. Let it Dry: Once you’ve covered the entire canvas with gift bag pieces, let it dry completely. This usually takes about 15-30 minutes, depending on the humidity.
5. Apply a Top Coat of Mod Podge: Once the first layer is dry, apply a top coat of Mod Podge to seal everything in and protect your artwork. This will also give it a nice, even finish.
6. Let it Dry Again: Let the top coat of Mod Podge dry completely. Again, this usually takes about 15-30 minutes.
Adding Embellishments and Finishing Touches
This is where you can really let your personality shine! Add extra details and embellishments to make your artwork truly unique.
1. Paint (Optional): If you want to add extra color or details, use acrylic paints to paint directly onto the gift bag pieces or the canvas. You can add highlights, shadows, or even create abstract designs.
2. Glitter (Optional): A little glitter can add a touch of sparkle and glamour to your artwork. Sprinkle glitter onto wet Mod Podge and let it dry completely.
3. Embellishments (Optional): Glue on buttons, beads, ribbons, or any other embellishments you like. This is a great way to add texture and dimension to your artwork.
4. Sealant (Optional): To protect your finished artwork from dust and moisture, you can apply a sealant. This will also help to prevent the colors from fading over time. Follow the instructions on the sealant can for best results.
Displaying Your Upcycled Masterpiece
Congratulations! You’ve created a beautiful and unique piece of art from upcycled gift bags. Now it’s time to show it off!
* Hang it on the Wall: The most obvious way to display your artwork is to hang it on the wall. Use a picture hook or nail to hang the canvas.
* Lean it on a Shelf: If you don’t want to put holes in your wall, you can simply lean your artwork on a shelf or mantel.
* Give it as a Gift: This upcycled gift bag art makes a thoughtful and personalized gift for friends and family.
Tips and Tricks for Success
Here are a few extra tips and tricks to help you create the best possible upcycled gift bag art:
* Choose High-Quality Gift Bags: The sturdier the gift bag, the better the final result. Look for bags made from thick paper or cardstock.
* Experiment with Different Textures: Don’t be afraid to mix and match different textures. Use gift bags with different finishes, such as glossy, matte, or textured.
* Use a Brayer: A brayer is a small roller that can be used to smooth out the gift bag pieces and remove air bubbles. This will help to ensure that the pieces adhere properly to the canvas.
* Don’t Be Afraid to Experiment: The best part about this project is that there are no rules! Experiment with different techniques and materials to create something truly unique.
* Let it Dry Completely: Make sure to let each layer of Mod Podge dry completely before moving on to the next step. This will prevent the gift bag pieces from peeling or bubbling.
* Protect Your Work Surface: Mod Podge can be messy, so be sure to protect your work surface with newspaper or a drop cloth.
* Have Fun!: Most importantly, have fun and enjoy the process! This is a great way to relax, get creative, and create something beautiful from something that would otherwise be thrown away.
I hope you enjoyed this tutorial! I can’t wait to see what amazing upcycled gift bag art you create. Happy crafting!
Conclusion
So, there you have it! Transforming humble, discarded gift bags into stunning works of art is not only incredibly satisfying but also a fantastic way to embrace sustainability and add a personal touch to your home decor. This DIY upcycled gift bag art project is a testament to the fact that beauty can be found in the most unexpected places, and that creativity doesn’t have to break the bank.
Why is this a must-try? Because it’s more than just a craft; it’s an experience. It’s about breathing new life into something old, about expressing your unique artistic vision, and about creating a conversation piece that tells a story. Imagine the pride you’ll feel when guests admire your artwork and you can confidently say, “I made that!” It’s a simple project with a huge impact, both on your creative spirit and on the environment.
But don’t stop there! The possibilities for variation are endless. Experiment with different gift bag designs – think bold patterns, subtle textures, or even metallic accents. Consider incorporating other embellishments like pressed flowers, glitter, or even small pieces of fabric to add depth and dimension to your artwork. You could also try different framing options, from simple wooden frames to more elaborate gilded ones, to perfectly complement your existing decor.
For a more modern look, try creating a series of smaller, abstract pieces using a limited color palette. Arrange them in a grid pattern for a gallery-worthy display. Or, if you’re feeling adventurous, try incorporating mixed media elements like paint, stencils, or even decoupage techniques to create truly unique and personalized pieces. Think about adding a layer of resin for a glossy, professional finish that will protect your artwork for years to come.
Don’t be afraid to experiment with different layouts and compositions. Try creating a large-scale piece by combining multiple gift bag panels, or focus on creating smaller, more intricate designs. The key is to let your creativity guide you and to have fun with the process.
This project is also a fantastic way to get the whole family involved. Kids will love helping to select gift bags, cut out shapes, and arrange the pieces. It’s a great opportunity to teach them about recycling, creativity, and the importance of reducing waste. Plus, it’s a fun and engaging activity that will keep them entertained for hours.
We truly believe that anyone can create beautiful and unique artwork using this simple technique. It’s all about embracing your creativity, experimenting with different materials and techniques, and having fun with the process.
So, what are you waiting for? Gather your stash of gift bags, unleash your inner artist, and create something amazing! We can’t wait to see what you come up with. Share your creations with us on social media using #UpcycledGiftBagArt – we’d love to feature your work! Let’s inspire each other to create beautiful and sustainable art that makes a difference. Remember, every piece you create is a unique expression of your creativity and a small step towards a more sustainable future.
Frequently Asked Questions
What kind of gift bags work best for this project?
The beauty of this project is its versatility! You can use virtually any type of gift bag, from glossy paper bags to textured fabric bags. However, some bags will be easier to work with than others. Sturdier paper bags tend to hold their shape better and are less prone to tearing. Bags with interesting patterns, textures, or metallic accents can add visual interest to your artwork. Avoid bags that are heavily creased or damaged, as these may be difficult to flatten and work with. Experiment with different types of bags to see what works best for your desired aesthetic. Remember to consider the thickness of the bag; very thin bags might require a backing for added stability.
How do I flatten the gift bags without damaging them?
Flattening the gift bags is a crucial step in the process. The best way to do this is to carefully unfold the bag along its seams. If the bag is heavily creased, you can use a warm iron (on a low setting) to gently press it flat. Place a piece of parchment paper or a thin cloth between the iron and the bag to protect it from direct heat. Avoid using excessive heat, as this can damage the bag or cause the ink to run. You can also use a rolling pin to flatten the bag, applying even pressure across the surface. For particularly stubborn creases, try lightly misting the bag with water before ironing or rolling.
What kind of adhesive should I use to attach the gift bag pieces to the canvas?
Choosing the right adhesive is essential for ensuring that your artwork lasts. We recommend using a high-quality craft glue or Mod Podge. These adhesives are designed to bond paper to various surfaces and will provide a strong, durable hold. Avoid using hot glue, as it can be too thick and may create unsightly bumps or ridges. When applying the adhesive, use a thin, even layer to prevent the paper from warping or bubbling. You can use a brush, a sponge, or even your fingers to spread the adhesive. Allow the adhesive to dry completely before adding any additional layers or embellishments.
Can I paint or embellish the gift bag pieces before attaching them to the canvas?
Absolutely! Painting or embellishing the gift bag pieces is a great way to add your own personal touch to your artwork. You can use acrylic paints, watercolors, markers, or even colored pencils to add color, texture, or patterns to the paper. Consider using stencils, stamps, or even freehand drawing to create unique designs. You can also add embellishments like glitter, beads, sequins, or pressed flowers to add dimension and sparkle. Just be sure to allow the paint or embellishments to dry completely before attaching the pieces to the canvas.
How do I protect my finished artwork?
Protecting your finished artwork is important for ensuring that it lasts for years to come. We recommend applying a sealant or varnish to the surface of the artwork. This will protect it from dust, moisture, and UV damage. You can use a spray-on sealant or a brush-on varnish, depending on your preference. Be sure to choose a sealant or varnish that is compatible with the materials you used to create your artwork. Apply several thin coats of sealant or varnish, allowing each coat to dry completely before applying the next. You can also frame your artwork behind glass or acrylic to provide additional protection.
What if I don’t have a canvas? What else can I use as a base?
While a canvas provides a sturdy and professional-looking base, you can certainly use other materials. Consider using a piece of sturdy cardboard, a wooden board, or even a large picture frame backing. You can also repurpose an old piece of furniture, such as a tabletop or a cabinet door. Just be sure to prepare the surface properly before attaching the gift bag pieces. Sand down any rough edges or surfaces and apply a primer to ensure that the adhesive bonds properly.
How can I make this project more sustainable?
Making this project even more sustainable is easy! In addition to upcycling gift bags, you can also use recycled or repurposed materials for the base and the frame. Look for used canvases at thrift stores or garage sales, or create your own canvas using recycled cardboard. You can also use reclaimed wood to build a custom frame. When choosing adhesives and sealants, opt for eco-friendly options that are low in VOCs (volatile organic compounds). And, of course, be sure to recycle any leftover materials or scraps.
What are some other variations I can try?
The possibilities for variation are truly endless! Try creating a mosaic-style artwork by cutting the gift bag pieces into small, irregular shapes and arranging them in a random pattern. You can also create a collage by layering different gift bag pieces on top of each other. Experiment with different textures by crumpling, folding, or tearing the paper before attaching it to the canvas. Consider adding three-dimensional elements to your artwork by incorporating found objects like buttons, shells, or twigs. You can also try creating a mixed media piece by combining the gift bag pieces with paint, ink, or other art materials. The key is to let your imagination run wild and to have fun with the process!
Leave a Comment