

DIY Sink Cleaner Recipe: Are you tired of stubborn clogs and unpleasant odors emanating from your kitchen or bathroom sink? I know I am! Store-bought drain cleaners can be harsh, expensive, and frankly, a bit scary to use. But fear not, because I’m about to share a simple, effective, and eco-friendly DIY sink cleaner recipe that will have your drains sparkling and smelling fresh in no time!
For generations, resourceful homeowners have relied on homemade remedies to tackle household chores. Think about it – our grandmothers didn’t have access to the plethora of chemical-laden products we see on shelves today. They used readily available ingredients like baking soda and vinegar to keep their homes clean and functional. This tradition of resourcefulness is not only cost-effective but also a sustainable way to care for our environment.
Why is this DIY trick so essential? Well, clogged sinks are more than just an inconvenience. They can lead to standing water, attract pests, and even damage your plumbing over time. Instead of reaching for a potentially harmful chemical drain cleaner, this DIY sink cleaner recipe offers a safer and gentler alternative. Plus, you probably already have all the ingredients you need in your pantry! So, let’s dive in and learn how to create this amazing solution that will save you money and keep your drains flowing freely.
DIY Sink Cleaner: Banish Clogs and Odors Naturally!
Hey there, fellow DIY enthusiasts! Are you tired of battling stubborn sink clogs and lingering odors with harsh chemicals? I know I was! That’s why I’m so excited to share my go-to, all-natural DIY sink cleaner recipe that’s not only effective but also gentle on the environment and your plumbing. This method is a game-changer, and I promise you’ll love how easy and affordable it is. Let’s get started!
What You’ll Need: The Essential Ingredients
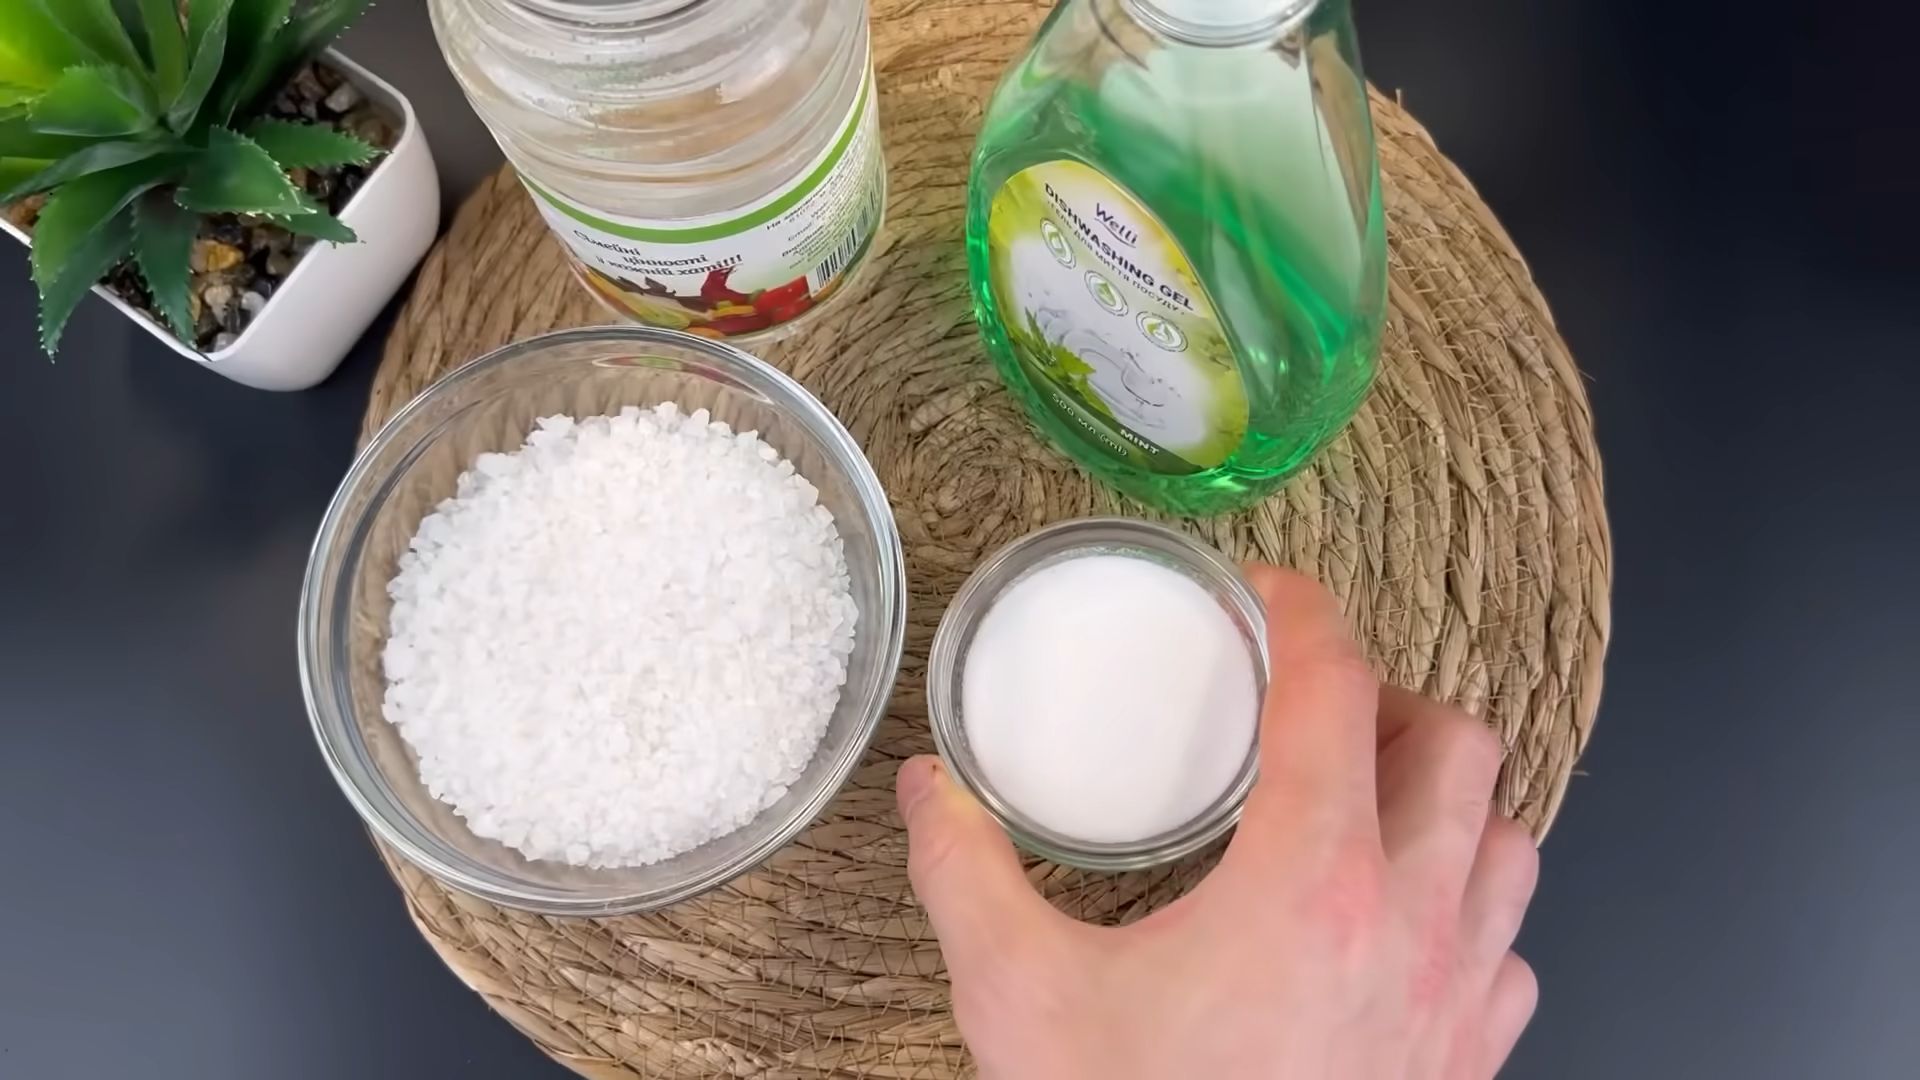
Before we dive into the cleaning process, let’s gather our supplies. The beauty of this recipe is that you probably already have most of these ingredients in your pantry!
* Baking Soda: This is our workhorse! Baking soda is a mild alkali that helps to neutralize acids and break down grease and grime.
* White Vinegar: The acidic counterpart to baking soda, vinegar reacts with it to create a fizzing action that helps to dislodge debris.
* Boiling Water: This helps to flush away loosened debris and further break down grease.
* Dish Soap (Optional): A small amount of dish soap can help to cut through grease and add extra cleaning power. I prefer using a natural, biodegradable option.
* Essential Oils (Optional): For a fresh, clean scent, add a few drops of your favorite essential oils, like lemon, tea tree, or eucalyptus.
* Plunger (Just in Case): Sometimes, even the best DIY cleaner needs a little help. Keep a plunger handy for stubborn clogs.
* Rubber Gloves: Protect your hands from potential irritation.
* Measuring Cups and Spoons: For accurate measurements.
* Kettle or Pot: To boil water.
Step-by-Step Guide: Unclogging and Freshening Your Sink
Here’s the breakdown of how to use this amazing DIY sink cleaner. I’ve made it super easy to follow!
1. Clear the Area: Remove any dishes, sponges, or other items from the sink and surrounding area. This will give you plenty of room to work.
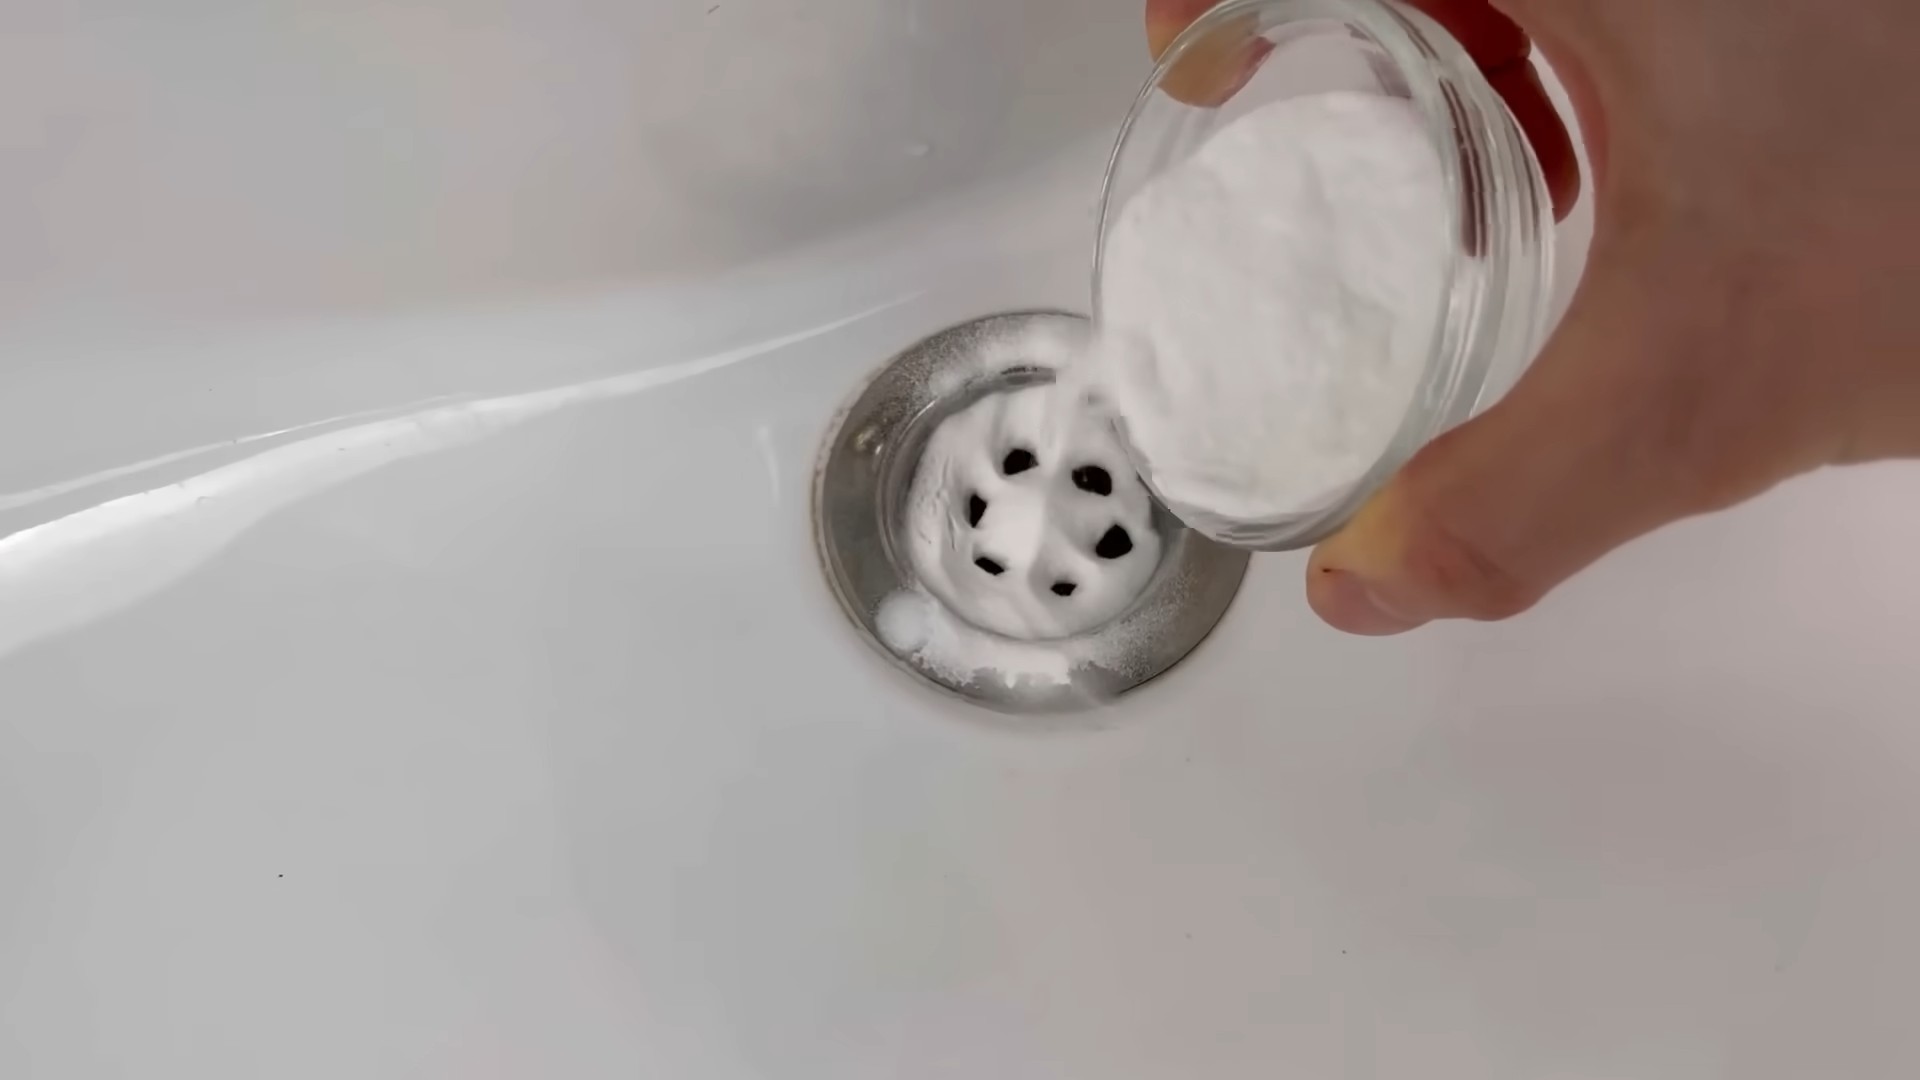
2. Pour in the Baking Soda: Measure out about 1 cup of baking soda and carefully pour it down the drain. Try to get as much of it into the drain opening as possible.
3. Add the Vinegar: Next, pour 1 cup of white vinegar down the drain on top of the baking soda. You’ll immediately notice a fizzing reaction. This is exactly what we want!
4. Let it Fizz: Allow the baking soda and vinegar mixture to fizz and bubble for at least 30 minutes. This gives it time to work its magic, breaking down grease and dislodging debris. For really stubborn clogs, you can let it sit for even longer – up to a few hours or even overnight.
5. Flush with Boiling Water: After the fizzing has subsided, carefully pour a kettle or pot of boiling water down the drain. The hot water will help to flush away the loosened debris and further break down any remaining grease. Be careful when handling boiling water to avoid burns.
6. Repeat if Necessary: If the sink is still draining slowly or if you notice any lingering odors, repeat steps 2-5. Sometimes, it takes a couple of treatments to completely clear a stubborn clog.
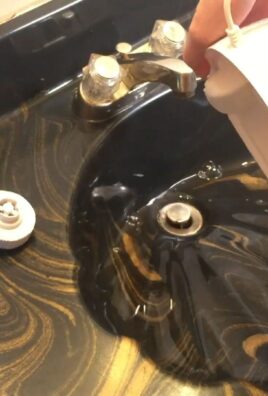
7. Add Dish Soap (Optional): If you want to add extra cleaning power, squirt a small amount of dish soap down the drain after flushing with boiling water. Let it sit for a few minutes, then flush again with hot water.
8. Add Essential Oils (Optional): For a fresh, clean scent, add a few drops of your favorite essential oils down the drain after flushing with hot water. Lemon, tea tree, and eucalyptus are all great choices for their antibacterial and deodorizing properties.
9. Test the Drain: Run the water to see if the sink is draining properly. If it’s still draining slowly, you may need to use a plunger.
10. Plunge if Needed: If the sink is still clogged after trying the baking soda and vinegar method, use a plunger to try to dislodge the clog. Make sure there’s enough water in the sink to cover the cup of the plunger. Create a tight seal around the drain opening and plunge vigorously up and down for several minutes.
11. Final Flush: After plunging, flush the drain with hot water to clear any remaining debris.
Troubleshooting: When Things Don’t Go as Planned
Even with the best intentions, sometimes clogs can be particularly stubborn. Here are a few troubleshooting tips to help you tackle those tough situations:
* Persistent Clogs: If the baking soda and vinegar method doesn’t work after a couple of tries, the clog may be too far down the drain or too large to be dislodged by this method alone. In this case, you may need to use a drain snake or call a plumber.
* Slow Draining: If the sink is draining slowly but not completely clogged, try using a drain snake to remove any hair or debris that may be partially blocking the drain.
* Lingering Odors: If you’re still noticing odors after cleaning the drain, try pouring a cup of baking soda down the drain and letting it sit overnight. Then, flush with hot water in the morning. You can also try using a drain cleaner that contains enzymes to break down organic matter.
* Preventative Measures: To prevent future clogs, avoid pouring grease, oil, or food scraps down the drain. Use a drain strainer to catch hair and debris. And, flush the drain with hot water regularly to keep it clear.
Boosting the Cleaning Power: Advanced Techniques
Want to take your DIY sink cleaning to the next level? Here are a few advanced techniques that I’ve found helpful:
* Baking Soda Paste for Stubborn Stains: For stubborn stains on the sink basin, make a paste of baking soda and water. Apply the paste to the stain, let it sit for a few minutes, and then scrub with a sponge or cloth.
* Lemon Juice for Hard Water Stains: Lemon juice is a natural acid that can help to dissolve hard water stains. Cut a lemon in half and rub it over the stains. Let it sit for a few minutes, then rinse with water.
* Borax for Extra Cleaning Power: Borax is a natural mineral that can help to boost the cleaning power of your DIY sink cleaner. Add a tablespoon of borax to the baking soda and vinegar mixture for extra cleaning power. *Be careful when using borax, as it can be irritating to the skin and eyes. Wear gloves and avoid contact with your skin and eyes.*
* Enzyme Drain Cleaners for Organic Matter: Enzyme drain cleaners contain enzymes that break down organic matter, such as hair, grease, and food scraps. These cleaners are a good option for preventing clogs and keeping your drain clean.
Safety First: Important Precautions
While this DIY sink cleaner is much safer than harsh chemical cleaners, it’s still important to take a few precautions:
* Wear Gloves: Protect your hands from potential irritation by wearing rubber gloves.
* Avoid Contact with Eyes: Avoid getting baking soda, vinegar, or other ingredients in your eyes. If contact occurs, rinse thoroughly with water.
* Be Careful with Boiling Water: Use caution when handling boiling water to avoid burns.
* Ventilation: Ensure adequate ventilation when using vinegar, as it can have a strong odor.
* Keep Out of Reach of Children and Pets: Store all ingredients out of reach of children and pets.
Why This Works: The Science Behind the Fizz
The magic of this DIY sink cleaner lies in the chemical reaction between baking soda (sodium bicarbonate) and vinegar (acetic acid). When these two substances combine, they create carbon dioxide gas, which is what causes the fizzing. This fizzing action helps to loosen and dislodge debris from the drain walls. The baking soda also acts as a mild abrasive, helping to scrub away grime. The boiling water then helps to flush away the loosened debris and further break down grease. It’s a simple yet effective combination that’s been used for generations!
Beyond the Sink: Other Uses for Baking Soda and Vinegar
The cleaning power of baking soda and vinegar extends far beyond the sink! Here are a few other ways you can use these versatile ingredients around your home:
* Cleaning the Oven: Make a paste of baking soda and water and spread it all over the inside of your oven. Let it sit overnight, then scrub with a sponge and rinse with water.
* Cleaning the Microwave: Place a bowl of water and vinegar in the microwave and heat for a few minutes. The steam will loosen food splatters, making them easy to wipe away.
* Cleaning the Toilet: Pour a cup of baking soda and a cup of vinegar into the toilet bowl. Let it fizz for a few minutes, then scrub with a toilet brush and flush.
* Deodorizing the Refrigerator: Place an open box of baking soda in the
Conclusion
So, there you have it! This simple, yet incredibly effective, DIY sink cleaner recipe is a game-changer for anyone tired of battling stubborn grime and unpleasant odors in their kitchen or bathroom. Forget those harsh, chemical-laden commercial cleaners that can irritate your skin and pollute your home. This homemade solution harnesses the power of readily available, eco-friendly ingredients to deliver sparkling results without the toxic baggage.
Why is this DIY trick a must-try? Because it’s not just about cleaning; it’s about creating a healthier, more sustainable home environment. You’re reducing your reliance on plastic packaging, minimizing your exposure to harmful chemicals, and saving money in the process. It’s a win-win-win!
The beauty of this DIY sink cleaner lies in its versatility. While the basic recipe of baking soda, vinegar, and hot water is a powerhouse on its own, feel free to experiment with variations to suit your specific needs and preferences. For a boost of freshness, add a few drops of your favorite essential oil, such as lemon, tea tree, or eucalyptus. Lemon essential oil, in particular, is known for its degreasing properties and uplifting scent. Tea tree oil offers antibacterial benefits, while eucalyptus can help clear stuffy sinuses.
If you’re dealing with a particularly stubborn clog, you can increase the amount of baking soda and vinegar used. Let the mixture fizz for a longer period before flushing with hot water. For sinks with garbage disposals, this DIY sink cleaner is especially beneficial, helping to break down food particles and eliminate lingering odors. Just be sure to run the disposal with plenty of water after the cleaning process.
Another variation involves using washing soda (sodium carbonate) instead of baking soda (sodium bicarbonate). Washing soda is a stronger alkali and can be more effective at cutting through grease and grime. However, it’s important to wear gloves when handling washing soda, as it can be irritating to the skin.
We’re confident that once you try this DIY sink cleaner, you’ll be amazed by its effectiveness and simplicity. It’s a quick, easy, and affordable way to keep your sinks sparkling clean and smelling fresh.
Don’t just take our word for it – give it a try! We encourage you to experiment with different variations and find what works best for your sinks. And most importantly, we want to hear about your experience! Share your results, tips, and modifications in the comments below. Let’s build a community of DIY enthusiasts who are passionate about creating healthier, more sustainable homes. Your feedback will not only help others discover the benefits of this DIY sink cleaner but also inspire us to continue sharing valuable tips and tricks. So, grab your baking soda, vinegar, and essential oils, and get ready to transform your sinks!
Frequently Asked Questions (FAQ)
What exactly makes this DIY sink cleaner so effective?
The effectiveness of this DIY sink cleaner stems from the chemical reaction between baking soda (a mild alkali) and vinegar (a mild acid). When combined, they create carbon dioxide gas, which produces a fizzing action that helps to loosen and dislodge grime, grease, and other debris from the sink drain and surfaces. The hot water then helps to flush away the loosened particles, leaving your sink clean and fresh. Furthermore, the baking soda acts as a gentle abrasive, scrubbing away stubborn stains without scratching the sink’s surface.
Can I use this DIY sink cleaner on all types of sinks?
This DIY sink cleaner is generally safe for most types of sinks, including stainless steel, porcelain, and ceramic. However, it’s always a good idea to test it in an inconspicuous area first, especially if you have a more delicate or antique sink. Avoid using it on sinks made of natural stone, such as marble or granite, as the vinegar can etch the surface over time. For these types of sinks, a milder cleaner made with baking soda and dish soap is a better option.
How often should I use this DIY sink cleaner?
The frequency of use depends on how often you use your sink and how prone it is to clogs and odors. As a general guideline, using this DIY sink cleaner once or twice a week is usually sufficient to keep your sink clean and fresh. If you notice a buildup of grime or a lingering odor, you can use it more frequently. Regular use can also help prevent clogs from forming in the first place.
What if I don’t have vinegar? Can I use something else?
While vinegar is the most commonly used acid in this DIY sink cleaner recipe, you can substitute it with lemon juice. Lemon juice contains citric acid, which has similar cleaning and deodorizing properties. However, vinegar is generally more effective at dissolving mineral deposits and soap scum. If you don’t have either vinegar or lemon juice, you can try using a small amount of dish soap instead, but it won’t be as effective at creating the fizzing action that helps to dislodge debris.
My sink is severely clogged. Will this DIY sink cleaner work?
This DIY sink cleaner is most effective for preventing clogs and clearing minor blockages. If your sink is severely clogged, it may not be strong enough to completely clear the blockage. In this case, you can try using a plunger first to see if you can dislodge the clog manually. If that doesn’t work, you may need to use a drain snake or call a professional plumber. However, even with a severe clog, using this DIY sink cleaner as a follow-up treatment can help to break down any remaining debris and prevent future clogs.
Can I use this DIY sink cleaner in my toilet?
While the ingredients in this DIY sink cleaner are generally safe for use in toilets, it’s not the most effective solution for toilet cleaning. Toilets require a stronger cleaner to remove stains and disinfect the bowl. There are other DIY toilet cleaner recipes that are specifically formulated for this purpose.
Is it safe to use this DIY sink cleaner if I have a septic system?
Yes, this DIY sink cleaner is generally safe to use if you have a septic system. The ingredients are biodegradable and won’t harm the beneficial bacteria in your septic tank. However, it’s important to use it in moderation and avoid pouring large amounts of baking soda or vinegar down the drain at once, as this could potentially disrupt the balance of your septic system.
Can I store the leftover DIY sink cleaner for later use?
It’s best to use the DIY sink cleaner immediately after mixing the ingredients, as the fizzing action is most effective when the mixture is fresh. Storing the mixture will cause the carbon dioxide gas to dissipate, reducing its cleaning power. However, you can pre-mix the baking soda and essential oils (if using) in a jar and store it for later use. Then, simply add the vinegar and hot water when you’re ready to clean your sink.
What are some other ways to keep my sink clean and prevent clogs?
In addition to using this DIY sink cleaner, there are several other things you can do to keep your sink clean and prevent clogs. Avoid pouring grease or oil down the drain, as this can solidify and cause blockages. Use a sink strainer to catch food particles and other debris. Regularly flush your drain with hot water to prevent buildup. And consider using a garbage disposal cleaner to keep your garbage disposal running smoothly.


Leave a Comment