

DIY Rope Basket with Handles: Ever feel like your home could use a touch of rustic charm and a whole lot more organization? I know I do! That’s why I’m so excited to share this fantastic DIY project with you – creating your very own rope basket with handles.
Basket weaving, in general, has a rich history, dating back thousands of years across various cultures. From carrying food to storing precious belongings, baskets have always been essential tools. While we might not be foraging for berries these days, the need for stylish and functional storage is definitely still relevant! This project takes that ancient craft and gives it a modern, personalized twist.
Let’s be honest, store-bought baskets can be expensive and often lack that unique, handmade feel. Plus, who doesn’t love the satisfaction of creating something beautiful and useful with their own two hands? This DIY rope basket with handles is not only a budget-friendly alternative, but it also allows you to customize the size, shape, and color to perfectly match your home décor. Imagine corralling your blankets, organizing your kids’ toys, or even using it as a stylish planter – the possibilities are endless! So, grab your rope and let’s get crafting! I promise, this is one DIY project you’ll absolutely love.
DIY Rope Basket with Handles: A Step-by-Step Guide
Hey there, fellow crafters! I’m so excited to share this super fun and surprisingly easy DIY project with you: a rope basket with handles! These baskets are not only incredibly stylish, adding a touch of rustic charm to any room, but they’re also incredibly practical for storage. Think blankets, toys, laundry, plants – the possibilities are endless! Plus, making it yourself means you can customize the size, shape, and even the rope color to perfectly match your décor. Let’s get started!
Materials You’ll Need
Before we dive in, let’s gather our supplies. Here’s what you’ll need:
* Rope: This is the star of the show! I recommend using cotton rope, as it’s soft, easy to work with, and comes in a variety of thicknesses. The amount you’ll need depends on the size of your basket, but I’d suggest starting with at least 100 feet. You can always buy more if needed. I used ½ inch cotton rope for a sturdy, medium-sized basket.
* Hot Glue Gun and Glue Sticks: A good quality hot glue gun is essential for this project. Make sure you have plenty of glue sticks on hand, as you’ll be using quite a bit.
* Scissors or Utility Knife: For cutting the rope.
* Measuring Tape or Ruler: To ensure your basket is the size you want.
* Bowl or Circular Object (Optional): This will help you create a perfect circular base. A mixing bowl, a plate, or even a small bucket will work.
* Leather Scraps or Thick Fabric (for handles): You can repurpose old belts, jackets, or even heavy-duty canvas.
* Awl or Leather Punch (for handles): To create holes for attaching the handles.
* Rivets or Chicago Screws (for handles): To securely attach the handles to the basket.
* Hammer (for rivets): If you’re using rivets.
* Pencil or Marker: For marking measurements.
* Clamps (Optional): These can be helpful for holding the rope in place while the glue dries, especially when starting the base.
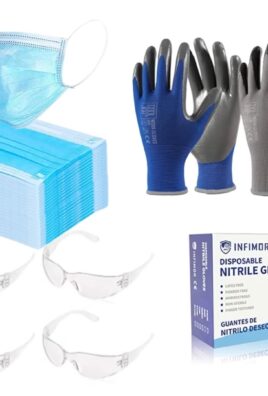
* Gloves (Optional): To protect your fingers from the hot glue.
Creating the Base
This is where the magic begins! We’ll start by creating the foundation of our basket – the base.
1. Form the Center Coil: Take the end of your rope and create a tight coil, about 1-2 inches in diameter. Apply a generous amount of hot glue to the inside of the coil, pressing the rope firmly together. Hold it in place for a few seconds until the glue sets. This is the very center of your basket, so make sure it’s secure.
2. Continue Coiling and Gluing: Now, start wrapping the rope around the center coil, applying hot glue to the side of the existing coil as you go. Press the new rope firmly against the previous coil, ensuring a strong bond. Work slowly and methodically, adding glue in small sections and holding the rope in place until it sets.
3. Use a Bowl as a Guide (Optional): If you want a perfectly round base, place your growing coil inside a bowl or circular object. This will help you maintain a consistent shape as you continue coiling and gluing.
4. Maintain a Flat Surface: As you coil, make sure the base remains flat. If it starts to buckle or warp, gently press it down and apply more glue to the areas that are lifting.
5. Determine the Base Size: Continue coiling and gluing until your base reaches the desired diameter. I made mine about 8 inches across, but you can adjust this to suit your needs. Remember, the larger the base, the larger the overall basket.
6. Secure the End: Once you’ve reached the desired size, carefully cut the rope at an angle to create a smooth transition. Apply a generous amount of hot glue to the end of the rope and press it firmly against the last coil, ensuring it’s securely attached.
Building the Walls
Now that we have a solid base, it’s time to start building the walls of our basket. This is where the basket starts to take shape!
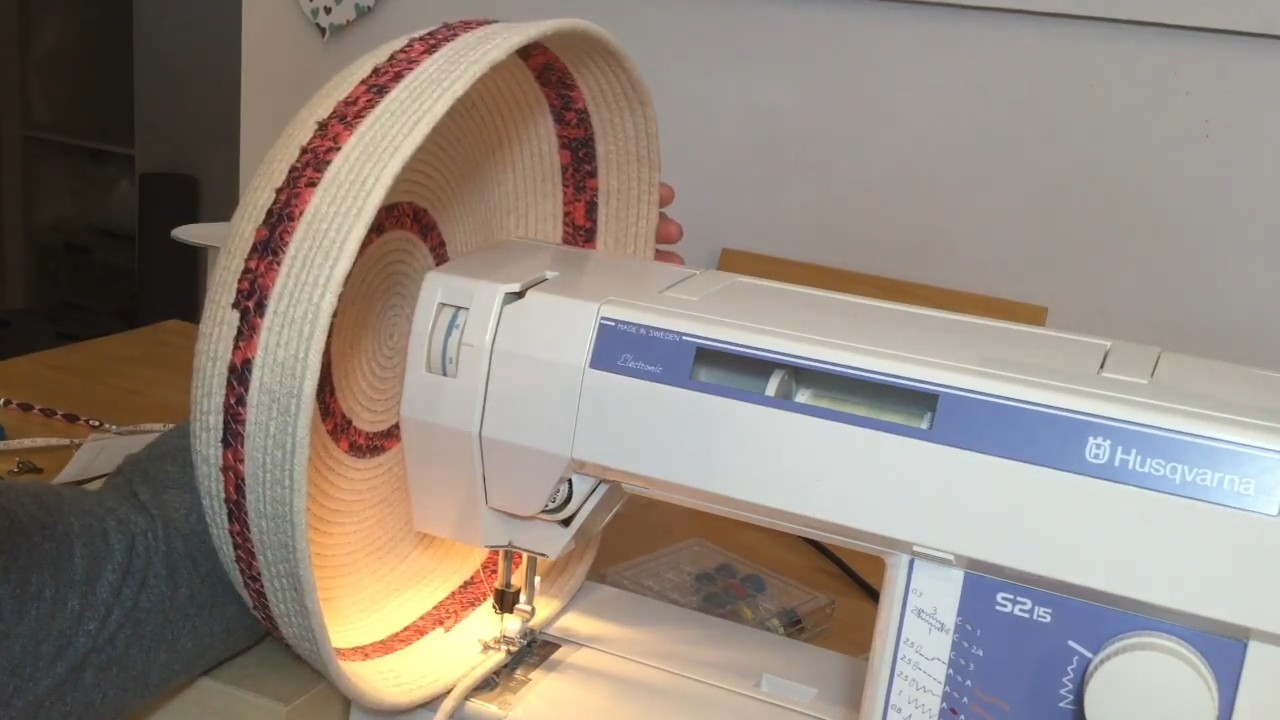
1. Transition to Upward Coiling: Instead of continuing to coil flat, start angling the rope upwards as you glue it to the edge of the base. This will create the walls of the basket.
2. Maintain Consistent Angle: Try to maintain a consistent angle as you coil upwards. This will ensure that your basket has even walls. You can adjust the angle slightly to create a more tapered or flared shape, depending on your preference.
3. Continue Coiling and Gluing: Just like with the base, continue coiling and gluing the rope, working your way upwards. Apply hot glue to the side of the previous row and press the new rope firmly against it.
4. Check for Stability: As you build the walls, periodically check for stability. If the walls start to wobble or lean, apply more glue to the areas that need support. You can also use clamps to hold the rope in place while the glue dries.
5. Create a Pattern (Optional): Get creative! You can introduce different colors of rope or create patterns by alternating the way you glue the rope. For example, you could glue the rope on the inside of the previous row for a slightly different texture.
6. Reach Desired Height: Continue coiling and gluing until your basket reaches the desired height. I made mine about 10 inches tall, but you can adjust this to suit your needs.
7. Finishing the Top Edge: When you reach the desired height, carefully cut the rope at an angle to create a smooth transition. Apply a generous amount of hot glue to the end of the rope and press it firmly against the last row, ensuring it’s securely attached. You can also fold the end of the rope inwards for a cleaner finish.
Adding the Handles
No basket is complete without handles! These will make it much easier to carry and move your basket around.
1. Prepare the Leather (or Fabric) Strips: Cut two strips of leather or thick fabric to the desired length and width for your handles. I made mine about 6 inches long and 1 inch wide.
2. Punch Holes for Attachment: Use an awl or leather punch to create two holes at each end of the leather strips. These holes will be used to attach the handles to the basket.
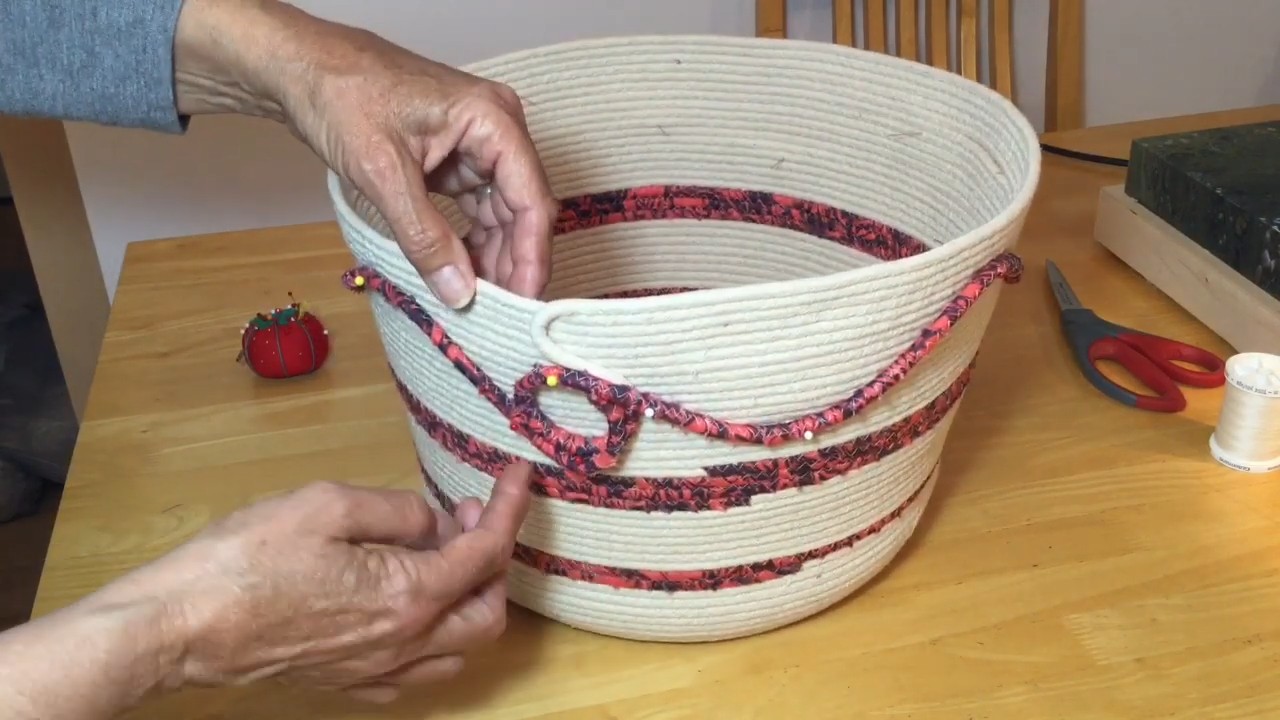
3. Position the Handles: Decide where you want to position the handles on the basket. I placed mine on opposite sides, about halfway down from the top edge.
4. Attach the Handles with Rivets or Chicago Screws: Insert the rivets or Chicago screws through the holes in the leather strips and the rope of the basket. If you’re using rivets, use a hammer to set them securely. If you’re using Chicago screws, tighten them with a screwdriver.
5. Ensure Secure Attachment: Make sure the handles are securely attached to the basket. You don’t want them to come loose when you’re carrying a heavy load.
Final Touches
Almost there! Now for the final touches to make your basket truly shine.
1. Inspect for Loose Ends: Carefully inspect the entire basket for any loose ends of rope or glue. Trim any excess rope with scissors or a utility knife.
2. Reinforce Weak Spots: If you notice any weak spots or areas where the glue is not holding well, apply more hot glue to reinforce them.
3. Clean Up Excess Glue: Remove any excess glue that may be visible on the surface of the basket. You can use a craft knife or your fingers to gently peel it away.
4. Add Embellishments (Optional): Get creative! You can add embellishments to your basket to personalize it. Consider adding tassels, beads, fabric scraps, or even paint.
5. Enjoy Your New Basket! That’s it! You’ve successfully created your own DIY rope basket with handles. Now you can fill it with your favorite items and enjoy its beauty and functionality.
Tips and Tricks for Success
Here are a few extra tips and tricks to help you create the perfect rope basket:
* Use a High-Temperature Glue Gun: A high-temperature glue gun will provide a stronger bond than a low-temperature one.
* Work in Small Sections: Apply glue in small sections and hold the rope in place until it sets. This will prevent the glue from cooling down too quickly and ensure a strong bond.
* Protect Your Fingers: Hot glue can be very hot! Wear gloves to protect your fingers from burns.
* Experiment with Different Rope Colors and Textures: Don’t be afraid to experiment with different types of rope to create unique and interesting baskets.
* Practice Makes Perfect: If this is your first time making a rope basket, don’t be discouraged if it’s not perfect
Conclusion
So, there you have it! Transforming humble rope into a stylish and functional basket with handles is not only achievable but surprisingly rewarding. We’ve walked you through the steps, highlighting the key techniques and offering tips to ensure your success. But why should you dedicate your time to this DIY project?
Firstly, creating your own DIY rope basket with handles allows for unparalleled customization. Tired of generic storage solutions that clash with your décor? This project empowers you to choose the exact rope thickness, color, and handle style to perfectly complement your home. Imagine a chunky, natural rope basket adding rustic charm to your living room, or a sleek, dyed rope basket organizing your bathroom essentials with a modern flair. The possibilities are truly endless.
Secondly, this project is incredibly budget-friendly. Compared to purchasing a similar basket from a retail store, you’ll save a significant amount of money by crafting it yourself. Rope is readily available at most craft stores or online retailers, and the other necessary materials are likely already in your crafting arsenal. Think of all the other creative endeavors you can fund with the savings!
Thirdly, the satisfaction of creating something beautiful and functional with your own two hands is immeasurable. There’s a unique sense of pride that comes from knowing you transformed raw materials into a piece that enhances your home. Plus, it’s a fantastic way to de-stress and unleash your inner artist.
But don’t stop there! Feel free to experiment with variations to truly make your basket unique. Consider adding embellishments like leather tags, tassels, or painted accents. Play with different weaving patterns to create textured designs. For a sturdier base, you could incorporate a wooden or cardboard circle. If you’re feeling adventurous, try using different types of rope, such as jute, cotton, or even recycled fabric strips. You can also experiment with different handle styles – leather straps, wooden dowels, or even repurposed belts can add a unique touch. Think about the size and shape you need – a small basket for holding keys by the door, a medium-sized basket for storing blankets, or a large basket for laundry.
This DIY rope basket with handles project is more than just a craft; it’s an opportunity to express your creativity, enhance your home, and save money. It’s a chance to slow down, focus on the present moment, and create something truly special.
We wholeheartedly encourage you to give this DIY trick a try. Don’t be intimidated if you’re a beginner – the steps are straightforward, and the results are well worth the effort. And most importantly, we want to hear about your experience! Share your creations with us on social media using #DIYRopeBasket and tag us so we can admire your handiwork. We can’t wait to see the unique and beautiful baskets you create! Let your imagination run wild and transform ordinary rope into extraordinary storage solutions. Happy crafting!
Frequently Asked Questions
What kind of rope is best for making a rope basket?
The best type of rope for a DIY rope basket depends on the look and feel you’re going for. Cotton rope is a popular choice because it’s soft, easy to work with, and comes in a variety of colors. Jute rope offers a more rustic and natural aesthetic, but it can be a bit rougher on the hands. Synthetic ropes like nylon or polypropylene are durable and water-resistant, making them suitable for baskets that will be used in damp environments. Consider the thickness of the rope as well – thicker rope will create a sturdier and more substantial basket. Ultimately, the best rope is the one that you enjoy working with and that achieves the desired look for your project.
How do I prevent the rope basket from unraveling?
Preventing your rope basket from unraveling is crucial for its longevity. The most important step is to securely glue or sew the end of the rope at the beginning and end of the project. For gluing, use a strong adhesive like hot glue or fabric glue. Apply a generous amount to the end of the rope and press it firmly against the adjacent coil. For sewing, use a sturdy needle and thread to stitch the end of the rope securely to the coil. You can also reinforce the seams between the coils by adding extra stitches or glue along the way. Another tip is to work tightly and consistently as you coil the rope, ensuring that each coil is snug against the previous one. Finally, consider adding a protective coating to the finished basket, such as a sealant or varnish, to further prevent unraveling and protect the rope from wear and tear.
How do I make the handles sturdy enough to hold weight?
The sturdiness of your rope basket handles depends on the materials and techniques you use. If you’re using rope for the handles, choose a thicker rope that can withstand the weight you intend to carry. Reinforce the attachment points of the handles to the basket by using multiple layers of glue or stitching. For added strength, you can incorporate metal rings or grommets at the attachment points. Leather straps are another excellent option for handles, as they are durable and can be easily attached with rivets or stitching. Wooden dowels can also be used for handles, providing a sturdy and comfortable grip. When attaching the handles, make sure to distribute the weight evenly across the basket to prevent any weak points from breaking. Test the handles with a gradually increasing amount of weight to ensure they can handle the intended load.
Can I dye the rope before making the basket?
Absolutely! Dyeing the rope before you start crafting your basket is a fantastic way to customize the color and create a truly unique piece. Natural fiber ropes like cotton or jute are the easiest to dye. You can use fabric dye, natural dyes (like coffee or tea), or even tie-dye techniques to achieve different effects. Follow the instructions on your chosen dye carefully, and be sure to wear gloves and protect your work surface. After dyeing, thoroughly rinse the rope to remove any excess dye and allow it to dry completely before you begin making your basket. This will prevent the dye from bleeding onto your hands or other surfaces. Dyeing the rope beforehand allows for a consistent color throughout the basket, creating a professional and polished look.
How do I clean my rope basket?
Cleaning your rope basket depends on the type of rope and any embellishments you’ve added. For cotton or jute rope baskets, you can often spot clean them with a damp cloth and mild soap. Avoid soaking the entire basket in water, as this can cause it to lose its shape or unravel. For more stubborn stains, you can try using a soft brush to gently scrub the affected area. If your basket is heavily soiled, you may be able to hand wash it in a tub of cool water with mild detergent. Rinse thoroughly and allow it to air dry completely, reshaping it as needed. For baskets made with synthetic ropes, you can usually wipe them down with a damp cloth or hose them off with water. If your basket has leather handles or embellishments, be sure to protect them from water and use a leather cleaner if necessary. Regular dusting and vacuuming can also help to keep your rope basket clean and prevent dirt from building up.

Leave a Comment