

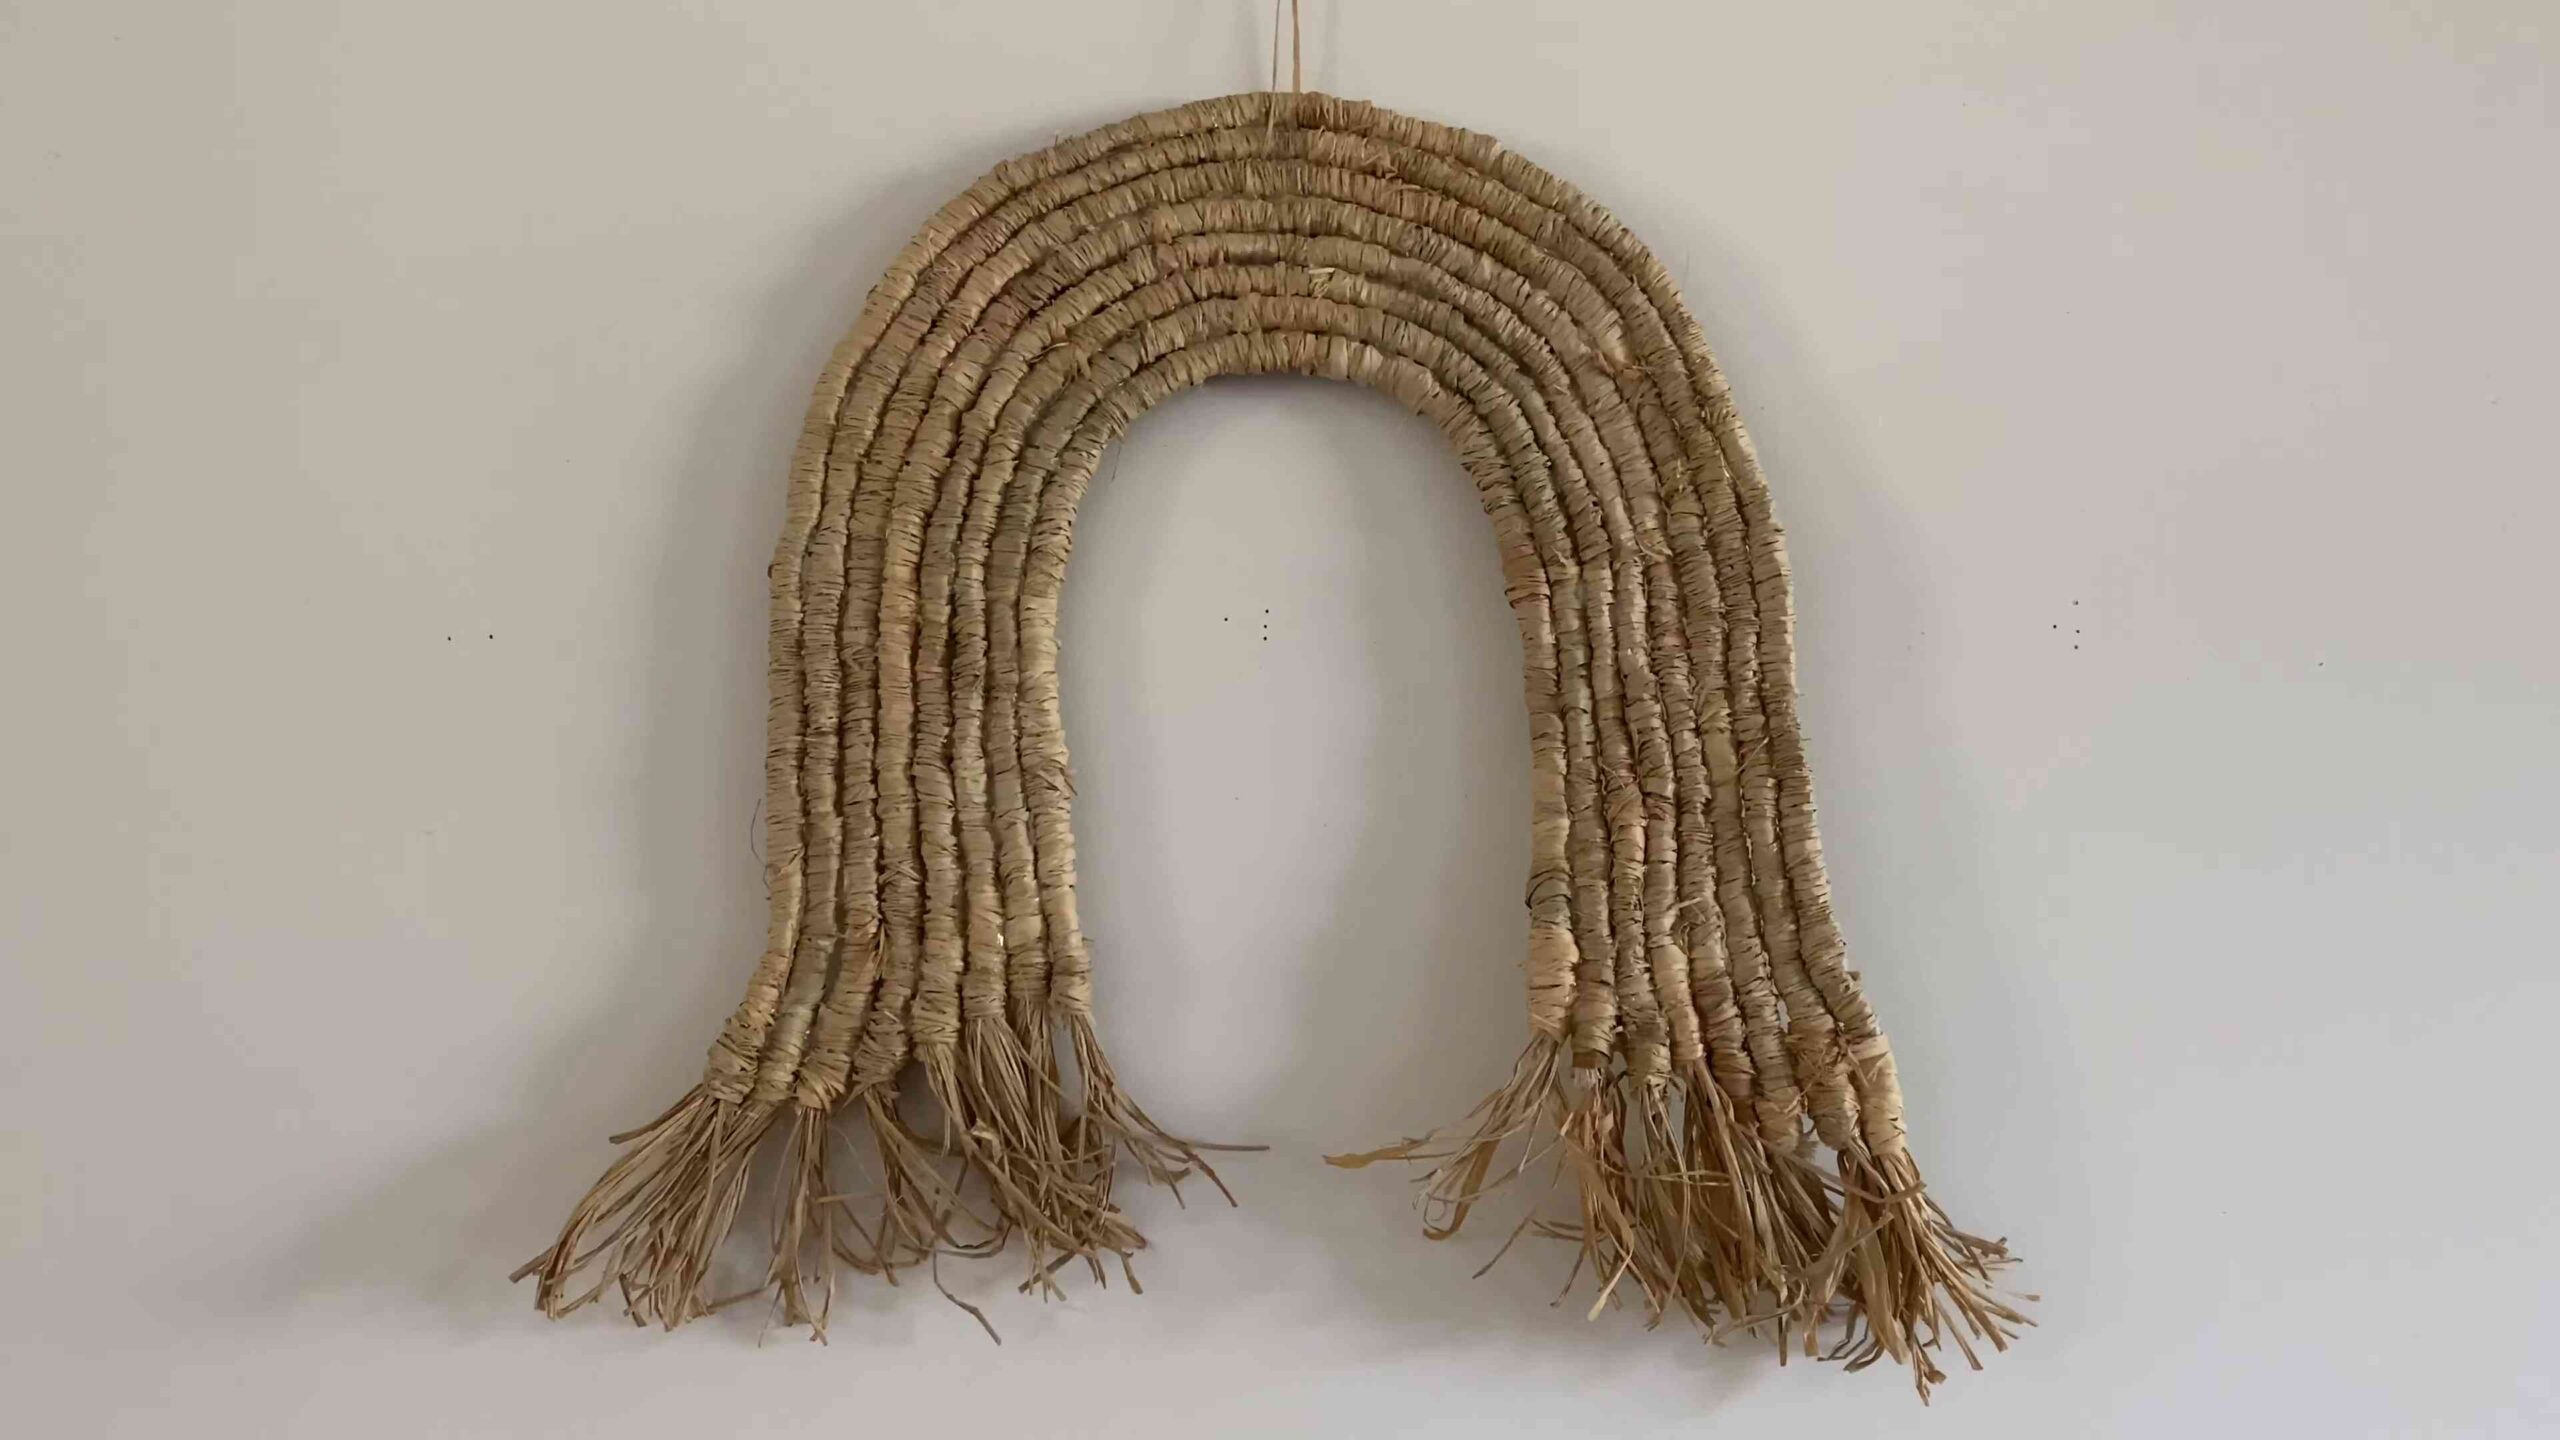
DIY Raffia Wall Hanging: Transform your living space with a touch of bohemian charm! Have you ever looked at those stunning, textured wall hangings in home decor magazines and thought, “I wish I could make that”? Well, guess what? You absolutely can! This DIY project is easier than you think, and the results are breathtaking.
The art of weaving and knotting natural fibers like raffia has a rich history, dating back centuries across various cultures. From practical uses like basketry and textiles to decorative applications, these techniques have been passed down through generations. In many cultures, raffia itself symbolizes prosperity and good fortune, making a DIY Raffia Wall Hanging not just a decorative piece, but also a meaningful addition to your home.
In today’s fast-paced world, creating something beautiful with your own hands can be incredibly therapeutic and rewarding. This DIY project offers a chance to disconnect from screens, unleash your creativity, and add a personal touch to your living space. Plus, it’s a fantastic way to save money compared to buying expensive, store-bought wall art. I’m excited to guide you through the process, step-by-step, so you can create a stunning raffia wall hanging that reflects your unique style and personality. Let’s get started!
DIY Raffia Wall Hanging: A Step-by-Step Guide to Bohemian Bliss
Hey there, fellow crafters! I’m so excited to share this super fun and surprisingly easy DIY project with you: a gorgeous raffia wall hanging. It’s the perfect way to add a touch of bohemian charm and natural texture to any room. Trust me, even if you’re a beginner, you can totally nail this! Let’s get started!
What You’ll Need:
* Raffia (lots of it! I recommend getting a few bundles in your desired colors. Natural raffia is always a good base.)
* A wooden dowel rod (the length depends on how wide you want your hanging to be)
* Scissors
* A ruler or measuring tape
* Yarn or twine (for hanging)
* Optional: Beads, feathers, or other embellishments to personalize your piece.
* Optional: A comb or brush to neaten the raffia.
* Optional: Fabric stiffener spray to help the raffia hold its shape.
Preparing Your Materials
Before we dive into the knotting, let’s get everything prepped and ready. This will make the whole process smoother and more enjoyable.
1. Cut the Raffia: This is probably the most time-consuming part, but it’s crucial for a consistent look. Decide on the length you want your raffia strands to be. Remember, the length you cut will be doubled when you attach it to the dowel. For example, if you want your hanging to be 18 inches long, cut your raffia strands to 36 inches. I like to use a piece of cardboard as a guide. Wrap the raffia around the cardboard, then cut along one edge to create a bunch of strands of the same length. Repeat this until you have a good pile of raffia. I usually cut a few hundred strands to start, and then cut more as needed. It’s better to have too much than not enough!
2. Prepare the Dowel Rod: Make sure your dowel rod is clean and free of any splinters. You can sand it down if necessary. If you want to paint or stain it, now’s the time to do it! I personally love the look of natural wood, so I usually leave mine as is.
3. Cut the Hanging Yarn/Twine: Cut a length of yarn or twine that’s long enough to hang your wall hanging. I usually cut about 3 feet, just to be safe. You can always trim it later.
Attaching the Raffia: The Larks Head Knot
This is the main knot we’ll be using to attach the raffia to the dowel rod. It’s super simple, I promise!
1. Fold the Raffia Strand: Take one of your pre-cut raffia strands and fold it in half, creating a loop at one end.
2. Position the Loop: Hold the loop of the raffia strand behind the dowel rod. The loop should be facing up towards you.
3. Bring the Ends Through the Loop: Reach through the loop from the front of the dowel rod and grab the two loose ends of the raffia strand. Pull them through the loop.
4. Tighten the Knot: Gently pull the loose ends down to tighten the knot around the dowel rod. Make sure the knot is snug but not too tight. You want the raffia to be able to move slightly.
5. Repeat: Repeat steps 1-4 with all of your raffia strands, placing them side-by-side along the dowel rod. The closer you place the knots, the denser your wall hanging will be. I like to pack them in pretty tightly for a full look.
6. Maintain Consistency: As you’re attaching the raffia, try to keep the knots consistent. This will help create a more uniform and professional-looking wall hanging.
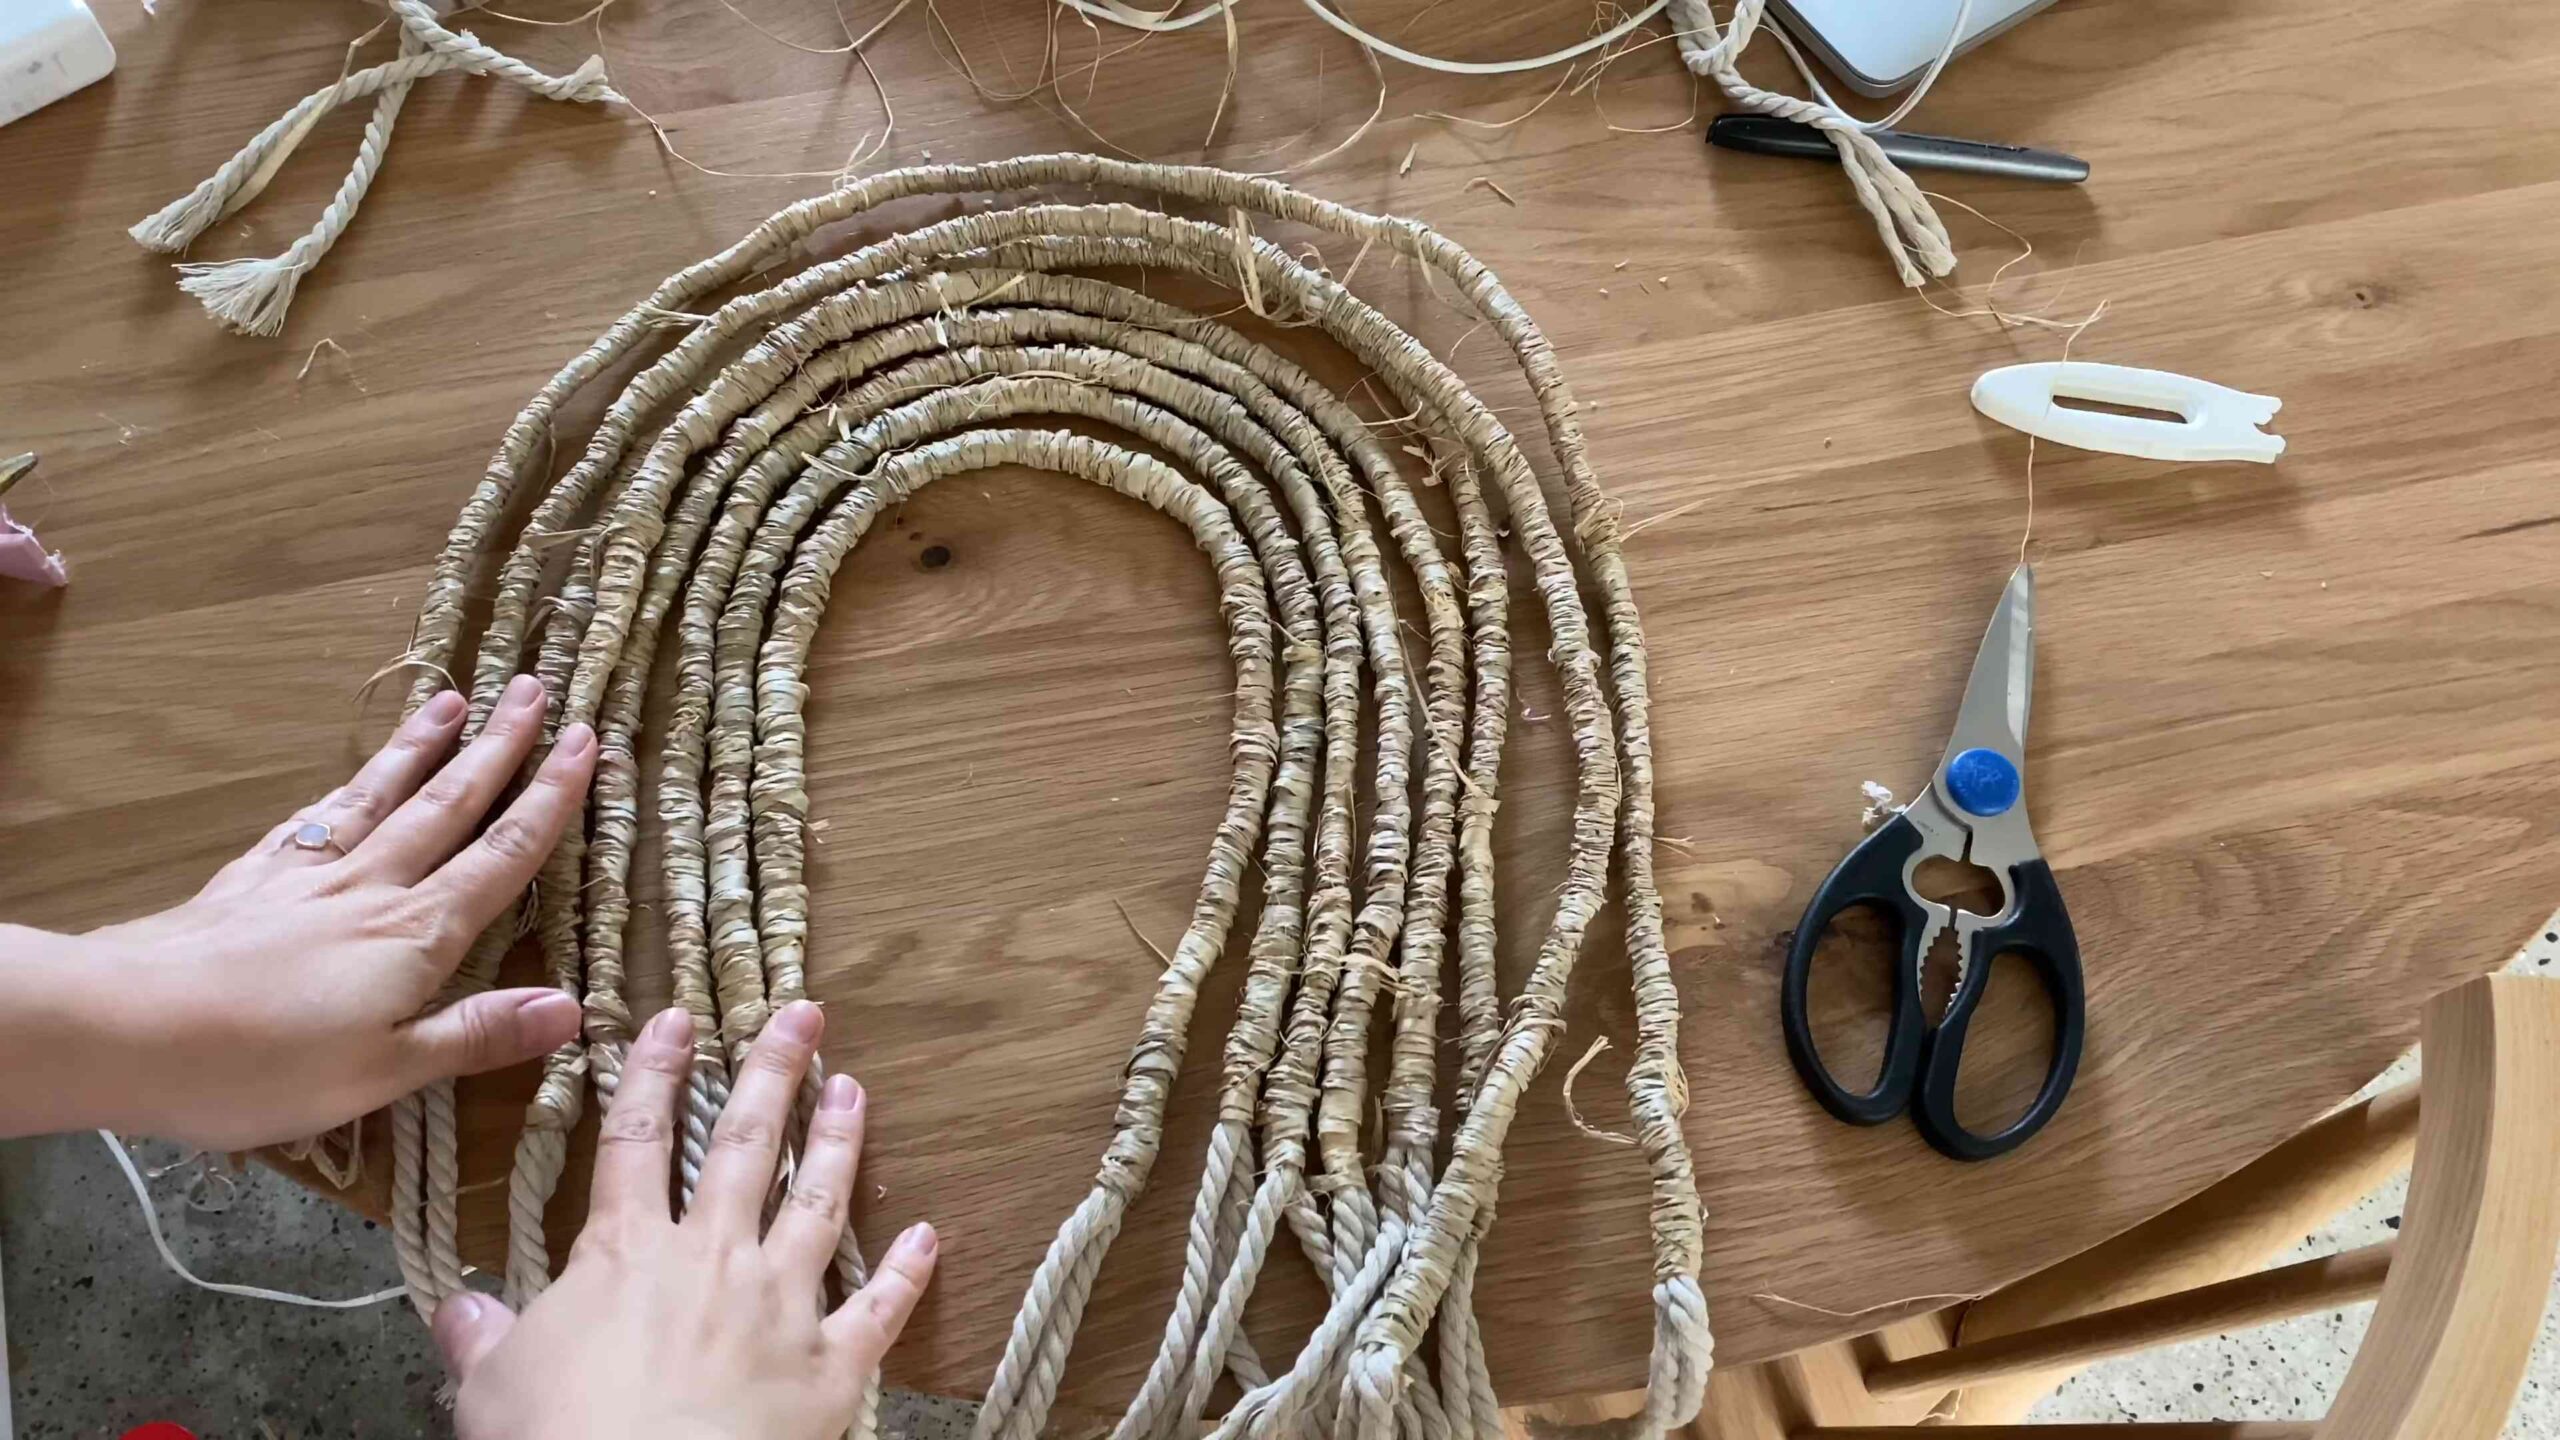
Creating the Design: Trimming and Shaping
Now comes the fun part: creating the design! This is where you can really let your creativity shine.
1. Hang the Wall Hanging: Before you start trimming, hang your wall hanging on a wall or door. This will give you a better perspective of the overall shape and design.
2. Plan Your Design: Take a step back and visualize the design you want to create. Do you want a straight bottom, a V-shape, an asymmetrical look, or something completely unique? You can even sketch out your design on paper beforehand if you’re feeling ambitious.
3. Start Trimming: Using your scissors, carefully start trimming the raffia to create your desired shape. I like to start with small snips and gradually work my way to the final shape. It’s always better to cut too little than too much!
4. Layering Colors (Optional): If you’re using multiple colors of raffia, you can create interesting patterns and textures by layering the colors. For example, you could create a gradient effect by gradually transitioning from one color to another.
5. Creating Texture (Optional): You can also create texture by varying the length of the raffia strands. For example, you could create a fringe effect by leaving some strands longer than others.
6. Comb or Brush (Optional): Once you’ve finished trimming, you can use a comb or brush to neaten the raffia and remove any loose strands. This will give your wall hanging a more polished look.
7. Fabric Stiffener (Optional): If you want the raffia to hold its shape better, you can spray it with fabric stiffener. This will help prevent the raffia from drooping or fraying. Follow the instructions on the fabric stiffener spray.
Adding Embellishments (Optional)
This is where you can really personalize your wall hanging and make it your own!
1. Beads: String beads onto individual raffia strands or create beaded tassels to hang from the bottom of the wall hanging.
2. Feathers: Attach feathers to the raffia using glue or by tying them on with yarn or twine.
3. Yarn or Twine: Wrap yarn or twine around sections of the raffia to add color and texture.
4. Other Embellishments: Get creative! Use shells, buttons, small pieces of fabric, or anything else that inspires you.
Finishing Touches
1. Attach the Hanging Yarn/Twine: Tie the ends of your hanging yarn or twine to each end of the dowel rod. Make sure the knot is secure.
2. Adjust the Hanging Length: Adjust the length of the hanging yarn or twine until your wall hanging hangs at the desired height.
3. Trim Any Loose Ends: Trim any loose ends of raffia, yarn, or twine.
4. Admire Your Work! Step back and admire your beautiful new raffia wall hanging! You did it!
Tips and Tricks for Success
* Don’t be afraid to experiment! This is your project, so have fun and try new things.
* Use high-quality raffia. It will make a big difference in the overall look and feel of your wall hanging.
* Take your time. This is not a project to rush. Enjoy the process and savor the creativity.
* Don’t be afraid to make mistakes. Everyone makes mistakes, especially when they’re learning something new. Just learn from them and keep going.
* Most importantly, have fun! Crafting should be enjoyable. If you’re not having fun, take a break and come back to it later.
I hope you enjoyed this tutorial! I can’t wait to see what you create. Happy crafting!
Conclusion
So, there you have it! Crafting your own raffia wall hanging isn’t just a fun afternoon project; it’s a gateway to personalized home décor that reflects your unique style and adds a touch of natural elegance to any room. We’ve walked you through the steps, from gathering your materials to adding those final, personal touches. But why is this DIY trick a must-try?
Firstly, it’s incredibly budget-friendly. Compared to purchasing a pre-made raffia wall hanging, creating your own allows you to control costs and utilize materials you might already have on hand. Think about repurposing old wooden dowels or branches from your backyard for the base. This not only saves money but also adds a rustic, eco-friendly element to your creation.
Secondly, the level of customization is unparalleled. You’re not limited to the designs and color palettes available in stores. You can choose the exact shades of raffia that complement your existing décor, experiment with different weaving techniques, and incorporate embellishments like beads, feathers, or even small pieces of driftwood. Imagine a raffia wall hanging that perfectly matches your living room’s color scheme or features a design inspired by your favorite travel destination. The possibilities are truly endless!
Thirdly, the process itself is incredibly therapeutic. In our fast-paced world, taking the time to create something with your own hands can be a deeply rewarding experience. The repetitive motions of weaving and knotting can be incredibly calming and meditative, allowing you to disconnect from the stresses of daily life and reconnect with your creative side.
Looking for suggestions or variations to elevate your raffia wall hanging? Consider these ideas:
* Ombre Effect: Dye your raffia in varying shades of a single color to create a stunning ombre effect. This adds depth and visual interest to your piece.
* Geometric Patterns: Experiment with different knotting and weaving techniques to create geometric patterns within your raffia wall hanging. This adds a modern and sophisticated touch.
* Mixed Media: Incorporate other natural materials like jute, cotton yarn, or even dried flowers into your design. This adds texture and visual complexity.
* Miniature Wall Hangings: Create a series of smaller raffia wall hangings to create a gallery wall effect. This is a great way to fill a larger space and showcase your creativity.
* Adding Lights: Weave in some fairy lights for a warm and inviting glow. This is perfect for creating a cozy atmosphere in your bedroom or living room.
We wholeheartedly encourage you to try this DIY raffia wall hanging project. It’s a fantastic way to add a personal touch to your home décor, unleash your creativity, and enjoy the therapeutic benefits of crafting. Don’t be afraid to experiment, make mistakes, and let your imagination run wild.
Once you’ve completed your masterpiece, we’d love to see it! Share your creations with us on social media using #DIYRaffiaWallHanging. We can’t wait to see what you come up with! We are confident that you will find this **DIY raffia wall hanging** project to be both enjoyable and rewarding.
FAQ
What kind of raffia should I use?
There are different grades of raffia available, and the best choice depends on your budget and desired aesthetic. Natural raffia is the most common and affordable option. It has a slightly rough texture and a natural, earthy color. Dyed raffia is available in a wide range of colors, allowing you to create more vibrant and personalized designs. For a more refined look, consider using raffia ribbon, which is smoother and more uniform in texture. Ultimately, the best type of raffia is the one that you enjoy working with and that best suits your vision for the project.
How do I dye raffia?
Dyeing raffia is a relatively simple process. You can use fabric dye, food coloring, or even natural dyes like coffee or tea. Soak the raffia in warm water for about 30 minutes to help it absorb the dye more evenly. Then, prepare your dye bath according to the manufacturer’s instructions (or your chosen method). Submerge the raffia in the dye bath and let it soak for the recommended time, stirring occasionally to ensure even coverage. Once the raffia has reached the desired color, rinse it thoroughly with cold water until the water runs clear. Finally, hang the raffia to dry completely. Remember to wear gloves and protect your work surface when dyeing raffia.
What size should my dowel rod be?
The ideal size of your dowel rod depends on the desired size of your raffia wall hanging. A longer dowel rod will result in a wider wall hanging, while a shorter dowel rod will create a more compact piece. As a general guideline, a dowel rod that is 12-18 inches long is a good starting point for a small to medium-sized wall hanging. You can always adjust the length of the dowel rod to suit your specific needs and preferences. Also, consider the thickness of the dowel rod. A thicker dowel rod will be more sturdy and able to support a heavier raffia wall hanging.
How do I prevent the raffia from unraveling?
Raffia can sometimes unravel, especially at the ends. To prevent this, you can try a few different techniques. One option is to tie a small knot at the end of each strand of raffia. Another option is to apply a small amount of fabric glue or clear nail polish to the ends of the raffia to seal them. You can also try wrapping the ends of the raffia with thread or yarn to create a more secure finish. When working with raffia, it’s also important to handle it gently to avoid pulling or snagging the fibers.
Can I use other materials besides raffia?
Absolutely! One of the great things about this DIY project is that you can easily incorporate other materials to create a more unique and personalized design. Consider adding jute, cotton yarn, wool roving, or even strips of fabric to your raffia wall hanging. You can also embellish your piece with beads, feathers, shells, or small pieces of driftwood. Experiment with different textures and colors to create a truly one-of-a-kind piece of art.
How do I hang my raffia wall hanging?
There are several ways to hang your raffia wall hanging. One option is to tie a piece of string or yarn to each end of the dowel rod and then hang the string from a nail or hook on the wall. Another option is to attach D-rings to the back of the dowel rod and then hang the wall hanging from the D-rings. You can also use adhesive hooks or strips to hang the wall hanging directly on the wall, but make sure to choose hooks or strips that are strong enough to support the weight of the piece.
My raffia wall hanging looks uneven. How can I fix it?
It’s common for DIY projects to have slight imperfections, and that’s part of their charm! However, if your raffia wall hanging looks significantly uneven, there are a few things you can try. First, step back and assess the overall balance of the piece. Are there any areas that are noticeably heavier or longer than others? If so, you can try trimming the raffia in those areas to create a more even silhouette. You can also try adding more raffia to the areas that look too sparse. Another trick is to use a comb or brush to gently smooth out the raffia and create a more uniform texture. Remember, perfection is not the goal. Embrace the imperfections and enjoy the process of creating something beautiful with your own hands.

Leave a Comment