

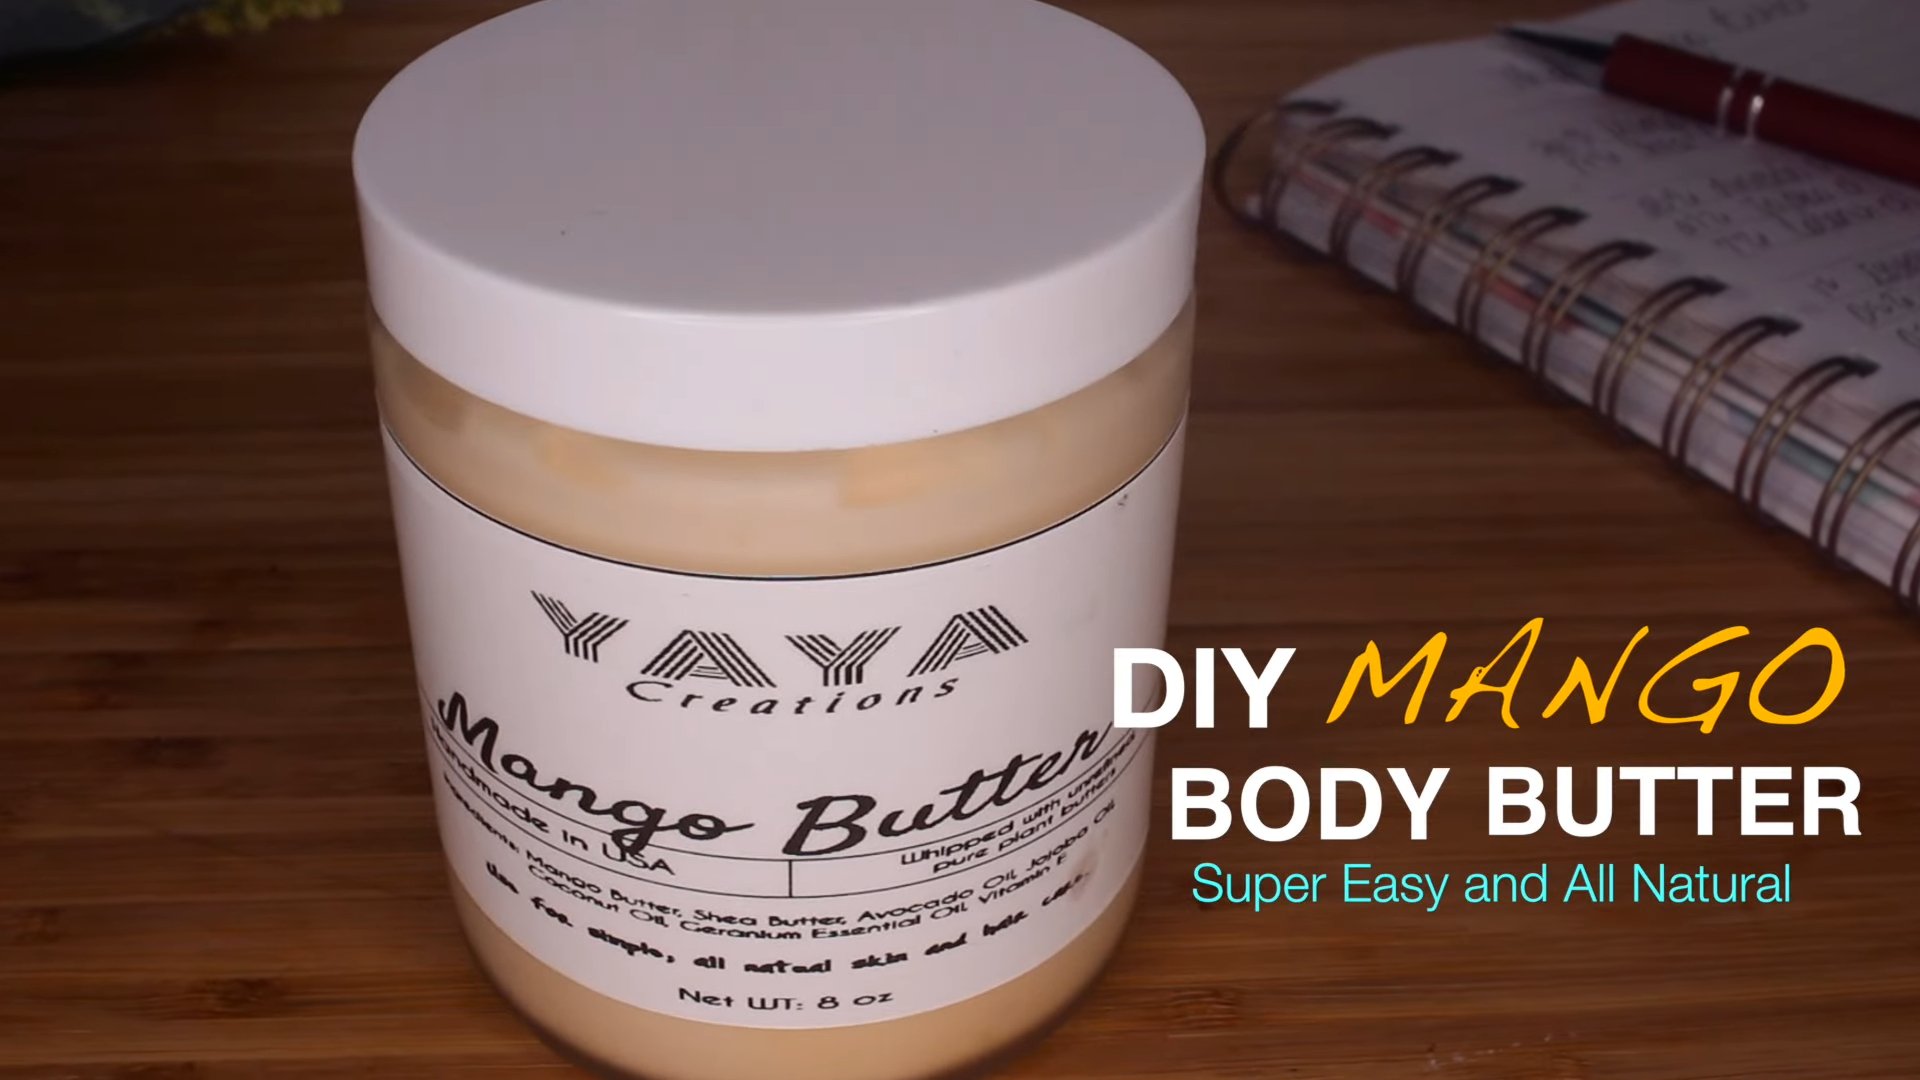
DIY Mango Body Butter Recipe: Who doesn’t dream of having luxuriously soft, glowing skin? I know I do! And what if I told you that achieving that radiant complexion could be as simple as whipping up something amazing in your own kitchen? Forget those expensive store-bought lotions filled with questionable ingredients. Today, we’re diving headfirst into the wonderful world of homemade skincare with a decadent and incredibly effective DIY Mango Body Butter Recipe.
The practice of using natural ingredients for skincare has roots stretching back centuries. Think of ancient Egyptians using aloe vera or Cleopatra’s legendary milk baths. This connection to nature is something we’ve almost lost in our modern world, but it’s time to reclaim it! This isn’t just about saving money; it’s about knowing exactly what you’re putting on your skin and embracing the power of natural goodness.
Let’s face it, dry skin is a common problem, especially during those harsh winter months or after too much sun exposure. Many commercial lotions are packed with chemicals that can actually irritate your skin in the long run. That’s where this recipe comes in! Mango butter is naturally rich in vitamins A and E, which are known for their moisturizing and anti-inflammatory properties. This DIY Mango Body Butter Recipe will not only hydrate your skin but also leave it feeling incredibly smooth and smelling divine. So, are you ready to ditch the dryness and embrace the glow? Let’s get started!
DIY Luxurious Mango Body Butter: A Step-by-Step Guide
Hey there, fellow DIY enthusiasts! Today, I’m super excited to share my absolute favorite recipe for homemade mango body butter. Trust me, once you try this, you’ll never go back to store-bought lotions again. It’s incredibly moisturizing, smells divine, and is packed with skin-loving ingredients. Plus, you get the satisfaction of knowing exactly what’s going on your skin!
This recipe is surprisingly easy, even for beginners. So, let’s dive in and create some seriously amazing body butter!
What You’ll Need: The Ingredient Rundown
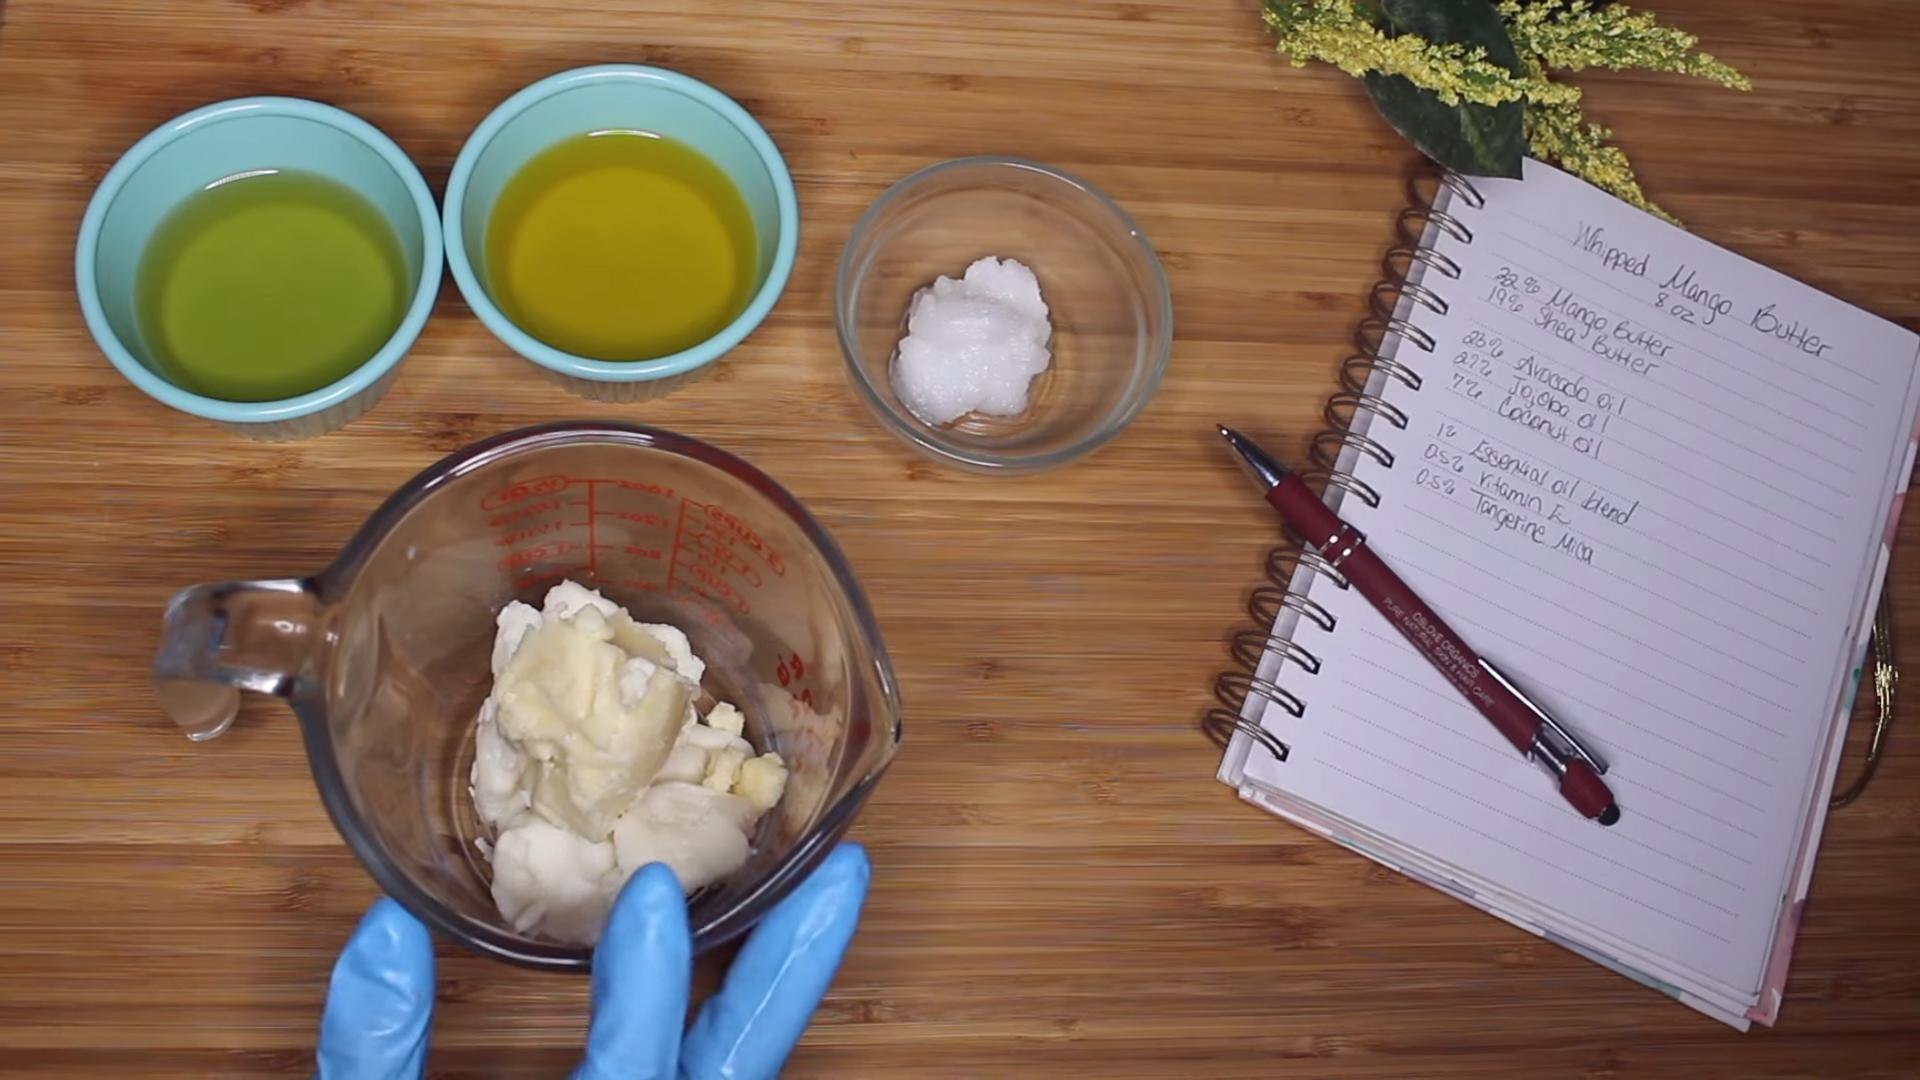
Before we get started, let’s gather all our ingredients and equipment. This will make the whole process smoother and more enjoyable.
* Mango Butter (8 oz): This is the star of the show! Mango butter is incredibly rich and moisturizing, and it has a lovely, subtle scent. Make sure you get pure, unrefined mango butter for the best results.
* Shea Butter (4 oz): Shea butter adds extra creaminess and helps to soothe and protect the skin. Like mango butter, opt for unrefined shea butter.
* Coconut Oil (4 oz): Coconut oil contributes to the body butter’s smooth texture and provides additional hydration. You can use refined or unrefined coconut oil, depending on your preference. Unrefined will have a stronger coconut scent.
* Sweet Almond Oil (2 oz): Sweet almond oil is a lightweight oil that absorbs quickly into the skin, leaving it feeling soft and supple. You can substitute this with other carrier oils like jojoba oil, apricot kernel oil, or grapeseed oil.
* Vitamin E Oil (1 teaspoon): Vitamin E oil is a powerful antioxidant that helps to protect the skin from damage and extend the shelf life of your body butter.
* Essential Oils (Optional, 20-30 drops): This is where you can get creative and customize your body butter’s scent! Some of my favorite essential oils for this recipe include:
* Mango essential oil (if you can find it!)
* Sweet orange essential oil
* Ylang-ylang essential oil
* Vanilla essential oil
* Lavender essential oil
* Grapefruit essential oil
* Double Boiler or Heat-Safe Bowl and Saucepan: We’ll be using a double boiler to gently melt the butters and oils. If you don’t have a double boiler, you can create one by placing a heat-safe bowl over a saucepan of simmering water.
* Electric Mixer (Handheld or Stand Mixer): This is essential for whipping the body butter to a light and fluffy consistency.
* Spatula: For scraping down the sides of the bowl.
* Measuring Cups and Spoons: For accurate measurements.
* Clean Jars or Containers: To store your finished body butter. I recommend using glass jars with airtight lids.
Phase 1: Melting the Butters and Oils
This is where we combine all the ingredients and gently melt them together. Patience is key here – we want to avoid overheating the butters and oils.
1. Prepare Your Double Boiler: If you’re using a double boiler, fill the bottom pot with water and bring it to a simmer. If you’re using a heat-safe bowl and saucepan, fill the saucepan with about an inch of water and bring it to a simmer. Place the heat-safe bowl on top of the saucepan, making sure the bottom of the bowl doesn’t touch the water.
2. Combine the Butters and Oils: In the top pot of the double boiler or in the heat-safe bowl, combine the mango butter, shea butter, coconut oil, and sweet almond oil.
3. Melt the Ingredients: Gently heat the butters and oils over low heat, stirring occasionally with a spatula, until they are completely melted and smooth. This may take 15-20 minutes, so be patient.
4. Remove from Heat: Once the butters and oils are melted, remove the double boiler or bowl from the heat.
5. Add Vitamin E Oil: Stir in the vitamin E oil. This will help preserve your body butter and add extra antioxidant benefits.
6. Let it Cool Slightly: Allow the mixture to cool slightly for about 10-15 minutes. This will help prevent the essential oils from evaporating when you add them in the next step.
Phase 2: Adding Essential Oils and Cooling
Now it’s time to add the essential oils and prepare the mixture for whipping. This step is crucial for achieving the perfect consistency.
1. Add Essential Oils (Optional): If you’re using essential oils, add them to the melted butter and oil mixture. Start with 20 drops and add more if desired, but don’t exceed 30 drops total. Stir well to combine.
2. Chill in the Refrigerator: Place the mixture in the refrigerator for 1-2 hours, or until it’s solid but not completely frozen. You want it to be firm enough to hold its shape but still soft enough to be whipped. The edges should be solid, and the center should be slightly soft. I usually check it every 30 minutes to make sure it doesn’t get too hard.
3. Check the Consistency: To test the consistency, poke the mixture with a spoon. If it’s firm but yields slightly, it’s ready for the next step. If it’s too soft, put it back in the refrigerator for another 30 minutes. If it’s too hard, let it sit at room temperature for a few minutes to soften slightly.
Phase 3: Whipping to Perfection
This is the fun part! Whipping the body butter is what gives it its light and fluffy texture.
1. Prepare Your Mixer: Remove the chilled butter and oil mixture from the refrigerator. Transfer it to the bowl of your electric mixer (handheld or stand mixer).
2. Whip on Low Speed: Using the whisk attachment, start whipping the mixture on low speed for about 1 minute. This will help to break it up and prevent it from splattering.
3. Increase Speed Gradually: Gradually increase the speed to medium-high and continue whipping for 5-10 minutes, or until the body butter is light, fluffy, and has doubled in volume. Scrape down the sides of the bowl occasionally with a spatula to ensure that everything is evenly whipped.
4. Check the Texture: The body butter should have a whipped cream-like consistency. If it’s still too oily or dense, continue whipping for a few more minutes.
5. Adjust Consistency (Optional): If your body butter is too soft, you can place it back in the refrigerator for 15-20 minutes to firm it up slightly, then whip it again for a minute or two. If it’s too hard, let it sit at room temperature for a few minutes to soften, then whip it again.
Phase 4: Storing and Enjoying Your Creation
Congratulations! You’ve just made your own luxurious mango body butter. Now it’s time to store it properly and start enjoying its amazing benefits.
1. Transfer to Jars: Using a clean spatula, transfer the whipped body butter to clean, airtight jars or containers.
2. Store in a Cool, Dark Place: Store your body butter in a cool, dark place, away from direct sunlight and heat. This will help to prevent it from melting or going rancid.
3. Shelf Life: Homemade body butter typically has a shelf life of 6-12 months, depending on the ingredients used and how it’s stored.
4. How to Use: Apply a small amount of body butter to your skin after showering or bathing, or whenever your skin feels dry. Massage it in gently until it’s fully absorbed. A little goes a long way!
5. Enjoy the Benefits: Enjoy the moisturizing, soothing, and nourishing benefits of your homemade mango body butter! Your skin will thank you for it.
Troubleshooting Tips
Even with the best instructions, sometimes things don’t go exactly as planned. Here are a few troubleshooting tips to help you out:
* Body Butter is Too Oily: This usually happens if the mixture wasn’t chilled long enough before whipping, or if the ratios of butters and oils are off. Try chilling the body butter for another hour and then whipping it again. If that doesn’t work, you can add a small amount of melted shea butter or mango butter to the mixture and whip it again.
* Body Butter is Too Hard: This can happen if the mixture was chilled for too long, or if the ratios of butters and oils are off. Let the body butter sit at room temperature for a few minutes to soften, then whip it again. If that doesn’t work, you can add a small amount of melted sweet almond oil or coconut oil to the mixture and whip it again.
* Body Butter is Grainy: This can happen if the shea butter wasn
Conclusion
So, there you have it! A luxuriously creamy, deeply moisturizing, and utterly delightful DIY Mango Body Butter recipe that’s not only incredibly easy to make but also far superior to many store-bought alternatives. We’ve walked you through the simple steps, highlighting the benefits of each ingredient and empowering you to create a truly personalized skincare experience.
Why is this DIY trick a must-try? Because it puts you in control. You know exactly what’s going on your skin – no hidden chemicals, no questionable preservatives, just pure, natural goodness. The star of the show, mango butter, is a powerhouse of vitamins and antioxidants, working wonders to nourish, protect, and rejuvenate your skin. Combine that with the emollient properties of shea butter and the hydrating power of coconut oil, and you’ve got a recipe for radiant, healthy skin.
But the beauty of this recipe lies in its adaptability. Feel free to experiment with different essential oils to create your signature scent. Lavender for relaxation, peppermint for invigoration, or rose for a touch of luxury – the possibilities are endless. You could also add a teaspoon of vitamin E oil for an extra boost of antioxidant protection or a pinch of arrowroot powder for a less greasy feel. Consider infusing your coconut oil with herbs like calendula or chamomile for added soothing benefits. For a richer, more intense experience, try adding a small amount of cocoa butter alongside the mango and shea butters.
This DIY Mango Body Butter recipe isn’t just about saving money; it’s about investing in your well-being and connecting with the ingredients you use. It’s about creating a ritual of self-care that nourishes your body and soothes your soul.
We wholeheartedly encourage you to give this recipe a try. It’s a fun, rewarding project that will leave you with a product you can be truly proud of. And once you’ve experienced the difference that homemade, natural skincare can make, you’ll never look back.
Don’t be shy! Share your creations with us. We’d love to hear about your experiences, your variations, and your tips for making the perfect DIY Mango Body Butter. Post photos of your finished product, tell us about your favorite essential oil combinations, and let us know how this recipe has transformed your skincare routine. Let’s build a community of DIY enthusiasts who are passionate about natural beauty and self-care.
Now, go forth and create! Your skin will thank you for it.
Frequently Asked Questions (FAQ)
What exactly is mango butter, and why is it good for my skin?
Mango butter is a natural fat extracted from the kernel of the mango fruit. It’s rich in antioxidants, vitamins A, C, and E, and essential fatty acids. These components make it incredibly beneficial for the skin. It’s deeply moisturizing, helping to hydrate dry and flaky skin. It also promotes skin elasticity, reduces the appearance of fine lines and wrinkles, and soothes skin irritations like eczema and psoriasis. Mango butter is also non-comedogenic, meaning it won’t clog pores, making it suitable for most skin types.
Can I use a different type of butter if I don’t have mango butter?
While mango butter is the star of this recipe and provides unique benefits, you can substitute it with other butters, but the results may vary slightly. Shea butter is a good alternative, as it also offers excellent moisturizing and healing properties. Cocoa butter can be used for a richer, more emollient body butter, but be aware that it has a stronger scent and can be comedogenic for some individuals. If you choose to substitute, use the same amount as the mango butter called for in the recipe. Keep in mind that the texture and scent of the final product will be different.
What kind of coconut oil should I use?
We recommend using unrefined, virgin coconut oil for this recipe. Unrefined coconut oil retains more of its natural nutrients and has a pleasant coconut scent. Refined coconut oil is also an option, but it has been processed and may have fewer beneficial properties. Avoid using fractionated coconut oil (MCT oil), as it is a liquid at room temperature and will not contribute to the desired creamy consistency of the body butter.
How do I store the DIY Mango Body Butter?
Store your DIY Mango Body Butter in an airtight container in a cool, dark place. A glass jar is ideal. Avoid storing it in direct sunlight or in a warm environment, as this can cause it to melt and lose its whipped consistency. If stored properly, your body butter should last for several months. Check for any changes in smell or texture before each use.
My body butter turned out grainy. What did I do wrong?
Graininess in homemade body butter is a common issue and is usually caused by the shea butter solidifying at different rates. This can happen if the butter is heated and cooled too slowly. To fix grainy body butter, you can re-melt it completely and then quickly cool it in the refrigerator or freezer. Make sure to stir it frequently as it cools to prevent the formation of crystals. Another tip is to add a small amount of arrowroot powder or cornstarch, which can help to stabilize the mixture and prevent graininess.
Can I use essential oils if I have sensitive skin?
If you have sensitive skin, it’s crucial to be cautious when using essential oils. Some essential oils can be irritating to sensitive skin. We recommend starting with a very small amount (1-2 drops per batch) and testing the body butter on a small area of your skin before applying it all over. Gentle essential oils like lavender, chamomile, and frankincense are generally well-tolerated by sensitive skin. Avoid using citrus oils, as they can be photosensitive and cause skin irritation when exposed to sunlight. Always dilute essential oils properly and discontinue use if you experience any irritation. You can also opt to leave out the essential oils altogether for a fragrance-free body butter.
How long will the DIY Mango Body Butter last?
The shelf life of your DIY Mango Body Butter depends on the quality of the ingredients you use and how well you store it. Generally, it should last for 3-6 months. If you notice any changes in smell, texture, or color, it’s best to discard it. Using clean utensils and storing the body butter in an airtight container will help to prolong its shelf life.
Can I use this body butter on my face?
While this DIY Mango Body Butter is incredibly moisturizing, it may be too heavy for some facial skin types, especially those prone to acne. Mango butter is considered non-comedogenic, but shea butter and coconut oil can clog pores for some individuals. If you have dry skin, you can try using a small amount on your face, but be sure to monitor your skin for any breakouts. If you have oily or acne-prone skin, it’s best to avoid using this body butter on your face.
What if my body butter is too oily?
If your body butter feels too oily, you can add a small amount of arrowroot powder or cornstarch to absorb excess oil. Start with a teaspoon and add more as needed until you reach your desired consistency. You can also reduce the amount of coconut oil in the recipe and increase the amount of shea or mango butter.
Can I add color to my DIY Mango Body Butter?
Yes, you can add natural colorants to your DIY Mango Body Butter. Beetroot powder can add a pink hue, while spirulina powder can create a green tint. Be sure to use only a small amount, as these powders are highly pigmented. You can also use oil-soluble natural colorants, which are specifically designed for use in skincare products. Avoid using food coloring, as it can stain the skin.
Leave a Comment