

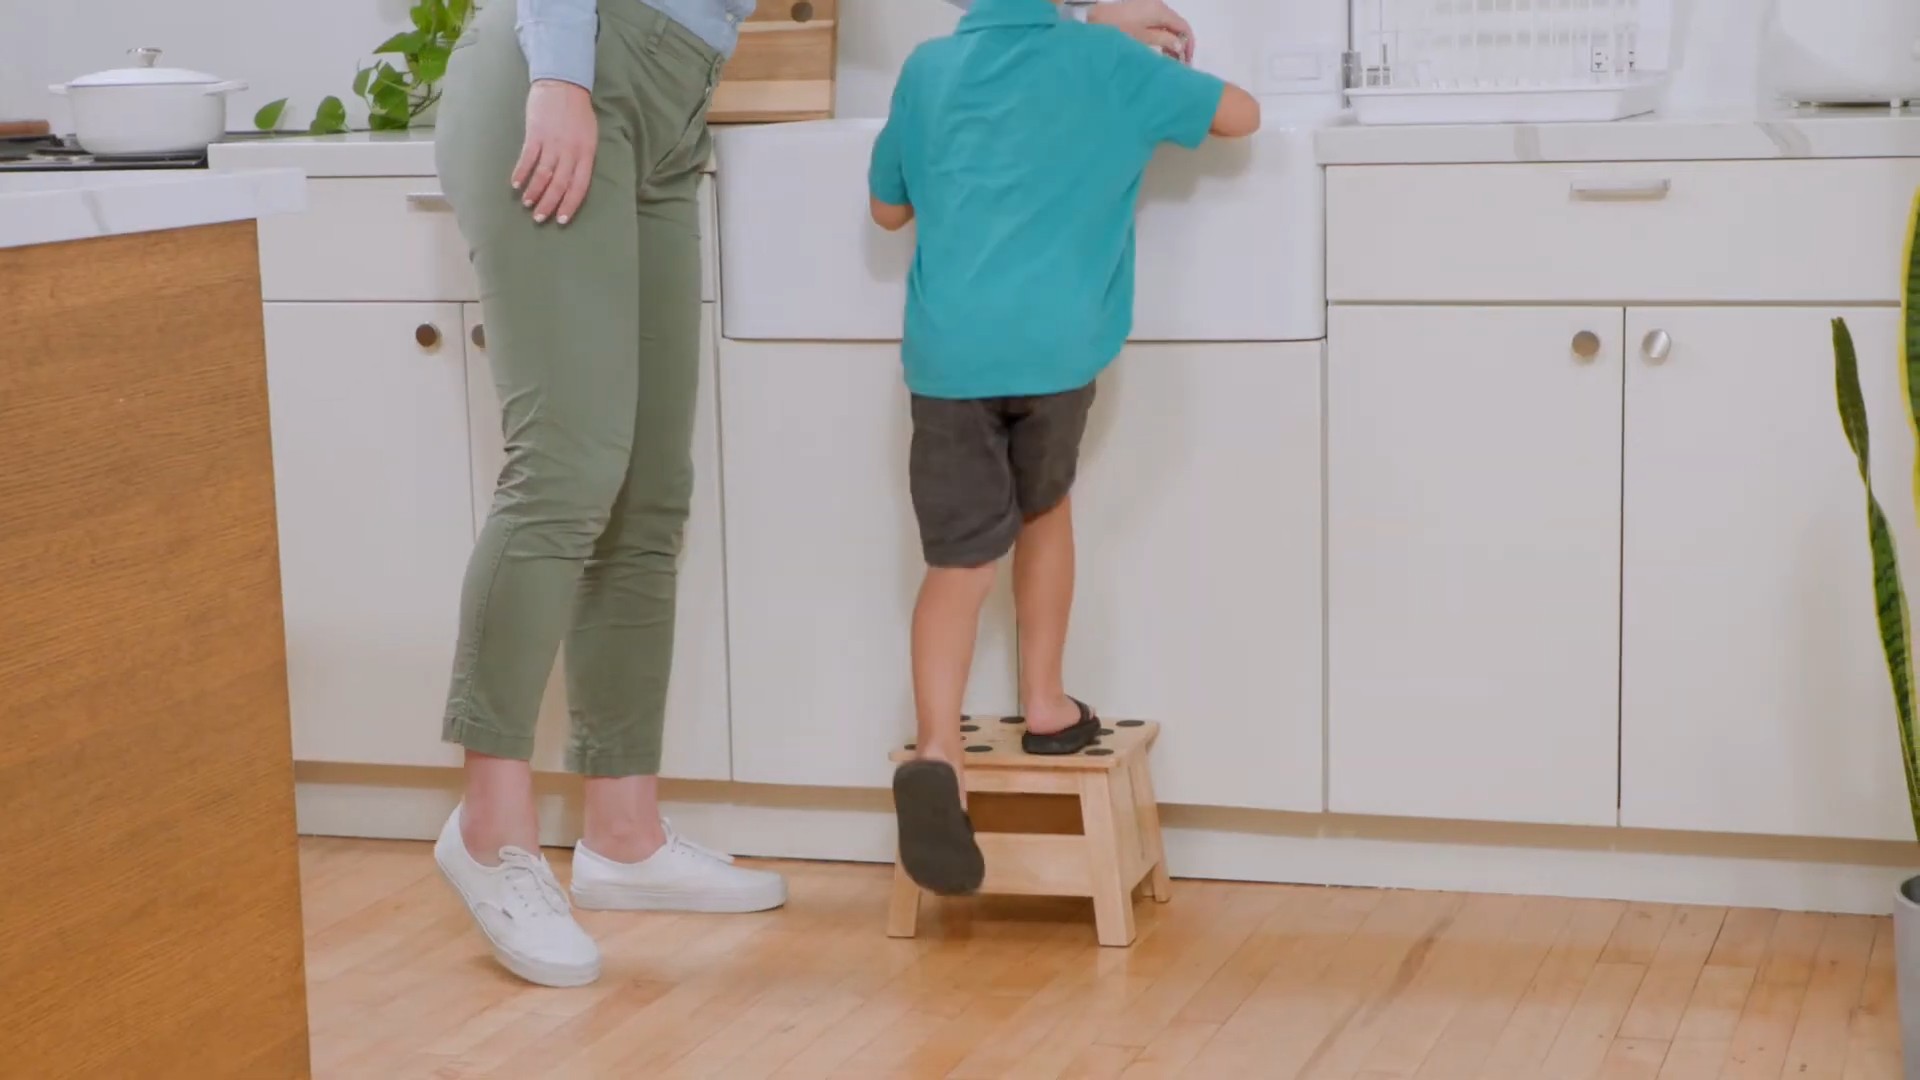
DIY Kids Step Stool: Ever feel like your little ones are constantly asking for help reaching things? I know I do! From grabbing a snack from the top shelf to washing their hands at the sink, the struggle is real. That’s why I’m so excited to share this super simple and rewarding DIY project: building a kids step stool!
Step stools have been around for ages, evolving from simple wooden blocks to beautifully crafted pieces of furniture. Historically, they’ve been essential tools in homes, allowing children (and shorter adults!) to participate more fully in daily activities. Think about it – a step stool empowers kids, fostering independence and a sense of accomplishment.
But why build one yourself? Well, store-bought step stools can be expensive and often lack the charm and personal touch that a handmade item brings. Plus, by creating your own DIY kids step stool, you can customize it to perfectly match your home decor and your child’s personality. This project is not only budget-friendly but also a fantastic way to spend quality time with your kids, teaching them valuable skills along the way. So, let’s get building and create a safe and stylish solution for those hard-to-reach places!
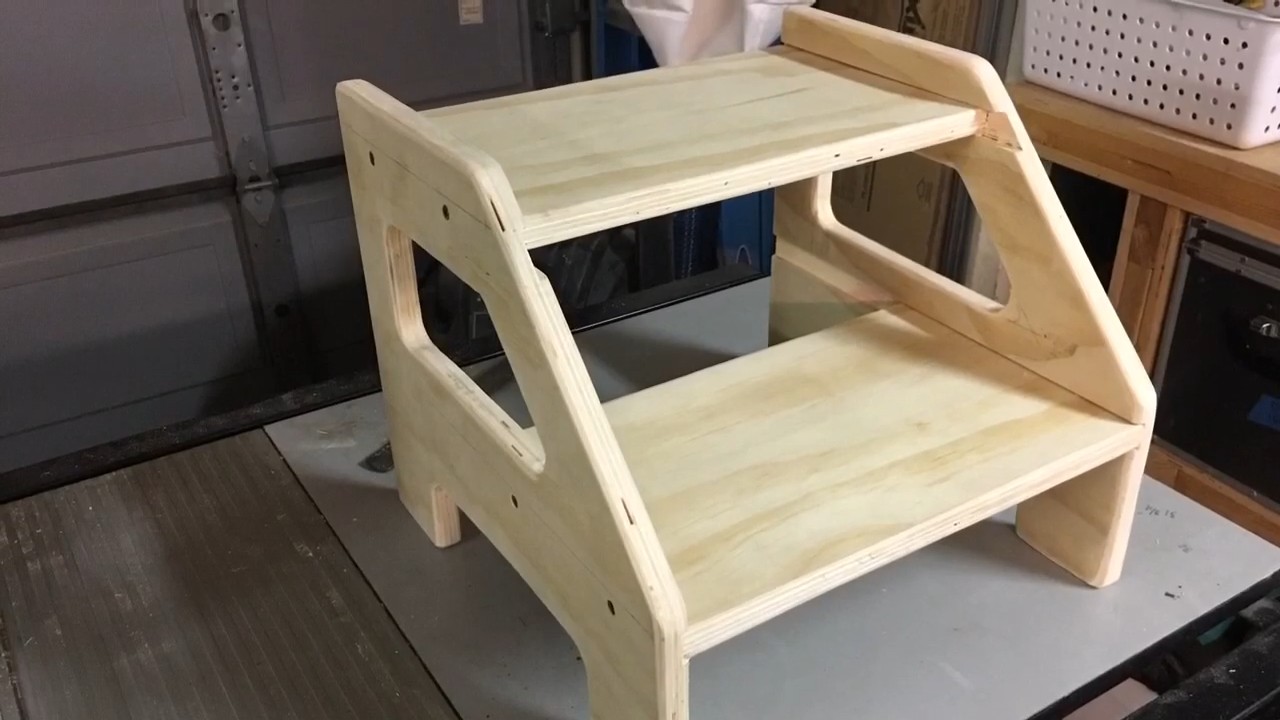
DIY Kids Step Stool: A Weekend Project for Little Helpers
Okay, friends, let’s build a super sturdy and adorable step stool for your little ones! This project is perfect for a weekend and will give your kids a boost when they need to reach the sink, help in the kitchen, or grab a book from a slightly-too-high shelf. I’ve designed this stool to be safe, strong, and customizable, so you can adapt it to fit your specific needs and style.
Materials You’ll Need
Before we dive in, let’s gather our supplies. Here’s what you’ll need:
* Wood:
* Two pieces of 1×12 lumber, each 24 inches long (for the sides)
* Two pieces of 1×12 lumber, each 12 inches long (for the top steps)
* One piece of 1×4 lumber, 24 inches long (for the top support)
* One piece of 1×4 lumber, 12 inches long (for the bottom step support)
* Fasteners:
* 1 1/4 inch wood screws
* Wood glue
* Wood filler (optional, for filling screw holes)
* Tools:
* Measuring tape
* Pencil
* Safety glasses
* Ear protection
* Saw (circular saw, miter saw, or hand saw)
* Drill with drill bits (including a countersink bit)
* Sander or sandpaper (various grits)
* Clamps
* Paint or stain (and appropriate applicators)
* Polyurethane or other sealant (optional)
* Carpenter’s square
* Level
Cutting the Wood
Accuracy is key here! Double-check your measurements before you cut. Remember the old saying: “Measure twice, cut once!”
1. Cut the Sides: Using your saw, carefully cut the two 1×12 boards to 24 inches in length. These will be the sides of your step stool.
2. Cut the Top Steps: Cut the two 1×12 boards to 12 inches in length. These will form the top steps of the stool.
3. Cut the Top Support: Cut the 1×4 board to 24 inches in length. This will provide support under the top step.
4. Cut the Bottom Step Support: Cut the 1×4 board to 12 inches in length. This will support the bottom step.
Assembling the Sides
This is where the stool starts to take shape! We’ll be creating the angled sides that give the stool its stability.
1. Mark the Angle: On each of the 1×12 side pieces, measure 4 inches up from the bottom edge along one end. Mark this point with a pencil.
2. Draw the Line: Using a straight edge, draw a line from the 4-inch mark to the top corner of the opposite end of the board. This line will define the angle of the side.
3. Cut the Angle: Carefully cut along the marked line on both side pieces. Make sure the angle is the same on both sides for a balanced stool.
4. Sand the Edges: Use sandpaper or a sander to smooth any rough edges created by the saw. This is important for safety and a professional finish.
Attaching the Top Step
Now we’ll connect the top step to the angled sides. This is a crucial step for the stool’s stability.
1. Position the Sides: Place the two angled side pieces upright, with the angled cuts facing upwards. The longer, vertical edge of each side should be facing inward.
2. Apply Glue: Apply a generous amount of wood glue to the top edge of both side pieces.
3. Attach the First Top Step: Carefully position one of the 12-inch 1×12 boards (the top step) on top of the glued edges of the side pieces. Ensure the step is flush with the top of the sides and centered.
4. Clamp the Step: Use clamps to hold the step securely in place while the glue dries. This is essential for a strong bond. Let the glue dry for at least 2 hours, or preferably overnight.
5. Drill Pilot Holes: Once the glue is dry, drill pilot holes through the side pieces and into the top step. Use a countersink bit to create a recess for the screw heads. This will prevent the wood from splitting and allow for a smooth finish.
6. Secure with Screws: Drive 1 1/4 inch wood screws through the pilot holes to secure the top step to the sides.
7. Repeat for the Second Top Step: Repeat steps 3-6 for the second 12-inch 1×12 board, placing it directly behind the first top step. This creates a wider, more stable top step.
Adding the Top Support
This support piece adds extra strength to the top step, making it safer for your little ones.
1. Position the Support: Place the 24-inch 1×4 board (the top support) underneath the top step, flush against the back edge of the second top step. It should span the width of the stool, resting against the inside of the side pieces.
2. Apply Glue: Apply wood glue to the top edge of the support board where it will contact the underside of the top step.
3. Clamp the Support: Use clamps to hold the support board in place while the glue dries.
4. Drill Pilot Holes: Drill pilot holes through the side pieces and into the ends of the support board. Also, drill pilot holes through the top step and into the top of the support board.
5. Secure with Screws: Drive 1 1/4 inch wood screws through the pilot holes to secure the support board to the sides and the top step.
Attaching the Bottom Step
Now we’ll add the bottom step, which provides an intermediate height for smaller children.
1. Determine Bottom Step Height: Decide how high you want the bottom step to be. A good height is typically around 6-8 inches from the ground. Mark this height on the inside of both side pieces.
2. Position the Bottom Step Support: Place the 12-inch 1×4 board (the bottom step support) between the side pieces, aligning the top edge of the support with the height marks you made in the previous step.
3. Apply Glue: Apply wood glue to the edges of the support board where it will contact the inside of the side pieces.
4. Clamp the Support: Use clamps to hold the support board in place while the glue dries.
5. Drill Pilot Holes: Drill pilot holes through the side pieces and into the ends of the support board.
6. Secure with Screws: Drive 1 1/4 inch wood screws through the pilot holes to secure the support board to the sides.
7. Position the Bottom Step: Place one of the 12-inch 1×12 boards (the bottom step) on top of the support board. Ensure it is centered and flush with the front edge of the support.
8. Apply Glue: Apply wood glue to the top of the support board where it will contact the underside of the bottom step.
9. Clamp the Step: Use clamps to hold the step in place while the glue dries.
10. Drill Pilot Holes: Drill pilot holes through the bottom step and into the support board.
11. Secure with Screws: Drive 1 1/4 inch wood screws through the pilot holes to secure the bottom step to the support board.
Finishing Touches
This is where you can really personalize the step stool and make it your own!
1. Fill Screw Holes (Optional): If you want a perfectly smooth finish, use wood filler to fill any screw holes or imperfections in the wood. Let the filler dry completely and then sand it smooth.
2. Sand the Entire Stool: Use sandpaper or a sander to smooth all surfaces of the step stool. Start with a coarser grit sandpaper (e.g., 120 grit) and gradually move to a finer grit (e.g., 220 grit) for a super smooth finish. Pay special attention to edges and corners.
3. Clean the Stool: Wipe down the stool with a damp cloth to remove any sanding dust.
4. Paint or Stain: Choose your favorite paint or stain to finish the stool. Apply the paint or stain according to the manufacturer’s instructions. You may need to apply multiple coats for full coverage. Let each coat dry completely before applying the next. Consider using non-toxic paints and stains, especially for children’s projects.
Conclusion
So, there you have it! Creating your own DIY Kids Step Stool isn’t just a fun weekend project; it’s an investment in your child’s independence and a fantastic way to add a personal touch to your home. Forget those flimsy, mass-produced plastic stools that crack under pressure and lack character. This project empowers you to build a sturdy, safe, and stylish step stool tailored to your child’s specific needs and your home’s aesthetic.
Why is this a must-try? Because it’s more than just a step stool. It’s a learning opportunity, a bonding experience, and a chance to unleash your creativity. You control the materials, ensuring they are non-toxic and durable. You choose the height, width, and design, making it perfectly suited for reaching the sink, helping in the kitchen, or grabbing a favorite book from a high shelf. And most importantly, you instill a sense of pride in your child, knowing that they have a special piece of furniture made with love.
But the fun doesn’t stop there! Consider these variations to truly personalize your DIY Kids Step Stool:
* **Paint it bright and bold:** Let your child choose their favorite colors or characters to paint on the stool. This turns it into a collaborative art project and makes the stool even more special.
* **Add storage:** Incorporate a small storage compartment under the top step for toys, books, or art supplies. This adds functionality and helps keep things organized.
* **Incorporate a handle:** A sturdy handle on the back of the stool makes it easier for little hands to carry and maneuver.
* **Upholster the top step:** Add a layer of foam and fabric to the top step for extra comfort. Choose a durable, easy-to-clean fabric that can withstand daily use.
* **Engrave it:** Personalize the stool with your child’s name or a special message. This adds a sentimental touch and makes it a cherished keepsake.
* **Use reclaimed wood:** Give your project a rustic, eco-friendly vibe by using reclaimed wood. This adds character and reduces waste.
The possibilities are truly endless! The key is to have fun and let your creativity guide you. Don’t be afraid to experiment with different materials, colors, and designs. Remember, this is your project, and you have the freedom to make it your own.
We are confident that you’ll find this DIY Kids Step Stool project rewarding and enjoyable. So, gather your materials, roll up your sleeves, and get ready to create something amazing. We can’t wait to see what you come up with!
And now, we want to hear from you! Have you tried building your own step stool? What tips and tricks did you learn along the way? Share your experiences, photos, and variations in the comments below. Let’s inspire each other and create a community of DIY enthusiasts! Your feedback is invaluable and helps us improve our projects and provide even better content in the future. So, don’t be shy – share your story and let us know how your DIY Kids Step Stool turned out!
FAQ
What type of wood is best for a DIY Kids Step Stool?
The best type of wood depends on your budget, desired aesthetic, and skill level. Pine is a popular choice because it’s affordable, easy to work with, and readily available. However, it’s a softer wood and may be more prone to dents and scratches. Hardwoods like maple, oak, or birch are more durable and resistant to wear and tear, but they are also more expensive and require more advanced woodworking skills. Plywood is another option, offering a good balance of strength and affordability. Just make sure to choose a high-quality plywood with a smooth surface. Ultimately, the best wood is the one that meets your specific needs and preferences. Consider the weight capacity you need, the finish you want to achieve, and your comfort level with different woodworking techniques.
How do I ensure the step stool is safe for my child?
Safety is paramount when building a DIY Kids Step Stool. Here are some key considerations:
* **Sturdy Construction:** Use strong, durable materials and secure joinery techniques. Ensure all screws are properly tightened and that there are no loose or wobbly parts.
* **Non-Toxic Finishes:** Use non-toxic paints, stains, and sealants that are safe for children. Look for products that are labeled as “low-VOC” or “zero-VOC.”
* **Rounded Edges:** Round off all sharp edges and corners to prevent injuries. Use a router or sandpaper to create smooth, rounded edges.
* **Non-Slip Surface:** Apply a non-slip coating or add non-slip strips to the top step to prevent your child from slipping.
* **Proper Height:** Choose a height that is appropriate for your child’s age and height. The stool should allow them to reach the desired surface comfortably without having to stretch or strain.
* **Weight Capacity:** Ensure the stool can support your child’s weight and any additional weight they may be carrying.
* **Supervision:** Always supervise your child when they are using the step stool.
What tools do I need to build a DIY Kids Step Stool?
The tools you’ll need will depend on the complexity of your design and the materials you’re using. However, here’s a general list of essential tools:
* **Measuring Tape:** For accurate measurements.
* **Pencil:** For marking cut lines.
* **Saw:** For cutting the wood to size (circular saw, jigsaw, or hand saw).
* **Drill:** For drilling pilot holes and driving screws.
* **Screwdriver:** For tightening screws (or use a drill with a screwdriver bit).
* **Sandpaper:** For smoothing rough edges and surfaces.
* **Clamps:** For holding pieces together while gluing or screwing.
* **Safety Glasses:** To protect your eyes from debris.
* **Dust Mask:** To protect your lungs from sawdust.
* **Wood Glue:** For strengthening joints.
* **Router (Optional):** For rounding edges and creating decorative details.
* **Sander (Optional):** For faster and more efficient sanding.
How much will it cost to build a DIY Kids Step Stool?
The cost will vary depending on the materials you choose, the tools you already own, and the complexity of your design. However, you can typically build a simple step stool for $20-$50. Wood is the most significant expense, so consider using reclaimed wood or choosing a more affordable wood like pine. You can also save money by using tools you already have or borrowing them from a friend.
How long will it take to build a DIY Kids Step Stool?
The time it takes to build a step stool will depend on your skill level, the complexity of your design, and the tools you have available. A simple step stool can be completed in a few hours, while a more complex design may take a full day or even a weekend. Be sure to factor in time for planning, measuring, cutting, assembling, sanding, and finishing.
Can I customize the design of the DIY Kids Step Stool?
Absolutely! That’s one of the best things about building your own step stool. You can customize the design to perfectly suit your child’s needs and your home’s aesthetic. Consider the height, width, and depth of the stool, as well as the shape and style. You can also add decorative details, such as painted designs, engraved names, or upholstered seats. Let your creativity guide you and create a step stool that is truly unique.
Where can I find inspiration for my DIY Kids Step Stool project?
There are many places to find inspiration for your project. Online resources like Pinterest, Instagram, and woodworking websites are great sources of ideas. You can also browse through home decor magazines or visit furniture stores to see different step stool designs. Don’t be afraid to adapt existing designs to your own needs and preferences.
What if I don’t have any woodworking experience?
Don’t worry! Building a simple step stool is a great way to learn basic woodworking skills. Start with a simple design and take your time. Watch online tutorials and read woodworking guides to learn the basics. Practice on scrap wood before working on your final project. And don’t be afraid to ask for help from experienced woodworkers. With a little patience and effort, you can build a beautiful and functional step stool, even if you’re a beginner.

Leave a Comment