

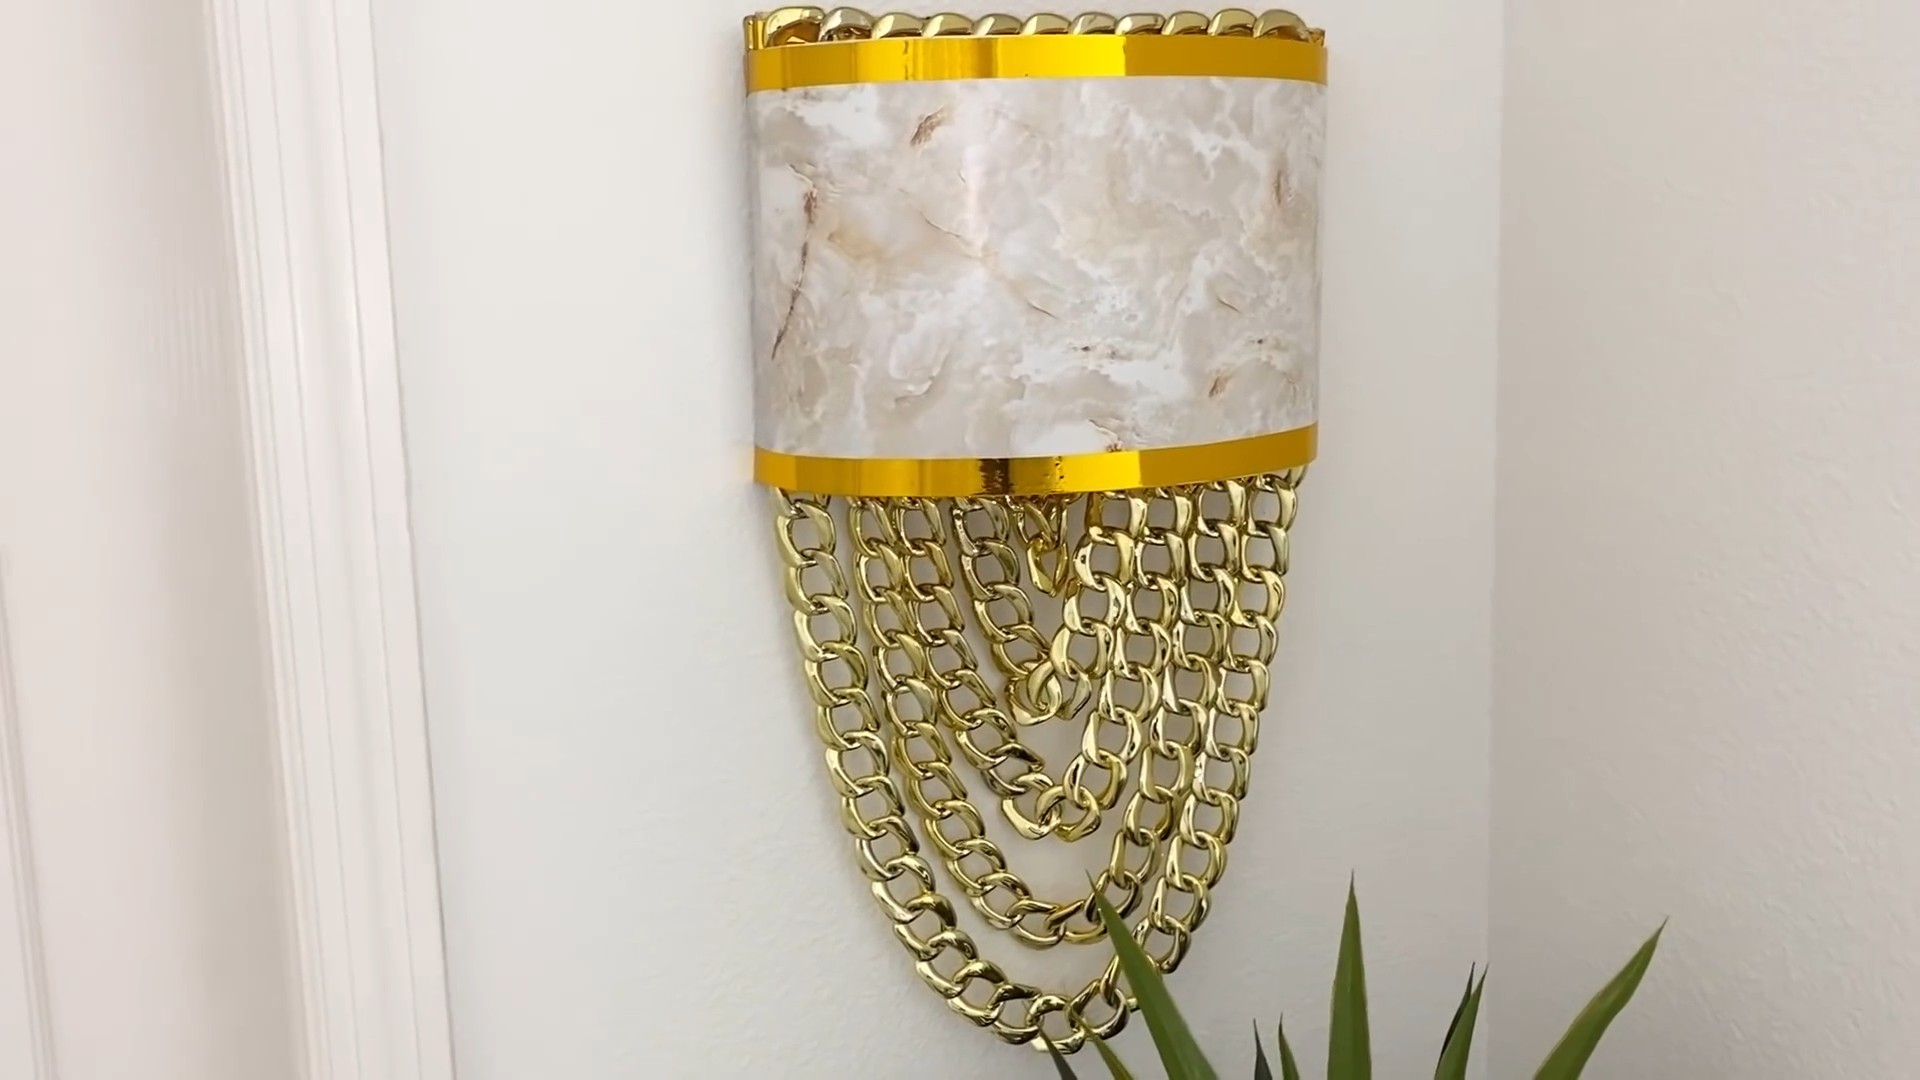
DIY Gold Chain Wall Lamp: Ever dreamed of adding a touch of glamour and unique personality to your home without breaking the bank? I know I have! Forget those generic, mass-produced lighting fixtures. We’re diving headfirst into a dazzling DIY project that will transform any room from drab to fab – a stunning gold chain wall lamp!
The concept of using chains in interior design isn’t entirely new. Historically, chains have symbolized strength and connection, often incorporated into architectural details and decorative elements. Think of grand chandeliers adorned with delicate chains or the bold, industrial aesthetic of exposed metalwork. Now, we’re taking that timeless appeal and giving it a modern, DIY twist.
Why a DIY Gold Chain Wall Lamp, you ask? Because everyone deserves a little luxury in their lives, and this project allows you to create a high-end look for a fraction of the cost. Plus, it’s incredibly satisfying to say, “I made that!” when guests admire your handiwork. In a world of cookie-cutter decor, this project lets your creativity shine and adds a personal touch that reflects your unique style. So, grab your tools, and let’s get ready to illuminate your space with a touch of golden magic!
DIY Gold Chain Wall Lamp: A Touch of Glam for Your Walls
Okay, friends, let’s get ready to add some serious sparkle to your space! I’m going to walk you through how to create a stunning gold chain wall lamp that looks like it came straight out of a high-end boutique, but without the hefty price tag. This project is surprisingly easy, even for beginners, and the results are absolutely gorgeous. Trust me, you’ll be obsessed!
Materials You’ll Need:
Before we dive in, let’s gather our supplies. Here’s what you’ll need to create your own dazzling gold chain wall lamp:
* Gold Chain: This is the star of the show! I recommend a chain with links that are large enough to easily thread the lamp cord through. The length will depend on how long you want your lamp to hang. I used about 6 feet for a dramatic effect, but you can adjust accordingly.
* Lamp Cord Kit: You can find these at most hardware stores or online. Make sure it includes a plug, a switch, and a socket. Choose a color that complements your gold chain – black or white usually works well.
* Light Bulb: Opt for an Edison-style bulb for a vintage, chic vibe, or choose any bulb that suits your taste and the lamp socket.
* Wall Mounting Hardware: This will depend on your wall type. You’ll need a hook or bracket strong enough to support the weight of the chain and lamp. Consider using drywall anchors if you’re mounting on drywall.
* Spray Paint (Optional): If you want to customize the color of your lamp socket or other hardware, grab a can of spray paint in your desired shade. Gold is always a good choice to match the chain!
* Pliers: These will be helpful for opening and closing chain links.
* Screwdriver: You’ll need this to assemble the lamp socket.
* Wire Strippers (Optional): Some lamp cord kits come pre-stripped, but if yours doesn’t, you’ll need wire strippers to expose the wires.
* Measuring Tape: To ensure accurate placement of your wall mount.
* Pencil: For marking the wall where you’ll install the mount.
* Safety Glasses: Protect your eyes!
Phase 1: Preparing the Chain and Lamp Cord
This phase is all about getting the chain and lamp cord ready for their glamorous transformation.
1. Measure and Cut the Chain (If Necessary): Decide how long you want your lamp to hang from the wall. If your chain is too long, use pliers to open a link and remove the excess. Remember, you can always remove more links later, so it’s better to start with a slightly longer chain.
2. Thread the Lamp Cord Through the Chain: This is where the magic begins! Starting at one end of the chain, carefully thread the lamp cord through the links. I found it easiest to work in small sections, pulling the cord through a few links at a time. Be patient, and don’t force it! You want to avoid damaging the cord.
3. Adjust the Cord Placement: Once the cord is threaded through the entire chain, adjust its position so that it hangs evenly. You want the cord to be relatively centered within the chain, allowing the chain to drape nicely.
Phase 2: Assembling the Lamp Socket
Now, let’s get that lamp socket ready to shine!
1. Disassemble the Lamp Socket: Most lamp socket kits come in a few pieces. Carefully disassemble the socket according to the instructions that came with your kit. Usually, this involves unscrewing a small screw or pressing a button to release the inner components.
2. Connect the Wires: This is the most important step, so pay close attention! The lamp cord will have two wires (usually black and white, or sometimes with markings). Connect these wires to the corresponding terminals inside the lamp socket. The terminals are usually marked with symbols or colors. Make sure the connections are secure. If your cord wasn’t pre-stripped, use wire strippers to expose about ½ inch of wire before connecting.
3. Reassemble the Lamp Socket: Once the wires are securely connected, carefully reassemble the lamp socket. Make sure all the parts fit snugly together and that the wires are tucked neatly inside.
4. Test the Connection (Before Final Assembly): Before you completely finish, plug in the lamp cord (without the bulb) and briefly test the switch to make sure the connection is working. If it doesn’t light up, double-check your wiring. Safety first! Unplug the cord before making any adjustments.
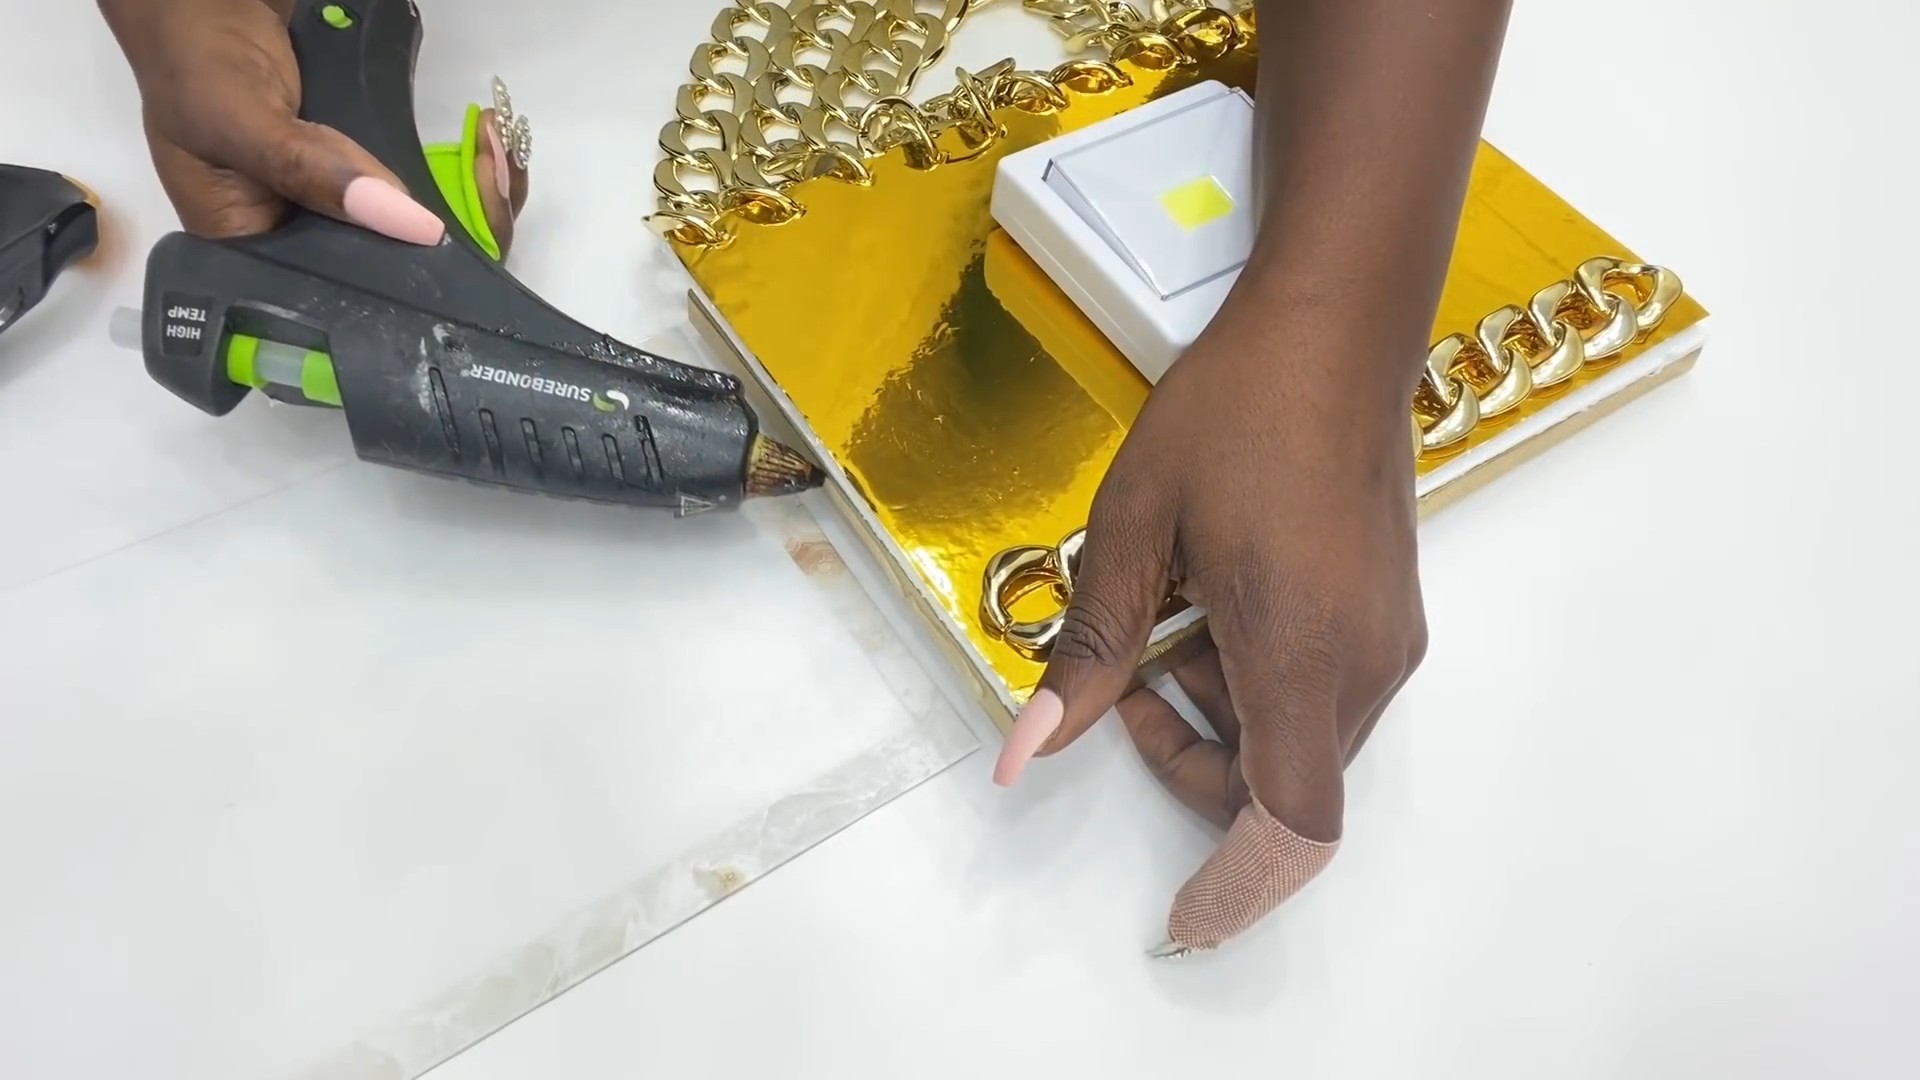
Phase 3: Mounting the Lamp and Adding the Finishing Touches
Almost there! Now it’s time to bring it all together and hang your beautiful new lamp.
1. Determine Wall Mount Placement: Decide where you want to hang your lamp. Use a measuring tape and pencil to mark the spot on the wall where you’ll install the mounting hardware. Consider the height and the desired drape of the chain.
2. Install the Wall Mounting Hardware: Install the hook or bracket according to the manufacturer’s instructions. If you’re using drywall anchors, make sure they’re properly installed to provide a secure hold.
3. Hang the Chain: Carefully hang the chain from the wall mount. Adjust the chain as needed to achieve the desired drape.
4. Install the Light Bulb: Screw in your chosen light bulb.
5. Final Adjustments: Take a step back and admire your creation! Make any final adjustments to the chain or cord placement.
6. Optional: Add Decorative Touches: If you want to add even more personality to your lamp, consider adding decorative tassels, beads, or other embellishments to the chain.
Troubleshooting Tips:
* Lamp Not Working: Double-check your wiring inside the lamp socket. Make sure the wires are securely connected to the correct terminals. Also, check the light bulb to make sure it’s not burned out.
* Chain Too Short/Long: You can easily adjust the length of the chain by adding or removing links using pliers.
* Wall Mount Not Secure: If you’re using drywall anchors, make sure they’re properly installed and rated to support the weight of the lamp. If necessary, consider using a stud finder to locate a wall stud for a more secure mount.
* Cord Not Staying Centered in Chain: Use small zip ties or pieces of tape to secure the cord to the chain at a few points along its length. This will help keep it centered and prevent it from slipping.
Safety Considerations:
* Always unplug the lamp before making any adjustments or repairs.
* Use caution when working with electricity. If you’re not comfortable with electrical wiring, consult a qualified electrician.
* Make sure the wall mounting hardware is strong enough to support the weight of the lamp.
* Keep the lamp away from flammable materials.
And there you have it! Your very own DIY gold chain wall lamp. I hope you enjoyed this project as much as I did. Now go ahead and bask in the glow of your beautiful, handmade creation! I know I will!
Conclusion
So, there you have it! Transforming an ordinary space into a haven of chic sophistication doesn’t require a hefty price tag or a professional interior designer. This DIY Gold Chain Wall Lamp project is more than just a craft; it’s an opportunity to inject your personality and creativity into your home decor. The beauty of this project lies in its simplicity and the dramatic impact it delivers. Imagine the warm, inviting glow emanating from your handcrafted lamp, casting elegant shadows and adding a touch of glamour to any room.
Why is this DIY trick a must-try? Because it’s affordable, customizable, and incredibly rewarding. Forget about scouring expensive furniture stores for the perfect lighting fixture. With a few readily available materials and a little bit of elbow grease, you can create a statement piece that reflects your unique style. Plus, the satisfaction of knowing you built it yourself is simply unmatched.
But the fun doesn’t stop there! Feel free to experiment with different variations to truly make this project your own. Consider using different types of chains – perhaps a thicker, more industrial chain for a bolder look, or a delicate, interwoven chain for a more romantic feel. You could also play with the color of the lamp shade. A deep jewel tone like emerald green or sapphire blue would add a touch of drama, while a soft pastel shade would create a more calming and serene atmosphere.
Another exciting variation is to incorporate embellishments into the chain itself. Think about adding small, decorative beads, charms, or even crystals to create a unique and eye-catching design. You could also experiment with different types of light bulbs. A vintage-style Edison bulb would add a touch of retro charm, while a smart bulb would allow you to control the brightness and color temperature from your phone.
Don’t be afraid to get creative and personalize this project to suit your individual taste and decor. The possibilities are endless!
We wholeheartedly encourage you to try this DIY Gold Chain Wall Lamp project. It’s a fantastic way to add a touch of luxury and personality to your home without breaking the bank. And most importantly, we want to hear about your experience! Share your photos and stories with us in the comments below. We can’t wait to see your unique creations and inspire others to embark on their own DIY adventures. Let’s transform our homes, one gold chain at a time!
Frequently Asked Questions (FAQ)
What tools and materials do I need for this DIY Gold Chain Wall Lamp project?
You’ll need a few essential tools and materials to get started. These typically include:
* A length of gold chain (the amount will depend on the desired length of your lamp)
* A wall-mounted lamp base (choose one that complements your style)
* A lampshade (again, the style and size are up to you)
* A light bulb (consider the wattage and color temperature)
* Pliers (for opening and closing chain links)
* Screwdriver (for attaching the lamp base to the wall)
* Drill (if necessary, for creating pilot holes in the wall)
* Measuring tape
* Pencil
* Safety glasses
Depending on your chosen variations, you might also need additional materials like beads, charms, crystals, or paint.
How do I determine the correct length of the gold chain?
The ideal length of the gold chain depends on the desired height of your lamp and the distance between the lamp base and the lampshade. A good starting point is to measure the distance between these two points and add a few extra inches for draping and adjusting the chain. It’s always better to have a little extra chain than not enough, as you can easily remove links if needed.
Is this DIY project suitable for beginners?
Absolutely! This DIY Gold Chain Wall Lamp project is designed to be beginner-friendly. The steps are straightforward and require minimal technical skills. However, if you’re not comfortable working with electrical components, it’s always best to consult with a qualified electrician. Safety should always be your top priority.
How do I attach the gold chain to the lamp base and lampshade?
The method for attaching the gold chain will depend on the specific design of your lamp base and lampshade. In most cases, you can use pliers to open and close the chain links, attaching them to existing hooks or loops on the lamp base and lampshade. If your lamp base or lampshade doesn’t have suitable attachment points, you may need to create them using small eye hooks or wire.
Can I use a different type of chain instead of gold?
Yes, absolutely! While we’re focusing on a gold chain for this project, you can certainly use other types of chains to achieve a different look. Silver, copper, or even black metal chains can create a more modern or industrial aesthetic. You could also experiment with different chain styles, such as rope chains, cable chains, or box chains. The key is to choose a chain that complements your overall decor and personal style.
What type of light bulb should I use?
The type of light bulb you use will depend on your personal preference and the desired ambiance. LED bulbs are a great option because they are energy-efficient and long-lasting. You can also choose from a variety of color temperatures, ranging from warm white to cool white. Vintage-style Edison bulbs are a popular choice for adding a touch of retro charm. Smart bulbs offer even more flexibility, allowing you to control the brightness and color temperature from your phone.
How do I clean my DIY Gold Chain Wall Lamp?
To keep your DIY Gold Chain Wall Lamp looking its best, it’s important to clean it regularly. Dust the chain and lampshade with a soft cloth or duster. For more stubborn dirt or grime, you can use a mild soap and water solution. Be sure to dry the chain thoroughly after cleaning to prevent tarnishing.
What if I don’t want to mount the lamp on the wall?
If you prefer not to mount the lamp on the wall, you can adapt this project to create a hanging pendant lamp instead. Simply attach the gold chain to a ceiling hook and suspend the lampshade from the chain. This is a great option for renters or those who prefer a more bohemian look.
Where can I find inspiration for different variations of this project?
The internet is a treasure trove of inspiration for DIY projects! Browse Pinterest, Instagram, and home decor blogs for ideas on different chain styles, lampshade colors, and embellishments. Don’t be afraid to experiment and put your own unique spin on this project.
What if I’m not happy with the final result?
The beauty of DIY is that you can always make changes! If you’re not happy with the final result, don’t be afraid to experiment with different variations until you achieve the look you desire. You can always add more chain, change the lampshade, or add embellishments. The most important thing is to have fun and enjoy the process. Remember, this DIY Gold Chain Wall Lamp is all about expressing your creativity and personal style.


Leave a Comment