

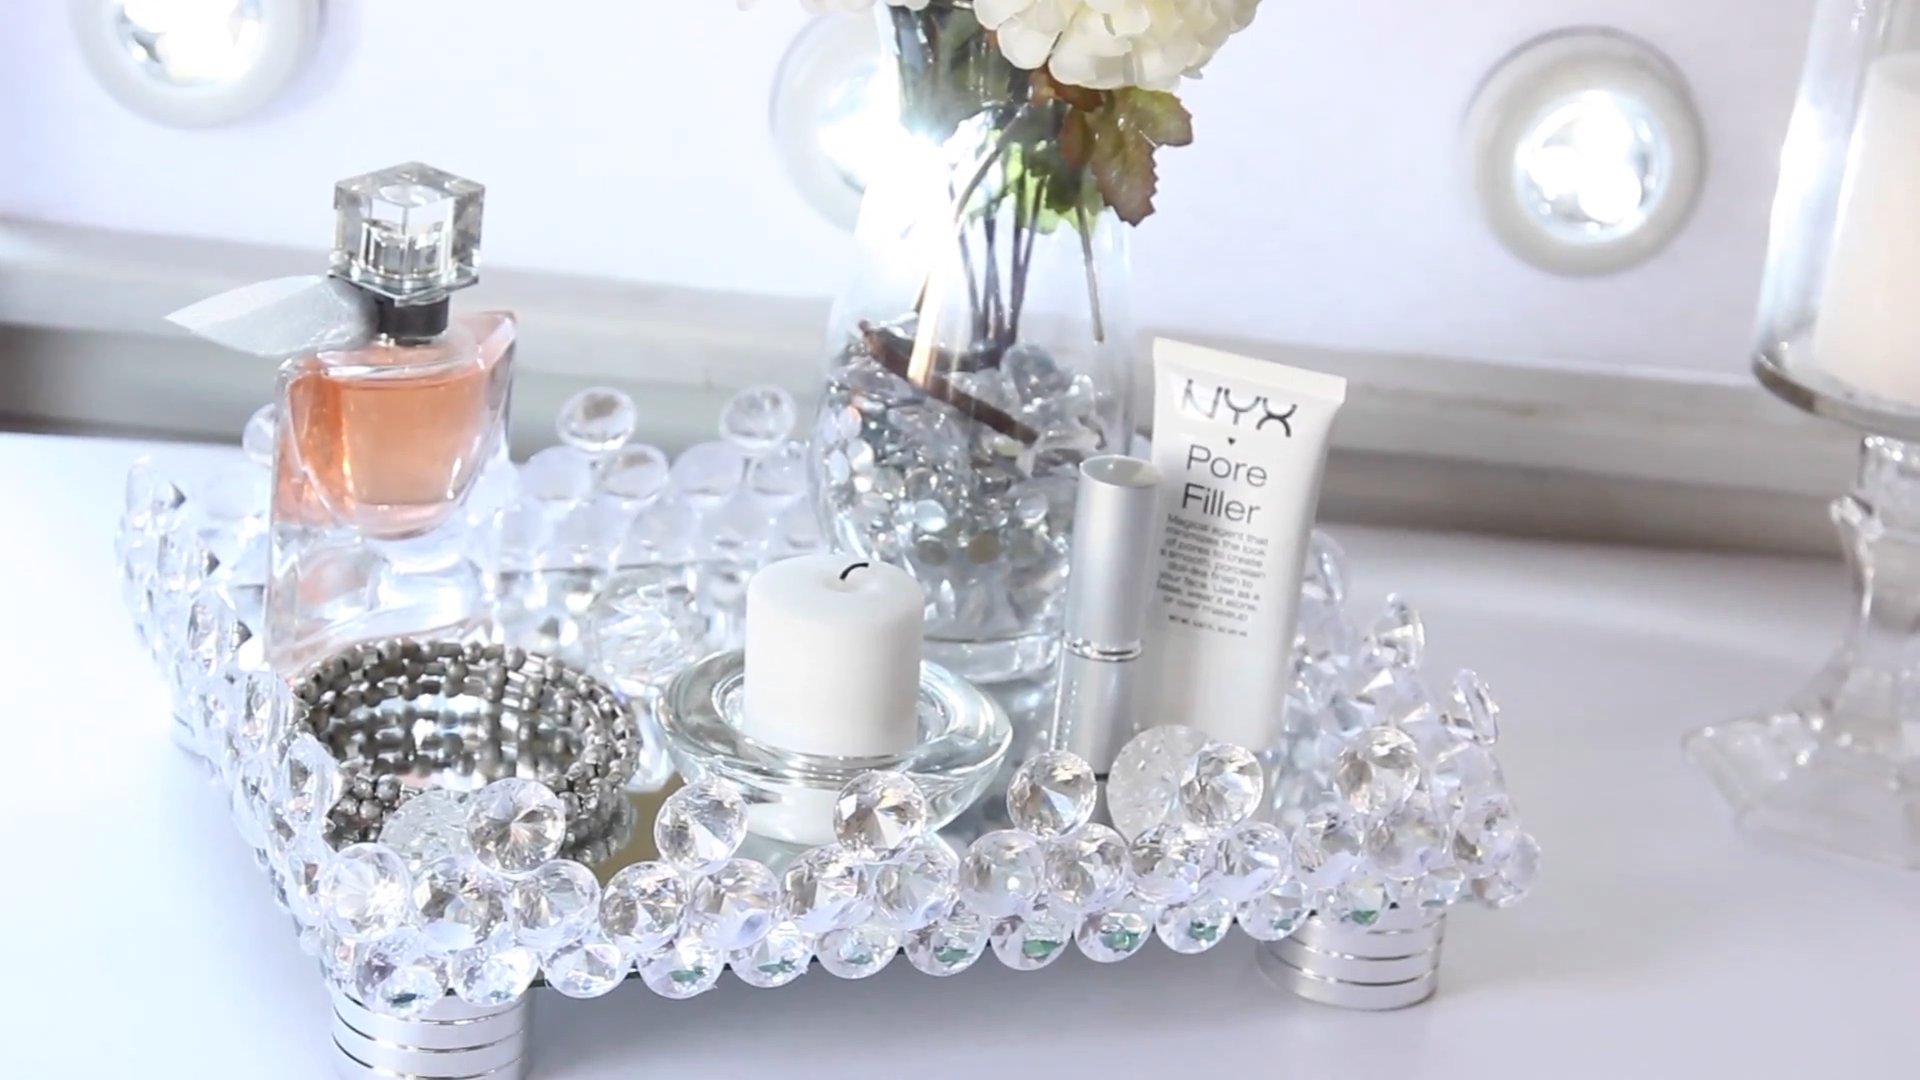
DIY Gem Vanity Tray: Ever feel like your makeup and jewelry are just scattered across your vanity, creating a chaotic mess? I know I have! It’s frustrating to spend precious minutes searching for that one earring or the perfect shade of lipstick. But what if I told you there’s a simple, elegant, and totally customizable solution that you can create yourself?
Vanity trays have a rich history, dating back to the Victorian era when they were used to display perfumes and grooming essentials. They were a symbol of luxury and personal care, and while times have changed, the need for organized and beautiful spaces hasn’t. Today, we’re bringing that touch of elegance into the modern era with a dazzling twist: a DIY Gem Vanity Tray!
This isn’t just about tidying up; it’s about adding a personal touch to your space and creating something truly unique. Imagine a tray sparkling with your favorite colors, reflecting your personality, and keeping all your essentials neatly organized. This DIY project is perfect for anyone looking to add a touch of glamour to their bedroom or bathroom, and it’s surprisingly easy to make. Plus, it’s a fantastic way to upcycle old trays or give a thoughtful, handmade gift. So, grab your glue gun and let’s get ready to create a stunning DIY Gem Vanity Tray that will transform your vanity from cluttered to captivating!
DIY Gem Vanity Tray: Add Sparkle to Your Space!
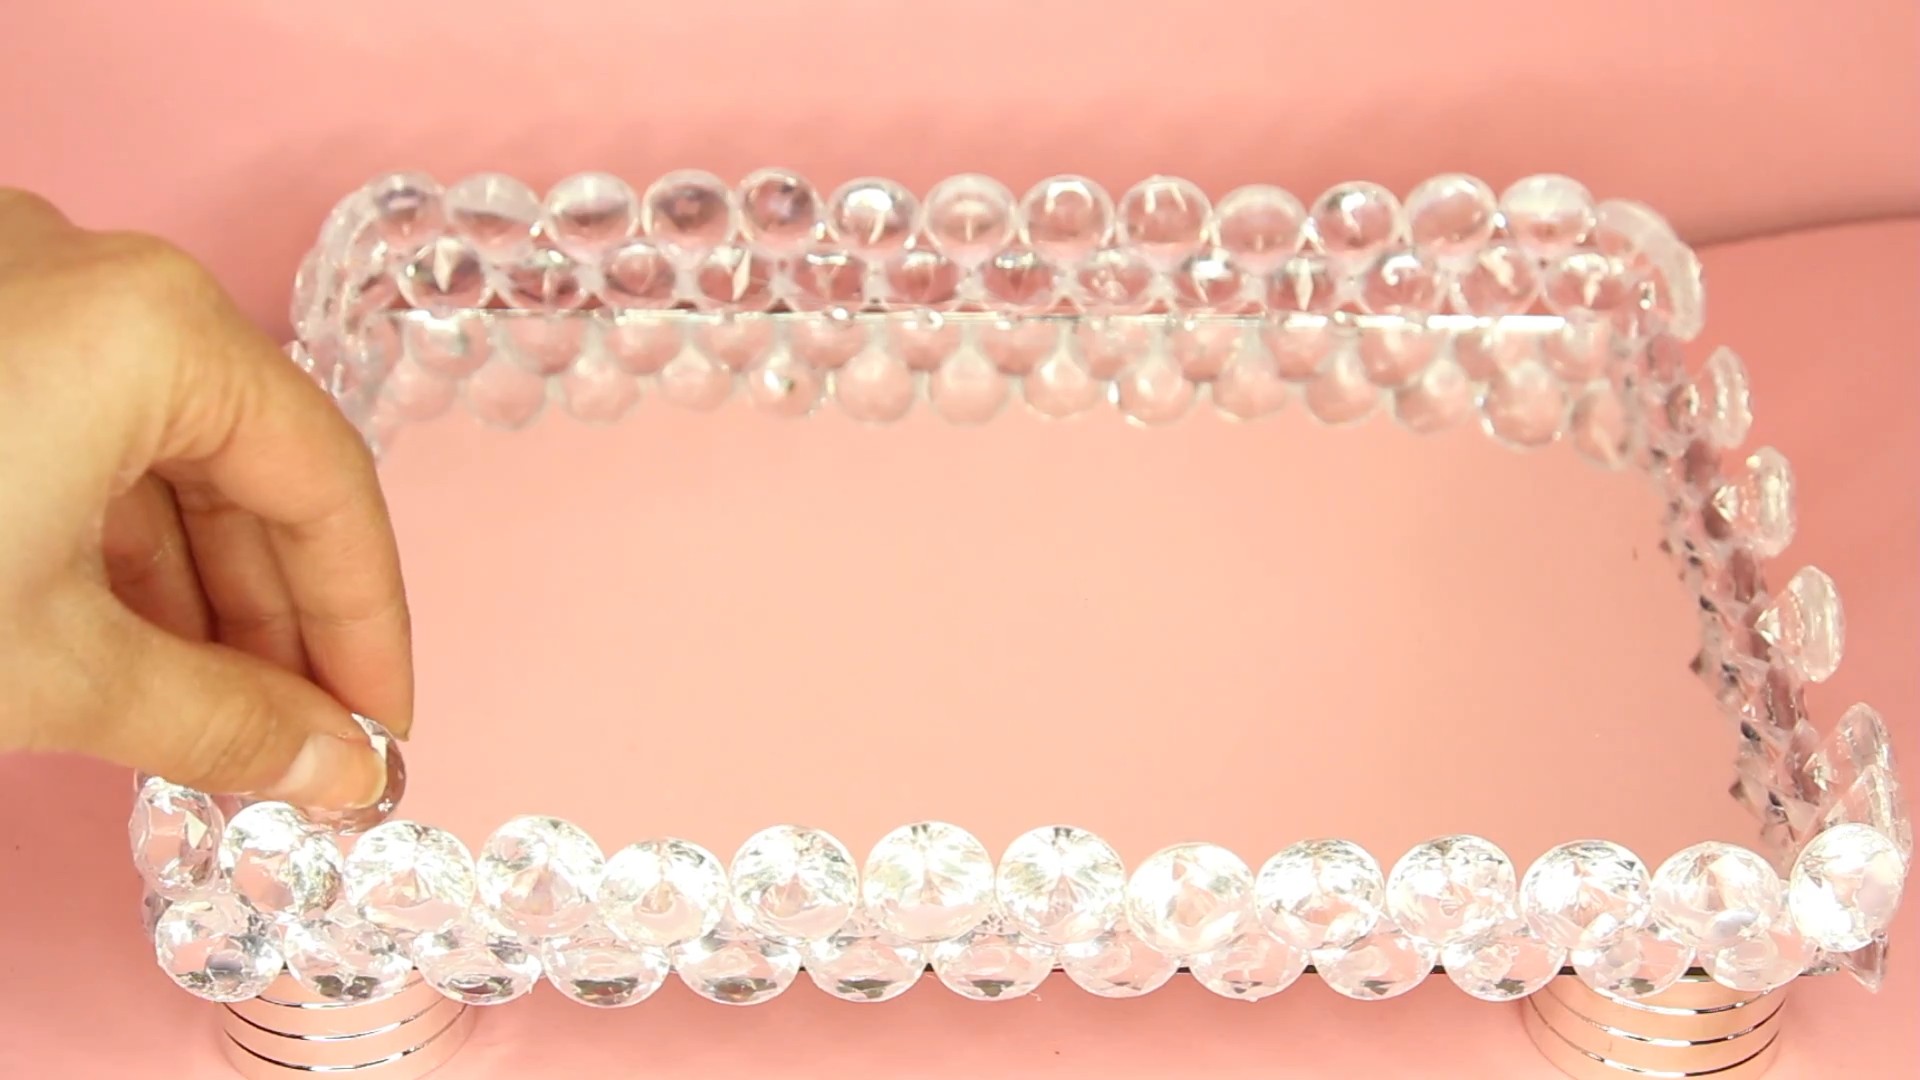
Hey there, fellow DIY enthusiasts! I’m so excited to share this project with you – a gorgeous gem vanity tray that’s surprisingly easy to make and adds a touch of glam to any room. I’ve always loved the look of those fancy, bejeweled trays you see in boutiques, but the price tag? Ouch! So, I decided to create my own, and I’m thrilled with how it turned out. Get ready to transform an ordinary tray into a dazzling display piece!
What You’ll Need: Your Supply List
Before we dive in, let’s gather our supplies. This is crucial for a smooth crafting experience. Trust me, nothing’s worse than getting halfway through and realizing you’re missing something!
* A plain tray: I used a rectangular wooden tray from a craft store. You can choose any shape or material you like – metal, plastic, even an old serving tray will work! Just make sure it’s clean and ready to be embellished.
* Assorted gems and rhinestones: This is where the fun begins! I recommend a variety of sizes, shapes, and colors to create a truly unique look. You can find these at craft stores, online retailers, or even repurpose old jewelry. Think about the overall aesthetic you’re going for – elegant, bohemian, colorful, etc.
* Strong adhesive: E6000 is my go-to for projects like this. It’s super strong and dries clear, which is exactly what we need. Hot glue can work in a pinch, but it might not be as durable.
* Toothpicks or a wax pencil: These are essential for picking up and placing the tiny gems. Trust me, trying to handle them with your fingers is a recipe for disaster!
* Optional: Spray paint or acrylic paint: If you want to change the color of your tray, now’s the time!
* Optional: Sealant: A clear sealant will protect your finished tray and keep your gems sparkling.
* Optional: Felt or cork for the bottom: This will prevent scratching your furniture.
* Pencil: For marking guidelines, if needed.
* Ruler: For measuring and ensuring even spacing.
* Paper towels: For cleaning up any adhesive spills.
Phase 1: Preparing Your Tray (If Necessary)
If you’re happy with the color of your tray, you can skip this step. But if you want to customize it, now’s the time to get creative!
1. Clean the tray: Use a damp cloth to remove any dust or debris. Make sure it’s completely dry before proceeding.
2. Sand the tray (if wooden): Lightly sanding the surface will help the paint adhere better.
3. Apply primer (if needed): If you’re using a dark color on a light tray, or vice versa, a primer will help ensure even coverage.
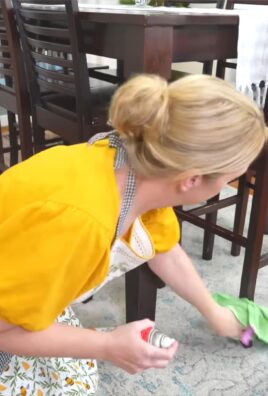
4. Paint the tray: Apply 2-3 thin coats of spray paint or acrylic paint, allowing each coat to dry completely before applying the next. I prefer spray paint for a smooth, even finish. Let it dry completely. This might take a few hours, so be patient!
Phase 2: Designing Your Gem Layout
This is where your creativity really shines! Before you start gluing, it’s a good idea to plan out your design.
1. Gather your gems: Spread them out on a clean surface so you can easily see all your options.
2. Experiment with different layouts: Arrange the gems on the tray in different patterns and combinations. Consider symmetry, color coordination, and the overall aesthetic you’re going for.
3. Take a picture: Once you’re happy with a layout, take a picture so you can refer back to it later. This is especially helpful if you’re working on a complex design.
4. Consider focal points: Think about where you want the eye to be drawn. You might want to use larger, more eye-catching gems in these areas.
5. Mark guidelines (optional): If you’re creating a symmetrical design, use a pencil and ruler to mark guidelines on the tray. This will help you keep everything aligned.
Phase 3: Gluing the Gems
Okay, now for the fun part! This is where your vision starts to come to life.
1. Work in small sections: Don’t try to glue all the gems at once. Work in small sections to prevent the adhesive from drying out.
2. Apply a small amount of adhesive: Use a toothpick or the tip of the adhesive tube to apply a small amount of adhesive to the back of each gem. A little goes a long way!
3. Place the gem carefully: Use a toothpick or wax pencil to pick up the gem and place it carefully on the tray, following your design.
4. Press gently: Press the gem gently into the adhesive to ensure it’s securely attached.
5. Wipe away excess adhesive: Use a damp paper towel to wipe away any excess adhesive that may have squeezed out around the gem.
6. Repeat: Repeat steps 2-5 until you’ve filled the entire tray with gems.
7. Let it dry completely: This is crucial! Allow the adhesive to dry completely before moving on to the next step. I recommend waiting at least 24 hours.
Phase 4: Finishing Touches
Almost there! These final steps will help protect your tray and give it a polished look.
1. Apply sealant (optional): If you want to protect your tray and keep your gems sparkling, apply a thin coat of clear sealant. Follow the manufacturer’s instructions. Let it dry completely.
2. Add felt or cork to the bottom (optional): Cut pieces of felt or cork to fit the bottom of the tray and glue them in place. This will prevent scratching your furniture.
3. Inspect your work: Take a close look at your finished tray and make sure all the gems are securely attached. If you find any loose gems, re-glue them.
4. Clean the tray: Use a soft cloth to gently clean the tray and remove any dust or fingerprints.
Tips and Tricks for a Sparkling Success
* Don’t be afraid to experiment: This is your project, so have fun with it! Try different gem combinations, patterns, and colors.
* Use a variety of gem sizes and shapes: This will add visual interest and dimension to your tray.
* Consider the overall aesthetic of your space: Choose gems that complement your existing decor.
* Work in a well-ventilated area: Especially if you’re using spray paint or sealant.
* Protect your work surface: Cover your work surface with newspaper or a drop cloth to prevent spills.
* Be patient: This project takes time and patience. Don’t rush it!
* Have fun! This is the most important tip of all. Enjoy the process of creating something beautiful and unique.
Alternative Design Ideas
* Monogrammed Tray: Use gems to create your initials or a favorite word on the tray.
* Floral Design: Arrange the gems in the shape of flowers or leaves.
* Geometric Pattern: Create a modern and stylish look with geometric shapes.
* Ombre Effect: Use gems in different shades of the same color to create a gradient effect.
* Holiday Theme: Create a festive tray for the holidays with red, green, and gold gems.
Caring for Your Gem Vanity Tray
To keep your gem vanity tray looking its best, follow these simple care tips:
* Dust regularly: Use a soft cloth to gently dust the tray.
* Avoid harsh chemicals: Do not use harsh chemicals or abrasive cleaners, as they can damage the gems and adhesive.
* Spot clean: If you need to clean the tray, use a damp cloth and mild soap.
* Avoid extreme temperatures: Do not expose the tray to extreme temperatures, as this can weaken the adhesive.
* Handle with care: Be careful not to drop or bump the tray, as this can dislodge the gems.
I hope you enjoyed this tutorial! I can’t wait to see what you create. Happy crafting!
Conclusion
So, there you have it! Transforming an ordinary tray into a dazzling, personalized gem vanity tray is not only incredibly satisfying but also a fantastic way to add a touch of glamour to your everyday routine. Forget those overpriced, mass-produced trays you see in department stores. With a little creativity and some readily available materials, you can craft a stunning piece that perfectly reflects your unique style.
This DIY project is more than just a craft; it’s an opportunity to unleash your inner artist and create something truly special. The beauty of this project lies in its versatility. Feel free to experiment with different types of gems – think iridescent stones, colorful glass beads, or even vintage buttons for a truly eclectic look. Consider using different tray shapes and sizes to suit your specific needs. A smaller, round tray would be perfect for holding perfumes, while a larger, rectangular tray could be used to organize makeup brushes and palettes.
Don’t be afraid to play with the arrangement of the gems. You could create a symmetrical pattern for a classic, elegant feel, or opt for a more random, organic design for a bohemian vibe. You can even incorporate personalized elements, such as initials or meaningful symbols, using smaller gems.
Why is this DIY gem vanity tray a must-try? Because it’s affordable, customizable, and adds a touch of luxury to your space without breaking the bank. It’s a fantastic way to upcycle an old tray or give a new one a unique makeover. Plus, the process itself is incredibly therapeutic and rewarding. Imagine the satisfaction of displaying your favorite beauty products on a tray that you created with your own two hands!
Beyond the aesthetic appeal, this DIY project also offers practical benefits. A well-organized vanity tray can help you keep your beauty products neat and tidy, making it easier to find what you need when you need it. It can also protect your surfaces from spills and stains.
We encourage you to give this DIY gem vanity tray a try. It’s a project that’s suitable for crafters of all skill levels, and the results are guaranteed to impress. Once you’ve created your masterpiece, we’d love to see it! Share your photos and experiences with us on social media using #DIYGemVanityTray. We can’t wait to see your creative interpretations and be inspired by your unique designs. Let’s spread the sparkle and inspire others to embrace their inner artist! This is a project that will not only beautify your space but also bring you joy and a sense of accomplishment. So gather your supplies, get creative, and let the gem-studded magic begin!
FAQ
What kind of glue should I use for this project?
The best type of glue to use for attaching gems to your tray is a strong adhesive that is suitable for both the tray material and the gems you are using. For most surfaces, like plastic, wood, or metal, a multi-purpose craft glue or epoxy adhesive will work well. Hot glue can also be used, but it may not provide as strong or long-lasting of a bond as other options. Make sure the glue dries clear to avoid any unsightly residue around the gems. Always test the glue on a small, inconspicuous area of the tray first to ensure it doesn’t damage the surface.
How do I clean my gem vanity tray?
Cleaning your gem vanity tray requires a gentle touch to avoid dislodging any gems or damaging the surface. The best approach is to use a soft, damp cloth to wipe down the tray regularly. For more stubborn dirt or grime, you can add a small amount of mild dish soap to the water. Avoid using harsh chemicals or abrasive cleaners, as these can damage the gems or the tray’s finish. If any gems come loose, simply re-glue them using the same adhesive you used initially.
What if I don’t have any gems? What else can I use?
The beauty of this DIY project is that you can customize it to your liking. If you don’t have gems, you can use a variety of other materials to decorate your tray. Consider using glass beads, sequins, buttons, small shells, or even broken pieces of mosaic tile. You can also paint the tray with acrylic paints and add embellishments like glitter or stencils. The possibilities are endless! Get creative and use whatever materials you have on hand to create a unique and personalized vanity tray.
Can I use a wooden tray for this project?
Absolutely! A wooden tray is an excellent choice for this DIY project. Before you begin, make sure the wood is smooth and free of any splinters. You may want to sand it down and apply a coat of primer to create a smooth surface for the glue to adhere to. You can also paint the wooden tray with acrylic paints to match your decor before adding the gems. When gluing the gems to the wood, use a strong wood glue or epoxy adhesive for the best results.
How do I prevent the gems from falling off?
To prevent the gems from falling off your vanity tray, it’s crucial to use a strong and appropriate adhesive. Make sure the surface of the tray is clean and dry before applying the glue. Apply a generous amount of glue to the back of each gem and press it firmly onto the tray. Allow the glue to dry completely according to the manufacturer’s instructions before using the tray. Avoid placing heavy items on the tray until the glue has fully cured. If you’re concerned about the gems falling off, you can also apply a clear sealant over the entire tray to provide an extra layer of protection.
What are some design ideas for my gem vanity tray?
There are countless design possibilities for your gem vanity tray! You can create a symmetrical pattern for a classic and elegant look, or opt for a more random and organic design for a bohemian vibe. Consider arranging the gems in a gradient of colors, or creating a mosaic-like pattern with different shapes and sizes of gems. You can also incorporate personalized elements, such as initials or meaningful symbols, using smaller gems. Another idea is to create a themed tray, such as a beach-themed tray with shells and blue gems, or a floral-themed tray with flower-shaped gems and pastel colors. Let your imagination run wild and create a design that reflects your personal style.
Where can I find affordable gems for this project?
You can find affordable gems for this project at a variety of places. Craft stores like Michaels and Hobby Lobby often have a wide selection of gems and beads at reasonable prices. You can also find gems online at retailers like Amazon and Etsy. Dollar stores are another great option for finding inexpensive gems, although the quality may not be as high. Flea markets and garage sales can also be a treasure trove of vintage gems and beads. Don’t be afraid to get creative and repurpose old jewelry or buttons for this project.
How long does it take to complete this DIY project?
The time it takes to complete this DIY project will depend on the size of the tray, the complexity of the design, and your own crafting speed. A simple tray with a basic design can be completed in a few hours, while a larger tray with a more intricate design may take several days. The most time-consuming part of the project is usually gluing the gems onto the tray. Make sure to allow enough time for the glue to dry completely before using the tray.
Leave a Comment