

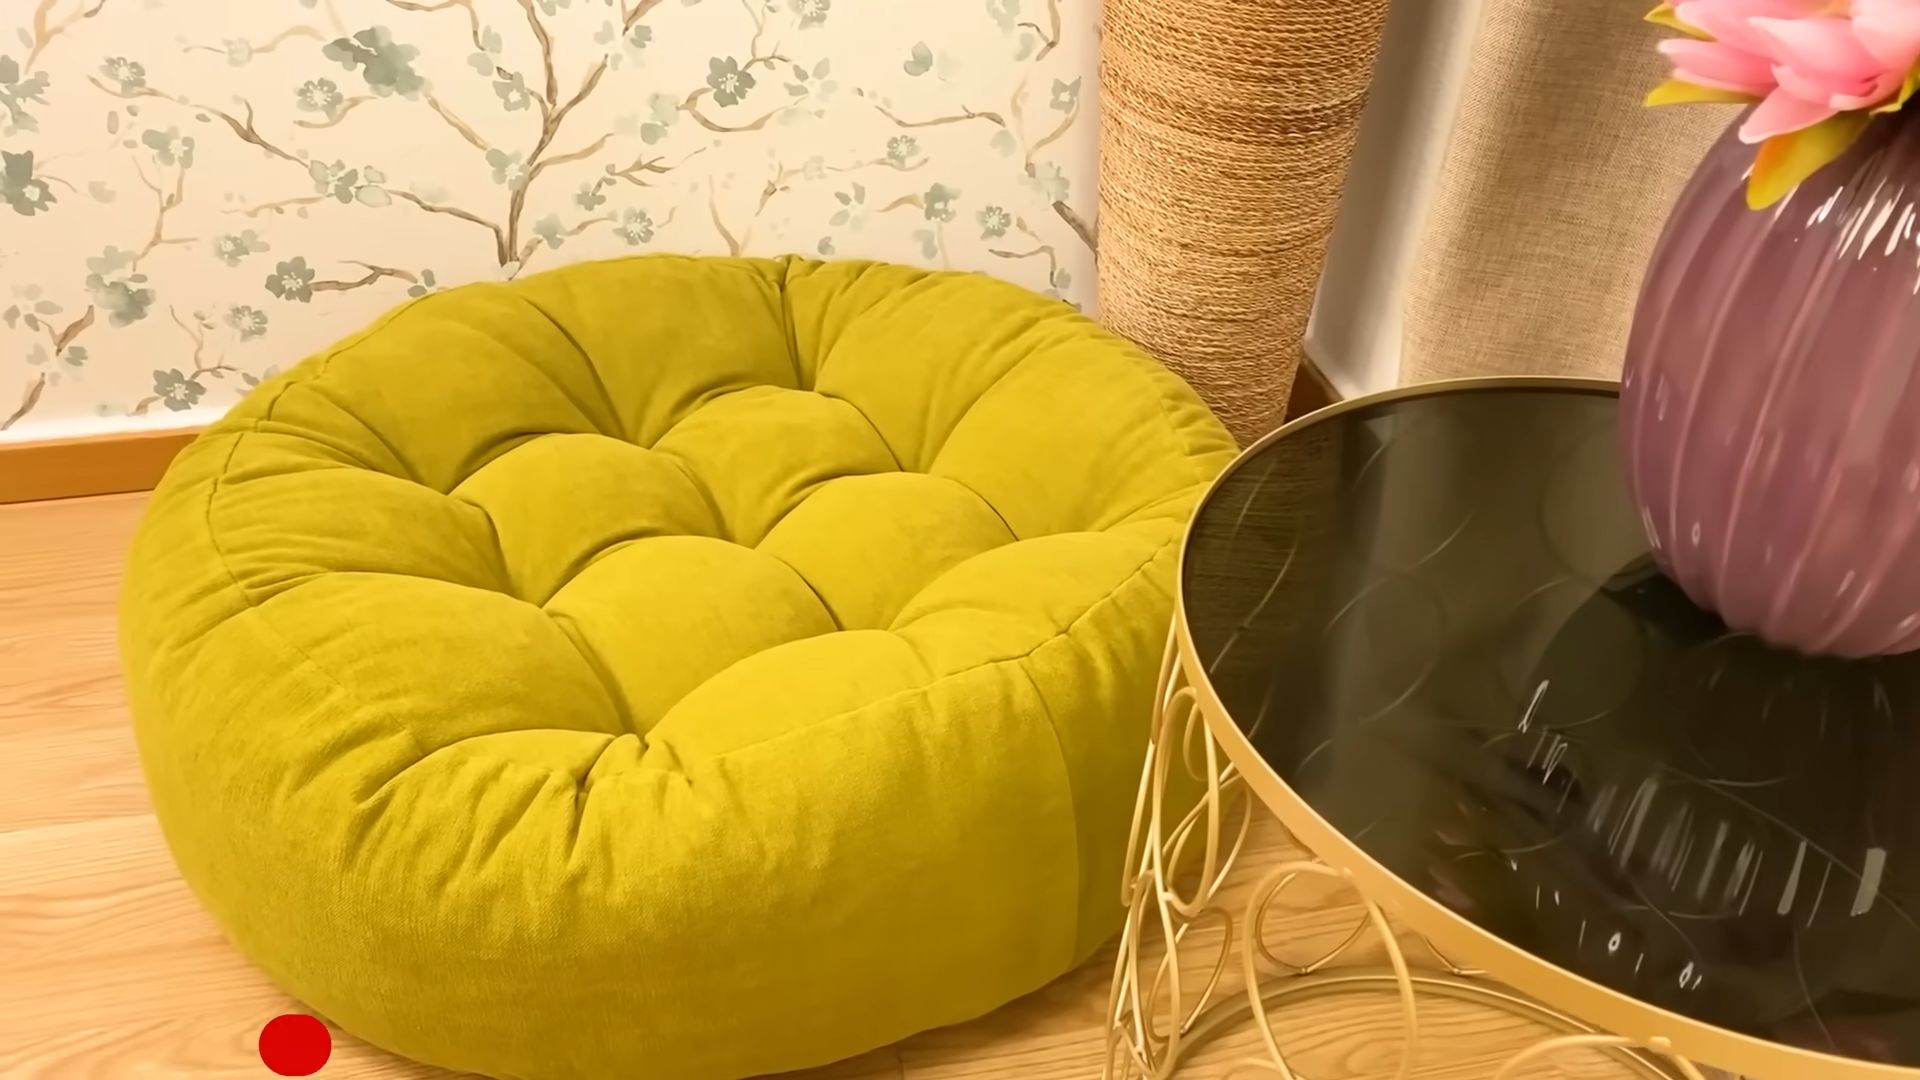
DIY Floor Puff Cushion: Imagine sinking into a cloud of comfort, right in your living room, crafted by your own two hands! Forget those expensive store-bought cushions; we’re diving into the world of DIY and creating a cozy, stylish floor puff cushion that’s uniquely yours.
Floor cushions have a rich history, dating back centuries in various cultures. From the intricately woven floor seating of the Middle East to the simple, functional cushions used in Japanese homes, these versatile pieces have always offered a relaxed and inviting alternative to traditional furniture. They encourage a sense of community and closeness, perfect for gatherings with friends and family.
But why should you embark on this DIY adventure? Well, besides saving money, creating your own DIY floor puff cushion allows you to personalize your space with colors, patterns, and textures that perfectly reflect your style. Plus, it’s a fantastic way to upcycle old fabrics and give them a new lease on life! In today’s fast-paced world, having a comfortable and inviting space to unwind is more important than ever. I’m here to guide you through each step, ensuring you create a floor puff cushion that’s not only beautiful but also incredibly comfortable and durable. Let’s get crafting!
DIY Floor Puff Cushion: A Cozy Seating Project
Hey there, fellow DIY enthusiasts! Are you looking for a comfy and stylish addition to your living space? I’m going to walk you through creating your very own floor puff cushion. It’s a fantastic project that’s both budget-friendly and customizable to match your unique style. Get ready to ditch those stiff chairs and sink into ultimate relaxation!
Materials You’ll Need
Before we dive in, let’s gather all the necessary materials. Trust me, having everything on hand will make the process much smoother.
* Fabric: This is where you can really let your creativity shine! Choose a durable fabric that can withstand some wear and tear. Think canvas, denim, upholstery fabric, or even a thick cotton. The amount you’ll need depends on the size of your puff cushion, but I’d recommend at least 2-3 yards. Consider the width of the fabric too!
* Inner Lining Fabric (Optional): This is for creating an inner bag to hold the filling. It’s not absolutely necessary, but it helps keep the filling contained and makes washing the outer cover easier. Muslin or a cheap cotton fabric works perfectly. You’ll need the same amount as your outer fabric.
* Filling: This is what will give your puff cushion its squishy goodness! You have a few options here:
* Polystyrene Beads (Beanbag Filling): These are lightweight and conform to your body, but they can be messy if they escape.
* Shredded Foam: A more eco-friendly option, shredded foam provides great support and is less likely to spill.
* Fabric Scraps: If you’re looking for a truly budget-friendly and sustainable option, use fabric scraps! This is a great way to recycle old clothes or leftover fabric from other projects. Just make sure the scraps are clean and relatively small.
* Combination: You can even mix different fillings to achieve your desired level of comfort and support.
The amount of filling you need will depend on the size of your cushion. Start with a large bag and adjust as needed.
* Sewing Machine: A sewing machine will make this project much faster and easier, but you can also sew it by hand if you’re feeling patient.
* Thread: Choose a thread that matches your fabric.
* Scissors: Sharp scissors are essential for cutting fabric accurately.
* Measuring Tape or Ruler: For measuring and marking your fabric.
* Pins: To hold the fabric pieces together while sewing.
* Chalk or Fabric Marker: For marking your cutting lines.
* Zipper (Optional): If you want to be able to remove the outer cover for washing, you’ll need a zipper. Choose a zipper that’s long enough to create a decent opening.
* Needle and Thread (for hand sewing): For closing up any gaps or adding finishing touches.
* Paper and Pencil: For creating a pattern.
Creating the Pattern
Before you start cutting fabric, you’ll need a pattern. I find that a simple circular pattern works best for a floor puff cushion, but you can experiment with other shapes if you’re feeling adventurous.
1. Decide on the Size: Think about how big you want your puff cushion to be. A diameter of 30-40 inches is a good starting point for a comfortable size.
2. Draw the Circle: On a large piece of paper, draw a circle with the desired diameter. You can use a compass, a string tied to a pencil, or even trace around a large object like a bucket or a pot lid.
3. Add Seam Allowance: Add a seam allowance of about 1/2 inch around the entire circle. This will give you room to sew the pieces together without making the finished cushion smaller than you intended.
4. Cut Out the Pattern: Carefully cut out the pattern along the outer line (including the seam allowance).
Cutting the Fabric
Now that you have your pattern, it’s time to cut the fabric.
1. Fold the Fabric: Fold your fabric in half, right sides together. This will allow you to cut two pieces at once.
2. Pin the Pattern: Place the pattern on top of the folded fabric and pin it securely in place. Make sure the pattern is aligned with the grain of the fabric.
3. Cut the Fabric: Carefully cut around the pattern, following the outer line.
4. Repeat: Repeat steps 1-3 to cut out two circles from the outer fabric and two circles from the inner lining fabric (if you’re using it).
Sewing the Inner Lining (Optional)
If you’re using an inner lining, this is the first step.
1. Pin the Circles Together: Place the two inner lining circles right sides together and pin them around the edges, leaving a 12-18 inch opening for filling.
2. Sew the Circles: Sew around the circles, using a 1/2 inch seam allowance. Remember to leave the opening unsewn.
3. Turn Right Side Out: Turn the inner lining right side out through the opening.
Sewing the Outer Cover
Now for the main event: creating the outer cover!
1. Pin the Circles Together: Place the two outer fabric circles right sides together and pin them around the edges.
2. Sew the Circles: Sew around the circles, using a 1/2 inch seam allowance. Leave an opening for the zipper (if using) or a larger opening (12-18 inches) if you’re not using a zipper.
3. Install the Zipper (Optional): If you’re using a zipper, now’s the time to install it.
* Prepare the Opening: Press the edges of the opening inward, creating a clean edge.
* Pin the Zipper: Pin the zipper to the opening, making sure the zipper teeth are aligned with the edge of the fabric.
* Sew the Zipper: Sew the zipper in place, using a zipper foot on your sewing machine.
4. Turn Right Side Out: Turn the outer cover right side out through the opening.
Filling the Cushion
This is where your puff cushion starts to take shape!
1. Insert the Inner Lining (Optional): If you’re using an inner lining, insert it into the outer cover.
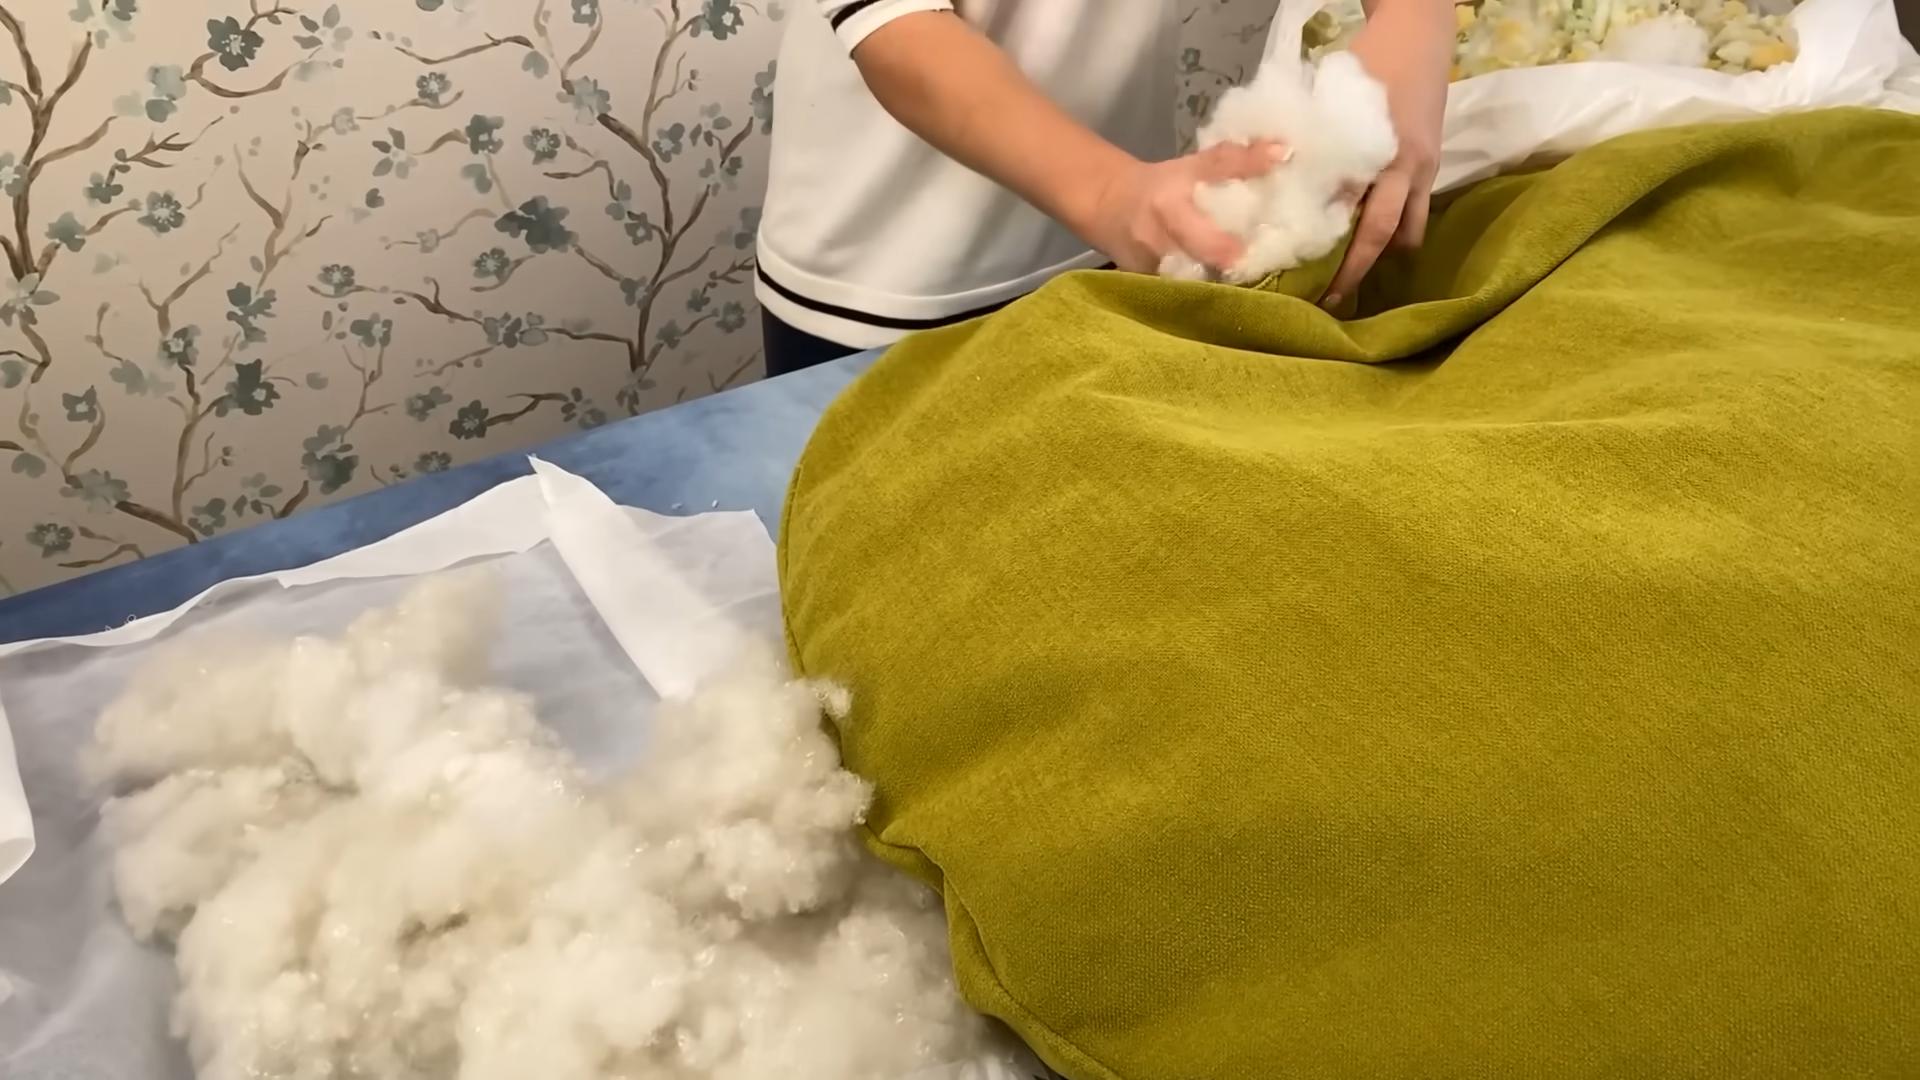
2. Start Filling: Carefully pour the filling into the inner lining (or directly into the outer cover if you’re not using a lining). Be careful not to overfill the cushion, as it will become too stiff.
3. Adjust the Filling: As you fill the cushion, periodically fluff it and adjust the filling to ensure it’s evenly distributed.
4. Continue Filling: Continue filling until the cushion is firm but still comfortable to sit on.
5. Close the Opening: Once you’re happy with the amount of filling, it’s time to close the opening.
* Hand Sew (No Zipper): If you’re not using a zipper, fold the edges of the opening inward and pin them together. Then, using a needle and thread, hand sew the opening closed with a blind stitch.
* Close the Zipper (With Zipper): Simply close the zipper!
Finishing Touches
Congratulations! You’ve created your very own floor puff cushion. Here are a few finishing touches to make it even better:
* Fluff and Shape: Give your cushion a good fluff and shape it to your liking.
* Add Tassels or Pom-Poms (Optional): For a fun and decorative touch, add tassels or pom-poms to the corners of the cushion.
* Embellish (Optional): You can also embellish the cushion with embroidery, appliques, or other decorative elements.
Tips and Tricks
Here are a few extra tips and tricks to help you along the way:
* Use a Funnel: When filling the cushion, use a funnel to help prevent spills.
* Work in a Well-Ventilated Area: If you’re using polystyrene beads, work in a well-ventilated area to avoid inhaling the fumes.
* Don’t Be Afraid to Experiment: This is your project, so don’t be afraid to experiment with different fabrics, fillings, and embellishments.
* Recycle Old Clothes: Old jeans, t-shirts, and sweaters can be repurposed into fabric scraps for filling your cushion.
* Washable Fabric: If you plan on washing the outer cover frequently, choose a washable fabric and pre-wash it before cutting.
* Reinforce Seams: For added durability, reinforce the seams with a double stitch or a zigzag stitch.
* Consider a Handle: Adding a handle to the side of the cushion will make it easier to
Conclusion
So, there you have it! Transforming old clothes and fabric scraps into a comfortable and stylish DIY floor puff cushion is not only incredibly rewarding but also a fantastic way to embrace sustainability and personalize your living space. Forget those expensive store-bought cushions that lack character and often come with a hefty price tag. This project empowers you to create a unique piece that reflects your individual style and reduces textile waste simultaneously.
Why is this DIY floor puff cushion a must-try? Because it’s more than just a cushion; it’s a statement. It’s a statement about your commitment to resourcefulness, your appreciation for handmade goods, and your desire to create a home that truly feels like *you*. It’s also incredibly practical. Imagine sinking into this plush cushion after a long day, enjoying a good book, or using it as extra seating for guests. The possibilities are endless.
But the beauty of this project lies in its adaptability. Feel free to experiment with different fabrics and filling materials. Instead of old clothes, consider using burlap for a rustic look, velvet for a touch of luxury, or even outdoor fabric for a weather-resistant cushion perfect for your patio. For the filling, you could use shredded foam, cotton batting, or even beanbag filling for a different texture and level of support.
Consider adding embellishments to further personalize your creation. Think about incorporating embroidery, patchwork, or even adding tassels or pom-poms for a playful touch. You could also experiment with different shapes and sizes. A smaller, round cushion would be perfect for meditation, while a larger, rectangular one could serve as a comfortable footrest.
Don’t be afraid to get creative and let your imagination run wild! The most important thing is to have fun and enjoy the process of creating something beautiful and functional with your own two hands.
We are confident that you’ll love the results of this DIY project. It’s a simple, cost-effective, and incredibly satisfying way to add comfort, style, and personality to your home. So, gather your materials, unleash your inner crafter, and get ready to create a DIY floor puff cushion that you’ll cherish for years to come.
We can’t wait to see what you create! Share your finished cushions with us on social media using #DIYFloorPuffCushion and inspire others to embrace the joy of DIY. Let’s build a community of resourceful crafters who are passionate about creating beautiful and sustainable homes. We are eager to see your unique interpretations and learn from your experiences. Happy crafting!
Frequently Asked Questions (FAQ)
What kind of fabric is best for a DIY floor puff cushion?
The best fabric for your DIY floor puff cushion depends on your desired aesthetic and the cushion’s intended use. For durability and easy cleaning, consider denim, canvas, or upholstery fabric. These materials can withstand regular use and are relatively easy to maintain. If you’re aiming for a softer, more luxurious feel, velvet or corduroy are excellent choices. For outdoor use, opt for weather-resistant fabrics like outdoor canvas or treated polyester. Remember to pre-wash your fabric before cutting and sewing to prevent shrinkage later on. Ultimately, the best fabric is one that you love the look and feel of, and that suits the purpose of your cushion. Don’t be afraid to mix and match different fabrics for a unique and eclectic look!
What’s the best filling material for a floor puff cushion?
The ideal filling material depends on your desired level of comfort and support. Shredded foam is a popular choice because it’s readily available, affordable, and provides good support. It also conforms to the body, making it comfortable for extended periods of sitting. Cotton batting is another option, offering a softer and more natural feel. However, it may require more frequent fluffing to maintain its shape. Beanbag filling (polystyrene beads) is a lightweight and moldable option, perfect for creating a cushion that conforms to your body. However, it can be messy if the cushion develops a tear. For an eco-friendly option, consider using recycled fabric scraps or old clothing as filling. This is a great way to reduce textile waste and create a truly unique cushion. Experiment with different fillings to find the perfect combination of comfort and support for your needs.
How do I clean my DIY floor puff cushion?
Cleaning your DIY floor puff cushion depends on the fabric and filling you used. If the cushion has a removable cover, you can simply unzip it and wash it according to the fabric’s care instructions. For non-removable covers, spot cleaning is the best approach. Use a mild detergent and a damp cloth to gently blot any stains. Avoid soaking the fabric, as this can damage the filling. For cushions filled with shredded foam or cotton batting, you can occasionally fluff them to redistribute the filling and prevent clumping. If your cushion is filled with beanbag filling, be extra careful when cleaning to avoid tearing the fabric and spilling the beads. Vacuuming the cushion regularly can help remove dust and debris. Always test any cleaning solution on a small, inconspicuous area of the fabric before applying it to the entire cushion.
Can I make a floor puff cushion without sewing?
Yes, you can! While sewing is the most common method for creating a floor puff cushion, there are no-sew options available. One popular method involves using fabric glue or fusible webbing to attach the fabric pieces together. This requires careful planning and precise cutting to ensure a secure and durable seam. Another option is to repurpose an existing pillowcase or duvet cover. Simply fill it with your chosen filling material and tie or knot the open end to create a makeshift cushion. While no-sew methods may not be as durable as sewn cushions, they are a great option for beginners or those who don’t have access to a sewing machine.
How much fabric do I need to make a floor puff cushion?
The amount of fabric you need depends on the desired size and shape of your cushion. For a standard round cushion (approximately 24 inches in diameter), you’ll need about 2-3 yards of fabric for the outer cover. If you’re using multiple fabrics for a patchwork design, you’ll need to calculate the amount of each fabric accordingly. It’s always a good idea to purchase a little extra fabric to account for mistakes or unexpected shrinkage. Before cutting your fabric, measure and mark the dimensions carefully to ensure accurate results. Consider creating a paper pattern to help guide your cutting and sewing.
How do I prevent my floor puff cushion from losing its shape?
To prevent your floor puff cushion from losing its shape, choose a durable filling material that retains its form well. Shredded foam and beanbag filling are good options. Regularly fluffing the cushion can also help redistribute the filling and prevent clumping. If your cushion has a removable cover, washing and drying it according to the fabric’s care instructions can help tighten the fibers and maintain its shape. Avoid placing heavy objects on the cushion for extended periods, as this can compress the filling. Consider adding an inner lining to the cushion to help contain the filling and prevent it from shifting. With proper care and maintenance, your DIY floor puff cushion will retain its shape and provide comfortable seating for years to come.
Leave a Comment