

DIY Dry Shampoo Cocoa Powder: Tired of greasy hair ruining your day? Let’s be honest, we’ve all been there! Sometimes, washing your hair just isn’t an option, whether you’re short on time, trying to extend your style, or simply embracing the “no-poo” movement. But what if I told you there’s a simple, natural, and surprisingly delicious-smelling solution hiding in your pantry?
Dry shampoo has been around for ages, with historical roots tracing back to ancient cultures using clay and powders to absorb oil. Fast forward to today, and the market is flooded with commercial dry shampoos, often packed with chemicals and leaving behind a tell-tale white cast, especially on darker hair. That’s where this DIY trick comes in!
This isn’t just another beauty hack; it’s a game-changer for anyone seeking a quick, affordable, and eco-friendly way to refresh their hair. Using cocoa powder as a key ingredient in your DIY dry shampoo cocoa powder not only absorbs excess oil but also adds a subtle, natural tint that blends seamlessly with brown or black hair. Say goodbye to embarrassing white residue and hello to fresh, voluminous locks in minutes! I’m excited to share this simple recipe that will save you time, money, and keep your hair looking fabulous!
DIY Dry Shampoo with Cocoa Powder: A Brunette’s Best Friend
Hey there, fellow dark-haired beauties! Are you tired of shelling out big bucks for dry shampoo that leaves a ghostly white cast in your gorgeous locks? Well, I’ve got a secret weapon for you: cocoa powder! Yes, you read that right. This pantry staple makes an amazing, all-natural dry shampoo, especially if you have brown or black hair. It absorbs oil, adds volume, and even smells delicious. Trust me, once you try this, you’ll never go back to the store-bought stuff. Let’s get started!
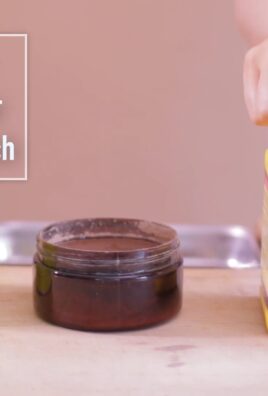
What You’ll Need
Before we dive in, let’s gather our supplies. This is a super simple recipe, so you probably already have most of these things on hand.
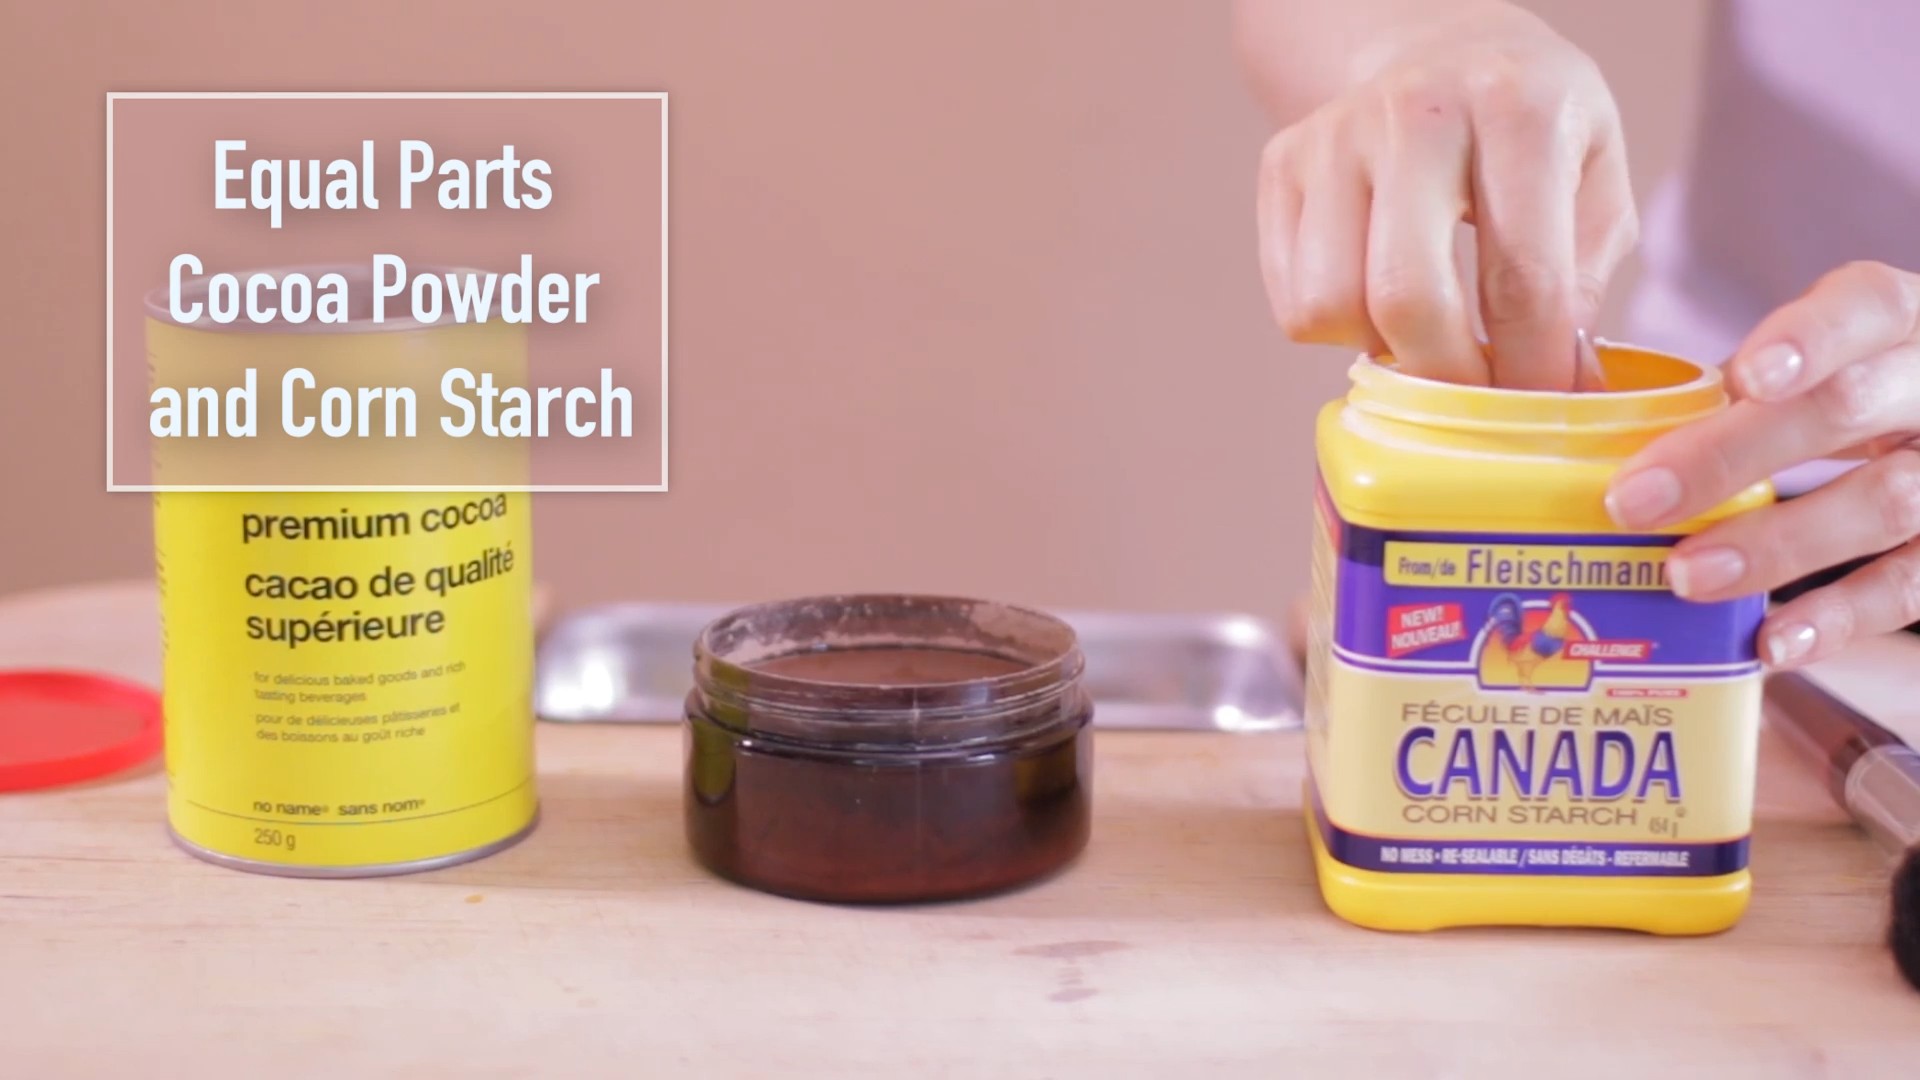
* Cocoa Powder: Unsweetened cocoa powder is the star of the show. It’s what gives the dry shampoo its color and oil-absorbing power.
* Cornstarch or Arrowroot Powder (Optional): If you have particularly oily hair, adding a bit of cornstarch or arrowroot powder can boost the oil absorption.
* Essential Oil (Optional): A few drops of your favorite essential oil can add a lovely scent. Lavender, rosemary, and peppermint are all great choices.
* Small Bowl or Container: For mixing the ingredients.
* Makeup Brush or Powder Brush: A large, fluffy brush is perfect for applying the dry shampoo.
* Small Container for Storage: An old spice jar, a small container with a lid, or even a travel-sized powder container will work.
Mixing Your DIY Dry Shampoo
This is the easiest part! It literally takes less than five minutes.
1. Combine the Ingredients: In your small bowl or container, combine the cocoa powder and cornstarch/arrowroot powder (if using). I usually start with about 2 tablespoons of cocoa powder and 1 tablespoon of cornstarch. You can adjust the ratio depending on your hair color and oiliness. If you have very dark hair, you might want to use more cocoa powder. If your hair is lighter brown, use less.
2. Add Essential Oil (Optional): If you’re using essential oil, add 2-3 drops to the mixture. Stir well to distribute the oil evenly.
3. Mix Thoroughly: Use a spoon or whisk to mix the ingredients until they are well combined and there are no clumps.
4. Transfer to Storage Container: Pour or spoon the mixture into your chosen storage container. Make sure the lid is secure to prevent spills.
Applying Your DIY Dry Shampoo
Now for the fun part: banishing that greasy hair!
1. Part Your Hair: Use your fingers or a comb to part your hair into sections. This will help you apply the dry shampoo evenly.
2. Dip Your Brush: Dip your makeup brush or powder brush into the dry shampoo. Tap off any excess powder to avoid over-application. Remember, a little goes a long way!
3. Apply to Roots: Gently dab the brush onto your roots, focusing on the oiliest areas. I usually concentrate on my hairline and the crown of my head.
4. Massage In: Use your fingertips to massage the dry shampoo into your scalp. This will help it absorb the oil and blend in with your hair color.
5. Brush Through: Once you’ve applied the dry shampoo to all the oily areas, use a clean brush to brush through your hair. This will distribute the powder evenly and remove any excess.
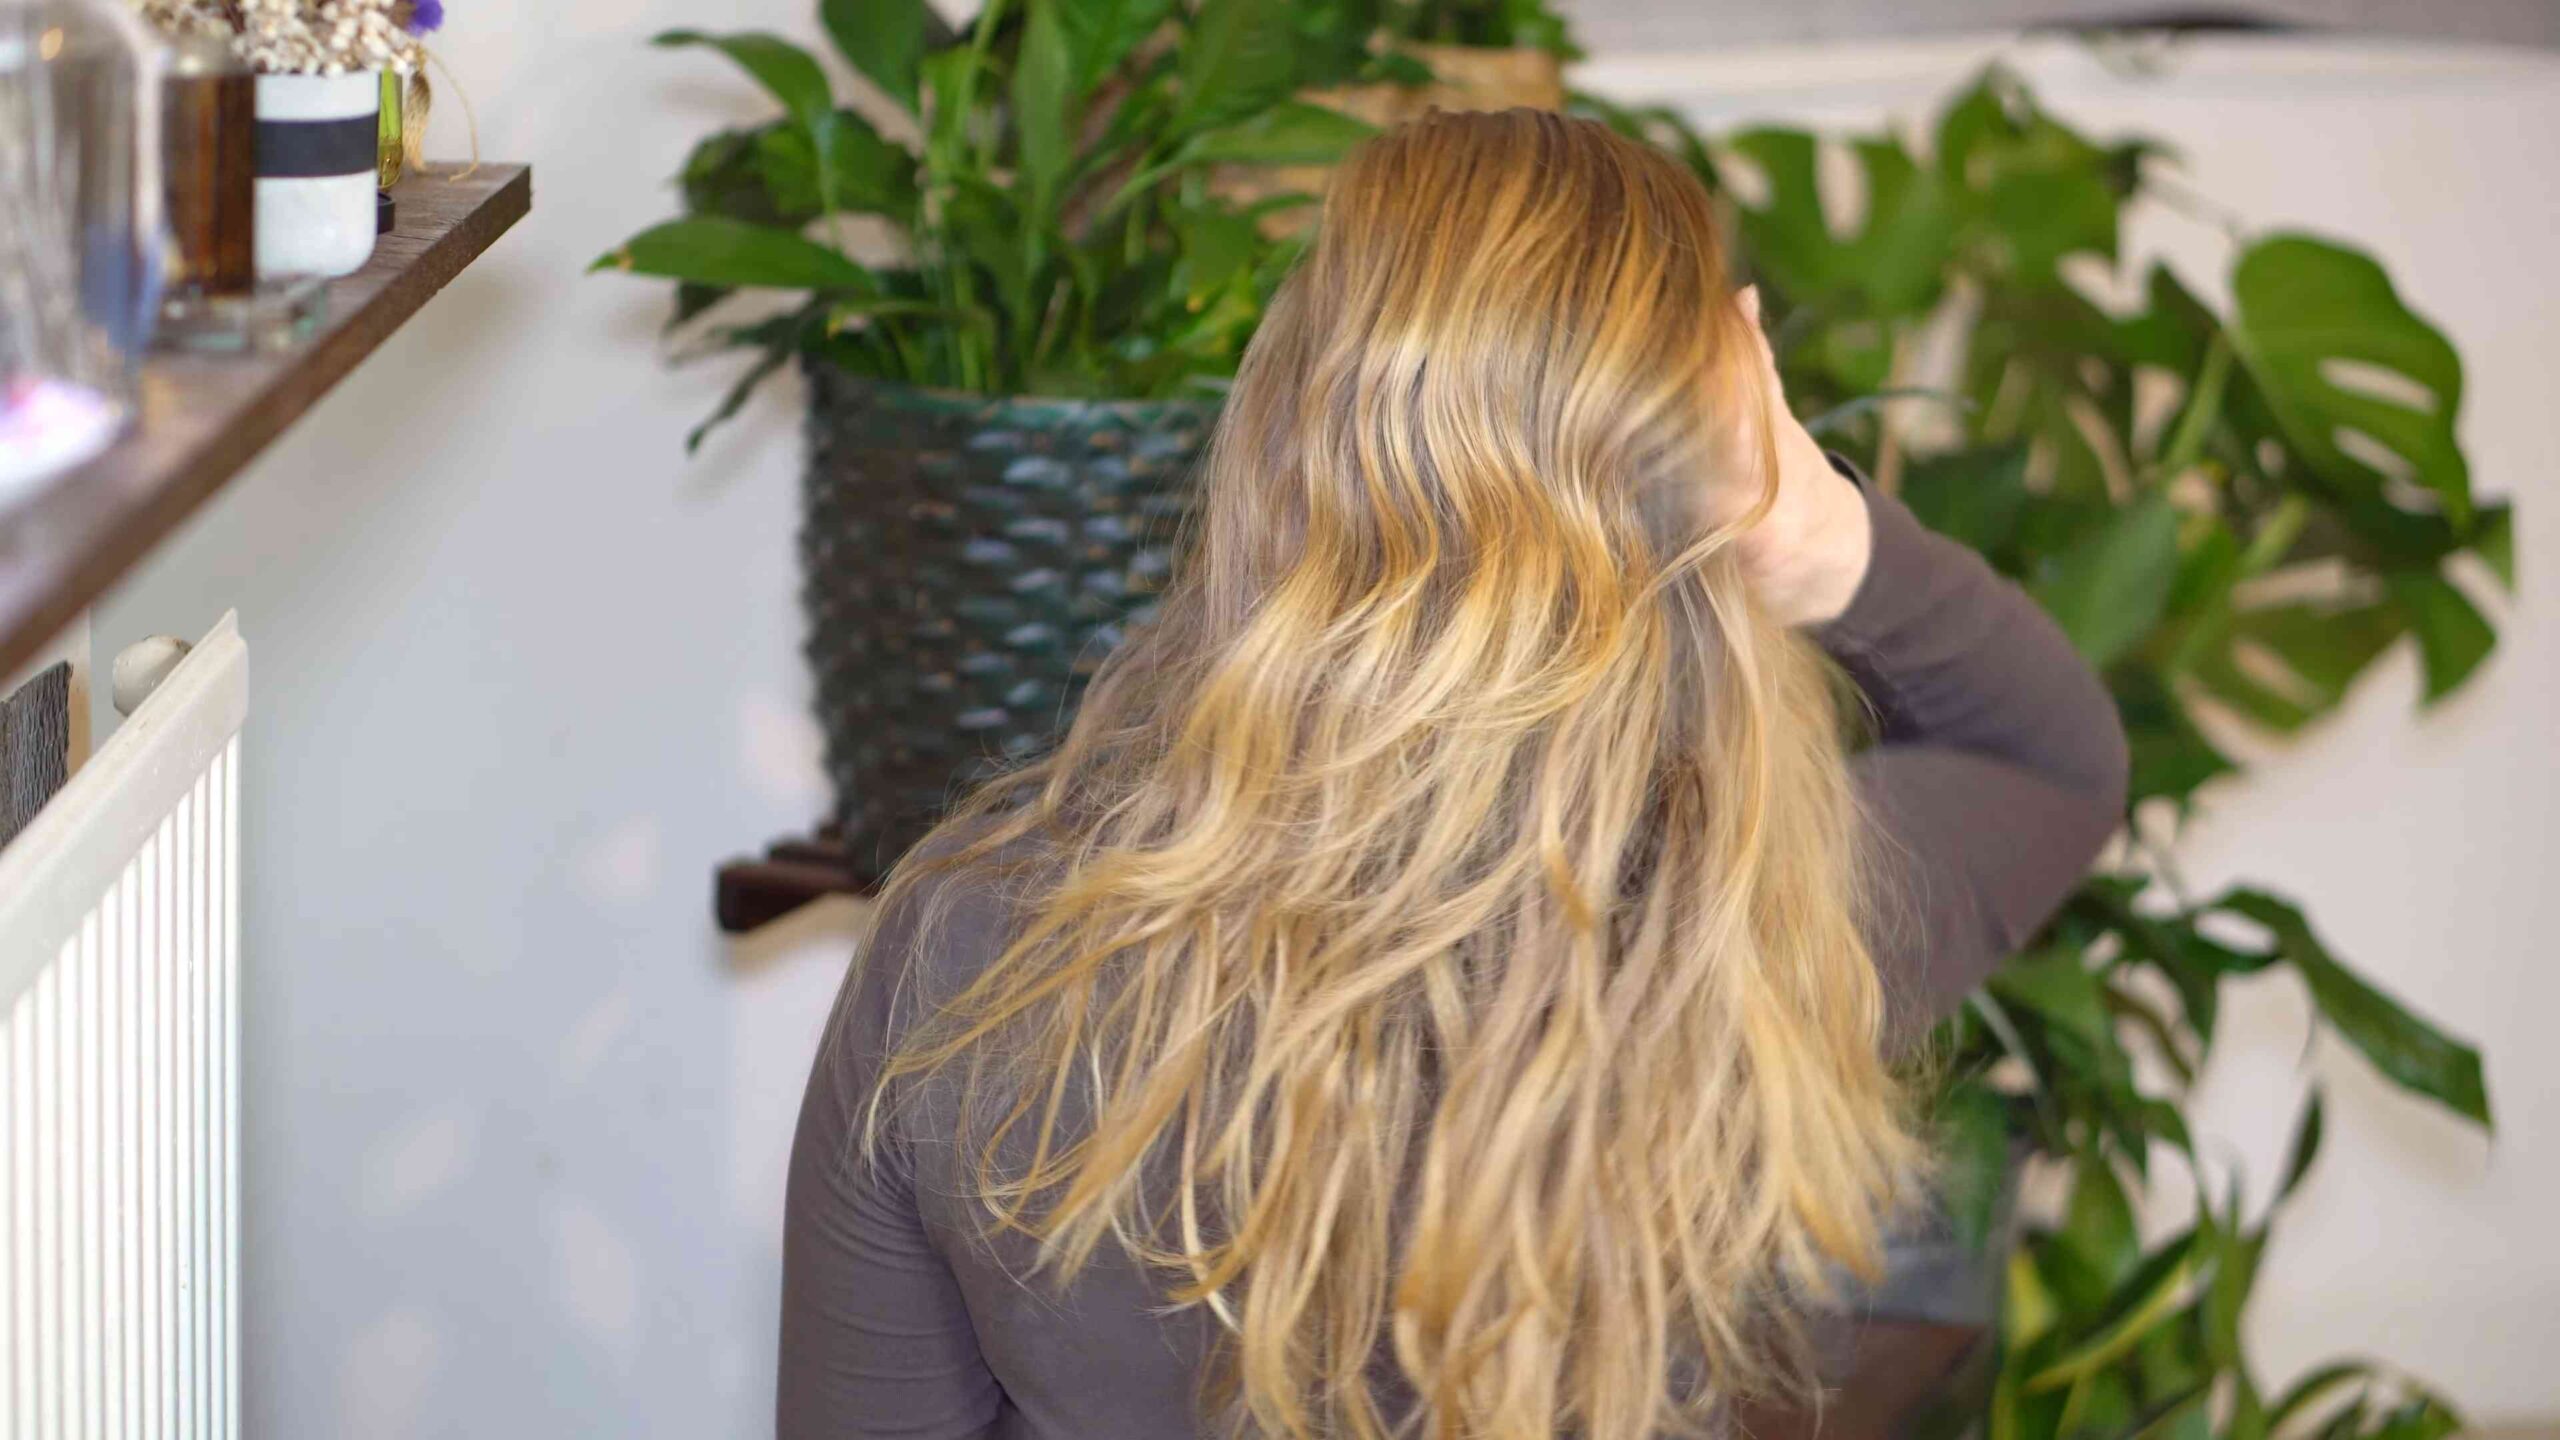
6. Style as Usual: Style your hair as you normally would. You should notice that your hair looks cleaner, fresher, and has more volume.
Tips and Tricks for Perfect Results
Here are a few extra tips to help you get the most out of your DIY dry shampoo:
* Start Small: It’s always better to start with a small amount of dry shampoo and add more if needed. Over-application can leave your hair looking dull or powdery.
* Adjust the Ratio: Experiment with the ratio of cocoa powder to cornstarch/arrowroot powder to find what works best for your hair color and oiliness.
* Use a Dark-Colored Brush: A dark-colored brush will help you see how much dry shampoo you’re applying and prevent over-application.
* Apply Before Bed: For best results, apply the dry shampoo before bed. This will give it time to absorb the oil overnight.
* Don’t Overuse: While dry shampoo is a lifesaver, it’s not a substitute for washing your hair. Overusing dry shampoo can lead to product buildup and scalp irritation. I recommend using it no more than 2-3 times per week.
* Experiment with Scents: Feel free to experiment with different essential oils to find your favorite scent. Just make sure the essential oil is safe for topical use.
* For Light Brown Hair: If your hair is on the lighter side of brown, consider mixing the cocoa powder with a lighter powder like cinnamon or even a bit of brown eyeshadow that matches your hair color. This will help prevent the dry shampoo from being too dark.
* Clean Your Brush Regularly: To prevent product buildup and bacteria growth, clean your makeup brush or powder brush regularly with soap and water.
* Store in a Cool, Dry Place: Store your DIY dry shampoo in a cool, dry place to prevent it from clumping or spoiling.
* If You Have Very Oily Hair: Consider adding a small amount of bentonite clay to the mixture. Bentonite clay is a powerful absorbent that can help control excess oil. Start with about 1/2 teaspoon and adjust as needed.
* Test on a Small Area First: Before applying the dry shampoo to your entire head, test it on a small, inconspicuous area to make sure you don’t have any allergic reactions.
* Don’t Be Afraid to Experiment: This is just a basic recipe, so feel free to experiment with different ingredients and ratios to find what works best for you.
Troubleshooting Common Issues
Sometimes, things don’t go exactly as planned. Here are some common issues you might encounter and how to fix them:
* White Cast: If you’re seeing a white cast, it means you’re using too much cornstarch or arrowroot powder. Reduce the amount of cornstarch or arrowroot powder in your mixture, or use a darker cocoa powder. Make sure you are brushing the product through your hair thoroughly.
* Too Dark: If the dry shampoo is making your hair look too dark, it means you’re using too much cocoa powder. Reduce the amount of cocoa powder in your mixture, or add a lighter powder like cinnamon or arrowroot.
* Clumpy: If the dry shampoo is clumping, it could be due to moisture. Make sure your ingredients are dry before mixing them, and store the dry shampoo in a cool, dry place. You can also try adding a small amount of rice flour to the mixture to help prevent clumping.
* Not Absorbing Oil: If the dry shampoo isn’t absorbing enough oil, it could be that your hair is too oily or that you’re not using enough dry shampoo. Try applying more dry shampoo, or add a small amount of bentonite clay to the mixture.
* Itchy Scalp: If you’re experiencing an itchy scalp, it could be due to an allergic reaction or product buildup. Discontinue use and try a different recipe. Make sure you’re not overusing the dry shampoo.
Why I Love This DIY Dry Shampoo
I’ve been using this DIY dry shampoo for years, and I absolutely love it! Here’s why:
* It’s Natural: I love knowing exactly what’s going into my hair. This dry shampoo is made with simple, natural ingredients that I can trust.
* It’s Affordable: Store-bought dry shampoo can be expensive, but this DIY version is incredibly affordable. Cocoa powder is cheap and readily available.
* It Works: This dry shampoo actually works! It absorbs oil, adds volume, and leaves my hair looking and feeling clean.
* It Smells Great: The cocoa powder gives my hair a subtle, chocolatey scent that I love.
* It’s Customizable: I can easily customize this recipe to suit my hair color and needs.
So there you have it! My secret weapon for gorgeous, grease-free hair. Give this DIY dry shampoo a try, and let me know what you think. I’m confident you’ll love it as much as I do! Happy DIY-ing!
Conclusion
So, there you have it! Ditching the store-bought dry shampoo and embracing this DIY cocoa powder dry shampoo is more than just a thrifty choice; it’s a game-changer for your hair and your wallet. We’ve explored how simple it is to create a natural, effective, and delightfully scented alternative using ingredients you likely already have in your pantry. Forget those harsh chemicals and artificial fragrances – this method offers a gentle, scalp-friendly solution that absorbs excess oil and leaves your hair feeling refreshed and revitalized.
But why is this DIY trick a must-try? Beyond the cost savings, it’s about control. You control the ingredients, ensuring you’re not exposing your hair and scalp to potentially harmful substances. You can tailor the color to perfectly match your hair, eliminating that dreaded white cast that plagues so many commercial dry shampoos, especially for those with darker hair tones. And let’s be honest, the subtle chocolate aroma is a delightful bonus that will leave you feeling pampered and confident.
Variations and Suggestions:
The beauty of this DIY cocoa powder dry shampoo lies in its adaptability. Feel free to experiment with different ingredients to find the perfect blend for your hair type and preferences.
* For Lighter Hair: If you have blonde or light brown hair, consider mixing the cocoa powder with arrowroot powder or cornstarch to lighten the overall color and prevent any noticeable tint. You can also add a touch of cinnamon for a warm, spicy scent.
* For Oily Scalp: If you struggle with an excessively oily scalp, add a tablespoon of bentonite clay to the mixture. Bentonite clay is a powerful absorbent that will help to draw out excess oil and impurities.
* For Added Volume: A few drops of rosemary essential oil can stimulate hair follicles and promote volume. Just be sure to use essential oils sparingly and perform a patch test before applying to your entire scalp.
* For a Refreshing Scent: Peppermint essential oil can provide a cooling and invigorating sensation, perfect for a midday pick-me-up.
* For a Deeper Clean: Add a pinch of baking soda to the mixture. Baking soda is a natural cleanser that can help to remove product buildup and leave your hair feeling extra clean. However, use it sparingly, as it can be drying for some hair types.
We’ve provided a solid foundation, but the real magic happens when you personalize it to suit your unique needs. Don’t be afraid to experiment with different ratios and ingredients until you find the perfect recipe for your hair.
A Final Word:
This DIY cocoa powder dry shampoo is more than just a recipe; it’s an invitation to embrace a more natural and sustainable approach to hair care. It’s a chance to connect with your ingredients, understand what you’re putting on your body, and create a product that truly works for you.
We wholeheartedly encourage you to give this DIY trick a try. We are confident that you’ll be amazed by the results. Once you’ve experienced the benefits of this natural and effective dry shampoo, we’d love to hear about your experience! Share your tips, variations, and before-and-after photos in the comments below. Let’s build a community of DIY enthusiasts who are passionate about healthy hair and sustainable living. Your feedback will not only help others discover the magic of this DIY cocoa powder dry shampoo but also inspire us to create even more innovative and effective natural beauty solutions. So go ahead, give it a try, and let us know what you think!
Frequently Asked Questions (FAQ)
What exactly is dry shampoo and why should I use it?
Dry shampoo is a hair care product designed to absorb excess oil, grease, and dirt from your hair without the need for water. It’s a fantastic solution for extending the time between washes, refreshing your hair on the go, adding volume, and even texturizing your hair for styling purposes. It’s especially useful for those with oily hair, busy lifestyles, or anyone looking to minimize the frequency of shampooing to maintain hair health and color vibrancy.
Is cocoa powder safe to use on my hair?
Yes, cocoa powder is generally safe to use on your hair. It’s a natural ingredient that’s been used in beauty treatments for centuries. However, it’s essential to use unsweetened cocoa powder to avoid any sticky residue. Also, be mindful of potential allergies. If you have sensitive skin or a known allergy to chocolate or cocoa, perform a patch test on a small area of your skin before applying it to your entire scalp.
Will this DIY dry shampoo work for all hair colors?
This DIY dry shampoo works best for dark brown to black hair. The cocoa powder provides a natural tint that blends seamlessly with darker shades. For lighter hair colors like blonde or light brown, it’s crucial to mix the cocoa powder with a lighter absorbent powder like arrowroot powder, cornstarch, or even rice flour to prevent any noticeable tint or darkening effect. Experiment with the ratio of cocoa powder to lighter powder until you achieve the perfect blend for your hair color.
How do I apply the DIY dry shampoo?
Application is simple! Using a makeup brush or your fingertips, apply the mixture directly to your roots, focusing on the oiliest areas. Gently massage the powder into your scalp to absorb the oil. Let it sit for a few minutes to allow the powder to work its magic. Then, brush your hair thoroughly to distribute the powder evenly and remove any excess. You can also use a hairdryer on a cool setting to help blend the powder into your hair.
How often can I use this DIY dry shampoo?
You can use this DIY dry shampoo as often as needed to refresh your hair between washes. However, it’s important to avoid overusing it, as excessive buildup can lead to scalp irritation and dryness. Aim to use it no more than two or three times a week, and always remember to thoroughly wash your hair with shampoo and water regularly to remove any remaining product and maintain scalp health.
Can I store the leftover dry shampoo?
Yes, you can store the leftover dry shampoo in an airtight container in a cool, dry place. This will help to prevent moisture from getting in and clumping the powder. Properly stored, the dry shampoo should last for several months.
What if I don’t have cocoa powder? Can I use something else?
While cocoa powder is ideal for darker hair due to its natural tint, you can substitute it with other ingredients depending on your hair color. For lighter hair, arrowroot powder, cornstarch, or rice flour are excellent alternatives. You can also add a touch of cinnamon or nutmeg for a warm, spicy scent.
My scalp feels itchy after using the dry shampoo. What should I do?
If you experience any itching or irritation after using the dry shampoo, discontinue use immediately. It’s possible that you’re sensitive to one of the ingredients. Try a different recipe with alternative ingredients or consult with a dermatologist if the irritation persists.
Can I add essential oils to this DIY dry shampoo?
Yes, you can add a few drops of essential oils to this DIY dry shampoo for added benefits and fragrance. Rosemary essential oil can stimulate hair follicles and promote volume, while peppermint essential oil can provide a cooling and invigorating sensation. Lavender essential oil can help to soothe the scalp and promote relaxation. However, use essential oils sparingly and perform a patch test before applying to your entire scalp to ensure you don’t have any adverse reactions.
Will this DIY dry shampoo leave a residue on my hair?
If applied correctly and brushed out thoroughly, this DIY dry shampoo should not leave a noticeable residue on your hair. However, if you use too much product or don’t brush it out properly, it can leave a white or brown cast, especially on darker hair. To avoid this, start with a small amount of powder and gradually add more as needed. Be sure to brush your hair thoroughly to distribute the powder evenly and remove any excess.
Leave a Comment