

DIY Cardboard Wardrobe: Tired of clothes overflowing from your closet and creating a chaotic mess? I totally get it! We’ve all been there, staring into a wardrobe abyss, wondering where that favorite shirt disappeared to. But what if I told you there’s a super affordable, eco-friendly, and surprisingly stylish solution right under your nose?
For centuries, humans have sought clever ways to organize their belongings. From ancient chests to elaborate armoires, the need for storage is deeply ingrained in our history. But let’s face it, buying new furniture can be expensive and often contributes to environmental waste. That’s where the magic of upcycling comes in!
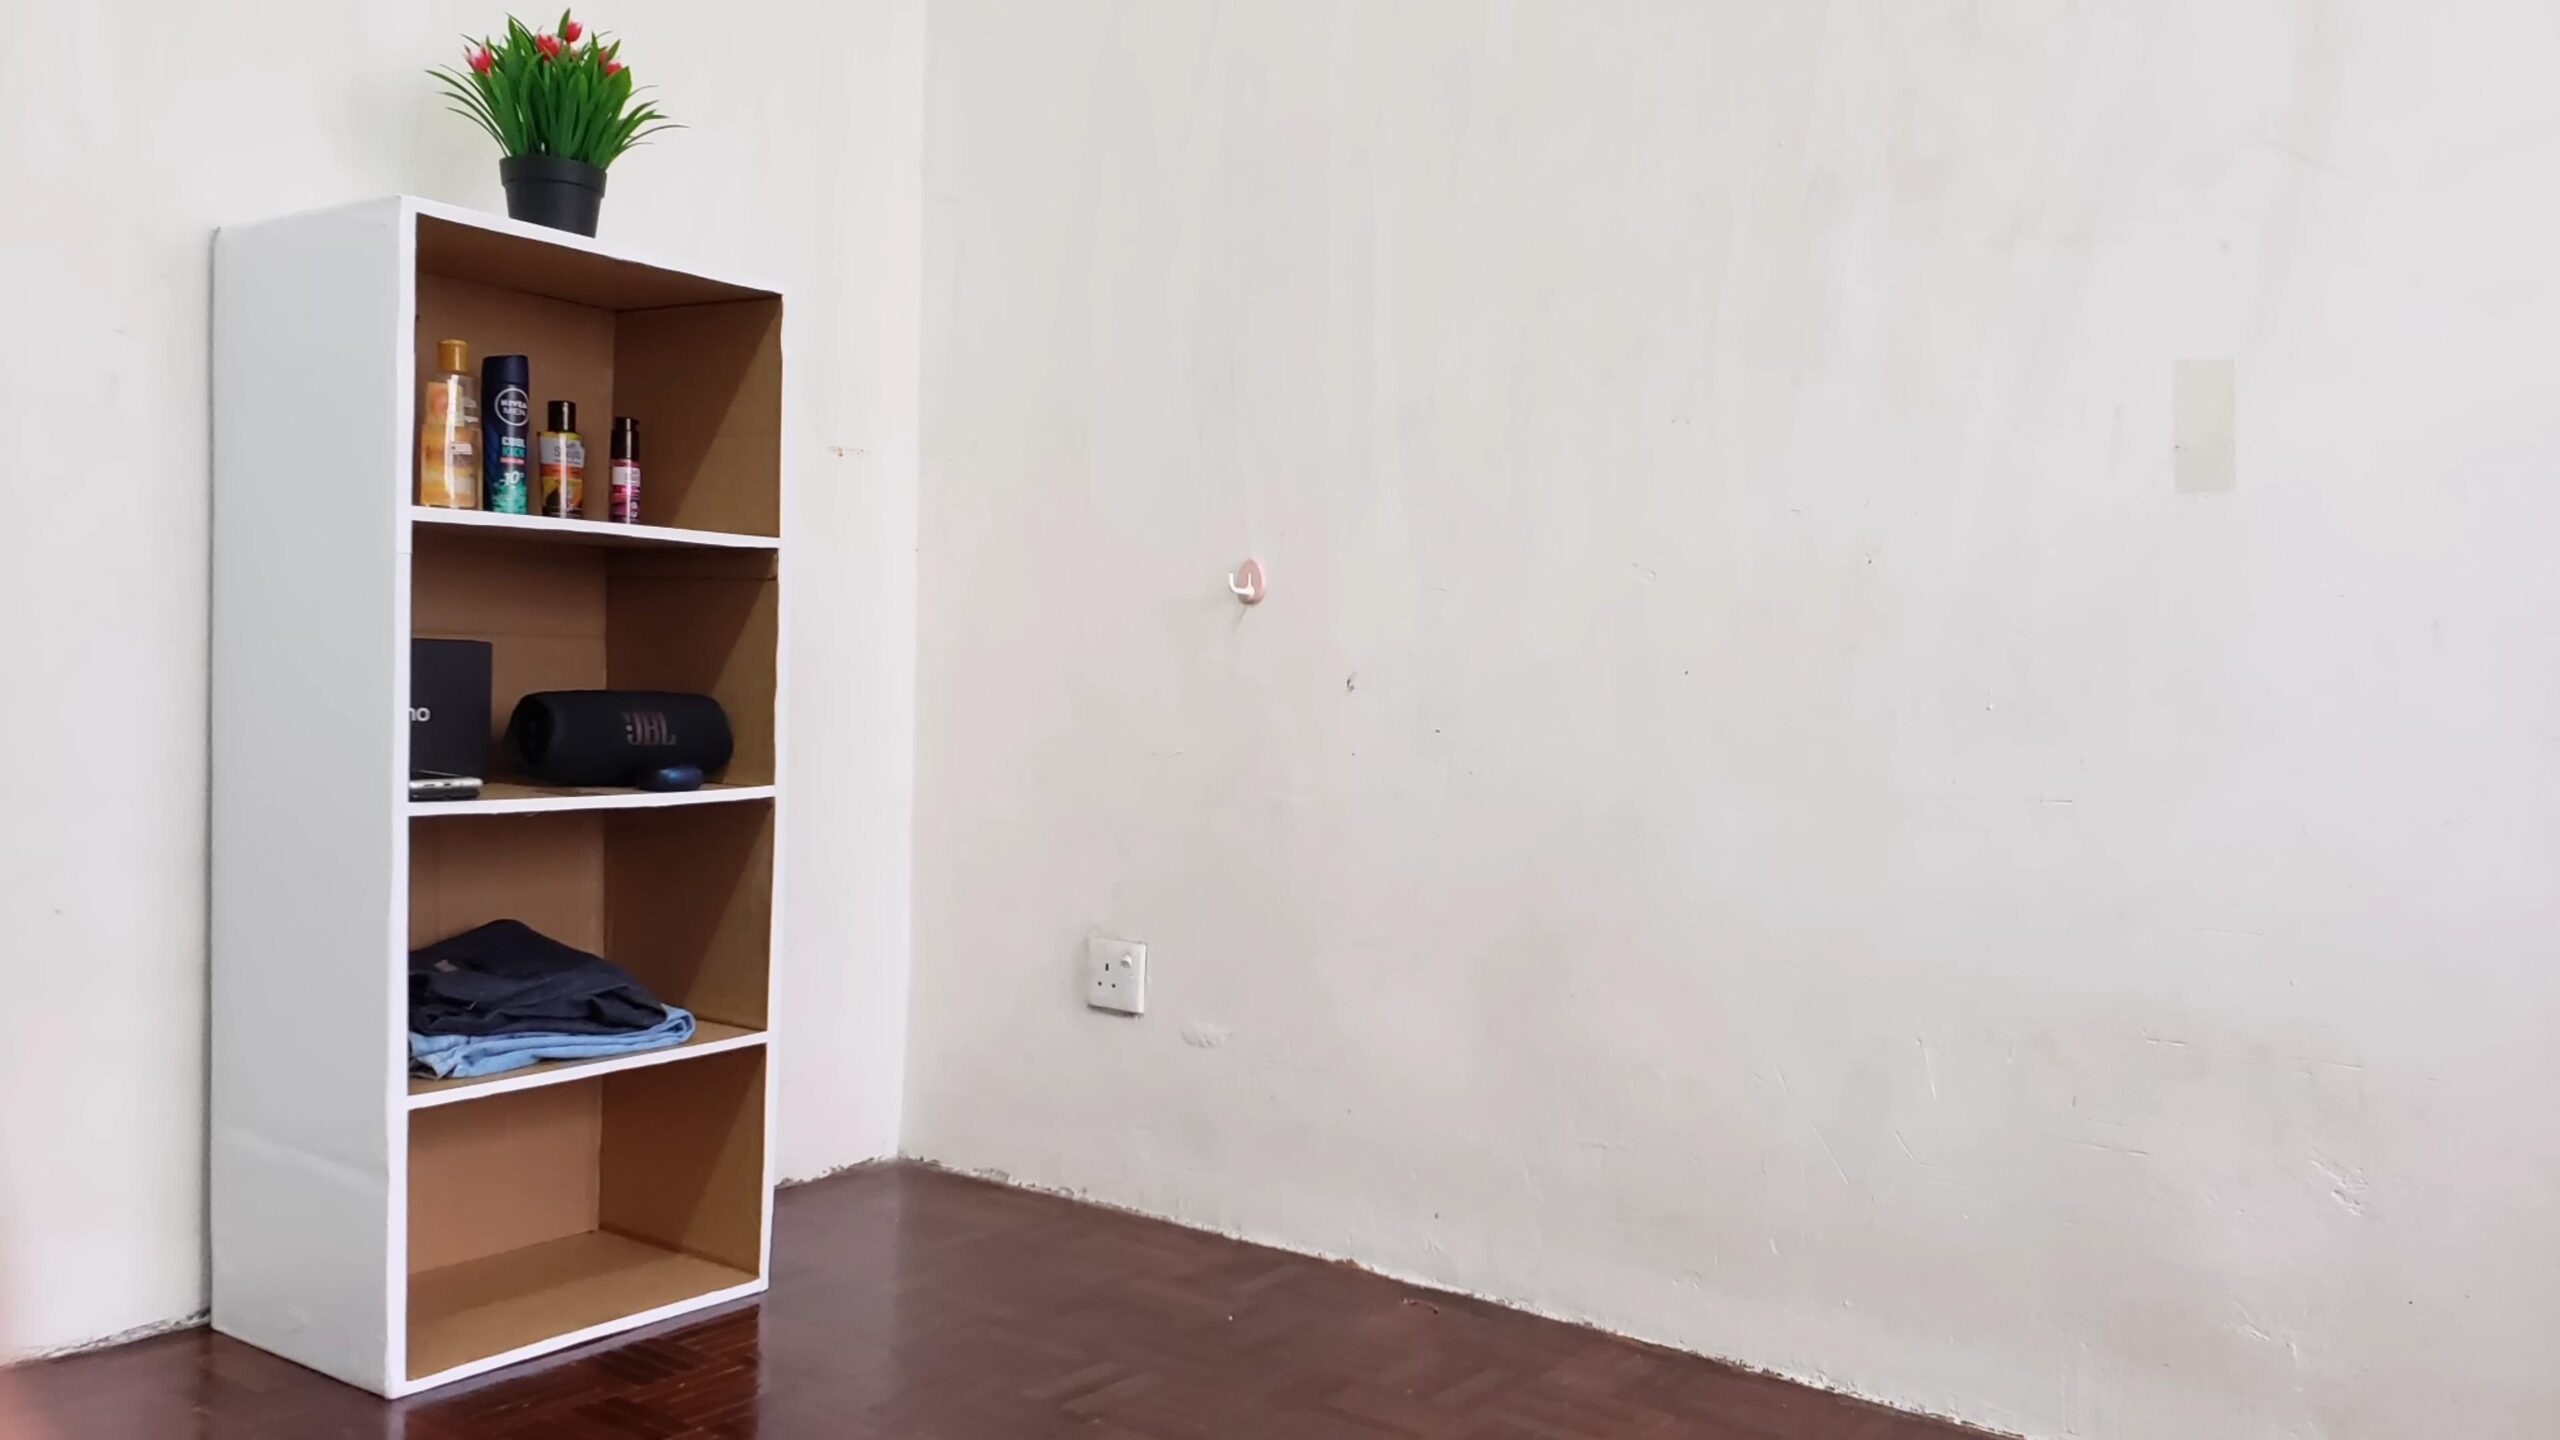
This DIY cardboard wardrobe project is not just about decluttering; it’s about embracing creativity, sustainability, and saving money. Imagine transforming those discarded cardboard boxes into a functional and personalized storage solution. No more flimsy clothing racks or overflowing drawers! This project is perfect for renters, students, or anyone looking for a budget-friendly way to organize their space. Plus, it’s a fantastic way to reduce your environmental footprint. So, grab your scissors, gather your cardboard, and let’s embark on this exciting journey to create your very own amazing DIY cardboard wardrobe!
DIY Cardboard Wardrobe: Build Your Own Sustainable Closet!
Hey there, fellow DIY enthusiasts! Are you short on closet space? Or maybe you’re looking for a budget-friendly and eco-conscious storage solution? Well, you’ve come to the right place! Today, I’m going to walk you through building your very own cardboard wardrobe. Yes, you read that right – a wardrobe made entirely (or mostly!) from cardboard. It’s surprisingly sturdy, customizable, and a fantastic way to repurpose those leftover boxes. Let’s get started!
Materials You’ll Need:
* Lots of Large Cardboard Boxes: Think appliance boxes, furniture boxes, or anything similar. The bigger and sturdier, the better! Aim for boxes that are relatively uniform in size for a more consistent look.
* Cardboard Cutting Tools: A sharp utility knife or box cutter is essential. Make sure you have extra blades on hand, as cardboard can dull them quickly. A sturdy pair of scissors will also come in handy for smaller cuts.
* Measuring Tools: A long ruler, measuring tape, and a T-square or set square will help you make accurate measurements and straight cuts.
* Adhesive: Heavy-duty packing tape is your best friend here. Get a wide roll for maximum coverage and strength. You might also consider using a hot glue gun for smaller details or reinforcing weaker areas.
* Marking Tools: A permanent marker or pen for marking cut lines and measurements.
* Optional Reinforcements: Wooden dowels, PVC pipes, or even extra cardboard strips can be used to reinforce shelves or hanging rods.
* Safety Gear: A cutting mat to protect your work surface and cut-resistant gloves to protect your hands are highly recommended.
* Decorative Elements (Optional): Paint, wrapping paper, fabric, contact paper, or anything else you want to use to personalize your wardrobe.
Planning and Design:
Before you start hacking away at those boxes, it’s crucial to have a plan. This will save you time, frustration, and potentially a lot of wasted cardboard.
* Measure Your Space: Determine the dimensions of the area where you’ll be placing your wardrobe. This will dictate the maximum size of your structure.
* Sketch Your Design: Draw a rough sketch of your desired wardrobe layout. Consider how many shelves you want, where you want to place a hanging rod (if any), and any other specific features.
* Box Inventory: Assess the size and quantity of your cardboard boxes. This will help you determine the feasibility of your design and make adjustments as needed.
* Consider Reinforcements: Think about areas that might need extra support, such as shelves or the hanging rod. Plan how you’ll incorporate reinforcements using wooden dowels, PVC pipes, or extra cardboard.
* Door Design (Optional): If you want doors on your wardrobe, plan how they will be attached and secured. You can use hinges made from cardboard or fabric, or simply create overlapping flaps that are held in place with magnets or Velcro.
Building the Cardboard Wardrobe: Step-by-Step
Okay, now for the fun part! Let’s get building.
1. Preparing the Base:
The base is the foundation of your entire wardrobe, so it needs to be strong and stable.
1. Choose Your Base Boxes: Select the largest and sturdiest boxes you have for the base. Ideally, you want boxes that are relatively flat and wide.
2. Reinforce the Bottom: If the bottom of your boxes seems flimsy, reinforce them with extra layers of cardboard. Cut cardboard pieces to fit the bottom and tape them securely in place.
3. Assemble the Base: Depending on the size of your wardrobe, you might need to use one or more boxes for the base. If using multiple boxes, overlap the edges and tape them together securely to create a solid platform.
4. Level the Base: Ensure the base is level. You can use shims (small pieces of cardboard) to adjust the height of any uneven corners.
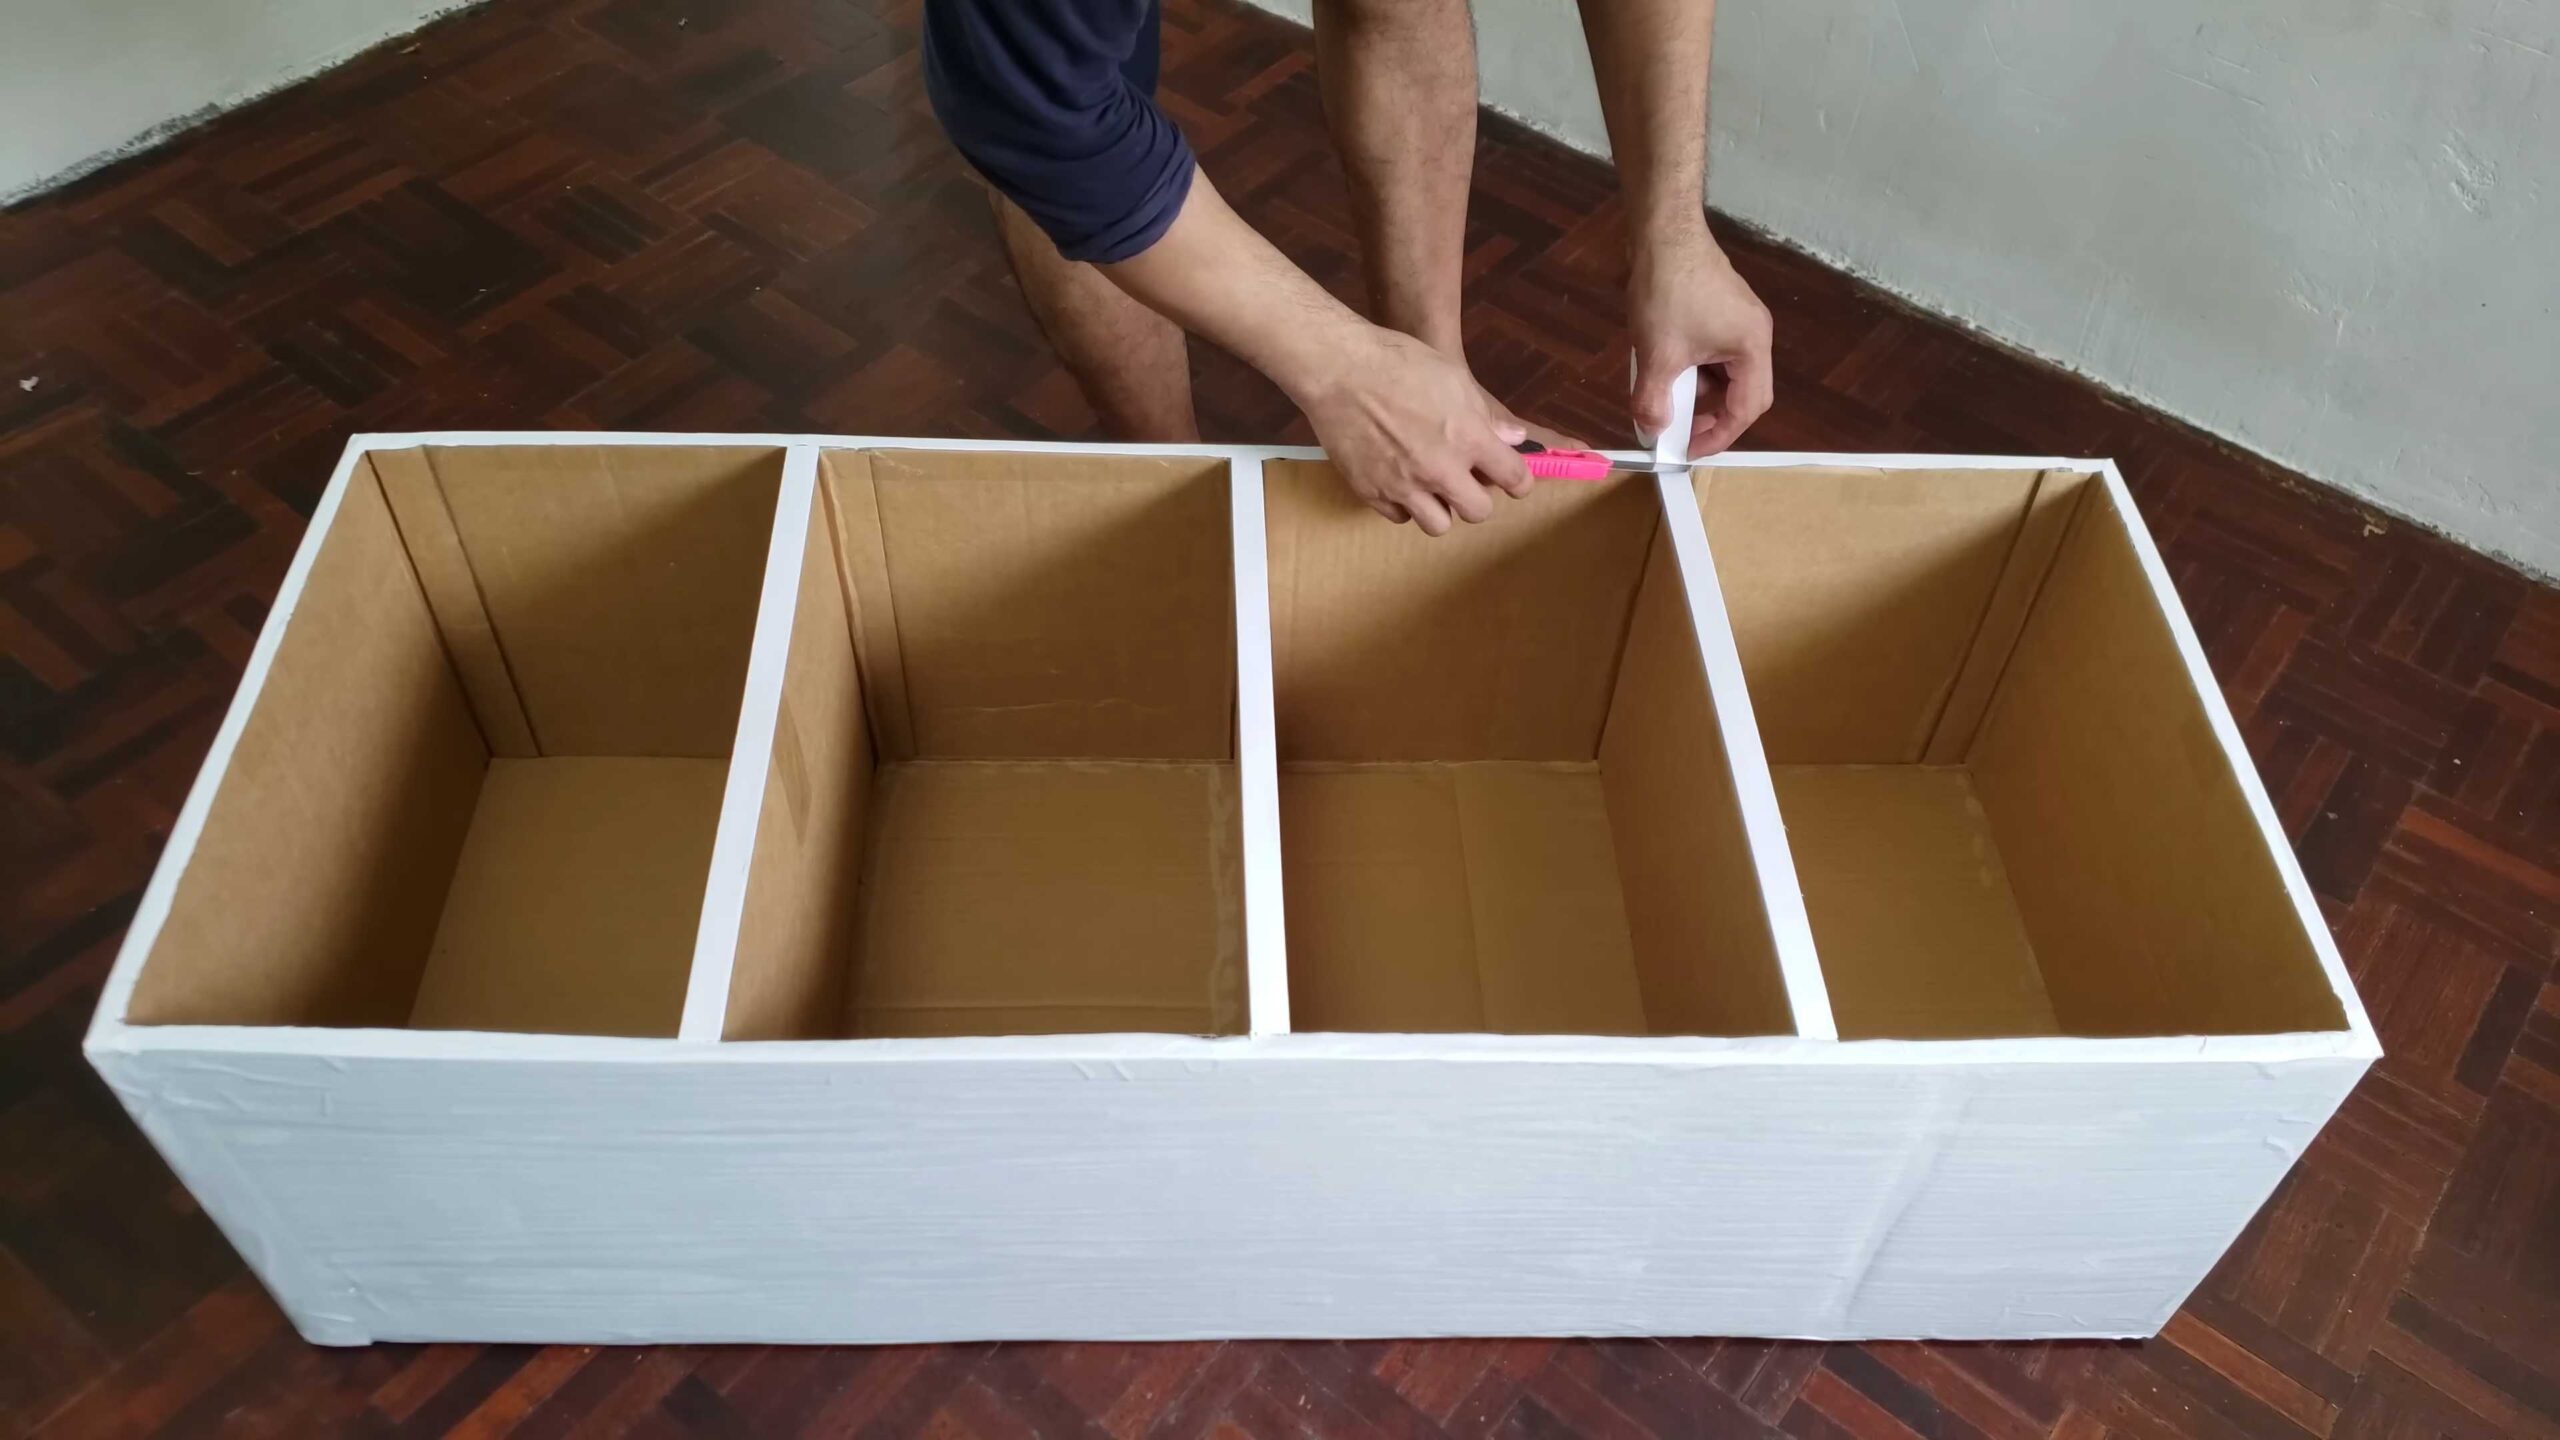
2. Creating the Walls:
The walls will provide the structure and support for your wardrobe.
1. Cut the Wall Panels: Measure and cut cardboard panels to the desired height and width of your wardrobe walls. Use your T-square to ensure straight cuts.
2. Reinforce the Edges: Reinforce the edges of the wall panels with extra strips of cardboard. This will prevent them from bending or collapsing under pressure. Fold the cardboard strips over the edges and tape them securely in place.
3. Attach the Walls to the Base: Carefully position the wall panels on the base and tape them securely in place. Use plenty of packing tape to create a strong bond. Make sure the walls are perpendicular to the base for a stable structure.
4. Connect the Walls: If your wardrobe has multiple walls, connect them to each other using packing tape. Overlap the edges of the walls and tape them together securely.
3. Adding Shelves:
Shelves will provide storage space for folded clothes, shoes, and other items.
1. Measure and Cut Shelf Supports: Cut cardboard strips to the desired width of your shelves. These strips will act as supports to hold the shelves in place.
2. Attach Shelf Supports to the Walls: Measure and mark the desired height of each shelf on the inside of the wardrobe walls. Attach the cardboard shelf supports to the walls using packing tape. Make sure the supports are level.
3. Cut the Shelves: Measure and cut cardboard panels to fit the space between the shelf supports.
4. Insert the Shelves: Slide the cardboard shelves onto the shelf supports.
5. Reinforce the Shelves (Optional): For heavier items, you might want to reinforce the shelves with wooden dowels or PVC pipes. Cut the dowels or pipes to the length of the shelves and place them underneath for added support. You can also add extra layers of cardboard to the shelves themselves.
4. Installing a Hanging Rod (Optional):
If you want to hang clothes in your wardrobe, you’ll need to install a hanging rod.
1. Choose Your Hanging Rod Material: You can use a wooden dowel, a PVC pipe, or even a sturdy cardboard tube for the hanging rod.
2. Cut the Hanging Rod to Size: Measure the width of your wardrobe and cut the hanging rod to the appropriate length.
3. Create Hanging Rod Supports: Cut two cardboard pieces to act as supports for the hanging rod. These supports should be tall enough to allow clothes to hang freely without touching the bottom of the wardrobe.
4. Attach Hanging Rod Supports to the Walls: Attach the cardboard hanging rod supports to the inside of the wardrobe walls using packing tape. Make sure the supports are level and positioned at the same height.
5. Install the Hanging Rod: Place the hanging rod on top of the supports. You can secure it in place with tape or glue.
5. Creating Doors (Optional):
Doors will help to conceal the contents of your wardrobe and protect them from dust.
1. Measure and Cut Door Panels: Measure the opening of your wardrobe and cut cardboard panels to the appropriate size for the doors. Make sure the doors are slightly larger than the opening to allow for overlap.
2. Create Hinges: You can create hinges using fabric or cardboard strips. Attach the hinges to the door panels and the wardrobe frame using tape or glue.
3. Attach the Doors: Attach the doors to the wardrobe frame using the hinges.
4. Create a Closure Mechanism: You can use magnets, Velcro, or simple cardboard flaps to keep the doors closed. Attach the closure mechanism to the doors and the wardrobe frame.
6. Reinforcing the Structure:
Now that the basic structure is complete, it’s time to reinforce it for added stability and durability.
1. Tape All Seams: Go over all the seams and edges of the wardrobe with packing tape. This will help to strengthen the joints and prevent them from coming apart.
2. Add Corner Supports: Cut cardboard triangles and attach them to the corners of the wardrobe using tape. This will provide extra support and prevent the corners from collapsing.
3. Reinforce Weak Areas: Identify any areas that seem weak or flimsy and reinforce them with extra layers of cardboard or wooden dowels.
7. Decorating Your Wardrobe (Optional):
Now for the fun part – personalizing your cardboard wardrobe!
1. Choose Your Decorating Materials: Select the materials you want to use to decorate your wardrobe, such as paint, wrapping paper, fabric, or contact paper.
2. Prepare the Surface: Clean the surface of the cardboard with a damp cloth to remove any dust or dirt.
3. Apply Your Decorations: Apply your chosen decorations to the cardboard using paint, glue, or tape. Get creative and have fun!
4. Add Finishing Touches: Add any finishing touches, such as knobs, handles, or decorative trim.
Tips and Tricks for Success:
Conclusion
So, there you have it! Building your own DIY cardboard wardrobe isn’t just a fun project; it’s a practical and surprisingly stylish solution to your storage woes. We’ve walked you through the steps, highlighting the ease and affordability of transforming humble cardboard boxes into a functional and personalized piece of furniture.
Why is this a must-try? Because it’s empowering! You’re taking control of your space, reducing waste by repurposing materials, and saving money in the process. Forget expensive flat-pack furniture that requires hours of assembly and often falls apart after a few years. This DIY cardboard wardrobe is surprisingly sturdy, adaptable to your specific needs, and allows for complete creative freedom.
Think beyond the basic design we’ve outlined. Want to add shelves? Simply cut and reinforce additional cardboard pieces. Need more hanging space? Extend the height and add another rod. Feeling artistic? Paint it, decoupage it, or cover it in fabric to match your décor. The possibilities are truly endless. Consider using different sized boxes to create compartments for shoes, accessories, or folded clothes. You could even add cardboard drawers for smaller items. For extra durability, especially if you plan on storing heavier items, consider reinforcing the corners and edges with packing tape or even wooden dowels.
Don’t be intimidated by the thought of working with cardboard. It’s a forgiving material, and mistakes are easily rectified with more tape or a strategically placed patch. The key is to take your time, measure carefully, and reinforce the structure as you go. Remember, the beauty of this project lies in its imperfections. It’s a testament to your creativity and resourcefulness.
We genuinely believe that this DIY cardboard wardrobe project is a game-changer for anyone looking for a budget-friendly and eco-conscious storage solution. It’s a project that’s both satisfying to complete and incredibly useful in the long run.
So, grab your cardboard boxes, gather your supplies, and get ready to transform your space. We’re confident that you’ll be amazed at what you can create. And most importantly, we want to hear about your experience! Share your photos, tips, and variations with us. Let’s build a community of DIY cardboard wardrobe enthusiasts and inspire others to embrace the power of upcycling. Let us know what you think of our DIY cardboard wardrobe project.
Now, let’s address some frequently asked questions to ensure your project is a resounding success.
Frequently Asked Questions (FAQ)
How sturdy is a cardboard wardrobe, really?
That’s a valid question! The sturdiness of your DIY cardboard wardrobe depends on several factors: the quality of the cardboard you use, the construction techniques you employ, and the weight of the items you store. Using double-walled cardboard boxes will significantly increase the wardrobe’s strength. Reinforcing the corners and edges with packing tape is crucial. Distribute the weight evenly inside the wardrobe. Avoid overloading any single section. While it won’t be as robust as a solid wood wardrobe, a well-constructed cardboard wardrobe can easily hold a surprising amount of clothing and accessories. For heavier items, consider adding internal supports made from cardboard tubes or wooden dowels.
What kind of cardboard boxes should I use?
Ideally, you want to use sturdy, double-walled cardboard boxes. These are typically used for shipping heavier items and offer much greater strength and durability than single-walled boxes. Look for boxes that are clean, dry, and free from damage. Appliance boxes, moving boxes, or even boxes from large online retailers are excellent choices. Avoid using boxes that are damp, crushed, or have been exposed to pests. The size of the boxes will depend on the dimensions you want for your wardrobe, so plan accordingly.
How do I prevent the cardboard from bending or collapsing?
Reinforcement is key! As mentioned earlier, use plenty of packing tape to reinforce all seams, corners, and edges. Consider adding internal supports made from cardboard tubes or wooden dowels, especially if you plan on storing heavier items. Distribute the weight evenly throughout the wardrobe. Avoid concentrating heavy items in one area. You can also add cardboard panels to the back of the wardrobe for added stability.
What’s the best way to cut the cardboard?
A sharp utility knife or box cutter is the best tool for cutting cardboard. Always use a cutting mat or a protected surface to avoid damaging your work area. Use a ruler or straight edge to ensure clean, straight cuts. Be careful when cutting, and always keep your fingers away from the blade. For thicker cardboard, you may need to make multiple passes with the knife.
How can I decorate my cardboard wardrobe?
This is where your creativity can really shine! You can paint it with acrylic paint, cover it in fabric using glue or staples, decoupage it with paper or images, or even add decorative trim. Consider using stencils or freehand designs to create unique patterns. You can also add knobs or handles to the doors or drawers. The possibilities are endless! Just make sure to use materials that are compatible with cardboard and won’t damage the structure.
Is a cardboard wardrobe resistant to moisture?
Unfortunately, cardboard is not naturally resistant to moisture. If you live in a humid environment or are concerned about spills, you can apply a sealant or waterproof coating to the cardboard. You can also line the inside of the wardrobe with plastic sheeting or fabric to protect your clothes from moisture. Avoid placing the wardrobe in areas that are prone to dampness or leaks.
How long will a cardboard wardrobe last?
With proper construction and care, a cardboard wardrobe can last for several months or even years. The lifespan will depend on the quality of the cardboard, the construction techniques used, and the amount of wear and tear it receives. Regularly inspect the wardrobe for any signs of damage and repair them promptly. Avoid overloading the wardrobe or exposing it to excessive moisture.
Can I disassemble the wardrobe easily if I need to move it?
Yes, one of the advantages of a cardboard wardrobe is that it can be easily disassembled for moving or storage. Simply remove the tape and carefully flatten the cardboard boxes. Store the flattened boxes in a dry place until you need to reassemble the wardrobe. You may need to replace some of the tape when reassembling.
What if I don’t have enough cardboard boxes?
Ask friends, family, or neighbors if they have any spare cardboard boxes. Check with local businesses, such as grocery stores or retail stores, as they often have a surplus of boxes they are willing to give away. You can also purchase cardboard boxes from moving supply stores or online retailers.
Is this project environmentally friendly?
Absolutely! Building a DIY cardboard wardrobe is a great way to upcycle and reduce waste. By repurposing cardboard boxes, you are preventing them from ending up in landfills. You are also saving money by avoiding the purchase of new furniture. It’s a win-win for both your wallet and the environment.
Leave a Comment