

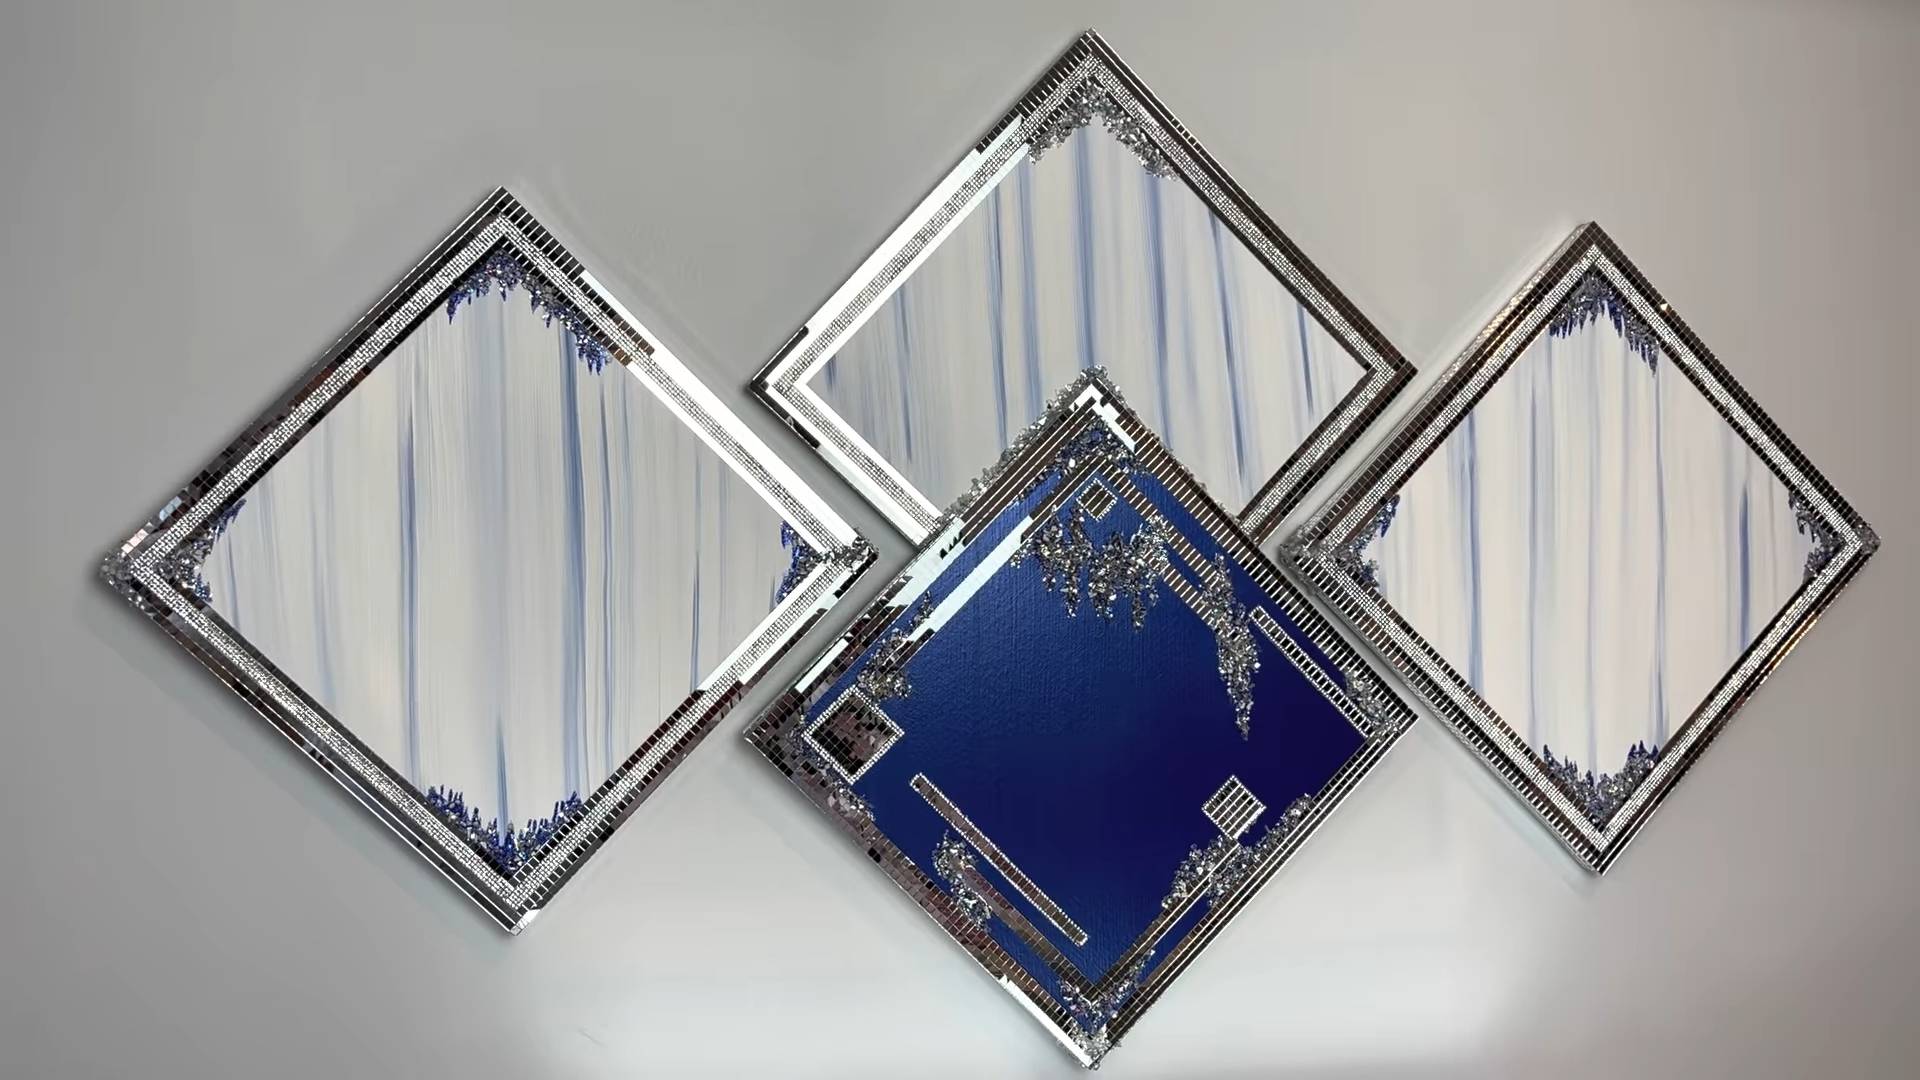
DIY Canvas Art: Unleash your inner artist and transform your living space without breaking the bank! Have you ever stared at a blank wall, yearning for a splash of personality but dreading the hefty price tag of original artwork? I know I have! That’s why I’m so excited to share these incredible DIY canvas art ideas that are not only budget-friendly but also incredibly fun to create.
The desire to adorn our homes with beautiful imagery is as old as civilization itself. From ancient cave paintings to Renaissance masterpieces, art has always been a powerful form of expression and a reflection of our culture. While we might not all be Picassos, the beauty of DIY canvas art lies in its accessibility. It empowers anyone, regardless of skill level, to create something unique and meaningful.
In today’s fast-paced world, finding moments of creativity and self-expression is more important than ever. These DIY canvas art projects offer a fantastic way to de-stress, unplug from technology, and tap into your artistic side. Plus, imagine the satisfaction of displaying a piece of art that you personally crafted! Not only will it add a personal touch to your home, but it will also be a conversation starter and a source of pride. So, let’s dive into some amazing DIY canvas art tricks and hacks that will inspire you to create your own masterpieces!
DIY Canvas Art: Unleash Your Inner Artist (Even If You Think You Don’t Have One!)
Okay, let’s be honest. Sometimes, blank walls just scream for a little personality. And while buying art can be amazing, it can also be seriously expensive. That’s where the magic of DIY canvas art comes in! I’m going to walk you through a few super fun and easy techniques to create stunning pieces that will have everyone asking, “Where did you BUY that?!” (Prepare to bask in the glory of “I made it myself!”).
Gathering Your Supplies: The Artist’s Toolkit
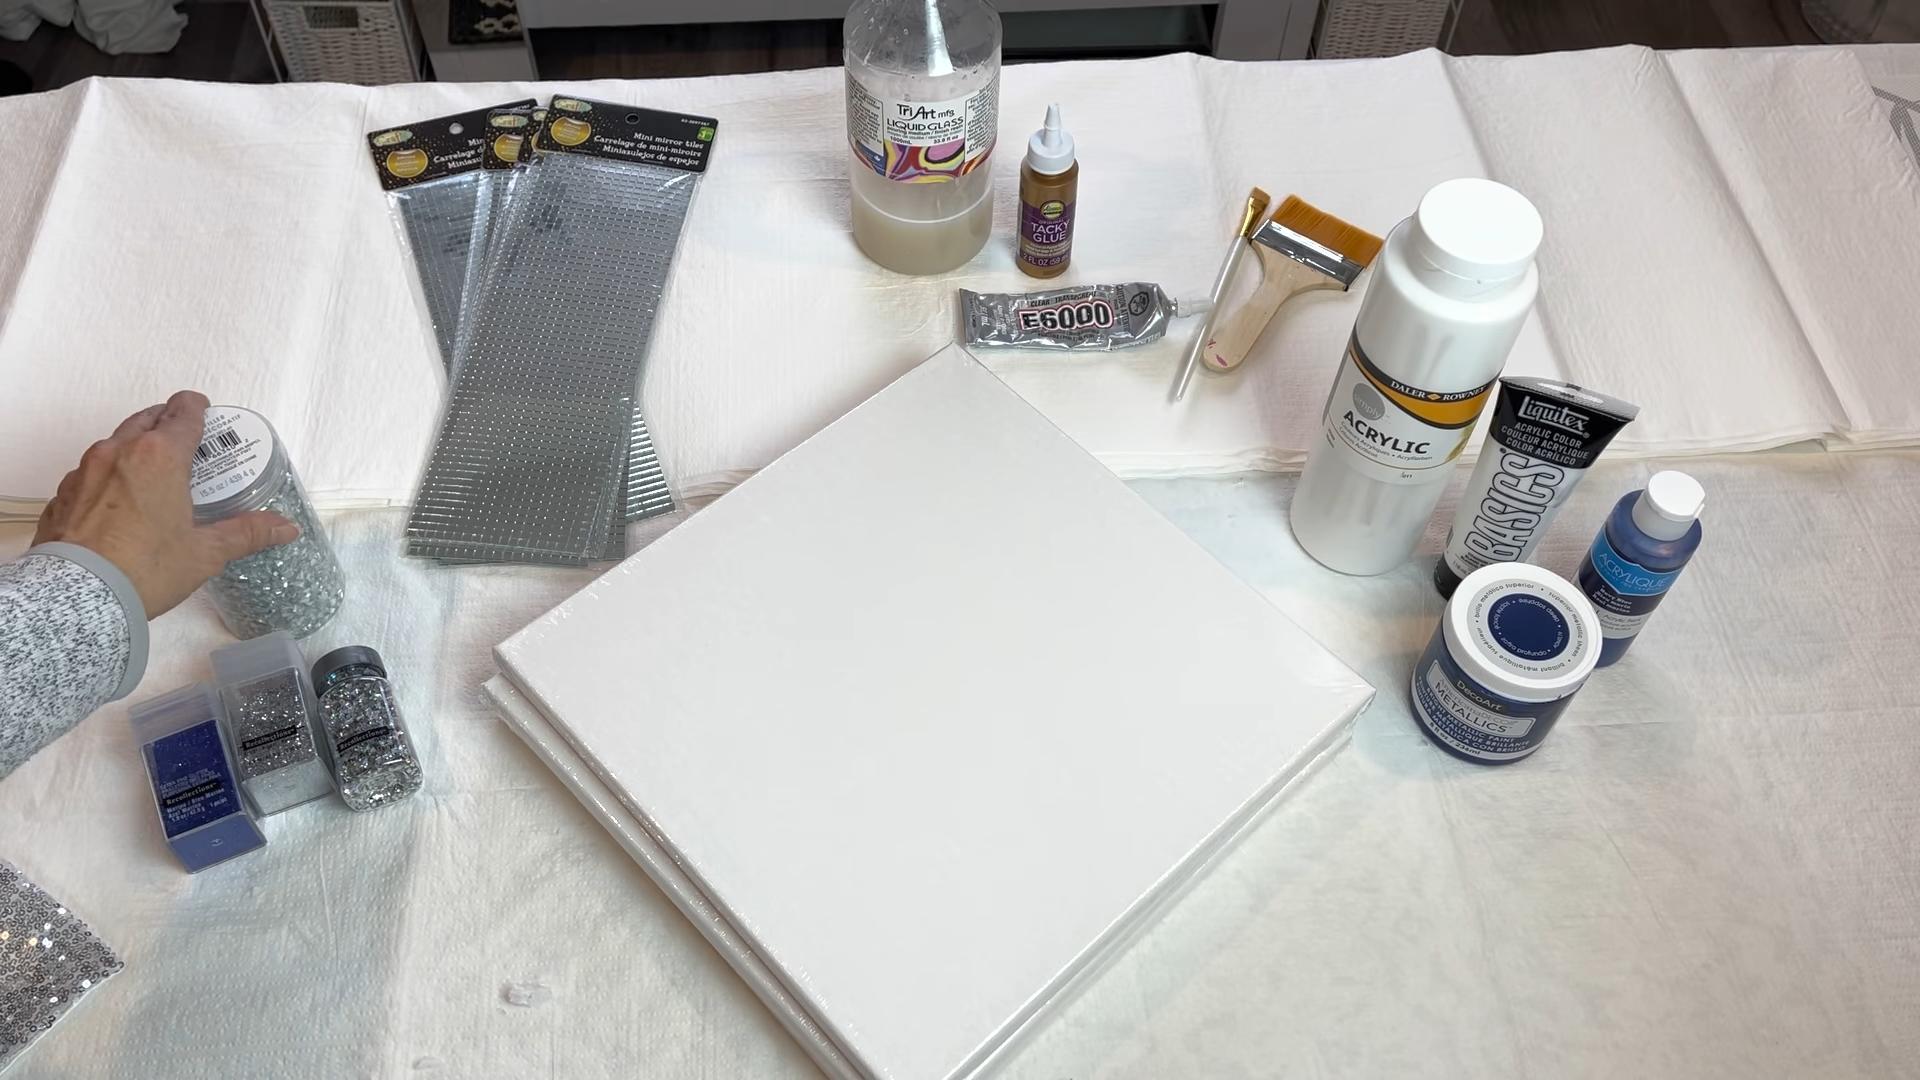
Before we dive into the creative chaos, let’s make sure we have everything we need. This is like prepping your kitchen before baking – essential for a smooth and enjoyable experience.
* Canvas: Obvious, right? Choose the size and shape that speaks to you. I personally love starting with a 16×20 inch canvas, but feel free to experiment! You can find these at any craft store, and sometimes even at dollar stores.
* Acrylic Paints: These are your best friends! They’re versatile, easy to work with, and dry relatively quickly. A basic set of primary colors (red, blue, yellow) plus white and black will allow you to mix almost any color imaginable. Don’t be afraid to get creative with metallics or neon colors too!
* Paintbrushes: A variety of sizes is key. You’ll want a large brush for covering large areas, medium brushes for detail work, and small, fine-tipped brushes for those intricate touches.
* Palette: A palette is where you’ll mix your paints. You can use a fancy artist’s palette, a paper plate, or even a piece of wax paper. Anything that’s non-absorbent will work.
* Water Container: For rinsing your brushes. Keep it clean! Dirty water will muddy your colors.
* Paper Towels or Rags: For wiping brushes and cleaning up spills (because, let’s face it, spills happen!).
* Optional but Helpful:
* Painter’s Tape: For creating clean lines and geometric designs.
* Palette Knife: For applying paint in thick, textured layers.
* Sponges: For creating interesting textures and effects.
* Hair Dryer: To speed up drying time (especially helpful for layered techniques).
* Easel: If you prefer to work standing up.
* Apron or Old Clothes: Because paint happens.
Technique 1: The Abstract Acrylic Pour
This is probably my favorite technique because it’s so unpredictable and creates such unique results. It’s also incredibly satisfying to watch the colors swirl and blend together.
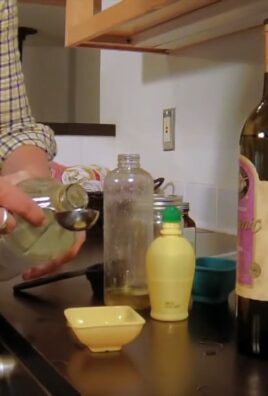
1. Prepare Your Workspace: Cover your work surface with plastic sheeting or newspaper. This is going to get messy!
2. Prepare Your Paints: This is crucial. You need to thin your acrylic paints with a pouring medium. There are specific pouring mediums you can buy at craft stores, or you can use a mixture of PVA glue (like Elmer’s) and water (about a 1:1 ratio). The consistency should be similar to warm honey. You want the paint to flow easily, but not be too watery. I usually prepare several small cups, each with a different color.
3. Add Silicone Oil (Optional): This is what creates those amazing “cells” in your pour. Add a few drops of silicone oil to each cup of paint and gently stir. Don’t over-stir, or you’ll lose the cell effect.
4. Pouring Time! There are several ways to pour. You can do a “dirty pour,” where you layer all the colors into one cup and then pour the whole thing onto the canvas. Or, you can pour each color individually, creating ribbons and swirls. Experiment and see what you like best!
5. Tilt and Manipulate: Once you’ve poured the paint, tilt the canvas in different directions to spread the paint and create interesting patterns. You can also use a palette knife or skewer to gently manipulate the paint.
6. Torch It (Optional): If you used silicone oil, you can use a heat gun or a small kitchen torch to pop any air bubbles and encourage the cells to form. Be careful not to burn the paint!
7. Let it Dry: This is the hardest part! It can take several days for the paint to completely dry. Find a safe, level place to let your masterpiece cure.
8. Varnish (Optional): Once the paint is completely dry, you can apply a coat of varnish to protect the painting and enhance the colors.
Technique 2: Geometric Tape Resist
This technique is perfect for creating clean, modern designs. It’s also a great way to use up leftover paint!
1. Tape It Up: Use painter’s tape to create your desired geometric pattern on the canvas. You can create stripes, triangles, diamonds, or any other shape you can imagine. Press the tape down firmly to prevent paint from seeping underneath.
2. Paint Away! Choose your colors and start painting over the entire canvas, including the taped areas. You can use one color, multiple colors, or even create an ombre effect.
3. Let it Dry (Almost): Allow the paint to dry until it’s just slightly tacky. This is important! If you let it dry completely, the tape will be harder to remove and you risk peeling off the paint underneath.
4. Peel and Reveal: Carefully peel off the painter’s tape to reveal your geometric design.
5. Touch-Ups (Optional): If there are any areas where the paint seeped under the tape, you can use a small brush to touch them up.
6. Seal it (Optional): Once everything is dry, you can seal it with a varnish.
Technique 3: Sponge Painting for Texture
This technique is all about adding depth and dimension to your canvas. It’s super easy and creates a beautiful, textured effect.
1. Base Coat: Start by painting the entire canvas with a base coat of your chosen color. Let it dry completely.
2. Choose Your Sponges: You can use natural sea sponges, synthetic sponges, or even textured household sponges. Experiment with different types of sponges to see what kind of textures you can create.
3. Dab and Pounce: Dip your sponge into your chosen paint color and then dab it onto the canvas. Don’t apply too much pressure – you want to create a light, textured effect. You can use different colors and layer them on top of each other to create even more depth.
4. Blend (Optional): If you want to blend the colors together, you can use a clean sponge to gently blend the edges.
5. Add Details (Optional): Once the sponge painting is dry, you can add details with a brush, such as highlights, shadows, or patterns.
6. Seal it (Optional): Once everything is dry, you can seal it with a varnish.
Technique 4: Palette Knife Painting: Impasto Fun
This technique is for those who love texture! It involves applying thick layers of paint with a palette knife to create a raised, sculptural effect.
1. Choose Your Colors: Select the colors you want to use for your painting. I recommend using a limited palette of 2-3 colors to create a cohesive look.
2. Load Your Palette Knife: Use your palette knife to scoop up a generous amount of paint.
3. Apply the Paint: Apply the paint to the canvas using a variety of strokes. You can use short, choppy strokes, long, sweeping strokes, or even swirl the paint around. The key is to experiment and see what kind of textures you can create.
4. Layer the Paint: Layer different colors on top of each other to create depth and dimension.
5. Clean Your Palette Knife: Clean your palette knife frequently to prevent the colors from becoming muddy.
6. Let it Dry: This technique requires a longer drying time due to the thick layers of paint. Be patient!
7. Varnish (Optional): Once the paint is completely dry, you can apply a coat of varnish to protect the painting and enhance the colors.
Technique 5: Drip Painting: Controlled Chaos
This technique is all about letting go and embracing the unpredictable nature of paint. It’s messy, fun, and creates a unique, abstract effect.
1. Prepare Your Workspace: Seriously, protect everything! This is going to get messy. Cover your work surface with plastic sheeting or newspaper.
2. Thin Your Paints: Thin your acrylic paints with water until they have a runny consistency. You want them to drip easily.
3. Load Your Paint: You can use a squeeze bottle, a pipette, or even just a brush to load your paint.
4. Drip Away! Hold your paint-filled container above
Conclusion
So, there you have it! Transforming your blank walls into personalized masterpieces doesn’t require a hefty art budget or years of training. This simple DIY canvas art trick empowers you to create stunning, unique pieces that reflect your individual style and breathe life into your living space. Forget those generic, mass-produced prints – with a little creativity and readily available materials, you can craft artwork that’s truly one-of-a-kind.
The beauty of this project lies in its versatility. Feel free to experiment with different techniques and materials to achieve your desired aesthetic. Consider using textured mediums like modeling paste or sand to add depth and dimension to your canvas. Explore various painting styles, from abstract expressionism to minimalist designs. Stencils can be your best friend for creating intricate patterns or geometric shapes. Don’t limit yourself to paint; incorporate fabric scraps, pressed flowers, or even found objects for a mixed-media approach.
For a more sophisticated look, try using metallic paints or gilding flakes to add a touch of glamour. If you’re drawn to a more rustic vibe, consider staining the canvas with coffee or tea before painting. You can also distress the finished artwork with sandpaper for a vintage feel. The possibilities are truly endless!
Remember, the most important thing is to have fun and let your creativity flow. Don’t be afraid to make mistakes – they can often lead to unexpected and beautiful results. This DIY canvas art project is not just about creating a piece of decor; it’s about expressing yourself and adding a personal touch to your home.
We wholeheartedly encourage you to give this DIY canvas art trick a try. It’s a rewarding and budget-friendly way to elevate your home decor and unleash your inner artist. Once you’ve created your masterpiece, we’d love to see it! Share your creations with us on social media using [Your Hashtag] and tell us about your experience. What techniques did you use? What challenges did you overcome? What are you most proud of? We can’t wait to see what you come up with! Let’s inspire each other and transform our homes into galleries of personal expression, one canvas at a time. This is more than just a craft; it’s a journey of self-discovery and creative fulfillment. So grab your supplies, clear your mind, and get ready to create something amazing!
Frequently Asked Questions (FAQ)
What kind of canvas should I use for this DIY project?
The type of canvas you choose depends on your budget and the desired look. Pre-stretched canvases are readily available at most art supply stores and craft stores. They come in various sizes and thicknesses, so choose one that suits your project. For beginners, a medium-weight canvas is a good option. If you’re planning on using heavy textures or mixed media, a heavier-weight canvas is recommended. You can also buy canvas rolls and stretch them yourself, which can be more cost-effective if you’re planning on creating multiple pieces. Consider the depth of the canvas as well; a deeper canvas can create a more dramatic effect.
What type of paint is best for DIY canvas art?
Acrylic paint is generally the best choice for DIY canvas art due to its versatility, affordability, and quick-drying properties. It’s also water-based, making it easy to clean up. You can find acrylic paints in a wide range of colors and finishes, from matte to glossy. For beginners, a set of basic acrylic colors is a good starting point. You can then mix these colors to create a wider palette. If you’re planning on using specific techniques, such as pouring or fluid art, you may want to consider using specialized acrylic paints designed for those purposes. Oil paints can also be used, but they require more time to dry and require the use of solvents for cleanup. Watercolors are generally not recommended for canvas art as they tend to bleed and fade over time.
How do I prepare the canvas before painting?
Most pre-stretched canvases are already primed, meaning they have a layer of gesso applied to them. Gesso is a white primer that creates a smooth, even surface for the paint to adhere to. If your canvas is not primed, or if you want to add an extra layer of protection, you can apply a coat of gesso yourself. Use a wide brush or a foam roller to apply the gesso in thin, even strokes. Let it dry completely before painting. You can also lightly sand the gessoed surface for an even smoother finish.
How do I protect my finished canvas art?
Once your painting is completely dry, you can protect it with a varnish or sealant. This will help to prevent fading, cracking, and damage from dust and moisture. Choose a varnish that is specifically designed for acrylic paints. You can find varnishes in various finishes, such as matte, satin, and gloss. Apply the varnish in thin, even coats, following the manufacturer’s instructions. Allow each coat to dry completely before applying the next.
Can I use stencils for DIY canvas art?
Absolutely! Stencils are a great way to create intricate patterns and designs on your canvas. You can buy pre-made stencils or create your own using cardstock or acetate sheets. To use a stencil, simply position it on the canvas and secure it with tape. Then, use a stencil brush or a sponge to apply the paint through the stencil openings. Be careful not to use too much paint, as this can cause the paint to bleed under the stencil. Once the paint is dry, carefully remove the stencil.
What if I make a mistake?
Don’t worry, mistakes happen! If you make a mistake while painting, simply let the paint dry completely and then paint over it. Acrylic paint is very forgiving and can be easily covered up. You can also use a wet cloth to wipe away mistakes while the paint is still wet. Remember, mistakes can often lead to unexpected and beautiful results, so don’t be afraid to experiment and embrace the imperfections.
How can I add texture to my canvas art?
There are many ways to add texture to your canvas art. You can use textured mediums like modeling paste, sand, or gel medium. Apply these mediums to the canvas with a palette knife or a brush to create different textures. You can also use found objects like fabric scraps, paper, or even natural materials like leaves and twigs to add texture. Experiment with different techniques and materials to find what works best for you.
Where can I find inspiration for my DIY canvas art?
Inspiration is everywhere! Look around you – in nature, in magazines, in books, and online. Browse art galleries and museums to see what other artists are creating. Pay attention to colors, patterns, and textures that you find appealing. You can also find inspiration on social media platforms like Pinterest and Instagram. Create a mood board with images and ideas that inspire you. The key is to find what resonates with you and use that as a starting point for your own creations.
How do I hang my finished canvas art?
There are several ways to hang your finished canvas art. You can use picture hooks, sawtooth hangers, or D-rings. Picture hooks are easy to install and are suitable for lightweight canvases. Sawtooth hangers are attached to the back of the canvas and allow you to hang it directly on a nail or screw. D-rings are attached to the back of the canvas with wire, allowing you to adjust the hanging position. Choose the hanging method that is most appropriate for the size and weight of your canvas. Make sure to use a level to ensure that your artwork is hanging straight.

Leave a Comment