

DIY Bolster Pillow Sewing: Ever dreamt of adding a touch of elegance and comfort to your living space without breaking the bank? I know I have! There’s something incredibly satisfying about creating something beautiful and functional with your own two hands. Bolster pillows, with their cylindrical shape and versatile nature, have been gracing homes for centuries, dating back to ancient civilizations where they were symbols of luxury and status. Today, they’re a fantastic way to elevate your décor, providing lumbar support, adding a pop of color, or simply making your sofa or bed look more inviting.
But let’s be honest, those store-bought bolster pillows can be surprisingly expensive! That’s where this DIY guide comes in. I’m going to show you how to create your very own custom bolster pillow, perfectly tailored to your style and needs. Whether you’re a seasoned seamstress or a complete beginner, this project is surprisingly simple and rewarding. Plus, mastering DIY Bolster Pillow Sewing allows you to choose your favorite fabrics, control the size and firmness, and ultimately, create a unique piece that reflects your personality. So, grab your sewing machine, some fabric scraps, and let’s get started on this fun and fulfilling project!
DIY Bolster Pillow: A Beginner-Friendly Sewing Project
Hey there, fellow crafters! Ever wanted to add a touch of elegance and comfort to your living space without breaking the bank? Well, you’re in the right place! Today, I’m going to walk you through creating your very own bolster pillow. It’s a surprisingly simple sewing project, even if you’re a beginner. Trust me, if I can do it, you can too!
What You’ll Need
Before we dive in, let’s gather our supplies. Having everything ready beforehand will make the process much smoother.
* Fabric: Choose a fabric you love! Consider the style of your room and the durability you need. I recommend a medium-weight fabric like cotton, linen, or even a durable upholstery fabric. The amount you need will depend on the size of your bolster pillow. We’ll calculate that in the next section.
* Inner Pillow Form: You can buy a pre-made bolster pillow form, or you can stuff it yourself with fiberfill. If you’re stuffing it yourself, you’ll need a generous amount of fiberfill.
* Sewing Machine: A basic sewing machine will do the trick.
* Thread: Choose a thread that matches your fabric.
* Scissors or Rotary Cutter: For cutting your fabric accurately.
* Measuring Tape or Ruler: Essential for precise measurements.
* Pins: To hold your fabric pieces together while sewing.
* Seam Ripper: Just in case you make a mistake (we all do!).
* Pencil or Fabric Marker: For marking your fabric.
* Compass or Circular Object: For tracing the circles for the ends of the bolster. A plate or bowl works great!
* Iron and Ironing Board: For pressing your seams.
Calculating Fabric Requirements and Cutting
Okay, let’s figure out how much fabric you’ll need. This is crucial for avoiding any last-minute fabric store runs!
1. Measure Your Pillow Form: If you’re using a pre-made form, measure its length and diameter. If you’re stuffing your own, decide on the desired length and diameter of your finished bolster. Let’s say, for example, you want a bolster that is 24 inches long and has a diameter of 8 inches.
2. Calculate the Rectangle Dimensions:
* Length: The length of your rectangle will be the length of your pillow form plus seam allowance. Add 1 inch for seam allowance (0.5 inches on each end). So, in our example, the length would be 24 inches + 1 inch = 25 inches.
* Width: The width of your rectangle will be the circumference of your pillow form plus seam allowance. The circumference is calculated as πd (pi times diameter). So, in our example, the circumference is approximately 3.14 x 8 inches = 25.12 inches. Add 1 inch for seam allowance (0.5 inches on each side). So, the width would be 25.12 inches + 1 inch = 26.12 inches. Round up to 26.25 inches for easier measuring.
3. Calculate the Circle Dimensions:
* The diameter of your circles will be the same as the diameter of your pillow form. In our example, that’s 8 inches. Add 1 inch for seam allowance (0.5 inches all around). So, the diameter of your circles will be 9 inches.
4. Cutting the Fabric:
* Rectangle: Using your scissors or rotary cutter, cut a rectangle that is 25 inches long and 26.25 inches wide.
* Circles: Using your compass or circular object, trace two circles with a diameter of 9 inches onto your fabric. Cut them out carefully.
Sewing the Bolster Pillow Cover
Alright, now for the fun part – sewing! Don’t worry, I’ll guide you through each step.
1. Prepare the Rectangle:
* Fold the rectangle in half lengthwise, with the right sides of the fabric facing each other. This means the pretty side of the fabric should be on the inside.
* Pin along the long edge, leaving a 10-12 inch opening in the middle. This opening will be used to insert the pillow form later.
2. Sew the Long Seam:
* Using your sewing machine, sew along the pinned edge with a 0.5-inch seam allowance. Remember to backstitch at the beginning and end of your seam to secure the stitches. Leave the 10-12 inch opening unsewn.
3. Press the Seam:
* Carefully press the seam open with your iron. This will help create a smooth and professional finish.
4. Attach the Circles:
* Pin one of the circles to one end of the fabric tube, with the right sides of the fabric facing each other. Make sure the circle is centered.
* This can be a little tricky because you’re sewing a flat circle to a curved tube. Take your time and pin frequently, easing the fabric as you go. You might find it helpful to clip small notches into the seam allowance of the circle to help it curve more easily.
* Sew the circle to the tube with a 0.5-inch seam allowance. Again, backstitch at the beginning and end of your seam.
5. Repeat for the Other Circle:
* Repeat the process for the other circle, attaching it to the other end of the fabric tube.
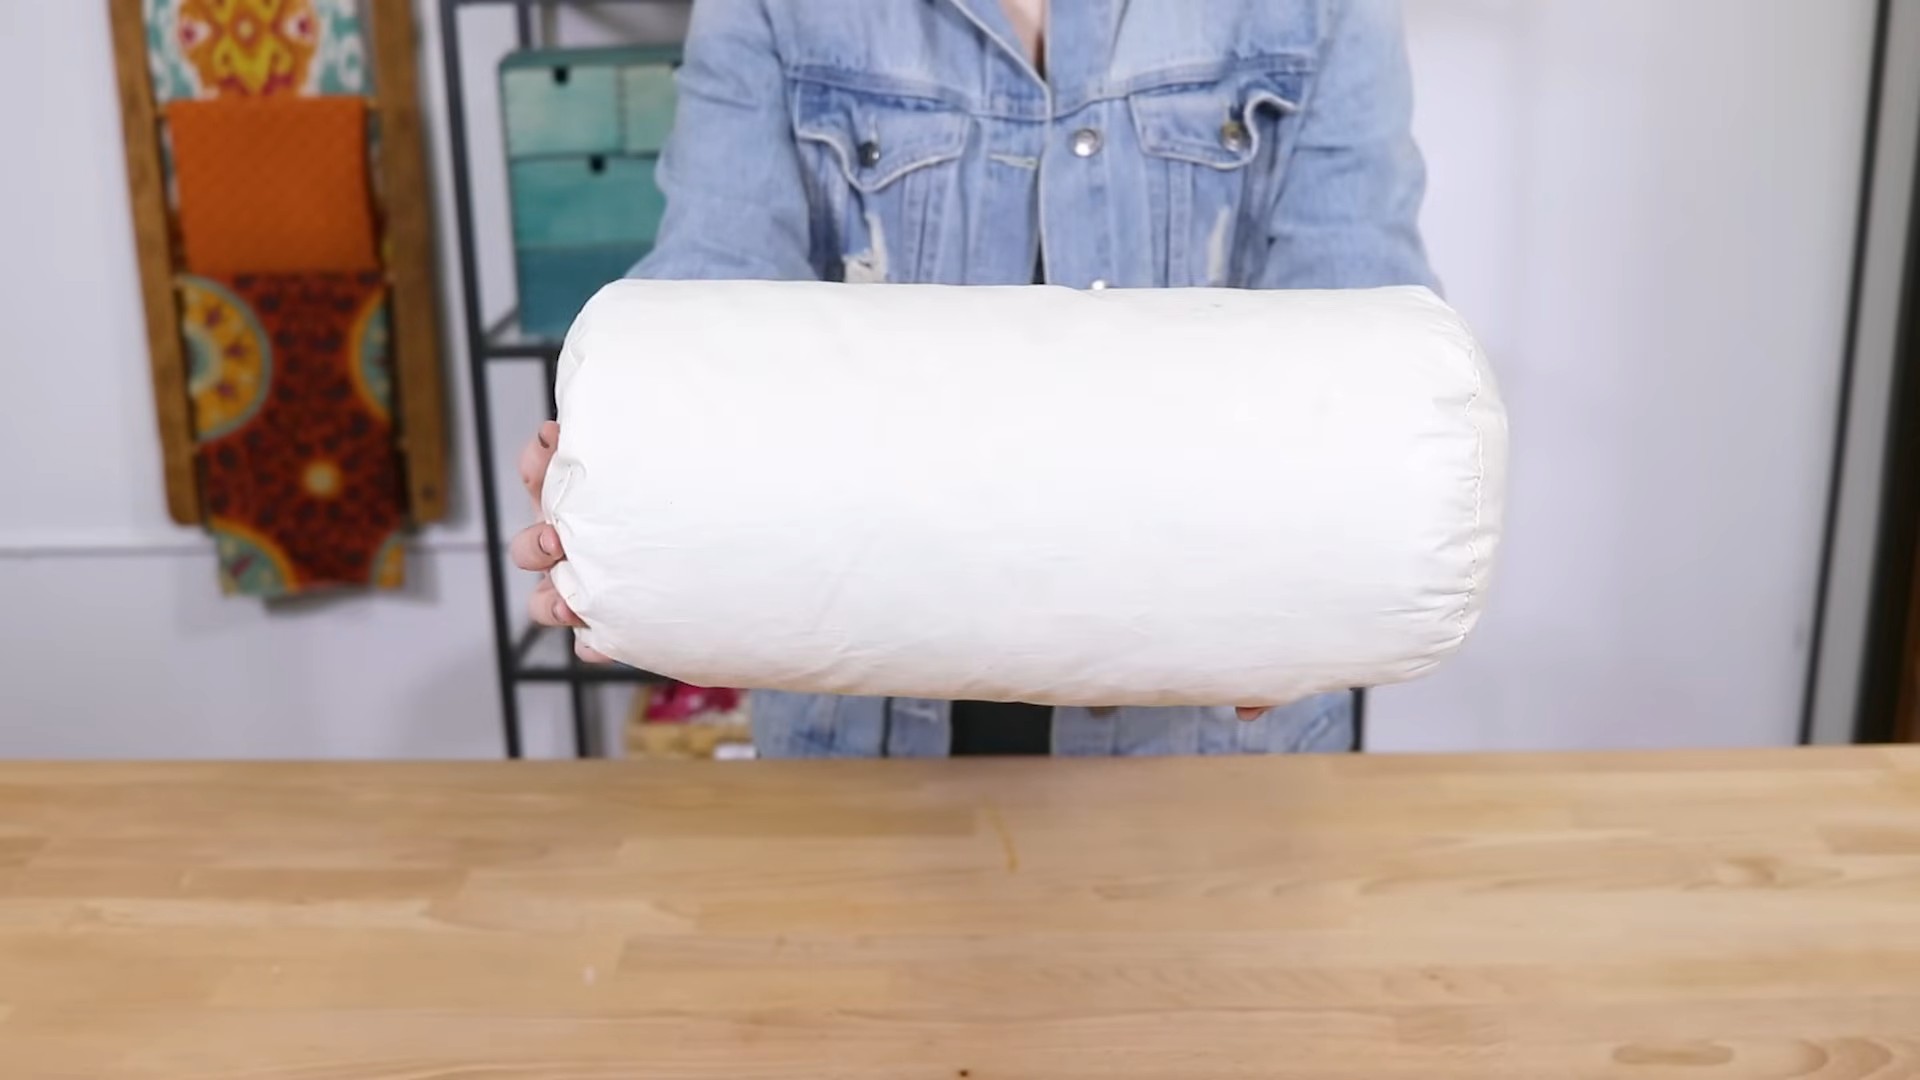
6. Turn the Cover Right Side Out:
* Carefully turn the pillow cover right side out through the opening you left in the long seam.
7. Stuff the Pillow (If Necessary):
* If you’re using a pre-made pillow form, simply insert it into the cover through the opening. If you’re stuffing your own, start filling the cover with fiberfill, making sure to distribute it evenly. You want the bolster to be firm and well-shaped.
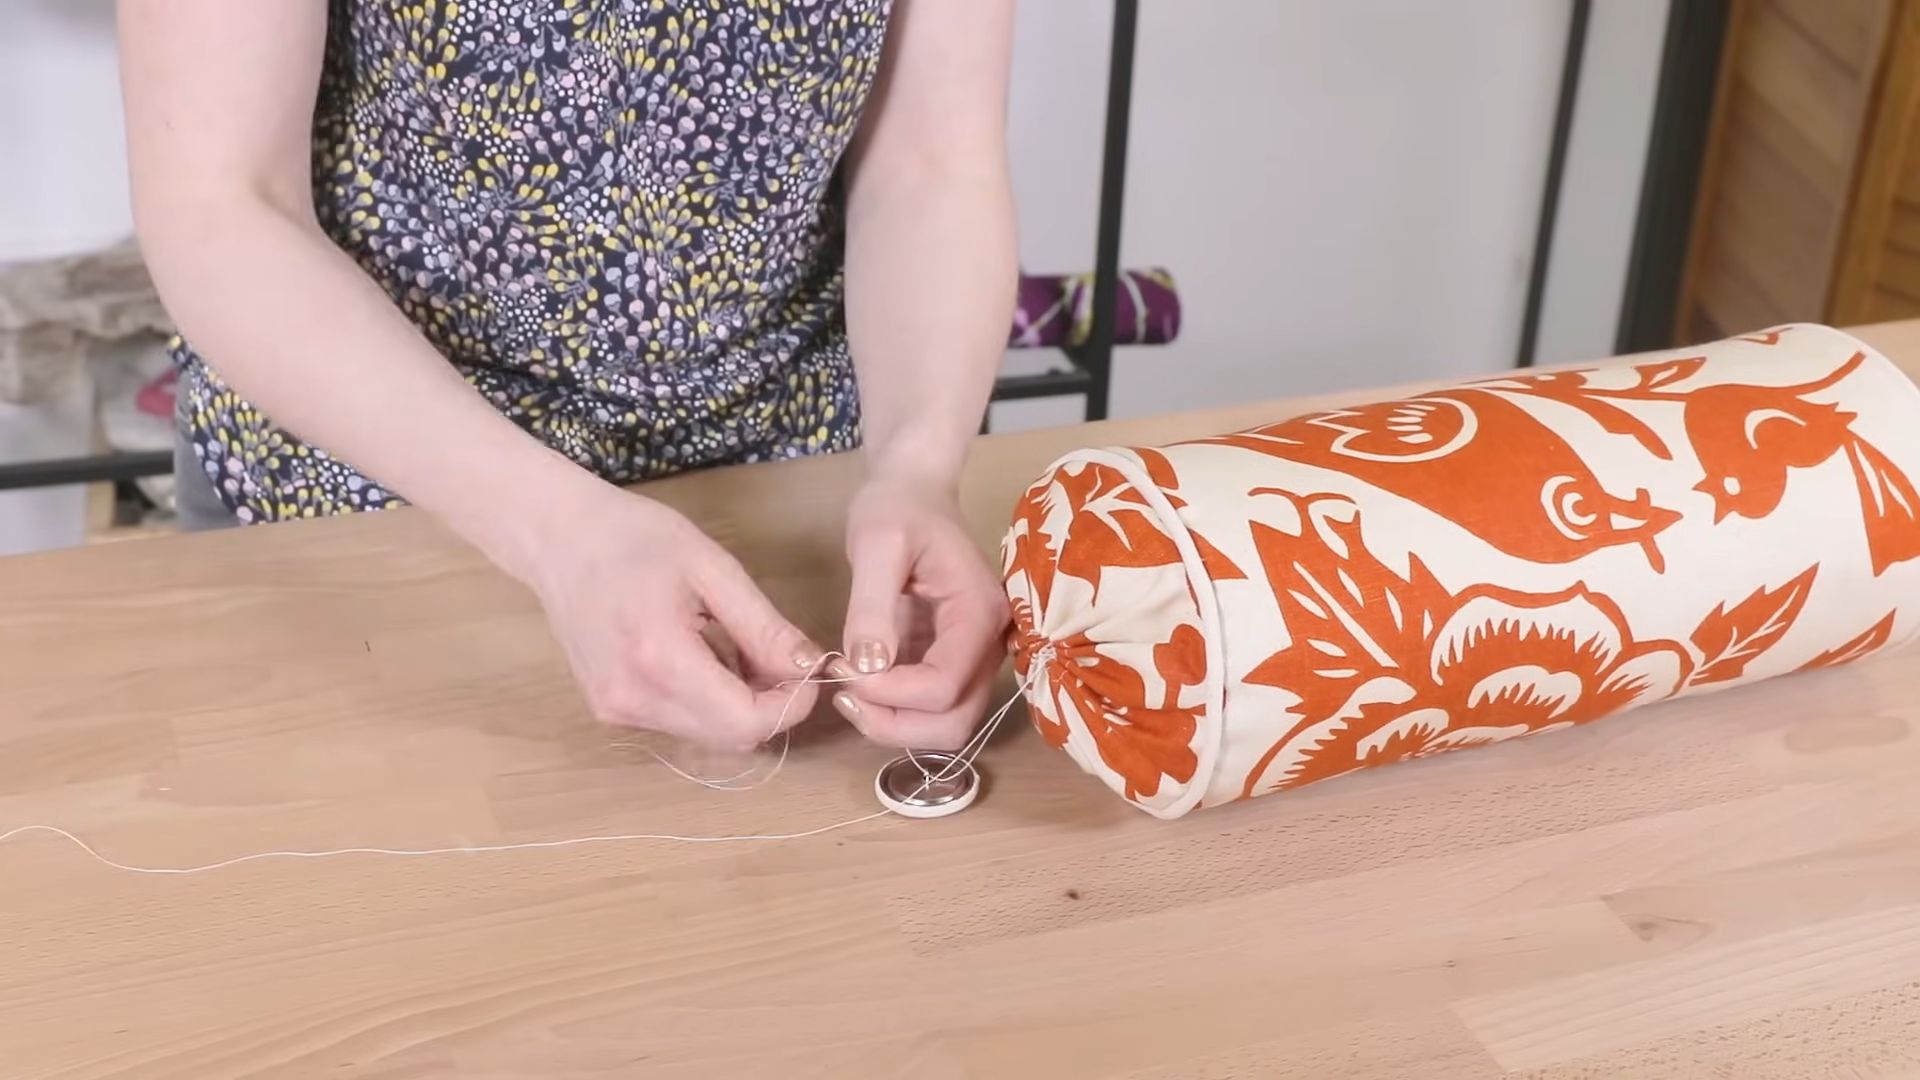
8. Close the Opening:
* Fold the raw edges of the opening inward by 0.5 inches and press with your iron.
* Pin the opening closed.
* You can either hand-stitch the opening closed using a blind stitch for an invisible finish, or you can machine-stitch it close. If you machine-stitch, try to sew as close to the edge as possible.
Adding Embellishments (Optional)
Now that your bolster pillow is complete, you can add some embellishments to personalize it! Here are a few ideas:
* Piping: Add piping around the edges of the circles for a more polished look.
* Tassels: Attach tassels to the ends of the bolster for a touch of bohemian flair.
* Buttons: Sew decorative buttons onto the fabric.
* Embroidery: Embroider a design or your initials onto the pillow cover.
* Fabric Paint: Use fabric paint to create a custom design.
Tips and Tricks for Success
Here are a few extra tips to help you create a beautiful and professional-looking bolster pillow:
* Pre-Wash Your Fabric: This will prevent shrinkage after you’ve sewn your pillow cover.
* Use Sharp Scissors or a Rotary Cutter: This will ensure clean and accurate cuts.
* Pin Frequently: Pinning your fabric pieces together will help prevent them from shifting while you sew.
* Take Your Time: Don’t rush the process. Sewing is a relaxing and enjoyable activity, so take your time and enjoy it!
* Press Your Seams: Pressing your seams will create a smooth and professional finish.
* Don’t Be Afraid to Experiment: Try different fabrics, colors, and embellishments to create a bolster pillow that is truly unique.
* Practice on Scrap Fabric: If you’re new to sewing, practice sewing straight lines and curves on scrap fabric before you start working on your pillow cover.
* Use a Walking Foot: If you’re sewing with a thick or slippery fabric, a walking foot can help prevent the fabric from shifting.
* Check Your Tension: Make sure your sewing machine tension is properly adjusted to prevent skipped stitches or puckered seams.
* Read Your Sewing Machine Manual: Your sewing machine manual contains valuable information about how to use your machine properly.
* Don’t Be Afraid to Ask for Help: If you’re having trouble with a particular step, don’t be afraid to ask a friend or family member for help. There are also many online resources available to help you learn how to sew.
And there you have it! Your very own DIY bolster pillow. I hope you enjoyed this tutorial and that you’re happy with your new creation. Now go ahead and add a touch of comfort and style
Conclusion
So, there you have it! Creating your own DIY bolster pillow isn’t just a cost-effective alternative to store-bought options; it’s a gateway to personalized comfort and style. Forget settling for generic sizes, fabrics, and designs. With this simple sewing project, you’re in complete control, crafting a bolster pillow that perfectly complements your décor and caters to your specific needs.
Why is this DIY trick a must-try? Because it empowers you to express your creativity, save money, and enjoy a truly unique and comfortable addition to your home. Imagine sinking into your sofa, supported by a bolster pillow made with your favorite fabric, perfectly sized for your back, neck, or legs. The satisfaction of creating something beautiful and functional with your own hands is unparalleled.
But the possibilities don’t end with the basic design. Feel free to experiment with different fabrics. Consider using luxurious velvet for a touch of elegance, durable canvas for a rustic feel, or even repurposing old blankets or curtains for an eco-friendly option. Play with embellishments! Add tassels, piping, or embroidery to personalize your bolster pillow further. You could even create a removable cover for easy washing and seasonal updates.
For those seeking extra support, consider adding a layer of memory foam inside the filling. This will provide enhanced cushioning and contouring, perfect for individuals with back pain or those who simply prefer a firmer feel. Alternatively, if you prefer a softer, more plush bolster pillow, opt for a down alternative filling.
Don’t be intimidated if you’re new to sewing. This project is beginner-friendly, and the step-by-step instructions are designed to guide you through the process. Even if you make a few mistakes along the way, remember that imperfections add character! The most important thing is to have fun and enjoy the creative process.
We are confident that once you experience the comfort and satisfaction of using your own handmade bolster pillow, you’ll never go back to store-bought options. So, gather your supplies, unleash your creativity, and get sewing!
We encourage you to try this DIY bolster pillow sewing project and share your experience with us. Post photos of your finished bolster pillows on social media using #DIYBolsterPillow and tag us so we can see your amazing creations. We can’t wait to see what you come up with! Your feedback and suggestions are invaluable, so please don’t hesitate to share your thoughts in the comments section below. Happy sewing!
Frequently Asked Questions (FAQ)
What kind of fabric is best for a DIY bolster pillow?
The best fabric for your DIY bolster pillow depends on your personal preferences and the intended use. For a durable and versatile option, consider cotton canvas or denim. These fabrics are easy to work with, relatively inexpensive, and can withstand regular use. If you’re looking for a more luxurious feel, velvet or linen are excellent choices. Velvet adds a touch of elegance, while linen offers a relaxed and breathable option. For outdoor use, consider using outdoor-rated fabrics that are water-resistant and fade-resistant. Ultimately, the best fabric is one that you love the look and feel of and that suits your sewing skills.
What kind of filling should I use for my bolster pillow?
There are several options for filling your bolster pillow, each with its own advantages. Polyester fiberfill is a popular choice because it’s affordable, hypoallergenic, and easy to find. It provides a soft and fluffy feel. For a firmer bolster pillow, consider using shredded memory foam. Memory foam conforms to your body, providing excellent support. Down alternative filling is another great option for those who prefer a softer feel but want to avoid using animal products. You can also use a combination of fillings to achieve your desired level of comfort and support. For example, you could use a core of shredded memory foam surrounded by a layer of polyester fiberfill.
How do I determine the right size for my bolster pillow?
The ideal size for your bolster pillow depends on how you plan to use it. For lumbar support, a smaller bolster pillow (around 6-8 inches in diameter and 18-24 inches long) is usually sufficient. For neck support, a slightly larger bolster pillow (around 8-10 inches in diameter and 24-30 inches long) may be more comfortable. If you plan to use the bolster pillow for leg support, you may want to make it longer (around 30-36 inches). Consider the size of your furniture and your personal preferences when determining the right size. You can also measure existing pillows that you find comfortable to get a better idea of the dimensions you need.
Can I make a removable cover for my bolster pillow?
Yes, absolutely! Making a removable cover for your bolster pillow is a great way to keep it clean and fresh. To create a removable cover, simply add a zipper or button closure to one end of the pillow. You can also use overlapping fabric panels to create an envelope-style closure. When sewing the cover, be sure to add seam allowances for easy removal and replacement. Consider using a contrasting fabric for the cover to add a pop of color to your décor.
What if I don’t have a sewing machine? Can I still make a bolster pillow?
While a sewing machine will make the process faster and easier, you can definitely make a bolster pillow by hand. Hand-sewing will require more time and patience, but it’s a perfectly viable option. Use a strong needle and thread, and be sure to use a sturdy stitch, such as a backstitch, to ensure that the seams are secure. You may also want to consider using a thicker fabric, such as canvas or denim, for hand-sewing, as these fabrics are less likely to fray.
How do I clean my DIY bolster pillow?
The cleaning method for your DIY bolster pillow will depend on the fabric and filling you used. If you made a removable cover, simply remove the cover and wash it according to the fabric care instructions. For the pillow insert, spot clean any stains with a mild detergent and water. If the entire pillow needs to be cleaned, you can hand-wash it in a tub of cool water with a mild detergent. Be sure to rinse it thoroughly and squeeze out any excess water. Allow the pillow to air dry completely before using it again. If you used a filling that is not washable, such as shredded memory foam, you may need to replace the filling periodically.
How can I customize my DIY bolster pillow to match my décor?
There are endless ways to customize your DIY bolster pillow to match your décor. Choose fabrics that complement your existing color scheme and patterns. Add embellishments such as tassels, piping, or embroidery. You can also use stencils or fabric paint to create unique designs. Consider using different textures to add visual interest. For example, you could combine a smooth velvet fabric with a textured linen fabric. Don’t be afraid to experiment and get creative!
What are some other uses for a bolster pillow besides back and neck support?
Bolster pillows are incredibly versatile and can be used for a variety of purposes. They can be used as leg support to elevate your legs and improve circulation. They can also be used as armrests while reading or watching TV. Bolster pillows can even be used as decorative accents on your bed or sofa. They can also be helpful for pregnant women, providing support for their growing bellies. The possibilities are endless!


Leave a Comment