

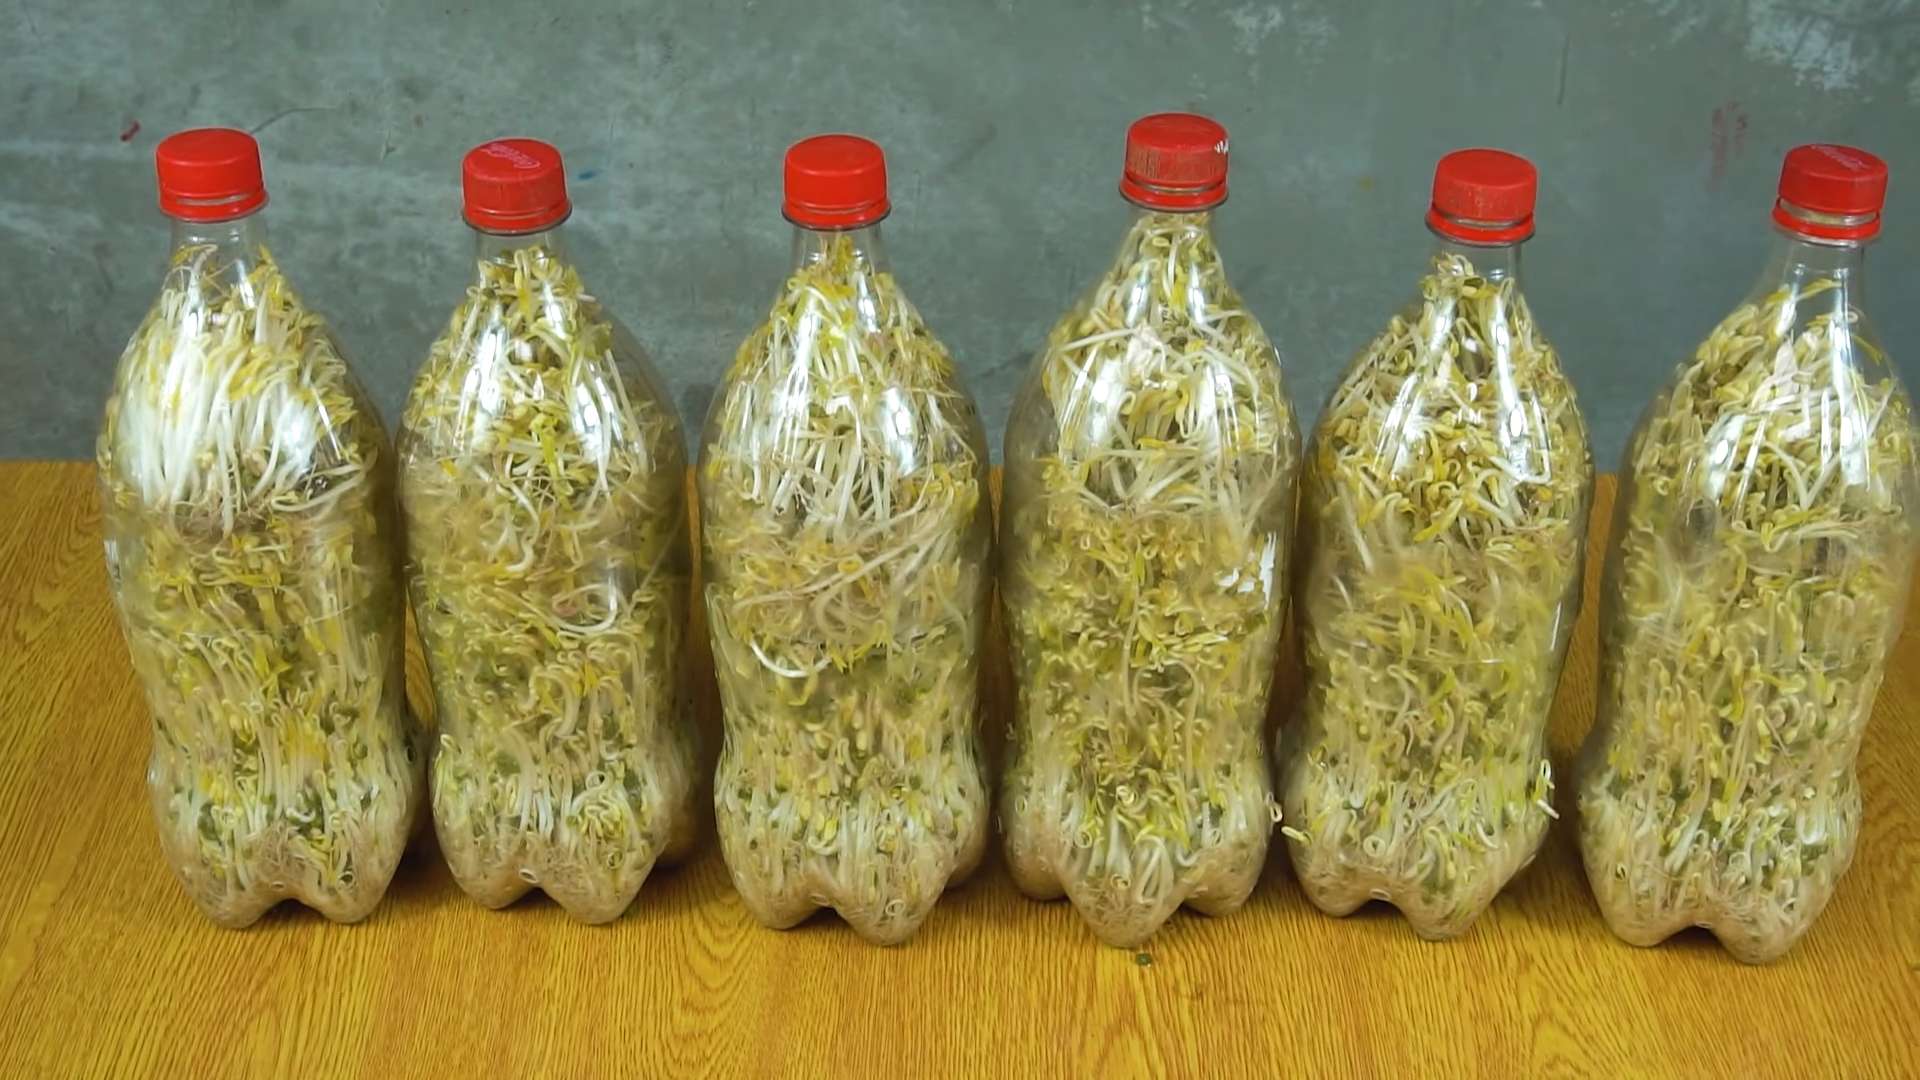
DIY Bean Sprouts Plastic Bottle: Unlock the secrets to fresh, homegrown goodness right in your kitchen! Have you ever craved the crisp, nutty flavor of bean sprouts but dreaded the grocery store run? Or perhaps you’re looking for a sustainable and budget-friendly way to add nutritious greens to your diet? Well, you’re in the right place! I’m excited to share a simple, yet incredibly effective, DIY trick that will transform your empty plastic bottles into miniature bean sprout farms.
Sprouting beans has a rich history, dating back thousands of years in Asian cultures, where they were valued for their nutritional benefits and ease of cultivation. Today, we can easily tap into this ancient practice with a modern twist. This DIY Bean Sprouts Plastic Bottle method is not only incredibly easy, but it’s also a fantastic way to recycle and reduce waste.
In today’s fast-paced world, finding time for gardening can be a challenge. This DIY project eliminates the need for a large garden space or complicated equipment. It’s perfect for apartment dwellers, busy professionals, or anyone looking to add a touch of green to their lives. Plus, you’ll have a constant supply of fresh, organic bean sprouts at your fingertips, ready to add a healthy crunch to your salads, stir-fries, and sandwiches. Let’s get sprouting!
DIY Bean Sprouts in a Plastic Bottle: A Beginner’s Guide
Hey there, fellow DIY enthusiasts! Are you ready to grow your own fresh, crunchy bean sprouts right in your kitchen? It’s easier than you think, and all you need is a plastic bottle and a few other simple supplies. Not only is this a fun and rewarding project, but it also provides you with a healthy and delicious addition to your meals. Let’s get sprouting!
What You’ll Need
Before we dive in, let’s gather our supplies. This is a super budget-friendly project, so you probably already have most of these items lying around:
* A clean, empty plastic bottle (2-liter soda bottle or similar works great)
* Bean sprouts seeds (mung beans are the most common and easiest to sprout)
* Drill or sharp knife
* Dark cloth or towel
* Water
* Rubber band (optional)
* Measuring cup
Preparing the Bottle
This is where we transform our humble plastic bottle into a sprouting haven.
1. Clean the Bottle Thoroughly: First things first, make sure your bottle is squeaky clean. Wash it with warm, soapy water and rinse it really well. Any residue could contaminate your sprouts.
2. Drill Drainage Holes: Now, we need to create drainage holes. This is crucial to prevent the sprouts from becoming waterlogged and rotting. Using your drill or sharp knife, carefully poke several small holes in the bottom of the bottle. I usually aim for about 10-15 holes, evenly spaced. Be careful not to make the holes too big, or the sprouts might fall through.
3. Cut the Bottle (Optional): You can either leave the bottle whole or cut it in half. Cutting it in half makes it easier to rinse and harvest the sprouts later. If you choose to cut it, use a sharp knife or scissors to cut the bottle horizontally about halfway up. The top half will act as a lid or cover.
Soaking the Seeds
This step is essential to kickstart the germination process.
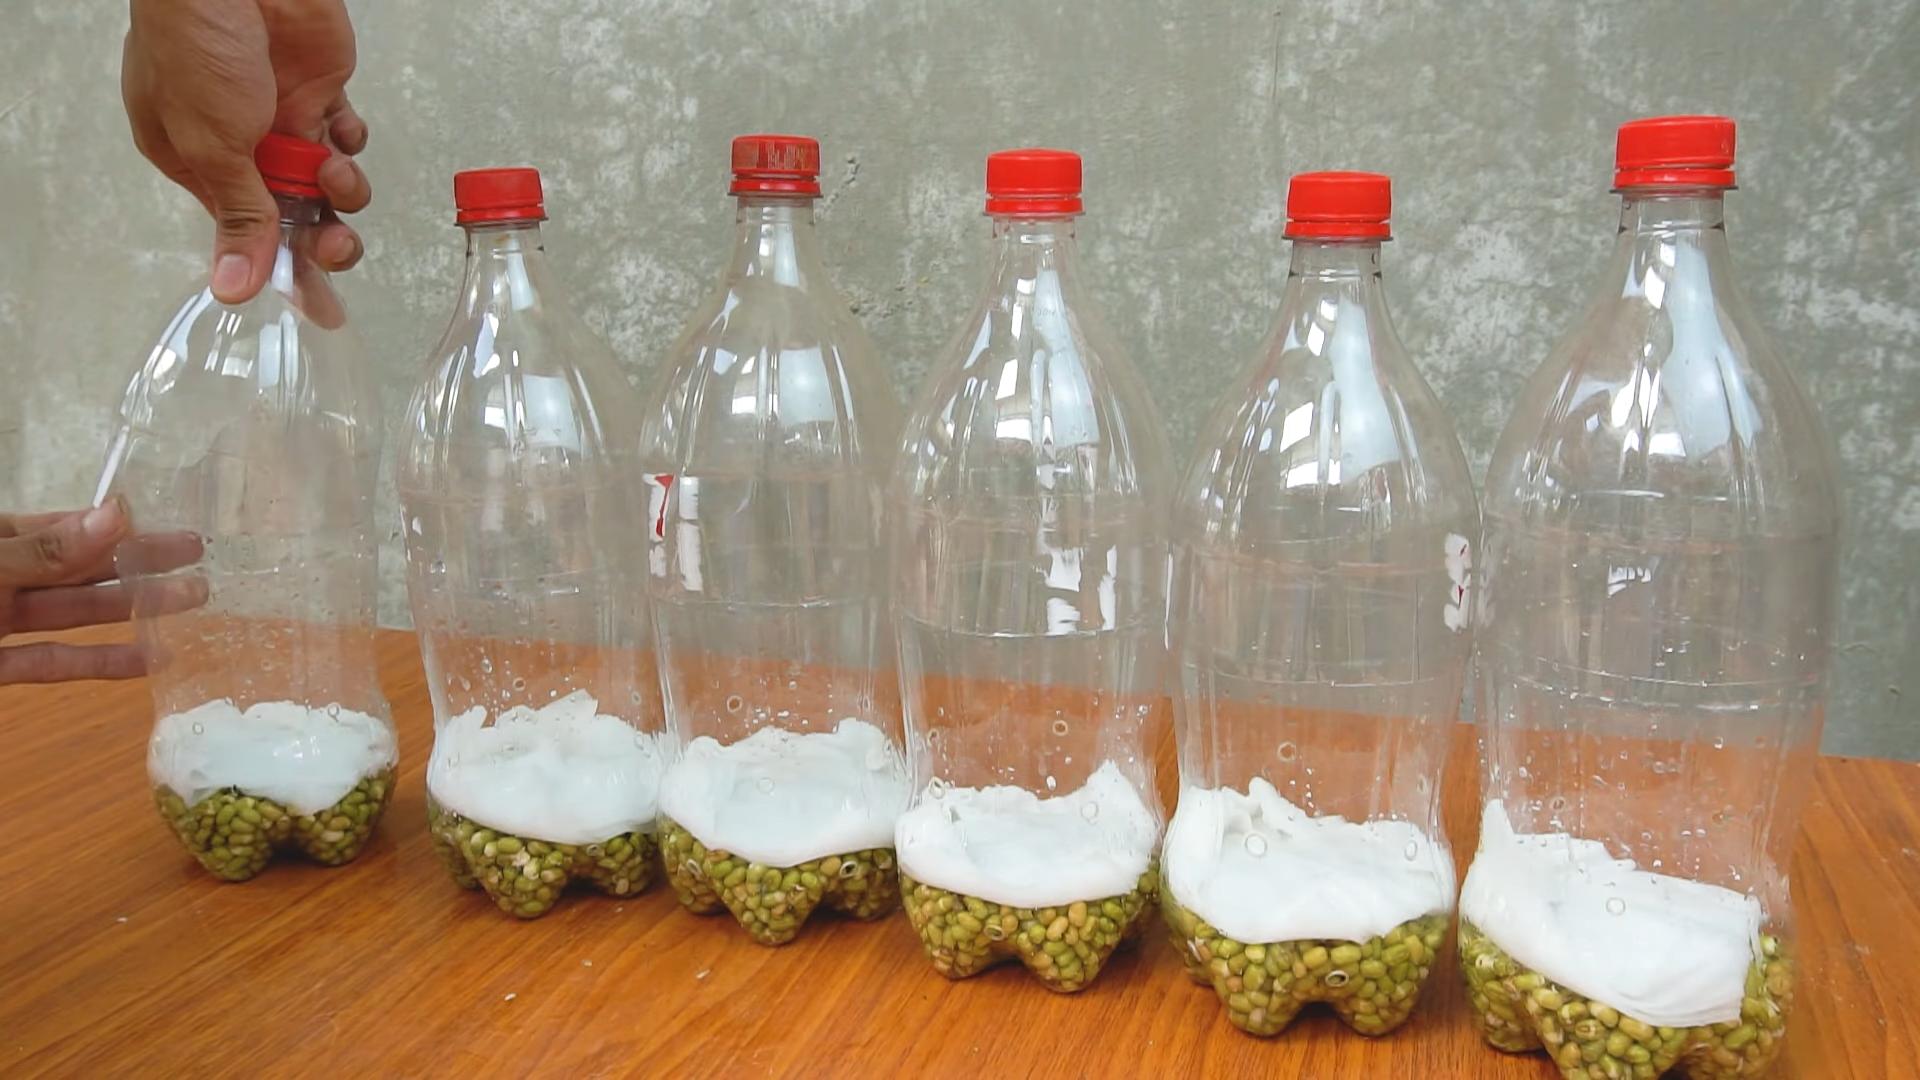
1. Measure the Seeds: Start with about 2-3 tablespoons of mung bean seeds. They’ll expand quite a bit as they soak, so don’t overcrowd the bottle.
2. Rinse the Seeds: Place the seeds in a bowl and rinse them thoroughly with cool water. This removes any dust or debris.
3. Soak the Seeds: Cover the seeds with plenty of cool water (about 2-3 times the volume of the seeds). Let them soak for 8-12 hours, or even overnight. You’ll notice they’ll swell up significantly.
Sprouting the Seeds
This is where the magic happens!
1. Drain and Rinse the Seeds: After soaking, drain the seeds completely using a fine-mesh sieve or colander. Rinse them again with cool water.
2. Transfer to the Bottle: Carefully transfer the soaked seeds into your prepared plastic bottle.
3. Secure the Top (If Cut): If you cut the bottle in half, place the top half upside down over the bottom half, creating a dark, enclosed environment. You can secure it with a rubber band if needed. If you didn’t cut the bottle, you can skip this step.
4. Darkness is Key: Bean sprouts need darkness to germinate properly. Wrap the bottle with a dark cloth or towel to block out the light. This encourages the sprouts to grow long and white.
5. Rinse and Drain Regularly: This is the most important part of the sprouting process. You need to rinse and drain the sprouts at least twice a day, preferably three times. This keeps them moist and prevents mold growth. To do this, simply run cool water through the bottle, ensuring all the sprouts are rinsed. Then, drain the water completely.
6. Maintain Proper Drainage: After each rinse, make sure the bottle is positioned so that all the excess water drains out. You can prop it up at an angle or place it upside down in a bowl to allow for thorough drainage.
7. Patience is a Virtue: The sprouting process usually takes 3-5 days, depending on the temperature and humidity. Keep the bottle in a cool, dark place, away from direct sunlight.
Harvesting and Storing Your Sprouts
Congratulations, you’ve grown your own bean sprouts!
1. Check for Readiness: The sprouts are ready to harvest when they are about 1-2 inches long and have small, yellow leaves.
2. Rinse Thoroughly: Before harvesting, give the sprouts one final rinse to remove any remaining seed husks.
3. Harvesting: If you cut the bottle, simply separate the two halves and gently pull out the sprouts. If you didn’t cut the bottle, you can carefully pour the sprouts out into a bowl.
4. Remove Seed Husks: Pick out any remaining seed husks. This is optional, but it improves the texture of the sprouts.
5. Storage: Store the harvested sprouts in an airtight container in the refrigerator. They should last for about a week. To keep them fresh, you can line the container with a paper towel to absorb excess moisture.
Troubleshooting
Even with the best intentions, things can sometimes go wrong. Here are a few common issues and how to fix them:
* Mold Growth: If you notice any mold growing on the sprouts, it’s usually due to insufficient rinsing or poor drainage. Discard the affected sprouts and start a new batch, making sure to rinse and drain them more frequently.
* Slow Growth: If the sprouts are growing slowly, it could be due to low temperature or insufficient darkness. Try moving the bottle to a slightly warmer location and ensure it’s completely covered with a dark cloth.
* Rotting Sprouts: Rotting sprouts are usually caused by overwatering or poor drainage. Make sure the bottle has adequate drainage holes and that you’re draining the sprouts thoroughly after each rinse.
* Bitter Taste: Sometimes, bean sprouts can develop a slightly bitter taste. This is usually due to the presence of seed husks. Make sure to remove as many seed husks as possible before storing the sprouts.
Tips and Tricks for Sprouting Success
Here are a few extra tips to help you become a sprouting pro:
* Use Fresh Seeds: Older seeds may have a lower germination rate.
* Maintain a Consistent Temperature: The ideal temperature for sprouting is between 70-75°F (21-24°C).
* Experiment with Different Beans: While mung beans are the easiest to sprout, you can also try sprouting other beans like lentils, adzuki beans, or chickpeas.
* Don’t Overcrowd the Bottle: Give the sprouts plenty of room to grow.
* Enjoy Your Sprouts: Add your fresh bean sprouts to salads, sandwiches, stir-fries, soups, or enjoy them as a healthy snack.
Why Sprout? The Benefits of Homegrown Sprouts
Growing your own bean sprouts isn’t just a fun DIY project; it’s also a fantastic way to boost your health and well-being. Here are some of the amazing benefits of incorporating sprouts into your diet:
* Nutrient Powerhouse: Sprouts are packed with vitamins, minerals, and enzymes. The sprouting process actually increases the bioavailability of these nutrients, making them easier for your body to absorb.
* Easy Digestion: Sprouts are easier to digest than mature beans because the sprouting process breaks down complex carbohydrates and proteins.
* Rich in Fiber: Sprouts are a good source of dietary fiber, which promotes healthy digestion and helps regulate blood sugar levels.
* Boosts Immunity: Sprouts contain antioxidants and other compounds that can help boost your immune system.
* Cost-Effective: Growing your own sprouts is much cheaper than buying them from the store.
* Fresh and Delicious: Homegrown sprouts are fresher and more flavorful than store-bought sprouts.
* Sustainable: Sprouting is a sustainable way to grow your own food, reducing your reliance on commercially produced produce.
Beyond Mung Beans: Exploring Other Sprouting Options
While mung beans are the classic choice for sprouting, the world of sprouts extends far beyond these little green gems. Experimenting with different types of seeds and beans can add variety to your diet and introduce you to a whole new range of flavors and textures. Here are a few other options to consider:
* Alfalfa Sprouts: These delicate sprouts have a mild, slightly sweet flavor and are a great addition to salads and sandwiches.
* Broccoli Sprouts: Broccoli sprouts are a nutritional powerhouse, packed with antioxidants and other beneficial compounds. They have a slightly peppery flavor.
* Radish Sprouts: Radish sprouts have a spicy, peppery flavor that adds a kick to salads and sandwiches.
* Lentil Sprouts: Lentil sprouts are a good source of protein and fiber. They have a mild, earthy flavor.
* Chickpea Sprouts:
Conclusion
So, there you have it! Growing your own bean sprouts in a plastic bottle is not just a fun project; it’s a gateway to fresher, healthier, and more sustainable eating. This simple DIY trick transforms an everyday waste item into a miniature farm, providing you with a constant supply of crisp, delicious bean sprouts right on your kitchen counter.
Why is this a must-try? Because it’s incredibly easy, cost-effective, and environmentally friendly. You’re reducing plastic waste, saving money on store-bought sprouts (which can sometimes be questionable in freshness), and gaining complete control over the growing process. You know exactly what’s going into your sprouts – just water and beans! Plus, the satisfaction of nurturing something from seed to sprout is surprisingly rewarding.
Beyond the basic method, there’s plenty of room for experimentation. Try different types of beans! Mung beans are the classic choice, but you can also use adzuki beans, lentils, or even chickpeas for a unique flavor profile. Adjust the sprouting time based on your preference for sprout length. Some people prefer shorter, crunchier sprouts, while others like them longer and more developed.
Consider the environment where you are sprouting. If you live in a very hot climate, you might need to rinse the sprouts more frequently to prevent them from drying out. In cooler climates, you might need to provide a slightly warmer location to encourage growth.
Don’t be afraid to get creative! You can even add a small amount of organic fertilizer to the water during the later stages of sprouting to boost nutrient content. Just be sure to rinse thoroughly before consuming.
This DIY bean sprouts plastic bottle method is a game-changer for anyone looking to add fresh, healthy ingredients to their diet without breaking the bank or contributing to excessive plastic consumption. It’s a small change with a big impact, both on your health and the environment.
We wholeheartedly encourage you to give this a try. It’s a simple, rewarding project that will bring a touch of freshness and sustainability to your kitchen. And most importantly, we want to hear about your experience! Share your photos, tips, and variations in the comments below. Let’s build a community of sprout enthusiasts and inspire others to embrace this easy and eco-friendly way to grow their own food. Happy sprouting!
Frequently Asked Questions (FAQ)
What types of beans work best for sprouting in a plastic bottle?
Mung beans are the most commonly used and generally considered the easiest to sprout. However, you can also successfully sprout adzuki beans, lentils, chickpeas, and even some types of peas. Keep in mind that different beans will have different sprouting times and flavor profiles. Experiment to find your favorites! Avoid using dried beans that are old or have been treated with chemicals, as they may not sprout properly. Organic beans are always a good choice.
How often should I rinse the bean sprouts?
Rinsing is crucial for preventing mold and ensuring healthy growth. Aim to rinse your bean sprouts at least twice a day, preferably three times, especially in warmer climates. Use cool, clean water and make sure to drain the bottle thoroughly after each rinse. The goal is to keep the sprouts moist but not waterlogged.
How long does it take for bean sprouts to grow?
The sprouting time varies depending on the type of bean and the ambient temperature. Mung beans typically take 3-5 days to reach a desirable length. Adzuki beans may take slightly longer. Keep an eye on your sprouts and harvest them when they reach your preferred size and texture.
What if my bean sprouts start to smell bad?
A foul odor is a sign of bacterial growth or mold. This usually indicates that the sprouts are not being rinsed frequently enough or that the drainage is inadequate. If you notice a bad smell, discard the entire batch of sprouts and thoroughly clean the plastic bottle before starting a new batch. To prevent this, ensure you are rinsing the sprouts at least twice a day and that the bottle is draining properly.
How do I prevent mold from growing on my bean sprouts?
Mold growth is a common concern when sprouting. To prevent it, ensure proper hygiene and ventilation. Use clean water for rinsing, and make sure the bottle is thoroughly cleaned before each batch. Adequate drainage is also essential. Avoid overcrowding the bottle with too many beans, as this can restrict airflow and increase the risk of mold. If you live in a humid environment, consider placing the bottle in a well-ventilated area.
How do I store bean sprouts after they are grown?
Once your bean sprouts have reached your desired length, rinse them thoroughly and drain them well. Store them in an airtight container lined with a paper towel in the refrigerator. The paper towel will help absorb excess moisture and keep the sprouts fresh for up to a week.
Can I eat the bean sprout roots?
Yes, the roots of bean sprouts are perfectly edible. They are a natural part of the sprout and contain nutrients. Some people prefer to trim the roots for aesthetic reasons, but it is not necessary.
Is it safe to sprout beans in a plastic bottle?
Using a plastic bottle for sprouting is generally safe, especially if you use a food-grade plastic bottle (look for recycling codes 1, 2, 4, or 5). However, it’s important to thoroughly clean the bottle before each use to remove any potential contaminants. Avoid using bottles that have contained harsh chemicals or cleaning products. If you are concerned about plastic leaching, you can use a glass jar instead.
What are the nutritional benefits of bean sprouts?
Bean sprouts are a nutritional powerhouse. They are low in calories and fat but rich in vitamins, minerals, and enzymes. They are a good source of vitamin C, vitamin K, folate, and fiber. They also contain antioxidants that can help protect against cell damage.
Can I sprout other types of seeds besides beans?
Yes, you can sprout a variety of other seeds, including alfalfa, broccoli, radish, and sunflower seeds. However, the sprouting process and time may vary depending on the type of seed. Research the specific requirements for each type of seed before attempting to sprout them.
What if my beans don’t sprout at all?
If your beans are not sprouting, there could be several reasons. The beans may be too old or damaged. They may not be getting enough moisture or ventilation. The temperature may be too cold or too hot. Make sure you are using fresh, high-quality beans and following the recommended sprouting instructions. If you have tried everything and the beans still don’t sprout, try a different batch of beans or a different sprouting method.
Leave a Comment