

Deep cleaning tips and tricks – that’s what we all crave, isn’t it? Let’s be honest, who truly *enjoys* spending hours scrubbing and scouring? But what if I told you that deep cleaning doesn’t have to be a dreaded chore? What if I could share some game-changing secrets that will transform your cleaning routine from a marathon into a manageable sprint?
For generations, our grandmothers and great-grandmothers passed down their own unique cleaning rituals, often relying on natural ingredients and clever techniques. Think about it – before the age of fancy detergents and specialized cleaners, they kept their homes sparkling with simple solutions like vinegar, baking soda, and elbow grease! These time-tested methods are not only effective but also eco-friendly and budget-conscious.
In today’s busy world, finding the time for a thorough clean can feel impossible. Dust bunnies multiply overnight, grime accumulates in hidden corners, and before you know it, your home needs a serious intervention. That’s where these deep cleaning tips and tricks come in. I’m going to show you how to tackle those neglected areas, banish stubborn stains, and create a healthier, happier living space – all without breaking the bank or sacrificing your precious free time. Get ready to reclaim your weekends and enjoy a sparkling clean home you can be proud of!
Deep Cleaning Your Home: A DIY Guide to Sparkling Spaces
Okay, let’s face it, deep cleaning isn’t exactly anyone’s favorite pastime. But the feeling of a truly clean and refreshed home? Totally worth it! I’m going to walk you through my tried-and-true methods for tackling even the most neglected corners of your house. Get ready to roll up your sleeves and transform your space!
Gather Your Supplies
Before we dive in, let’s make sure you have everything you need. Trust me, having all your supplies ready will save you tons of time and frustration. Here’s my go-to list:
* Cleaning cloths: Microfiber cloths are my absolute favorite. They’re super absorbent and great for lifting dirt and grime. Stock up on a bunch!
* Sponges: I prefer sponges with a scrubbing side for tougher messes.
* Spray bottles: Essential for homemade cleaning solutions.
* Bucket: For mixing cleaning solutions and rinsing cloths.
* Vacuum cleaner: A must-have for floors and upholstery.
* Mop: Choose one that suits your floor type.
* Scrub brush: For tackling grout and other stubborn areas.
* Toothbrush: An old toothbrush is perfect for cleaning tight spaces.
* Rubber gloves: Protect your hands from harsh chemicals.
* Cleaning solutions: I’ll share my favorite homemade recipes below, but you can also use store-bought cleaners.
* Baking soda: A natural deodorizer and mild abrasive.
* White vinegar: A powerful cleaner and disinfectant.
* Dish soap: Great for cutting through grease.
* Lemon juice: Adds a fresh scent and helps remove stains.
* Essential oils (optional): For a pleasant aroma.
* Squeegee: For streak-free windows and shower doors.
* Magic Eraser: For scuff marks and tough stains.
Homemade Cleaning Solutions: My Secret Weapons
I’m a big fan of using natural cleaning solutions whenever possible. They’re safer for your family and the environment, and they’re often just as effective as store-bought cleaners. Here are a few of my go-to recipes:
* All-purpose cleaner: Mix equal parts white vinegar and water in a spray bottle. Add a few drops of your favorite essential oil for a pleasant scent.
* Glass cleaner: Mix 1/4 cup white vinegar, 1/2 teaspoon dish soap, and 2 cups water in a spray bottle.
* Oven cleaner: Make a paste of baking soda and water. Apply it to the inside of your oven and let it sit overnight.
* Drain cleaner: Pour 1/2 cup baking soda down the drain, followed by 1 cup white vinegar. Let it fizz for 30 minutes, then flush with hot water.
* Grout cleaner: Mix baking soda and water into a paste. Apply it to the grout and let it sit for a few minutes. Scrub with a toothbrush and rinse.
Deep Cleaning Checklist: Room by Room
Now, let’s get down to the nitty-gritty. I like to tackle deep cleaning room by room to stay organized and avoid feeling overwhelmed.
The Kitchen: The Heart of the Home (and the Source of Many Messes!)
1. Clear the countertops: Remove everything from your countertops, including appliances, utensils, and decorative items. This will give you a clear surface to work with.
2. Clean the countertops: Wipe down the countertops with your all-purpose cleaner. Pay special attention to areas where food spills are common.
3. Clean the sink: Scrub the sink with dish soap and a sponge. Rinse thoroughly. For a sparkling sink, sprinkle baking soda in the sink and scrub with a lemon half.
4. Clean the stovetop: Remove the grates and burner caps. Soak them in hot, soapy water. Wipe down the stovetop with your all-purpose cleaner. For stubborn stains, use a paste of baking soda and water.
5. Clean the oven: If you’re using my homemade oven cleaner, apply the baking soda paste and let it sit overnight. The next day, scrub the oven clean and rinse thoroughly. If you’re using a store-bought oven cleaner, follow the instructions on the label.
6. Clean the microwave: Heat a cup of water with a few tablespoons of vinegar in the microwave for a few minutes. The steam will loosen any stuck-on food. Wipe down the inside of the microwave with a damp cloth.
7. Clean the refrigerator: Remove all the food from the refrigerator. Discard any expired or spoiled items. Wipe down the shelves and drawers with your all-purpose cleaner.
8. Clean the dishwasher: Run an empty dishwasher cycle with a cup of white vinegar in the top rack. This will help remove any buildup and freshen the dishwasher.
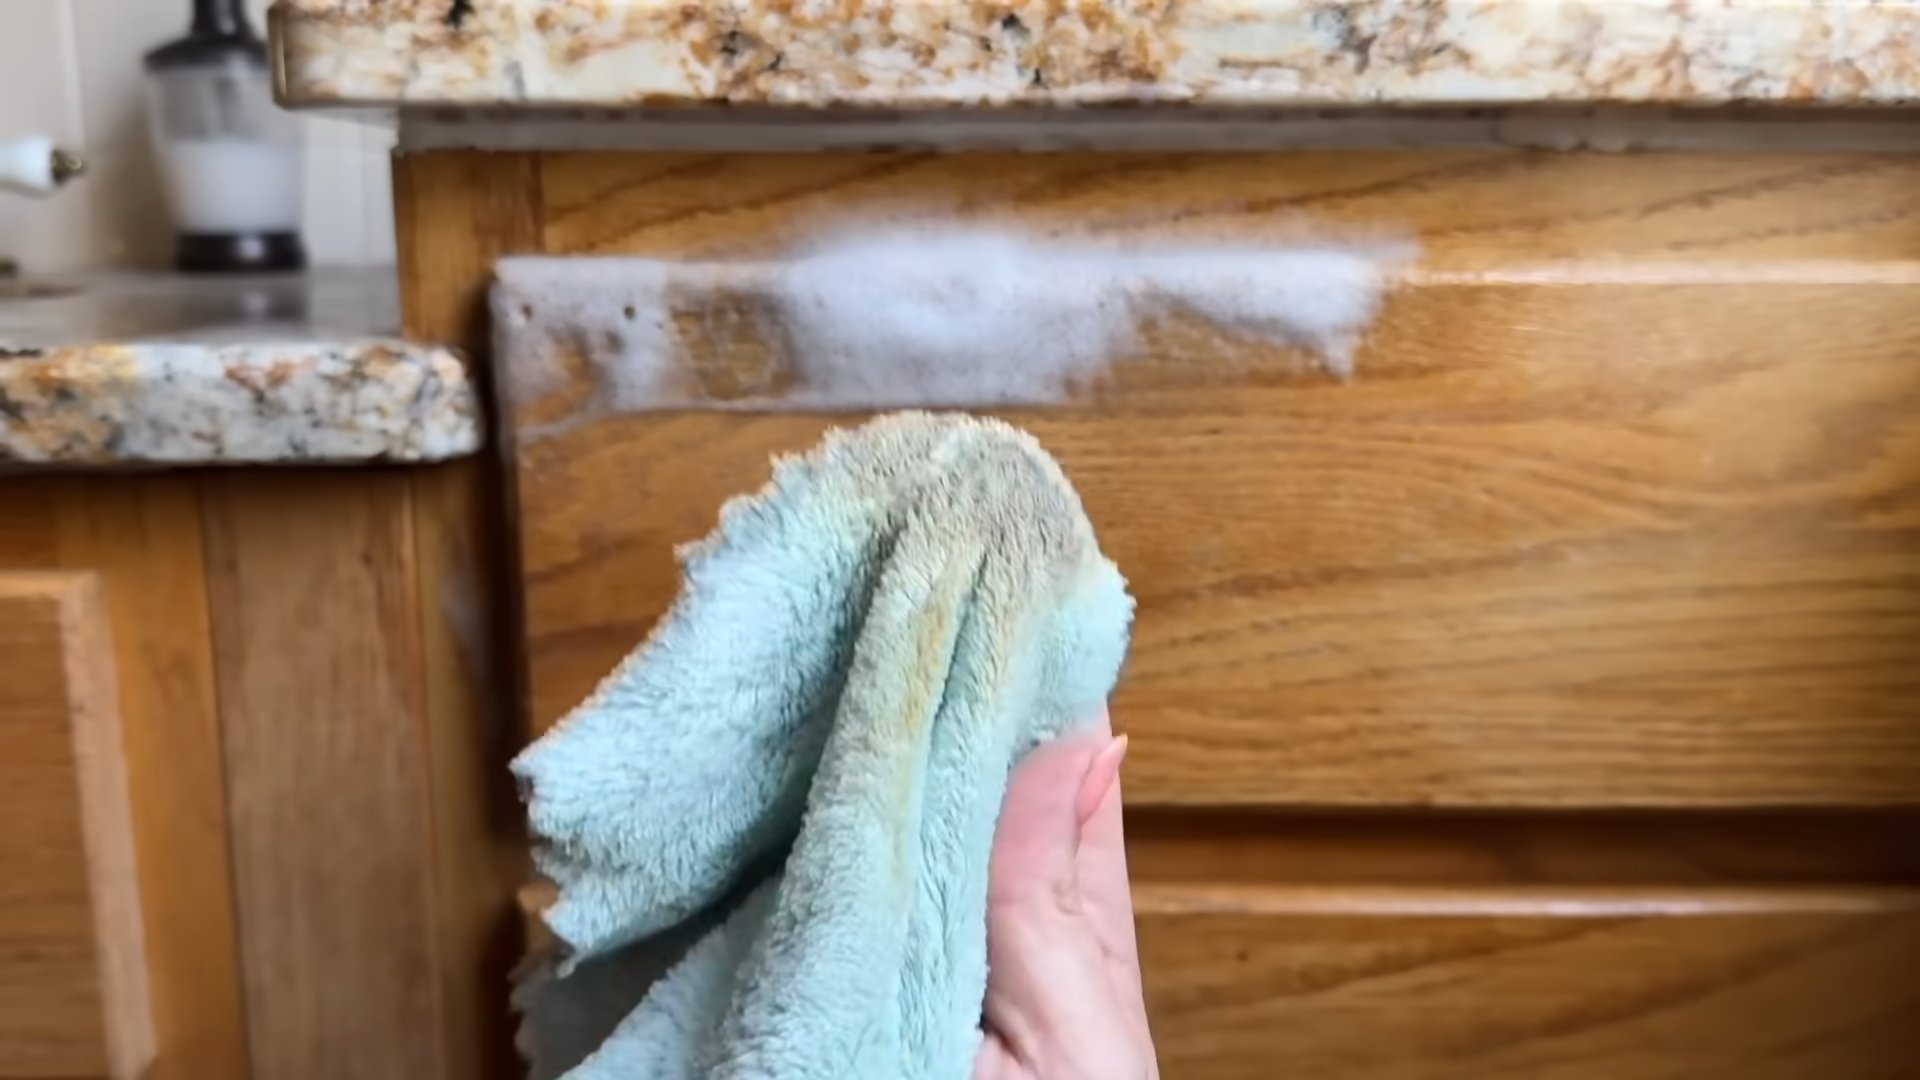
9. Clean the cabinets: Wipe down the cabinet doors and drawers with your all-purpose cleaner. Pay special attention to areas around the handles, which tend to get greasy.
10. Clean the floors: Sweep or vacuum the floors to remove any loose dirt and debris. Mop the floors with your all-purpose cleaner.
The Bathroom: A Sanctuary of Cleanliness (Hopefully!)
1. Clear the countertops: Remove everything from your countertops, including toiletries, makeup, and decorative items.
2. Clean the countertops: Wipe down the countertops with your all-purpose cleaner.
3. Clean the sink: Scrub the sink with dish soap and a sponge. Rinse thoroughly.
4. Clean the toilet: Flush the toilet. Pour toilet bowl cleaner into the bowl and let it sit for a few minutes. Scrub the bowl with a toilet brush and flush again. Wipe down the outside of the toilet with your all-purpose cleaner.
5. Clean the shower/tub: Spray the shower/tub with your all-purpose cleaner. Let it sit for a few minutes. Scrub the shower/tub with a sponge or scrub brush. Rinse thoroughly. For soap scum, try using a mixture of equal parts white vinegar and dish soap.
6. Clean the shower door: Use a squeegee to remove water from the shower door after each use. This will help prevent soap scum buildup. For existing soap scum, try using a mixture of equal parts white vinegar and dish soap.
7. Clean the mirror: Spray the mirror with your glass cleaner and wipe it down with a clean cloth.
8. Clean the floors: Sweep or vacuum the floors to remove any loose dirt and debris. Mop the floors with your all-purpose cleaner.
9. Clean the grout: Apply a paste of baking soda and water to the grout. Let it sit for a few minutes. Scrub with a toothbrush and rinse.
The Living Room: Where Comfort Meets Cleanliness
1. Declutter: Remove any clutter from the living room, such as magazines, books, and toys.
2. Dust: Dust all surfaces, including furniture, shelves, and picture frames.
3. Vacuum: Vacuum the floors, including under furniture.
4. Clean upholstery: Vacuum upholstery to remove dust and debris. Spot clean any stains with a mild detergent and water.
5. Clean windows: Spray the windows with your glass cleaner and wipe them down with a clean cloth.
6. Clean curtains/blinds: Dust or vacuum curtains and blinds.
7. Clean electronics: Wipe down electronic devices with a microfiber cloth.
The Bedrooms: A Haven of Rest and Relaxation (and Cleanliness!)
1. Declutter: Remove any clutter from the bedrooms, such as clothes, books, and toys.
2. Dust: Dust all surfaces, including furniture, shelves, and picture frames.
3. Vacuum: Vacuum the floors, including under furniture.
4. Wash bedding: Wash all bedding, including sheets, pillowcases, and blankets.
5. Clean windows: Spray the windows with your glass cleaner and wipe them down with a clean cloth.
6. Clean curtains/blinds: Dust or vacuum curtains and blinds.
7. Organize closets: Declutter and organize closets.
Extra Touches for a Truly Deep Clean
Okay, we’ve covered the basics, but here are a few extra steps you can take to really elevate your deep cleaning game:
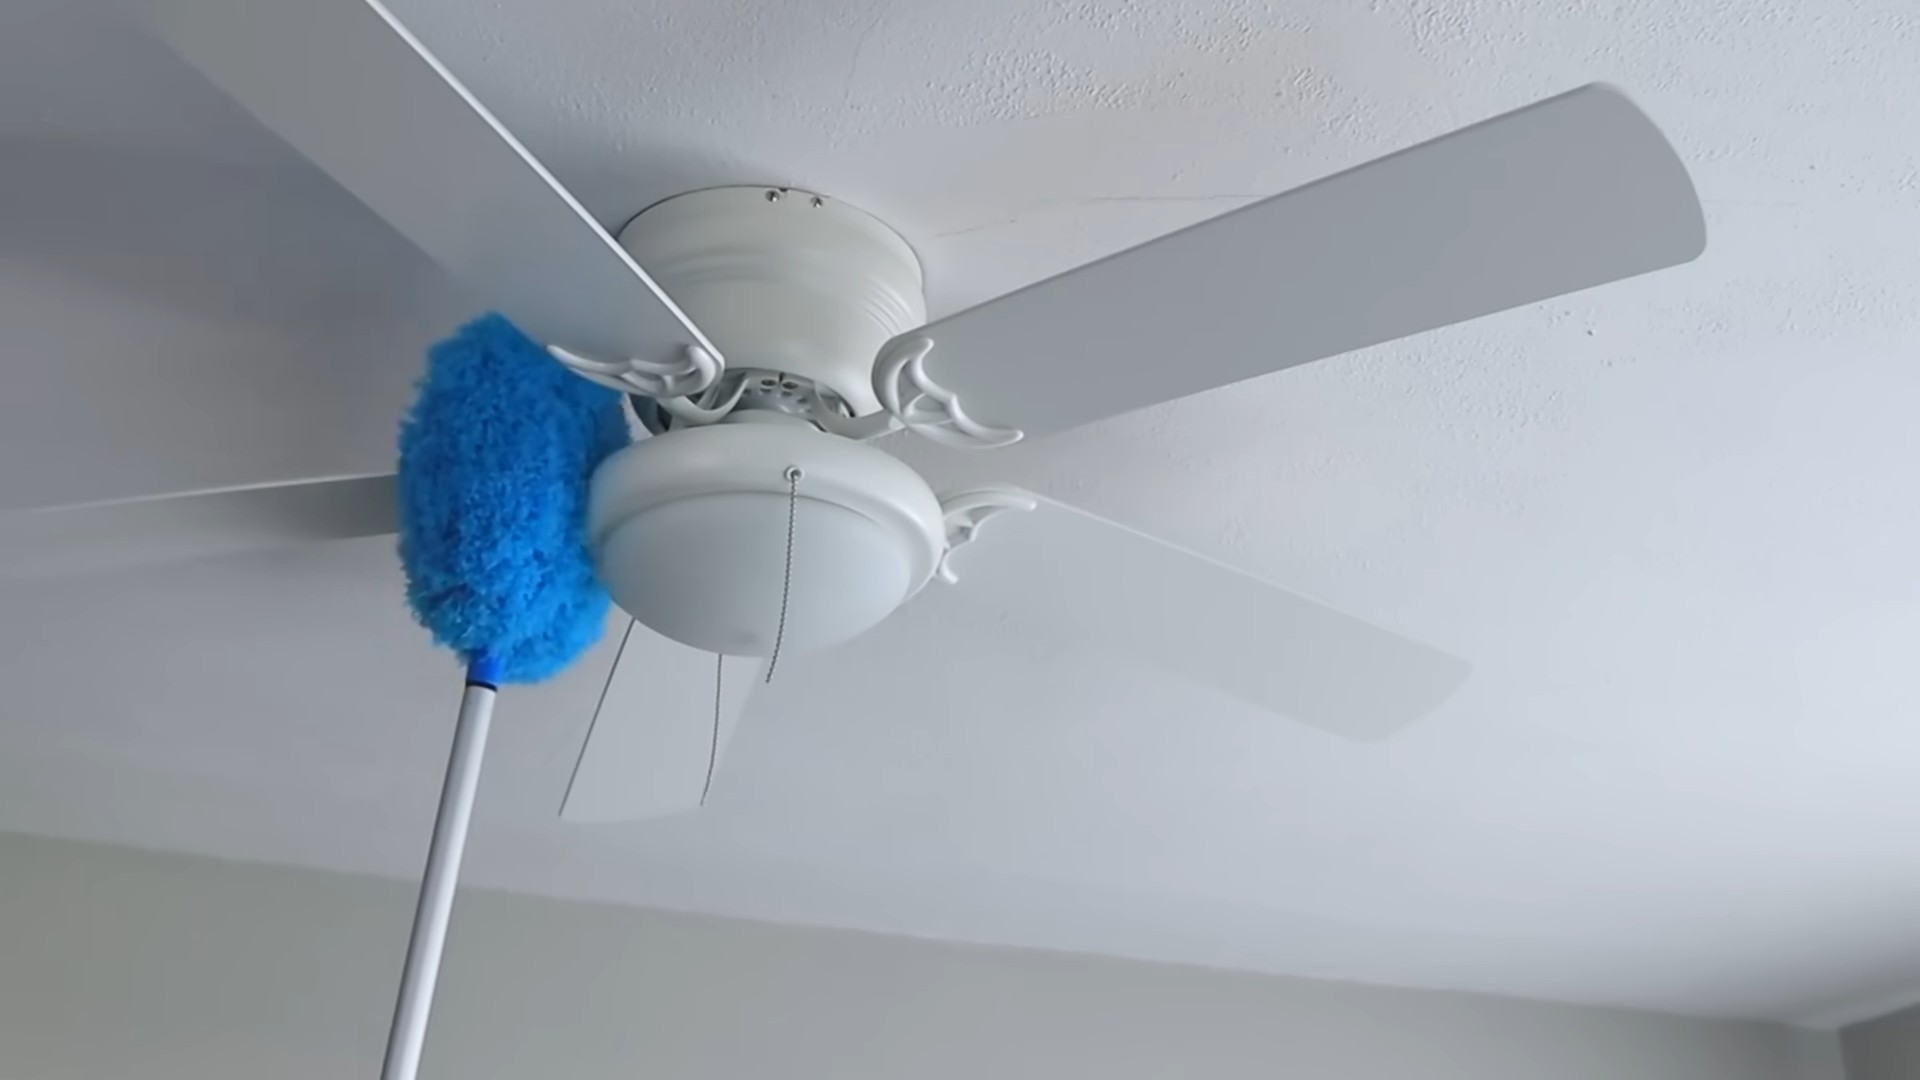
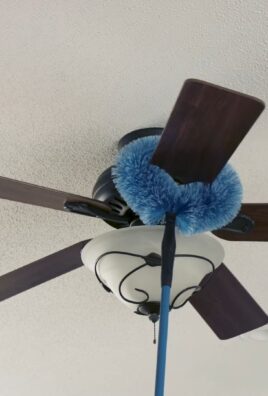
* Clean light fixtures: Dust or wash light fixtures to remove any buildup.
* Clean baseboards: Wipe down baseboards with your all-purpose cleaner.
* Clean door handles and light switches: These are high-touch areas that can harbor germs. Wipe them down with your all-purpose cleaner.
* Clean garbage cans: Wash garbage cans with soap and water.
* Air out your home: Open windows to air out your home and
Conclusion
So, there you have it! Mastering these deep cleaning tips and tricks isn’t just about achieving a spotless home; it’s about creating a healthier, more comfortable, and ultimately more enjoyable living space. We’ve explored a range of techniques, from tackling stubborn grime in your oven to revitalizing tired grout, all designed to make your deep cleaning efforts more effective and less daunting.
But why is this deep cleaning approach a must-try? Because it goes beyond surface-level tidiness. It’s about eliminating hidden allergens, banishing bacteria, and preventing the build-up of dirt and debris that can impact your health and well-being. A truly clean home is a sanctuary, a place where you can relax and recharge without worrying about the unseen nasties lurking beneath the surface.
Don’t be afraid to experiment and adapt these techniques to suit your specific needs and preferences. For example, if you’re sensitive to strong smells, consider using essential oils like lemon or tea tree oil in your cleaning solutions for a natural and refreshing fragrance. You can also adjust the ratios of ingredients in your DIY cleaners to find the perfect balance for your cleaning style.
Consider these variations to elevate your deep cleaning game:
* For a sparkling showerhead: Soak it in a bag filled with vinegar overnight to dissolve mineral deposits.
* To refresh your mattress: Sprinkle baking soda over the surface, let it sit for a few hours, and then vacuum it up.
* To clean your dishwasher effectively: Run an empty cycle with a cup of vinegar in the top rack.
Remember, deep cleaning doesn’t have to be an overwhelming chore. Break it down into smaller, manageable tasks and tackle one area at a time. Set realistic goals and reward yourself for your efforts. The satisfaction of a sparkling clean home is well worth the investment of time and energy.
We wholeheartedly encourage you to try these deep cleaning tips and tricks and experience the difference they can make in your home. We are confident that you will find them to be effective, efficient, and ultimately, empowering.
But don’t just take our word for it! We want to hear about your experiences. Share your before-and-after photos, your favorite cleaning hacks, and any variations you’ve discovered in the comments below. Let’s create a community of cleaning enthusiasts who are passionate about creating healthy and happy homes. Your insights could inspire others and help them achieve their own deep cleaning goals. So, grab your cleaning supplies, put on some music, and get ready to transform your home into a sparkling oasis. We can’t wait to hear about your success stories!
Frequently Asked Questions (FAQs)
What exactly is considered “deep cleaning,” and how is it different from regular cleaning?
Deep cleaning goes beyond the routine tasks of dusting, vacuuming, and wiping surfaces. It involves a more thorough and intensive cleaning of areas that are often neglected during regular cleaning. This includes things like cleaning inside appliances (ovens, refrigerators, dishwashers), scrubbing grout, washing windows inside and out, cleaning baseboards and trim, and decluttering and organizing spaces. The goal of deep cleaning is to remove built-up dirt, grime, and allergens, creating a healthier and more hygienic living environment. Regular cleaning focuses on maintaining cleanliness, while deep cleaning focuses on restoring cleanliness.
How often should I deep clean my home?
The frequency of deep cleaning depends on several factors, including your lifestyle, the size of your home, and the number of occupants. As a general guideline, deep cleaning should be done at least twice a year, typically in the spring and fall. However, if you have pets, children, or allergies, you may need to deep clean more frequently, perhaps every three to four months. You can also break down the deep cleaning tasks into smaller chunks and tackle one or two areas each month to make the process more manageable.
What are the essential supplies I need for deep cleaning?
A well-stocked cleaning caddy is essential for efficient deep cleaning. Here are some must-have supplies:
* All-purpose cleaner: For general cleaning of surfaces.
* Disinfectant: To kill germs and bacteria.
* Glass cleaner: For streak-free windows and mirrors.
* Oven cleaner: For removing baked-on grease and grime.
* Grout cleaner: For restoring dingy grout lines.
* Baking soda: A versatile cleaning agent for deodorizing and scrubbing.
* White vinegar: A natural cleaner and disinfectant.
* Microfiber cloths: For effective and lint-free cleaning.
* Sponges: For scrubbing and wiping surfaces.
* Scrub brushes: For tackling stubborn dirt and grime.
* Vacuum cleaner: With attachments for cleaning upholstery and hard-to-reach areas.
* Mop and bucket: For cleaning floors.
* Rubber gloves: To protect your hands.
* Trash bags: For disposing of waste.
Are DIY cleaning solutions as effective as store-bought cleaners?
In many cases, DIY cleaning solutions can be just as effective as store-bought cleaners, and they often have the added benefit of being more environmentally friendly and cost-effective. Ingredients like baking soda, vinegar, lemon juice, and essential oils have natural cleaning and disinfecting properties. However, it’s important to use caution when mixing DIY cleaning solutions, as some combinations can be dangerous. For example, never mix bleach with ammonia, as this can create toxic fumes. Always research and follow safe mixing guidelines when making your own cleaning products.
How can I make deep cleaning less overwhelming?
Deep cleaning can seem like a daunting task, but there are several ways to make it more manageable:
* Create a checklist: Break down the deep cleaning tasks into a detailed checklist to stay organized and track your progress.
* Prioritize: Focus on the areas that need the most attention first.
* Set realistic goals: Don’t try to do everything at once. Set small, achievable goals for each cleaning session.
* Delegate: If possible, enlist the help of family members or hire a professional cleaning service.
* Listen to music or podcasts: Make the cleaning process more enjoyable by listening to your favorite tunes or podcasts.
* Reward yourself: Treat yourself to something special after completing a deep cleaning task.
What are some common mistakes to avoid when deep cleaning?
Avoiding these common mistakes can help you achieve better results and prevent damage to your home:
* Using the wrong cleaning products: Always read the labels and use the appropriate cleaning products for each surface.
* Mixing cleaning products: Never mix different cleaning products together, as this can create dangerous fumes.
* Forgetting to ventilate: Open windows and doors to ensure proper ventilation when using cleaning products.
* Ignoring safety precautions: Wear gloves and eye protection to protect yourself from harsh chemicals.
* Overlooking hidden areas: Don’t forget to clean behind appliances, under furniture, and inside drawers and cabinets.
* Not rinsing thoroughly: Rinse surfaces thoroughly after cleaning to remove any residue.
How can I maintain a clean home between deep cleanings?
Maintaining a clean home between deep cleanings is essential for preventing the build-up of dirt and grime. Here are some tips:
* Make your bed every day: This simple task can instantly make your bedroom look tidier.
* Wipe down surfaces after use: Clean up spills and messes immediately to prevent them from setting.
* Do a quick clean of the kitchen after each meal: Wash dishes, wipe countertops, and sweep the floor.
* Vacuum or sweep regularly: Keep floors clean by vacuuming or sweeping at least once a week.
* Declutter regularly: Get rid of unwanted items to prevent clutter from accumulating.
* Enlist the help of family members: Assign cleaning tasks to each member of the household.
By following these tips, you can maintain a clean and healthy home and reduce the frequency of deep cleanings.

Leave a Comment