

Crunchy Homegrown Cucumbers Fast Method – that’s what we all crave, isn’t it? Imagine biting into a perfectly crisp, refreshing cucumber, bursting with flavor, knowing you grew it yourself, and did it faster than you thought possible! For centuries, cultivating cucumbers has been a cherished tradition, dating back to ancient civilizations who prized them for their cooling properties and nutritional value. From Cleopatra’s rumored love for them to their prominent place in various cuisines worldwide, cucumbers have always been more than just a vegetable.
But let’s be honest, waiting weeks (or even months!) for those delicious cucumbers to mature can test anyone’s patience. That’s where this DIY guide comes in. I’m going to share some amazing tricks and hacks to accelerate your cucumber growing process, so you can enjoy a bountiful harvest sooner than you ever imagined.
Why do you need this? Because who has time to wait? Whether you’re a seasoned gardener or just starting out, these simple yet effective techniques will empower you to achieve crunchy homegrown cucumbers fast method results. Say goodbye to store-bought, often bland cucumbers, and hello to a garden overflowing with fresh, flavorful goodness. Let’s get growing!
Grow Crunchy Cucumbers at Home: A Quick & Easy DIY Guide
Hey there, fellow gardening enthusiasts! Are you tired of bland, watery cucumbers from the grocery store? I know I was! That’s why I embarked on a mission to grow the crunchiest, most flavorful cucumbers right in my own backyard. And guess what? I’m here to share my secrets with you! This guide will walk you through a fast and effective method to achieve cucumber perfection. Let’s get started!
Choosing the Right Cucumber Variety
First things first, not all cucumbers are created equal. Some varieties are naturally crunchier than others. Here are a few of my personal favorites that consistently deliver that satisfying snap:
* Spacemaster: This compact bush variety is perfect for smaller gardens or containers. It produces crisp, dark green cucumbers that are ideal for slicing.
* Marketmore 76: A classic slicing cucumber known for its excellent flavor and disease resistance. It’s a reliable choice for beginners.
* Diva: A burpless, seedless cucumber with a thin skin and a refreshing, mild taste. It’s incredibly crunchy and easy to digest.
* Persian Cucumbers: These are smaller, thinner-skinned, and have a delightful crunch. They’re great for snacking or adding to salads.
Pro Tip: Read the seed packet descriptions carefully! They often highlight the cucumber’s texture and flavor profile.
Preparing Your Cucumber Growing Space
Cucumbers are sun-loving plants, so you’ll need to choose a spot that gets at least 6-8 hours of direct sunlight per day. They also prefer well-drained soil that’s rich in organic matter.
Here’s how I prepare my cucumber patch:
1. Clear the Area: Remove any weeds, rocks, or debris from the planting area.
2. Amend the Soil: Cucumbers are heavy feeders, so it’s essential to enrich the soil with compost or well-rotted manure. I usually add a generous layer (about 2-3 inches) and work it into the top 6-8 inches of soil.
3. Check the Drainage: Cucumbers don’t like soggy roots, so make sure your soil drains well. If you have heavy clay soil, consider adding some sand or perlite to improve drainage.
4. Consider a Trellis: While some cucumber varieties are bush types, most benefit from being grown on a trellis. This helps to improve air circulation, reduce disease, and makes harvesting easier. I personally love using a simple A-frame trellis made from bamboo poles.
Planting Your Cucumber Seeds or Seedlings
You can either start your cucumber seeds indoors or direct sow them in the garden. I prefer direct sowing because it eliminates the risk of transplant shock.
Direct Sowing:
1. Wait for Warm Weather: Cucumbers are sensitive to frost, so wait until the soil temperature is consistently above 60°F (15°C) before planting.
2. Sow the Seeds: Plant the seeds about 1 inch deep and 2-3 inches apart. If you’re using a trellis, plant the seeds along the base of the trellis.
3. Water Gently: Water the seeds gently to avoid disturbing them. Keep the soil consistently moist until the seedlings emerge.
4. Thin the Seedlings: Once the seedlings have a few true leaves, thin them to about 12-18 inches apart. Choose the strongest, healthiest seedlings to keep.
Starting Seeds Indoors (Optional):
1. Start Seeds 3-4 Weeks Before Last Frost: Use seed starting trays or small pots filled with seed starting mix.
2. Plant Seeds 1/2 Inch Deep: Keep the soil moist and warm (around 70-75°F or 21-24°C).
3. Provide Light: Once the seedlings emerge, provide them with plenty of light. A grow light is ideal, but a sunny windowsill can also work.
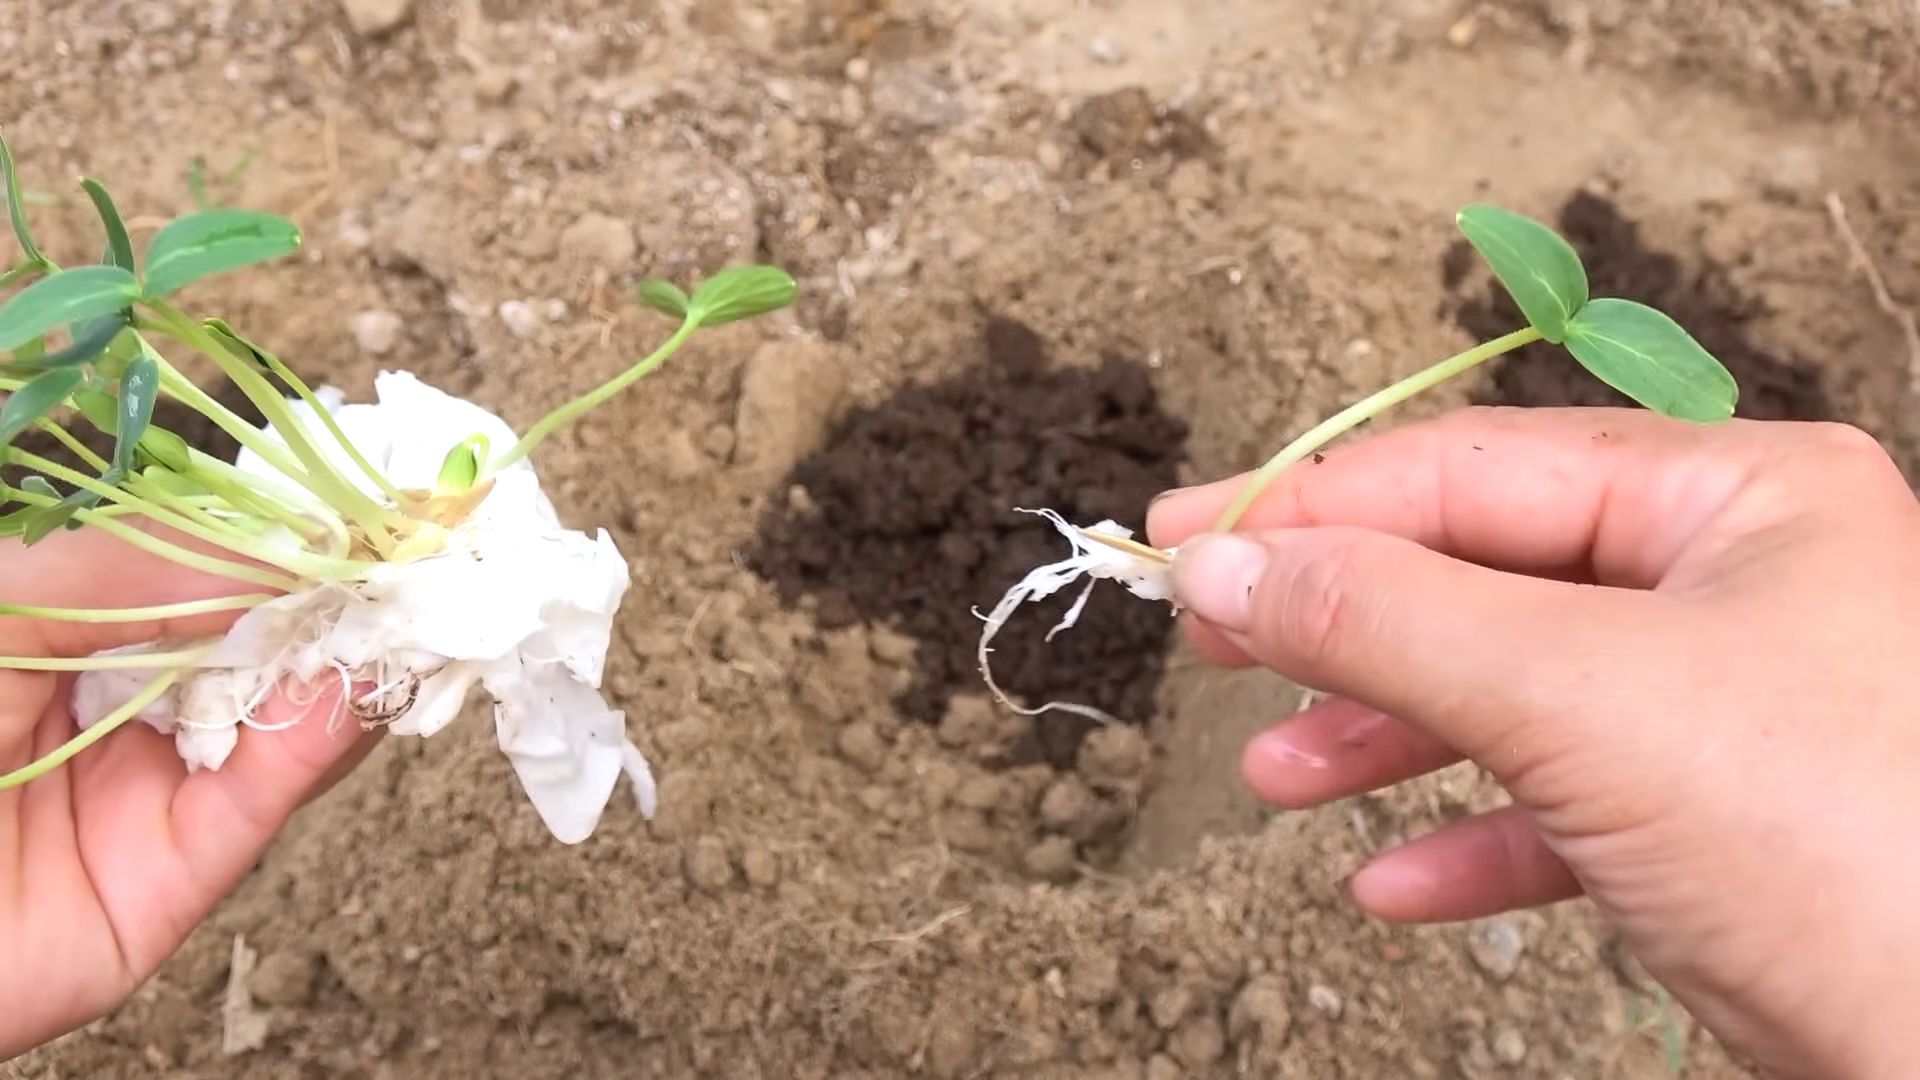
4. Harden Off Seedlings: Before transplanting the seedlings outdoors, gradually acclimate them to the outdoor conditions. Start by placing them outside for a few hours each day, increasing the time each day for about a week.
5. Transplant Carefully: Transplant the seedlings into the garden, spacing them about 12-18 inches apart.
Watering and Fertilizing for Maximum Crunch
Consistent watering and fertilization are crucial for growing crunchy cucumbers. Here’s my watering and feeding routine:
1. Water Deeply and Regularly: Cucumbers need consistent moisture, especially during hot weather. Water deeply at the base of the plants, avoiding wetting the foliage. I aim to water about 1-2 inches per week, depending on the weather.
2. Mulch to Retain Moisture: Apply a layer of mulch around the plants to help retain moisture, suppress weeds, and regulate soil temperature. Straw, wood chips, or shredded leaves are all good options.
3. Fertilize Regularly: Cucumbers are heavy feeders, so they need regular fertilization. I like to use a balanced organic fertilizer (like a 5-10-10) every 2-3 weeks. You can also use a liquid fertilizer, such as fish emulsion or seaweed extract, diluted according to the package instructions.
4. Side-Dress with Compost: In addition to regular fertilization, I also side-dress my cucumber plants with compost every few weeks. This provides a slow-release source of nutrients and helps to improve soil health.
The Secret to Extra Crunchy Cucumbers: Stress Them (Slightly!)
Okay, this might sound a little strange, but it’s true! A little bit of stress can actually make your cucumbers crunchier. Here’s how I do it:
1. Slightly Reduce Watering: During the fruit development stage, I slightly reduce the amount of water I give my cucumber plants. This encourages them to concentrate their sugars, resulting in a crisper texture. Don’t overdo it! You don’t want to completely dry out the plants, just reduce the watering slightly. I usually let the top inch of soil dry out before watering again.
2. Avoid Over-Fertilizing with Nitrogen: Too much nitrogen can lead to lush foliage but watery fruits. Make sure you’re using a balanced fertilizer and avoid over-fertilizing.
Pest and Disease Control
Cucumbers are susceptible to a few common pests and diseases. Here’s how I keep my plants healthy:
* Cucumber Beetles: These pesky beetles can damage foliage and spread diseases. I control them by handpicking them off the plants and using row covers to protect young seedlings. You can also use organic insecticides like neem oil or pyrethrin.
* Squash Vine Borers: These borers can tunnel into the stems of cucumber plants, causing them to wilt and die. I prevent them by wrapping the base of the stems with aluminum foil or pantyhose. You can also use Bacillus thuringiensis (Bt) to control them.
* Powdery Mildew: This fungal disease can cause a white, powdery coating on the leaves. I prevent it by providing good air circulation, avoiding overhead watering, and using a fungicide if necessary.
* Downy Mildew: This disease causes yellow spots on the upper surface of the leaves and a grayish-purple mold on the underside. I prevent it by providing good air circulation and using a fungicide if necessary.
Pro Tip: Regularly inspect your plants for signs of pests or diseases. The sooner you catch a problem, the easier it will be to control.
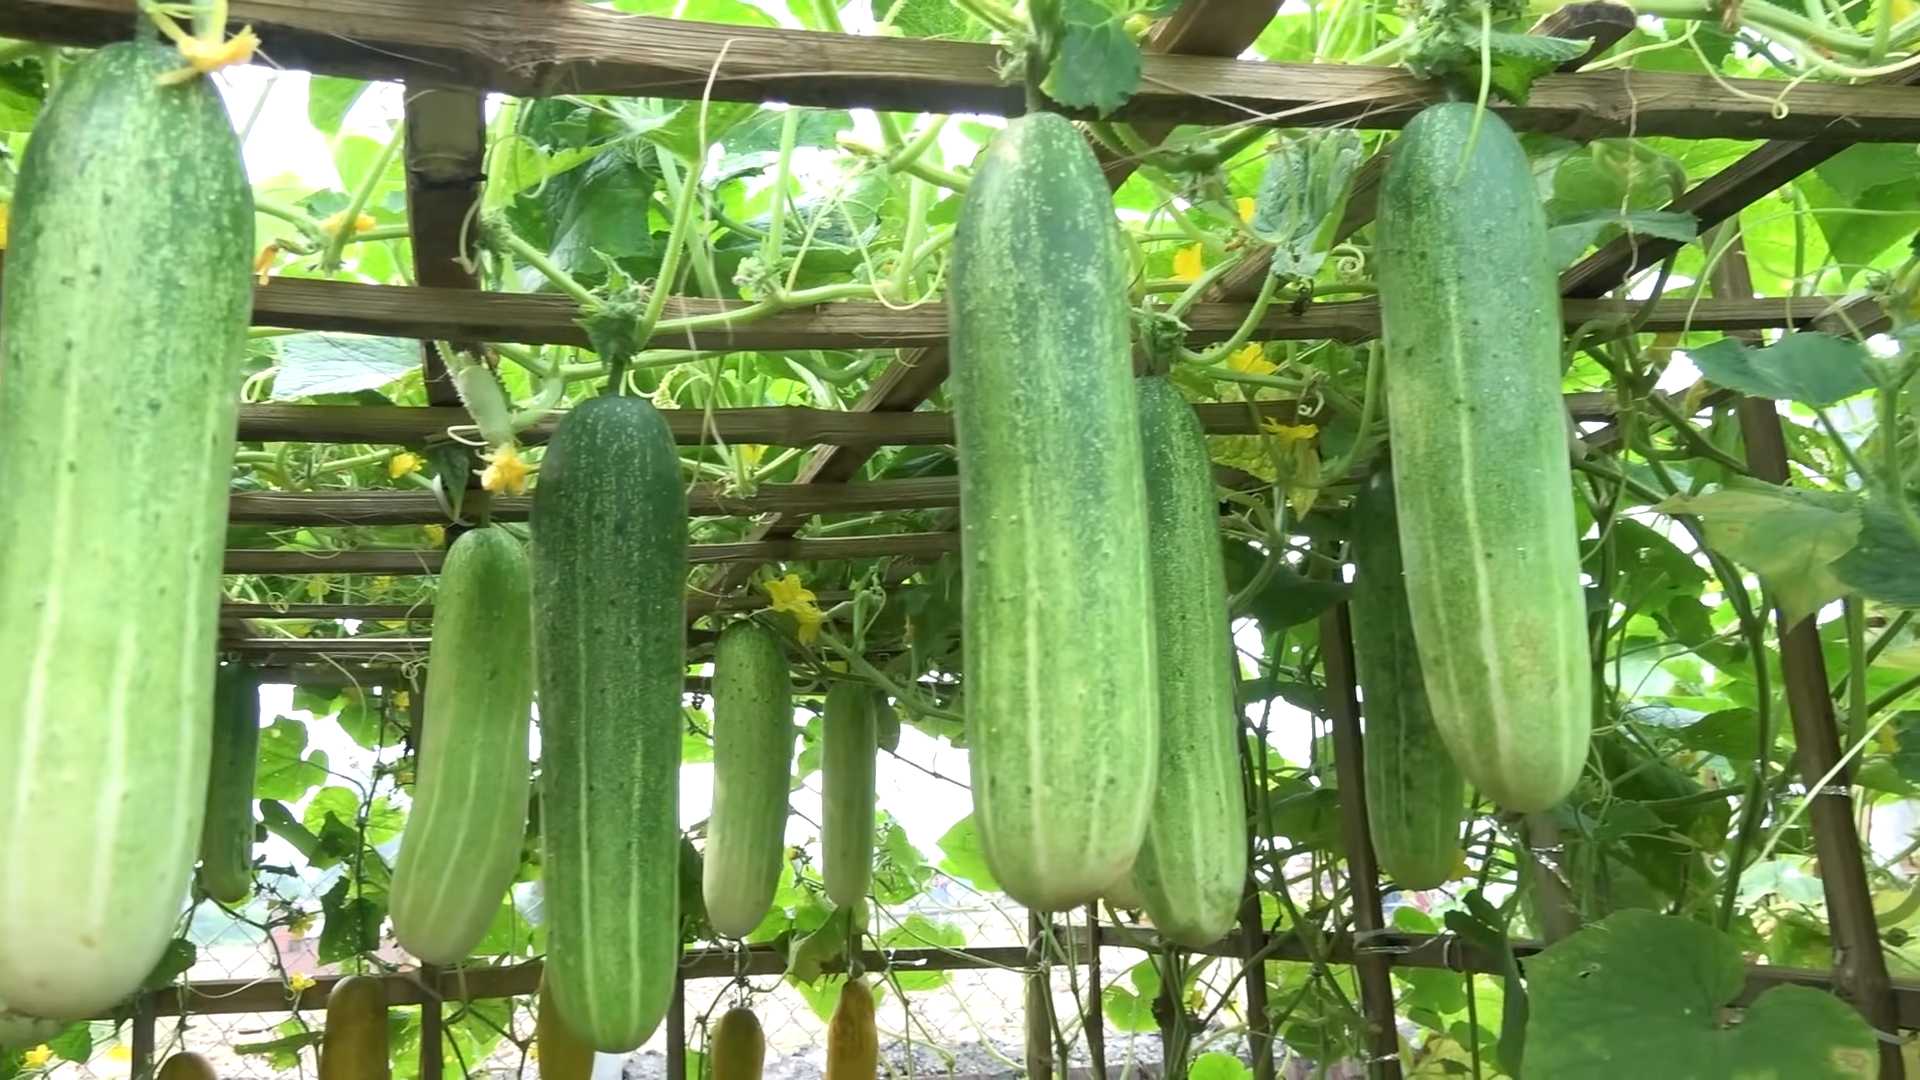
Harvesting Your Crunchy Cucumbers
The key to harvesting crunchy cucumbers is to pick them at the right stage of maturity.
1. Harvest When They’re Young and Tender: Cucumbers are generally ready to harvest when they’re about 6-8 inches long and still firm to the touch. Overripe cucumbers can become bitter and seedy.
2. Use a Sharp Knife or Pruning Shears: Cut the cucumbers from the vine, leaving a short stem attached.
3. Harvest Regularly: The more you harvest, the more cucumbers your plants will produce. I try to harvest every day or two during peak season.
Storing Your Crunchy Cucumbers
To keep your cucumbers crunchy and fresh, store them properly:
1. Refrigerate Immediately: Place the cucumbers in a plastic bag or container and store them in the refrigerator.
2. Don’t Store Near Ethylene-Producing Fruits: Ethylene gas can cause cucumbers to ripen too quickly and become soft. Avoid storing them near apples, bananas, or tomatoes.
3. Use Within a Week: Cucumbers are best eaten within a week of harvesting.
Troubleshooting Common Cucumber Problems
Even with the best care, you might encounter some problems while growing cucumbers. Here are a few common issues and how to fix them:
* Yellowing Leaves: This can be caused by a variety of factors, including nutrient deficiencies, overwatering, or disease. Check the soil drainage, fertilize regularly,
Conclusion
So, there you have it! Achieving delightfully crunchy homegrown cucumbers doesn’t require a green thumb of mythical proportions or a secret handshake with the produce gods. This fast method, focusing on consistent watering, proper harvesting, and immediate chilling, is your express ticket to cucumber crispness. Forget those soft, disappointing cucumbers of the past. With a little attention to detail and this simple DIY trick, you’ll be biting into refreshingly crunchy cucumbers that burst with flavor.
Why is this a must-try? Because the difference is truly remarkable. Store-bought cucumbers, even the freshest ones, often lack that satisfying snap. This method allows you to control the entire process, from seed to salad, ensuring peak freshness and unparalleled texture. Imagine the satisfaction of serving a cucumber salad, knowing that every single slice is a testament to your homegrown success.
But don’t stop there! Experiment with variations to tailor the process to your specific needs and preferences. For example, if you live in a particularly hot climate, consider providing your cucumber plants with afternoon shade to prevent overheating and water stress. You can also try different cucumber varieties known for their crispness, such as ‘Spacemaster’ or ‘Marketmore 76’. Another variation is to add a calcium supplement to the soil, as calcium is crucial for cell wall development, which directly impacts cucumber texture. You can also try pickling your crunchy cucumbers for a long-lasting treat.
The key to success lies in consistency. Consistent watering is paramount, especially during fruit development. Harvest your cucumbers when they are at their peak ripeness, before they become overly large and seedy. And don’t underestimate the power of immediate chilling. This simple step can make a world of difference in preserving that desirable crunch.
We are confident that this DIY trick will transform your cucumber-growing experience. It’s a simple, effective, and rewarding way to enjoy the freshest, most flavorful cucumbers imaginable. So, grab your gardening gloves, plant those seeds, and get ready to experience the joy of biting into a perfectly crunchy homegrown cucumber.
Now, we want to hear from you! Try this method and share your results. Did you notice a significant improvement in the texture of your cucumbers? Did you experiment with any variations? What tips and tricks did you discover along the way? Share your experiences in the comments below. Let’s build a community of cucumber enthusiasts and learn from each other’s successes. We are eager to see your crunchy cucumber creations!
Frequently Asked Questions (FAQ)
What exactly makes this method “fast”?
The “fast” aspect refers to the streamlined approach to achieving crunchy cucumbers. It’s not about speeding up the growing process itself, but rather focusing on the most impactful factors – consistent watering, timely harvesting, and immediate chilling – to maximize crispness. Other methods might involve more complex soil amendments or elaborate trellising systems, while this method prioritizes the essentials for quick and noticeable results.
How often should I water my cucumber plants to achieve optimal crunch?
Consistent watering is crucial. Aim to water deeply and regularly, ensuring the soil remains consistently moist but not waterlogged. The frequency will depend on your climate and soil type. As a general rule, water deeply every 2-3 days, or more frequently during hot, dry spells. A good way to check is to stick your finger about an inch into the soil. If it feels dry, it’s time to water. Consider using a soaker hose or drip irrigation to deliver water directly to the roots, minimizing water loss through evaporation.
When is the best time to harvest my cucumbers for maximum crispness?
Harvest your cucumbers when they are at their peak ripeness, which is typically when they reach their mature size and color according to the specific variety. Overripe cucumbers tend to become soft and seedy. Check your seed packet or plant tag for specific harvesting guidelines. Generally, cucumbers are ready to harvest when they are firm to the touch and have a vibrant green color. Avoid letting them turn yellow or become overly large.
Why is immediate chilling so important?
Immediate chilling slows down the enzymatic processes that cause cucumbers to soften and degrade. By plunging your freshly harvested cucumbers into ice water or refrigerating them promptly, you’re essentially “locking in” their crispness. This step is particularly important in warmer climates, where cucumbers can quickly lose their texture after harvesting.
Can I use this method for all cucumber varieties?
Yes, this method is generally applicable to all cucumber varieties. However, some varieties are naturally crisper than others. Consider choosing varieties known for their crispness, such as ‘Spacemaster’, ‘Marketmore 76’, or ‘Persian’ cucumbers, for even better results. Experiment with different varieties to find your personal favorite.
What if my cucumbers are still soft despite following these steps?
Several factors could contribute to soft cucumbers. Ensure you are watering consistently and deeply, especially during fruit development. Check the soil pH and nutrient levels. Cucumbers prefer a slightly acidic soil (pH 6.0-6.8) and benefit from regular fertilization. Also, consider the possibility of pests or diseases affecting your plants. Cucumber beetles and squash bugs can weaken plants and impact fruit quality. Finally, make sure you are harvesting your cucumbers at the right stage of maturity. Overripe cucumbers will always be softer.
Can I use this method for pickling cucumbers?
Yes, this method is excellent for pickling cucumbers. In fact, using crunchy cucumbers for pickling will result in even crisper and more satisfying pickles. The key is to use smaller cucumbers, as they tend to be firmer and have fewer seeds. Follow your favorite pickling recipe, and enjoy the delightful crunch of your homemade pickles.
What are some signs of overwatering or underwatering cucumber plants?
Overwatering can lead to yellowing leaves, stunted growth, and root rot. The soil will feel consistently soggy. Underwatering can cause wilting leaves, dry soil, and slow fruit development. The leaves may also turn brown and crispy around the edges. Adjust your watering schedule accordingly based on these signs.
Is there anything else I can add to the soil to improve cucumber crispness?
Adding calcium to the soil can help improve cucumber crispness. Calcium is essential for cell wall development, which directly impacts fruit texture. You can add calcium in the form of lime, gypsum, or bone meal. Follow the instructions on the product label for proper application rates.
How do I store my crunchy homegrown cucumbers after harvesting?
Store your cucumbers in the refrigerator, ideally in a crisper drawer. Wrap them loosely in plastic wrap or a reusable produce bag to help retain moisture. Properly stored cucumbers can last for up to a week in the refrigerator.


Leave a Comment