

Cleaning Cutting Board with Salt: It’s a kitchen staple, a silent workhorse, and often, a breeding ground for bacteria if not properly cared for. I’m talking about your cutting board! We all use them daily, but how many of us truly know the best way to keep them sparkling clean and germ-free? Forget harsh chemicals and complicated routines. I’m here to share a simple, effective, and surprisingly satisfying DIY trick that will revolutionize your cutting board cleaning game.
The practice of using salt as a cleaning agent isn’t new. In fact, for centuries, cultures around the world have recognized salt’s natural abrasive and antibacterial properties. From scrubbing cast iron pans to preserving food, salt has been a trusted cleaning companion. Think of it as your grandmother’s secret weapon, now rediscovered for the modern kitchen!
Why is this cleaning cutting board with salt method so crucial? Well, beyond the obvious hygiene benefits, a clean cutting board extends its lifespan. No one wants to replace their favorite wooden or plastic board prematurely. Plus, eliminating lingering odors and preventing cross-contamination are paramount for food safety. This DIY hack is not only budget-friendly but also eco-conscious, reducing your reliance on potentially harmful cleaning products. So, let’s dive in and discover how this simple ingredient can transform your cutting board from a potential health hazard to a pristine surface ready for your next culinary adventure!

DIY Cutting Board Cleaning and Refreshing with Salt and Lemon
Hey there, fellow DIY enthusiasts! I’m excited to share a super simple yet incredibly effective way to clean and refresh your wooden cutting boards using just two ingredients you probably already have in your kitchen: salt and lemon! I’ve been using this method for years, and it keeps my cutting boards looking and smelling fresh, plus it’s a natural and eco-friendly alternative to harsh chemicals. Let’s dive in!
Why Salt and Lemon?
Before we get started, let’s talk about why this dynamic duo works so well.
* Salt: Acts as a gentle abrasive, helping to scrub away food particles and stains without damaging the wood. It also has natural antibacterial properties.
* Lemon: Contains citric acid, a natural disinfectant and deodorizer. It helps to kill bacteria, remove odors, and brighten the wood. Plus, it leaves a lovely, fresh scent!
Materials You’ll Need
* Wooden cutting board (obviously!)
* Coarse salt (sea salt or kosher salt works best)
* Lemon (one should be enough, but have a spare on hand just in case)
* Clean sponge or scrub brush
* Clean, dry towel
* Optional: Food-grade mineral oil or beeswax cutting board conditioner
Step-by-Step Cleaning Process
Okay, let’s get down to business! Here’s how I clean my cutting boards using the salt and lemon method:
1. Rinse the Cutting Board: Start by rinsing your cutting board under warm water to remove any loose food particles. Don’t soak it, just a quick rinse will do.
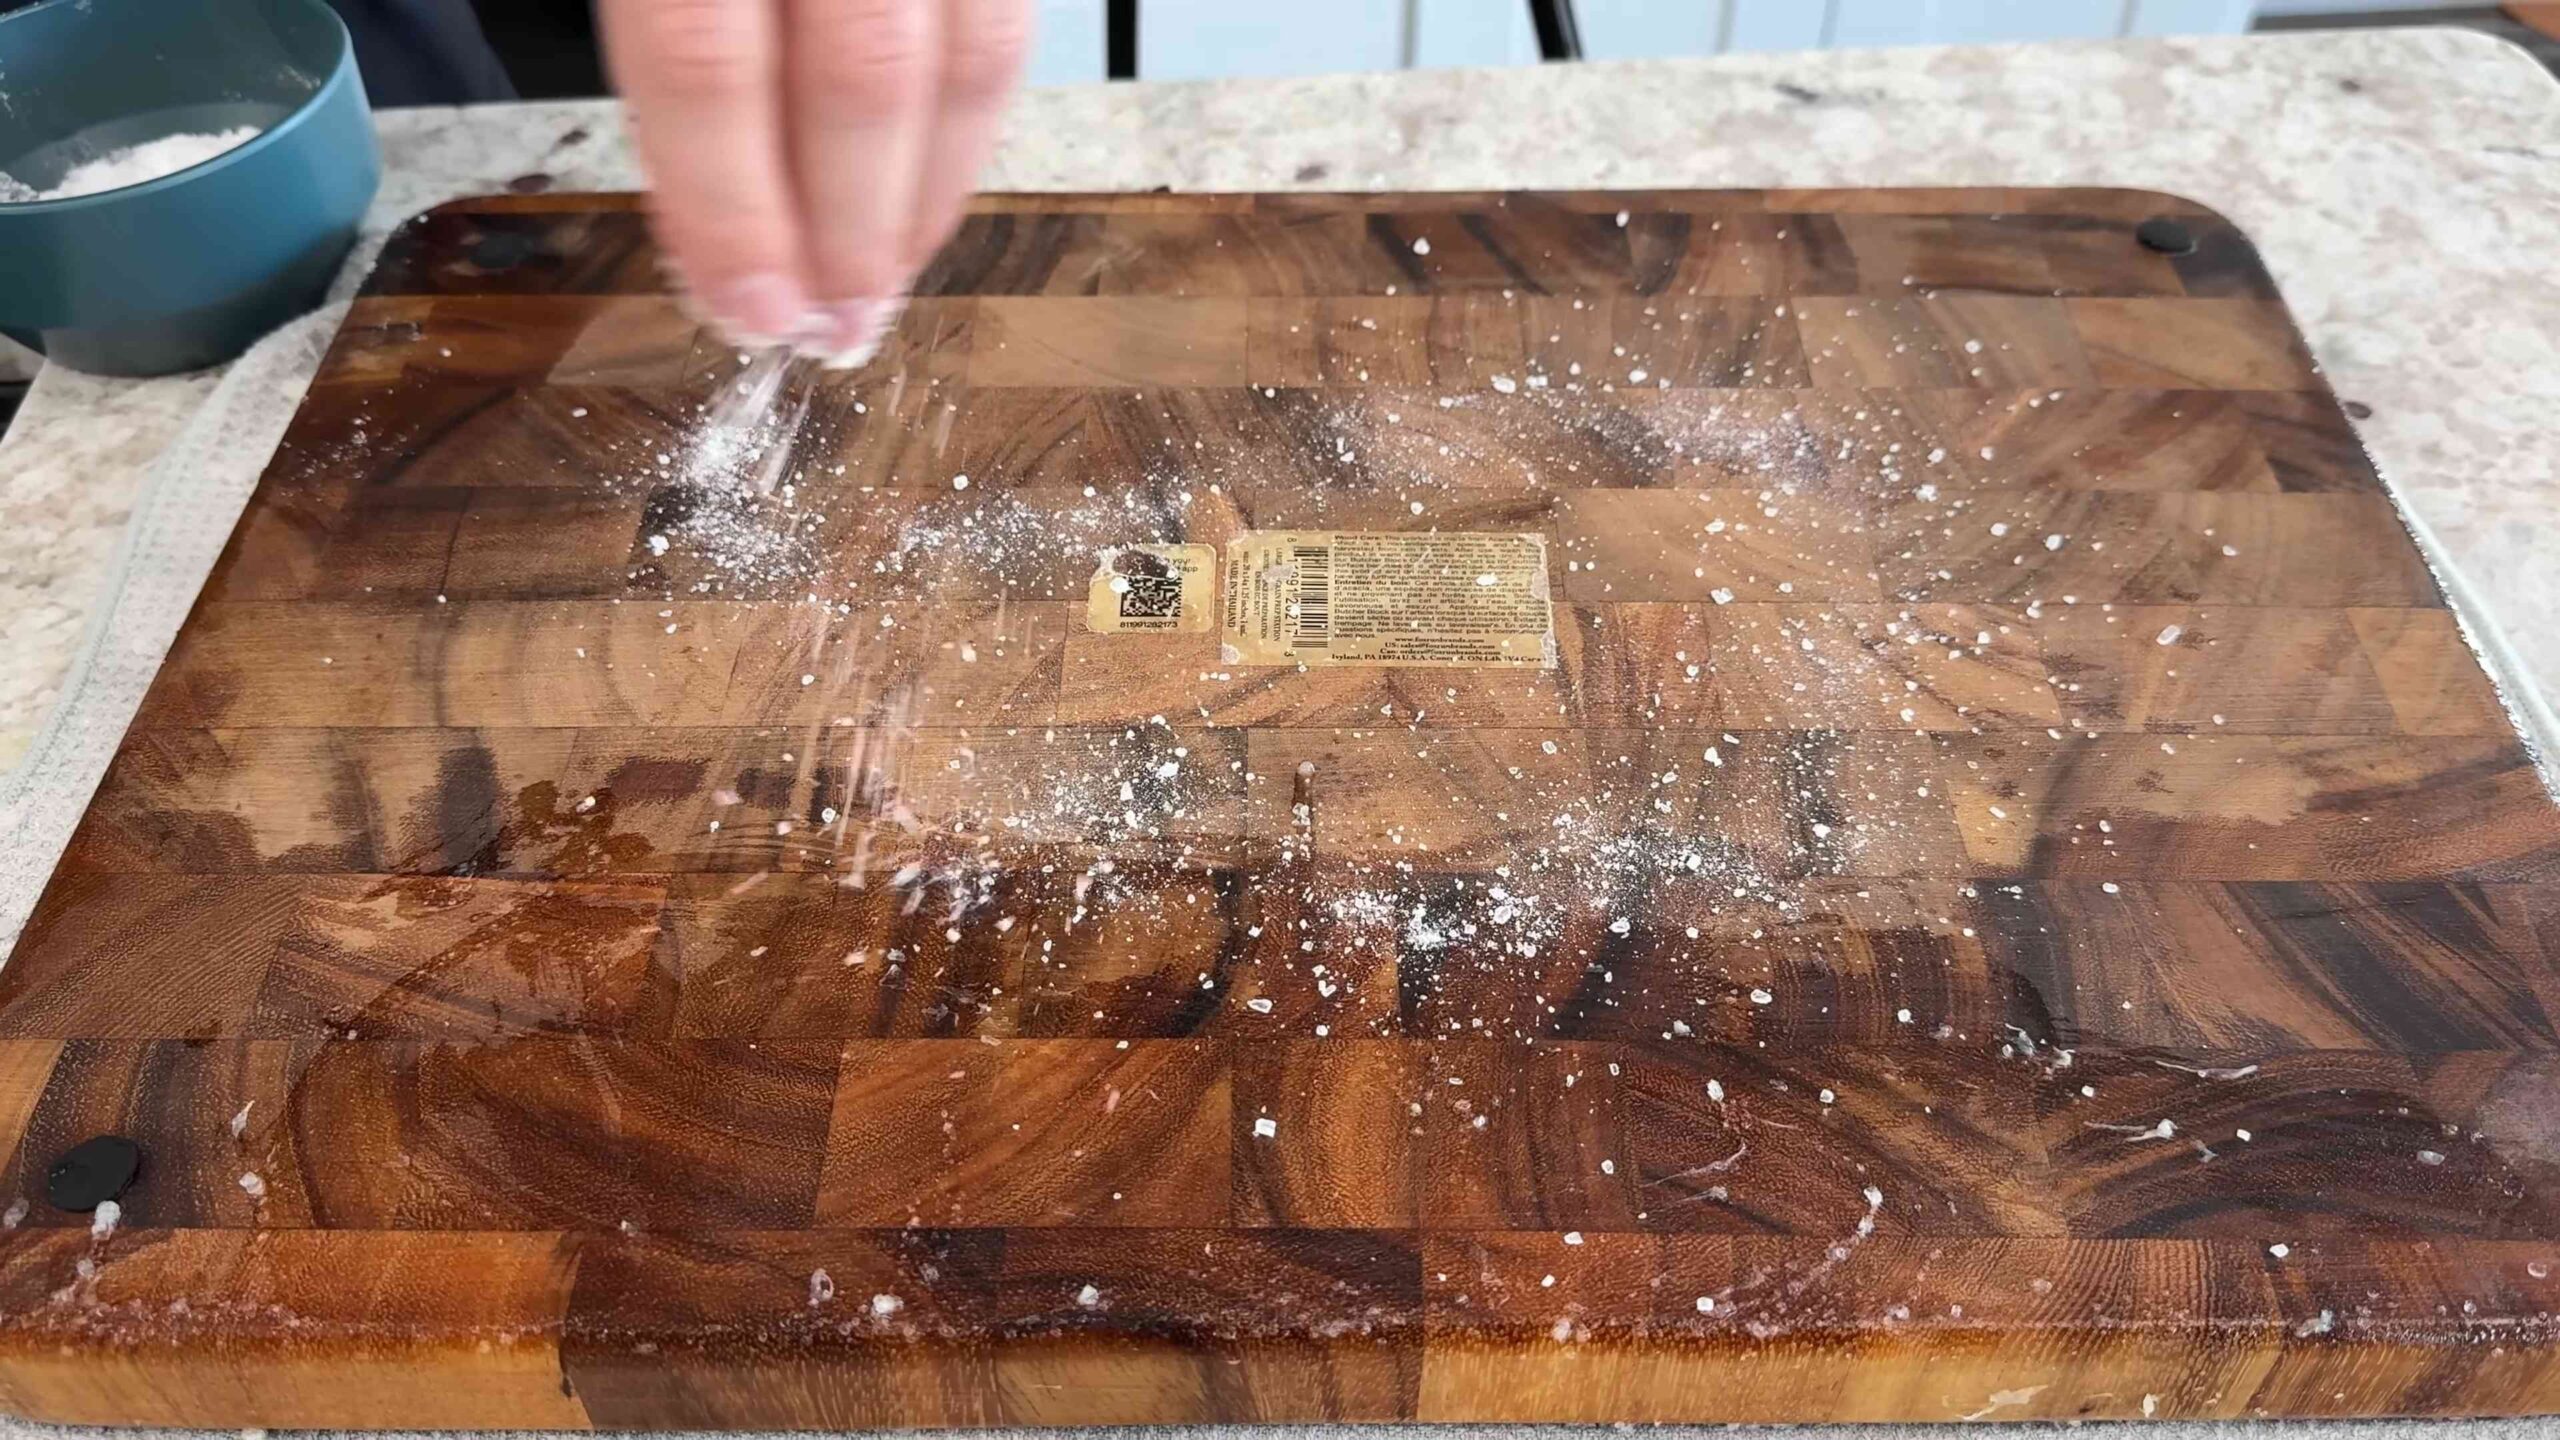
2. Apply the Salt: Generously sprinkle coarse salt all over the surface of the cutting board. You want a good, even layer that covers the entire area. Don’t be shy with the salt! The amount you use will depend on the size of your board. I usually use about 1/4 to 1/2 cup for a standard-sized cutting board.
3. Lemon Time! Cut the lemon in half. Take one half of the lemon and use it to scrub the salt into the cutting board. Apply firm pressure and scrub in a circular motion, making sure to cover every inch of the surface. As you scrub, the lemon juice will mix with the salt to create a paste.
4. Scrub, Scrub, Scrub: Keep scrubbing for a few minutes, really working the salt and lemon juice into the wood grain. Pay extra attention to any areas with stains or stubborn food residue. If the lemon half starts to dry out, squeeze it to release more juice. If needed, switch to the other lemon half.
5. Let it Sit: Once you’ve thoroughly scrubbed the entire cutting board, let the salt and lemon mixture sit for about 5-10 minutes. This allows the citric acid to work its magic, disinfecting and deodorizing the wood. I usually use this time to wash the dishes or wipe down the countertops.
6. Rinse Thoroughly: After the waiting period, rinse the cutting board thoroughly under warm water. Make sure to remove all traces of salt and lemon juice. You can use a sponge or scrub brush to help with this step.
7. Dry Completely: Use a clean, dry towel to thoroughly dry the cutting board. It’s important to dry it completely to prevent warping or cracking. You can also let it air dry, but make sure it’s in a well-ventilated area. I often prop it up on its side to allow air to circulate on both sides.
8. Sanitize (Optional): For extra sanitization, you can rinse the cutting board with a diluted vinegar solution (1 part white vinegar to 3 parts water) after rinsing with water. This will help kill any remaining bacteria. Just be sure to rinse it well with water again after the vinegar rinse.
Oiling and Conditioning Your Cutting Board
Once your cutting board is clean and dry, it’s time to rehydrate and protect the wood. This is a crucial step to prevent cracking and warping, and to keep your cutting board looking its best.
1. Choose Your Oil: I highly recommend using food-grade mineral oil or a beeswax cutting board conditioner. These products are specifically designed for wooden cutting boards and are safe for food contact. Avoid using vegetable oils like olive oil or canola oil, as they can go rancid and leave a sticky residue.
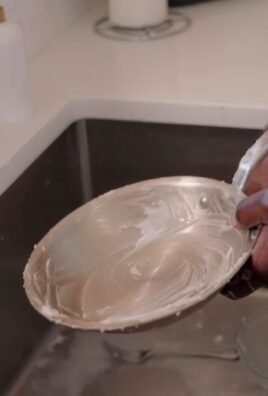
2. Apply the Oil: Pour a generous amount of mineral oil or cutting board conditioner onto the surface of the cutting board. Use a clean cloth or paper towel to spread the oil evenly over the entire surface, including the edges and sides.
3. Let it Soak: Allow the oil to soak into the wood for at least a few hours, or even overnight. The longer it soaks, the better. You’ll notice that the wood will absorb the oil, becoming darker and richer in color.
4. Wipe Off Excess Oil: After the soaking period, use a clean cloth or paper towel to wipe off any excess oil that hasn’t been absorbed. You want the cutting board to be lightly oiled, but not greasy.
5. Repeat as Needed: Depending on how dry your cutting board is, you may need to repeat the oiling process a few times. I usually oil my cutting boards every few weeks, or whenever they start to look dry or faded.
Dealing with Stubborn Stains and Odors
Sometimes, even with the salt and lemon method, you might encounter stubborn stains or lingering odors. Here are a few tips for tackling those tough cases:
* Baking Soda Paste: For stubborn stains, try making a paste of baking soda and water. Apply the paste to the stain, let it sit for a few minutes, and then scrub with a sponge or brush. Rinse thoroughly.
* Hydrogen Peroxide: For tough odors, you can try spraying the cutting board with hydrogen peroxide. Let it sit for a few minutes, and then rinse thoroughly. Be sure to use a food-grade hydrogen peroxide.
* Sunlight: Sunlight is a natural disinfectant and deodorizer. After cleaning your cutting board, you can place it in direct sunlight for a few hours to help kill bacteria and remove odors. Just be careful not to leave it in the sun for too long, as this can cause the wood to dry out and crack.
Maintaining Your Cutting Board
Prevention is key! Here are a few tips for maintaining your cutting board and keeping it clean and fresh:
* Wash After Each Use: Wash your cutting board with warm, soapy water after each use. This will help prevent food particles from building up and causing stains or odors.
* Don’t Soak: Avoid soaking your cutting board in water, as this can cause it to warp or crack.
* Dry Thoroughly: Always dry your cutting board thoroughly after washing it.
* Oil Regularly: Oil your cutting board regularly to keep it hydrated and protected.
* Use Separate Cutting Boards: Consider using separate cutting boards for raw meat and poultry to prevent cross-contamination.
Safety First!
* Always use caution when handling knives and other sharp objects.
* Wear gloves if you have sensitive skin.
* Avoid getting lemon juice in your eyes.
* If you’re using hydrogen peroxide, be sure to wear gloves and eye protection.
Final Thoughts
And there you have it! A simple, natural, and effective way to clean and refresh your wooden cutting boards using just salt and lemon. I hope you found this guide helpful. With a little bit of care and maintenance, your cutting boards will last for years to come. Happy cleaning!
Conclusion
So, there you have it! This simple yet incredibly effective method for cleaning your cutting board with salt is a game-changer. Forget harsh chemicals and complicated cleaning routines. With just coarse salt, a lemon (or even just water), and a little elbow grease, you can revitalize your cutting boards and keep them hygienically clean.
Why is this a must-try? Because it’s natural, affordable, and remarkably effective. Commercial cleaners often contain chemicals that can leach into your food, especially when used on porous surfaces like wood or bamboo cutting boards. This salt cleaning method avoids that risk entirely. Plus, the abrasive nature of the salt helps to lift stubborn stains and food particles that regular washing might miss. It’s a win-win for your health and your kitchen!
But don’t just stop there! Feel free to experiment with variations. For a deeper clean and deodorizing effect, add a tablespoon of baking soda to the salt before scrubbing. If you’re dealing with particularly stubborn odors, like garlic or onion, let the salt and lemon mixture sit on the board for 15-20 minutes before scrubbing. You can also use different types of salt, such as sea salt or kosher salt, although coarse salt generally provides the best scrubbing power. Remember to always oil your wooden cutting board after cleaning to prevent it from drying out and cracking. Use food-grade mineral oil or beeswax for optimal results.
We’re confident that once you try this method for cleaning your cutting board with salt, you’ll be amazed by the results. It’s a simple, sustainable, and safe way to keep your kitchen tools in top condition.
Now, it’s your turn! Give this DIY trick a try and let us know what you think. Share your before-and-after photos and any variations you discover in the comments below. We’re eager to hear about your experiences and learn from your insights. Happy cleaning!
Frequently Asked Questions
Q: What kind of salt should I use?
A: Coarse salt is generally recommended for cleaning cutting boards. The larger granules provide better abrasion, which helps to lift stains and food particles more effectively. Sea salt, kosher salt, or even rock salt can be used, but avoid using fine table salt, as it will dissolve too quickly and won’t provide the necessary scrubbing power. The key is to have a salt with a texture that can physically scrub the surface of the board.
Q: Can I use this method on all types of cutting boards?
A: This method is particularly well-suited for wooden and bamboo cutting boards. However, it can also be used on plastic cutting boards. For plastic boards, be mindful of the pressure you apply while scrubbing, as excessive force could scratch the surface. Avoid using this method on glass or marble cutting boards, as the salt could potentially scratch these materials. Always test a small, inconspicuous area first to ensure that the salt doesn’t damage the surface.
Q: How often should I clean my cutting board with salt?
A: The frequency of cleaning depends on how often you use your cutting board. For daily use, a quick wash with soap and water after each use is sufficient. However, you should perform a deeper clean with salt at least once a week, or more often if you’ve been cutting raw meat, poultry, or fish. If you notice any lingering odors or stains, it’s a good indication that it’s time for a salt scrub.
Q: What if I don’t have a lemon?
A: While lemon juice adds a pleasant scent and has antibacterial properties, it’s not strictly necessary. You can substitute it with white vinegar, which also has antibacterial properties and helps to deodorize the cutting board. Alternatively, you can simply use water. The salt itself is the primary cleaning agent, so even without lemon or vinegar, the method will still be effective.
Q: How do I prevent my wooden cutting board from drying out after cleaning?
A: After cleaning your wooden cutting board, it’s essential to oil it to prevent it from drying out and cracking. Use food-grade mineral oil or beeswax. Apply a generous amount of oil to the entire surface of the board, including the edges and sides. Let the oil soak in for several hours, or even overnight. Then, wipe off any excess oil with a clean cloth. Regular oiling will help to keep your cutting board in good condition for years to come.
Q: My cutting board has deep cuts and grooves. Will this method still work?
A: This method can still be effective for cutting boards with deep cuts and grooves, but you may need to use a bit more elbow grease to reach into those areas. Use a stiff-bristled brush or a scrub brush to help dislodge food particles from the grooves. You may also need to repeat the cleaning process a few times to ensure that the board is thoroughly clean. For very deep cuts, consider using a small amount of baking soda mixed with water to create a paste, and apply it to the grooves before scrubbing with salt.
Q: Can I use this method to remove stains from my cutting board?
A: Yes, this method is effective for removing many types of stains from cutting boards, especially food stains. The abrasive nature of the salt helps to lift the stains from the surface. For stubborn stains, let the salt and lemon mixture sit on the board for 15-20 minutes before scrubbing. You can also try making a paste of baking soda and water and applying it to the stain before scrubbing with salt. For very persistent stains, you may need to repeat the process several times.
Q: Is this method safe for cleaning cutting boards used for raw meat?
A: Yes, this method is safe for cleaning cutting boards used for raw meat, poultry, or fish. However, it’s crucial to thoroughly clean and disinfect the board after each use to prevent the spread of bacteria. After scrubbing with salt and lemon, rinse the board thoroughly with hot, soapy water. You can also disinfect the board with a solution of diluted bleach (1 tablespoon of bleach per gallon of water). Let the bleach solution sit on the board for a few minutes, then rinse thoroughly with clean water. Always dry the board completely before storing it. Consider having separate cutting boards for raw meat and other foods to minimize the risk of cross-contamination.
Q: How do I store my cutting board after cleaning?
A: After cleaning and oiling your cutting board, it’s important to store it properly to prevent warping and cracking. Store the board in a dry, well-ventilated area. Avoid storing it in direct sunlight or near a heat source, as this can cause it to dry out and crack. If you’re storing multiple cutting boards together, make sure they’re not stacked too tightly, as this can restrict airflow. You can also use a cutting board rack to store your boards vertically, which helps to promote air circulation and prevent warping.


Leave a Comment