

Clean Humidifier Effectively – that’s the key to breathing easier and keeping your home healthier, and I’m here to show you how! Are you tired of that musty smell coming from your humidifier? Or maybe you’re worried about the unseen gunk lurking inside, potentially spreading harmful bacteria into the air you breathe? You’re not alone! For generations, humidifiers have been used to combat dry air, especially during harsh winters, tracing back to ancient practices of using water-filled vessels to increase moisture levels. But, like any appliance, they require regular maintenance.
Let’s face it, cleaning a humidifier isn’t exactly anyone’s favorite chore. But neglecting it can lead to the growth of mold, mildew, and mineral buildup, which can then be dispersed into the air, potentially causing respiratory problems and allergies. That’s why I’ve put together this easy-to-follow guide packed with DIY tricks and hacks to help you clean humidifier effectively and keep it running smoothly. I’ll share my favorite methods, using simple household ingredients, to ensure your humidifier is dispensing clean, healthy moisture, creating a more comfortable and healthier living environment for you and your family. Get ready to say goodbye to that funky smell and hello to fresh, clean air!
DIY Deep Clean: Breathe Easy with a Sparkling Humidifier
Okay, let’s face it: humidifiers are lifesavers, especially during dry winters or allergy season. But they can quickly become breeding grounds for mold, mildew, and bacteria if we don’t keep them clean. And nobody wants to breathe in *that*. So, I’m going to walk you through my tried-and-true method for deep cleaning your humidifier, leaving it fresh and ready to keep your air clean and healthy.
Why Deep Cleaning Matters
Before we dive in, let’s quickly cover why this is so important. A dirty humidifier can actually *worsen* your air quality. Those nasty microorganisms can get aerosolized and spread throughout your room, potentially causing respiratory problems, allergies, and even infections. Regular cleaning prevents this and ensures your humidifier is actually doing its job – adding clean moisture to the air.
What You’ll Need
Here’s a list of everything you’ll need to get your humidifier sparkling:
* White vinegar (the unsung hero of cleaning!)
* Hydrogen peroxide (another cleaning powerhouse)
* Dish soap (gentle but effective)
* Soft-bristled brush (an old toothbrush works great!)
* Clean cloths or paper towels
* Water (duh!)
* Gloves (optional, but recommended)
* A sink or tub (for soaking and rinsing)
* A small container (for soaking small parts)
Disassembling Your Humidifier
This is the first, and often most crucial, step. Every humidifier is a little different, so consult your owner’s manual if you’re unsure how to take yours apart. But generally, here’s what you’ll be doing:
1. Unplug it! Safety first, always.
2. Empty the water tank. Get rid of any remaining water. Don’t just leave it sitting there!
3. Remove the water tank from the base. This is usually pretty straightforward.
4. Disassemble any removable parts. This might include a filter, a tray, a cap, or other small components. Pay close attention to how everything fits together so you can easily reassemble it later. Take pictures if you need to!
5. Identify the parts that need the most attention. These are usually the water tank, the base, and any areas that come into direct contact with water. Look for signs of mineral buildup, mold, or mildew.
Cleaning the Water Tank
The water tank is where all the action happens, so it’s usually the dirtiest part. Here’s how I tackle it:
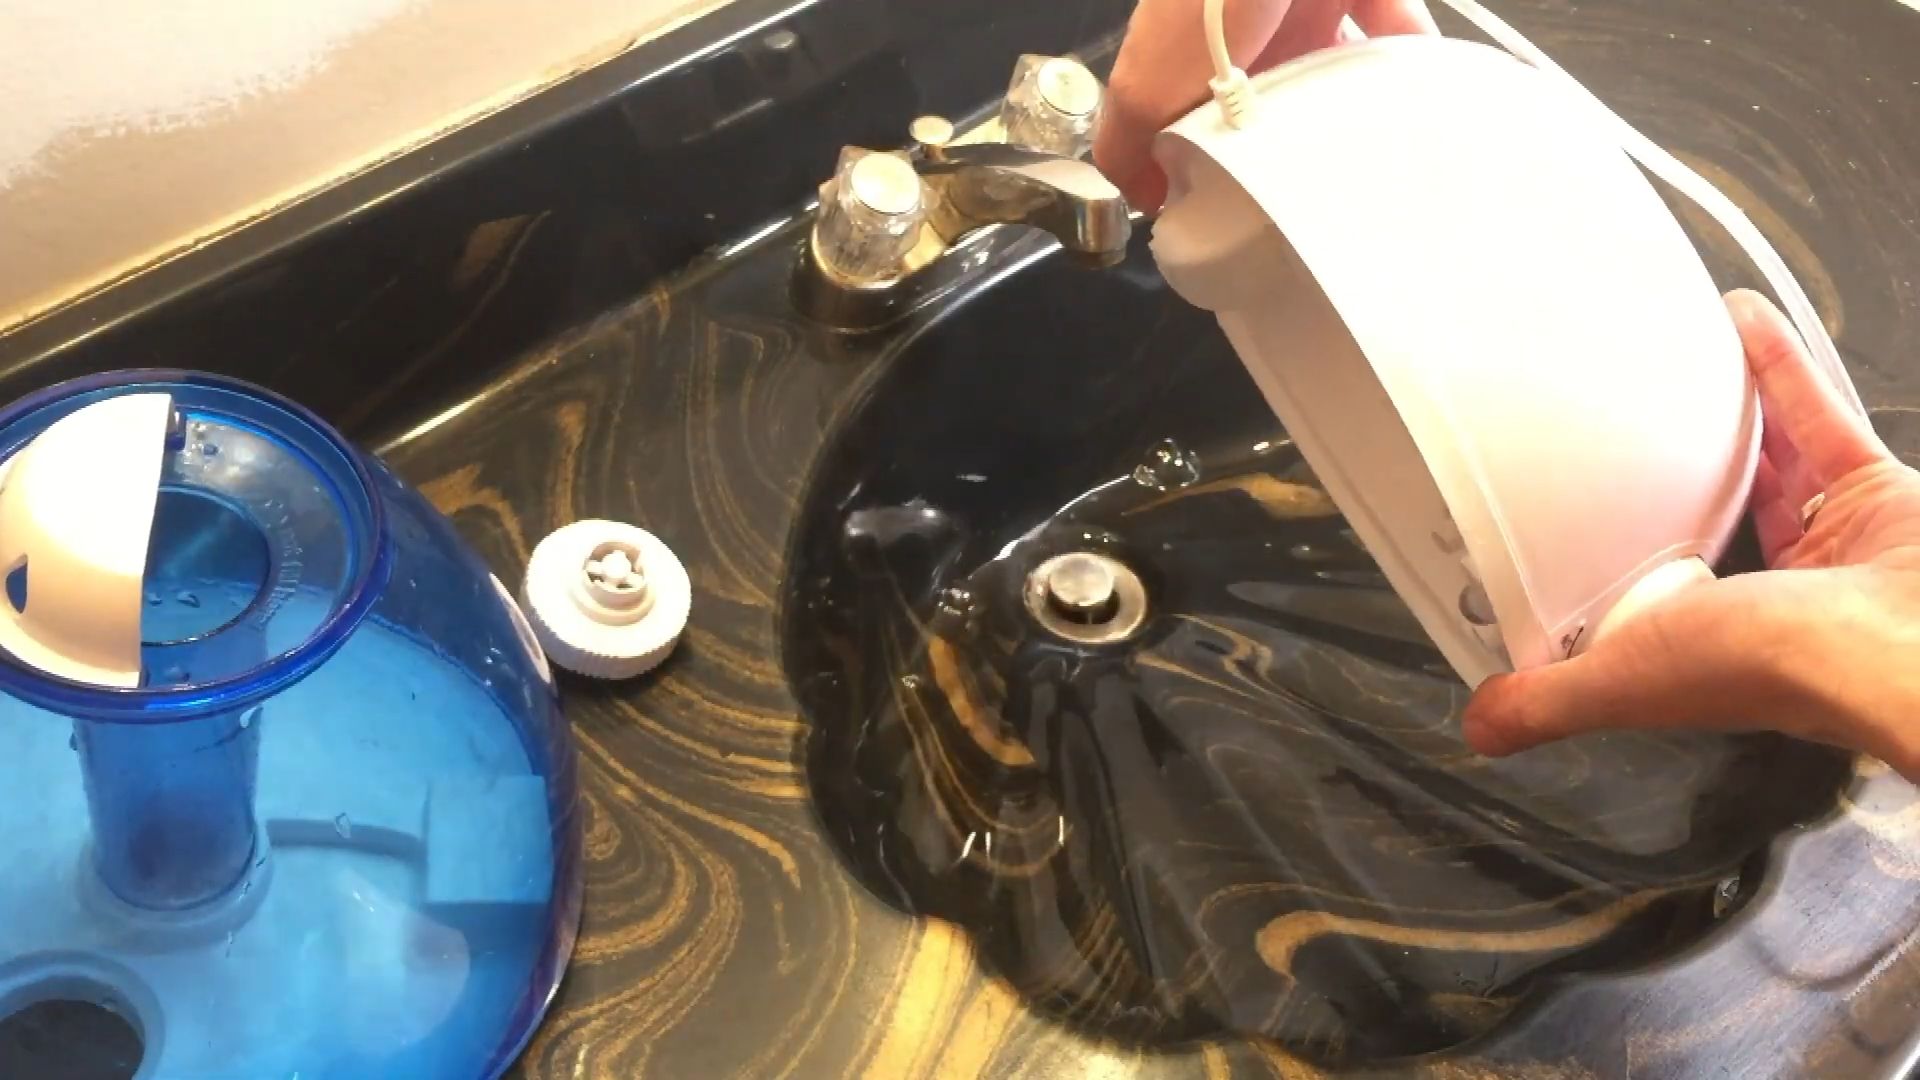
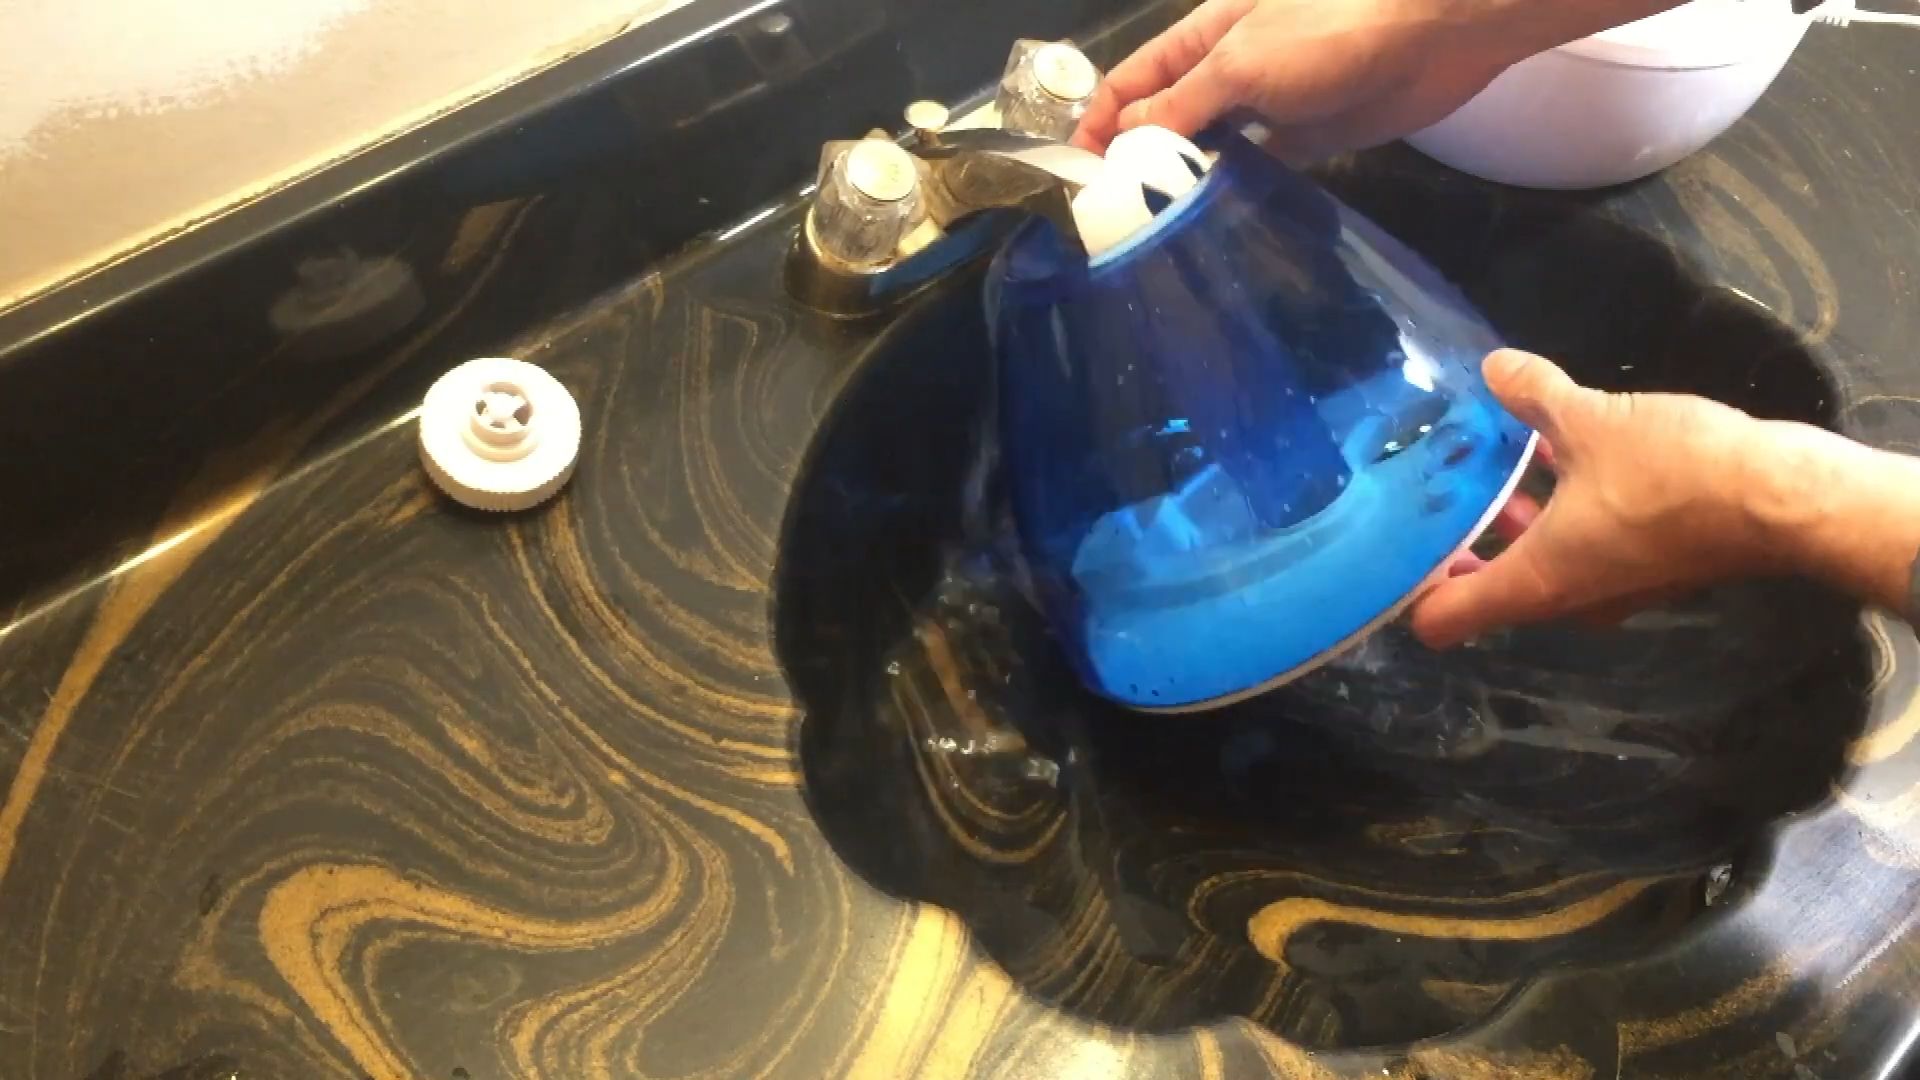
1. Rinse the tank with water. This will remove any loose debris.
2. Fill the tank with white vinegar. I usually use undiluted vinegar for this step, but if your tank is particularly grimy, you can add a little water.
3. Let it soak for at least 30 minutes. For really stubborn buildup, you can let it soak for several hours, or even overnight. The vinegar will help dissolve mineral deposits and loosen any mold or mildew.
4. Scrub the tank with a soft-bristled brush. Pay close attention to the corners and any areas with visible buildup.
5. Rinse thoroughly with water. Make sure to get rid of all the vinegar smell!
6. Inspect the tank. If there are still stubborn stains or buildup, repeat steps 2-5.
7. Sanitize with hydrogen peroxide (optional). After rinsing, you can fill the tank with hydrogen peroxide and let it sit for about 30 minutes to kill any remaining bacteria or mold spores. Rinse thoroughly again after sanitizing.
8. Air dry completely. Before reassembling, make sure the tank is completely dry to prevent mold growth.
Cleaning the Humidifier Base
The base is where the humidifier’s motor and other electrical components are located, so you need to be a little more careful when cleaning it.
1. Wipe down the exterior with a damp cloth. Remove any dust or dirt.
2. Clean the water reservoir. This is the area where the water sits before being evaporated.
3. Mix a solution of white vinegar and water. I usually use a 1:1 ratio.
4. Use a soft-bristled brush to scrub the reservoir. Pay close attention to any areas with mineral buildup or mold.
5. Rinse thoroughly with water. Make sure to get rid of all the vinegar.
6. Clean the transducer (if applicable). The transducer is the part that vibrates to create the mist. It’s usually a small, round disc.
7. Use a cotton swab dipped in white vinegar to gently clean the transducer. Be very careful not to damage it.
8. Rinse the transducer with water.
9. Dry the base completely. Use a clean cloth or paper towel to dry all the components.
Cleaning Other Removable Parts
Don’t forget about those smaller parts! They can also harbor bacteria and mold.
1. Soak the parts in a solution of warm water and dish soap. This will help loosen any dirt or grime.
2. Scrub the parts with a soft-bristled brush.
3. Rinse thoroughly with water.
4. Sanitize with hydrogen peroxide (optional). You can soak the parts in hydrogen peroxide for about 30 minutes to kill any remaining bacteria or mold spores. Rinse thoroughly again after sanitizing.
5. Air dry completely.
Dealing with Stubborn Mold or Mildew
Sometimes, you’ll encounter stubborn mold or mildew that just won’t budge. Here are a few tricks I’ve used:
* Baking soda paste: Mix baking soda with a little water to form a paste. Apply the paste to the affected area and let it sit for a few minutes before scrubbing.
* Lemon juice: Lemon juice is a natural disinfectant and can help break down mold and mildew. Apply lemon juice to the affected area and let it sit for a few minutes before scrubbing.
* Tea tree oil: Tea tree oil is a powerful antifungal agent. Add a few drops of tea tree oil to a spray bottle filled with water and spray the affected area. Let it sit for a few minutes before wiping clean. (Be careful using tea tree oil around pets, as it can be toxic to them.)
Reassembling Your Humidifier
Once all the parts are clean and dry, it’s time to put everything back together.
1. Refer to your owner’s manual or the pictures you took during disassembly. This will help you remember how everything fits together.
2. Carefully reassemble all the parts. Make sure everything is securely in place.
3. Fill the water tank with clean water.
4. Plug in the humidifier and turn it on.
5. Check for any leaks or malfunctions.
Maintaining Your Clean Humidifier
Now that your humidifier is sparkling clean, here are a few tips to keep it that way:
* Empty and rinse the water tank daily. This will prevent mineral buildup and mold growth.
* Change the water every day. Stagnant water is a breeding ground for bacteria.
* Clean your humidifier at least once a week. A quick cleaning with vinegar and water will help prevent buildup.
* Replace the filter regularly. Check your owner’s manual for recommended filter replacement intervals.
* Store your humidifier properly when not in use. Make sure it’s completely dry before storing it in a cool, dry place.
Troubleshooting
* Humidifier still smells musty: Repeat the cleaning process, paying close attention to the water tank and base. You may need to soak the parts for a longer period of time.
* Humidifier isn’t producing mist: Check the water level and make sure the transducer is clean. You may also need to replace the filter.
* Humidifier is leaking: Check the seals and connections to make sure they’re tight. You may need to replace the seals if they’re damaged.
By following these steps, you can keep your humidifier clean and healthy, ensuring that you’re breathing in clean, moisturized air. Happy breathing!
Conclusion
So, there you have it! A simple, effective, and budget-friendly way to keep your humidifier sparkling clean and functioning optimally. We’ve walked you through the steps, highlighting the importance of regular cleaning to prevent the build-up of harmful bacteria and mold that can negate the very purpose of using a humidifier in the first place. Remember, a clean humidifier is a healthy humidifier, contributing to cleaner air and a healthier living environment, especially crucial during dry seasons or for those with respiratory sensitivities.
This DIY trick isn’t just about saving money on expensive cleaning solutions; it’s about taking control of your indoor air quality and ensuring the well-being of yourself and your family. The peace of mind that comes from knowing you’re breathing clean, properly humidified air is invaluable.
But the benefits don’t stop there. By regularly cleaning your humidifier with this method, you’re also extending its lifespan. Mineral deposits and grime can cause internal components to wear down prematurely, leading to costly repairs or replacements. A little preventative maintenance goes a long way in saving you money in the long run.
Why is this DIY trick a must-try? Because it’s easy, affordable, effective, and promotes a healthier home environment. It’s a win-win situation!
Now, let’s talk about variations. While white vinegar is our go-to solution for its effectiveness and safety, you can experiment with other natural cleaning agents. For instance, a diluted solution of lemon juice can also work wonders, leaving behind a fresh, citrusy scent. Just be sure to rinse thoroughly to remove any lingering residue. For particularly stubborn mineral deposits, you might consider using a descaling solution specifically designed for humidifiers, but always follow the manufacturer’s instructions carefully.
Another variation involves the cleaning frequency. While we recommend cleaning your humidifier at least once a week during periods of regular use, you might need to increase the frequency if you notice a build-up of mineral deposits or a musty odor. Trust your senses and adjust accordingly.
Furthermore, consider the type of water you’re using in your humidifier. Tap water often contains minerals that contribute to scale build-up. Using distilled water or filtered water can significantly reduce the frequency of cleaning required and prolong the life of your humidifier. It’s a small investment that can make a big difference.
We’re confident that this DIY method to clean humidifier effectively will become a staple in your home maintenance routine. It’s a simple yet powerful way to ensure your humidifier is working at its best, providing you with the clean, humidified air you need to stay healthy and comfortable.
So, what are you waiting for? Give it a try! We’re eager to hear about your experiences. Share your results, tips, and any variations you’ve discovered in the comments below. Let’s build a community of clean humidifier enthusiasts and help each other breathe easier! We encourage you to share this article with your friends and family so they too can benefit from this simple and effective cleaning method. Let’s all work together to create healthier homes, one clean humidifier at a time.
Frequently Asked Questions (FAQ)
1. How often should I clean my humidifier?
The frequency of cleaning depends on how often you use your humidifier and the type of water you use. As a general rule, you should aim to clean your humidifier at least once a week during periods of regular use. If you use tap water, which contains more minerals, you might need to clean it more frequently. If you notice a build-up of mineral deposits or a musty odor, it’s definitely time for a cleaning. Using distilled or filtered water can help reduce the frequency of cleaning.
2. Can I use bleach to clean my humidifier?
While bleach is a powerful disinfectant, it’s generally not recommended for cleaning humidifiers. Bleach can be corrosive and can damage the internal components of your humidifier. Additionally, bleach fumes can be harmful to breathe, especially for individuals with respiratory sensitivities. White vinegar is a much safer and equally effective alternative. If you do choose to use bleach, make sure to dilute it significantly and rinse the humidifier thoroughly to remove any lingering residue. Always follow the manufacturer’s instructions.
3. What type of vinegar should I use to clean my humidifier?
White vinegar is the best choice for cleaning humidifiers. It’s readily available, inexpensive, and effective at dissolving mineral deposits and killing bacteria and mold. Avoid using other types of vinegar, such as apple cider vinegar or balsamic vinegar, as they may contain sugars or other additives that can leave behind a sticky residue.
4. How do I clean the filter in my humidifier?
The cleaning process for the filter depends on the type of filter your humidifier has. Some humidifiers have reusable filters that can be washed with water and mild soap. Others have disposable filters that need to be replaced periodically. Consult your humidifier’s manual for specific instructions on how to clean or replace the filter. Regularly cleaning or replacing the filter is essential for maintaining optimal performance and preventing the build-up of bacteria and mold.
5. What if I have stubborn mineral deposits that won’t come off with vinegar?
For particularly stubborn mineral deposits, you can try soaking the affected parts in a solution of white vinegar and water for a longer period, such as overnight. You can also use a soft brush or sponge to gently scrub the deposits. If the vinegar solution is not enough, consider using a descaling solution specifically designed for humidifiers. These solutions are typically stronger than vinegar and can effectively remove even the most stubborn mineral deposits. Always follow the manufacturer’s instructions when using a descaling solution.
6. Can I put essential oils in the water tank of my humidifier?
This depends on the type of humidifier you have. Some humidifiers are specifically designed to be used with essential oils, while others are not. Adding essential oils to a humidifier that is not designed for them can damage the internal components and void the warranty. If your humidifier is compatible with essential oils, follow the manufacturer’s instructions carefully and use only high-quality essential oils.
7. How do I prevent mold from growing in my humidifier?
Regular cleaning is the most effective way to prevent mold from growing in your humidifier. In addition to cleaning the humidifier weekly, you should also empty the water tank and dry it thoroughly when you’re not using the humidifier. Using distilled or filtered water can also help prevent mold growth, as tap water often contains minerals and impurities that can promote mold growth.
8. My humidifier smells musty even after cleaning. What should I do?
If your humidifier still smells musty after cleaning, it could be a sign that there is mold or bacteria growing in hard-to-reach areas. Try soaking the humidifier parts in a stronger solution of white vinegar and water for a longer period. You can also use a small brush or cotton swab to clean any crevices or hard-to-reach areas. If the musty smell persists, you may need to replace the humidifier.
9. Is it safe to use a humidifier if I have allergies or asthma?
Humidifiers can be beneficial for individuals with allergies or asthma, as they can help to relieve dry nasal passages and soothe irritated airways. However, it’s important to keep the humidifier clean to prevent the growth of mold and bacteria, which can trigger allergy or asthma symptoms. Using distilled or filtered water can also help to reduce the risk of allergens in the air. If you have allergies or asthma, consult with your doctor before using a humidifier.
10. Where is the best place to put my humidifier in my home?
The best place to put your humidifier is in a central location in the room where you spend the most time. Avoid placing the humidifier near furniture or walls, as the moisture can damage these surfaces. Also, avoid placing the humidifier in a drafty area, as this can reduce its effectiveness. Make sure the humidifier is placed on a stable surface to prevent it from tipping over.

Leave a Comment