

Clean Gas Stove: Is your gas stove looking less like a culinary command center and more like a Jackson Pollock painting gone wrong? Don’t despair! I know the feeling. We’ve all been there, staring down a greasy, grimy stovetop wondering if it’s even worth the effort. But trust me, a sparkling clean gas stove isn’t just about aesthetics; it’s about safety, efficiency, and frankly, a little bit of kitchen zen.
For generations, the heart of the home has revolved around the hearth, and in modern times, that translates to our stoves. From wood-burning ovens to the sleek gas ranges we use today, the ability to cook and nourish ourselves and our families has always been central to our lives. But with all that cooking comes the inevitable mess.
That’s why I’m so excited to share these simple, effective DIY tricks and hacks to help you clean gas stove surfaces and burners like a pro. You’ll learn how to tackle even the most stubborn baked-on food and grease with ingredients you probably already have in your pantry. Not only will a clean stove look fantastic, but it will also ensure your burners are functioning properly, saving you time and energy in the long run. Plus, who doesn’t love the feeling of accomplishment that comes with a sparkling clean kitchen? Let’s get started!
DIY Deep Clean: Revive Your Grimy Gas Stove Like a Pro!
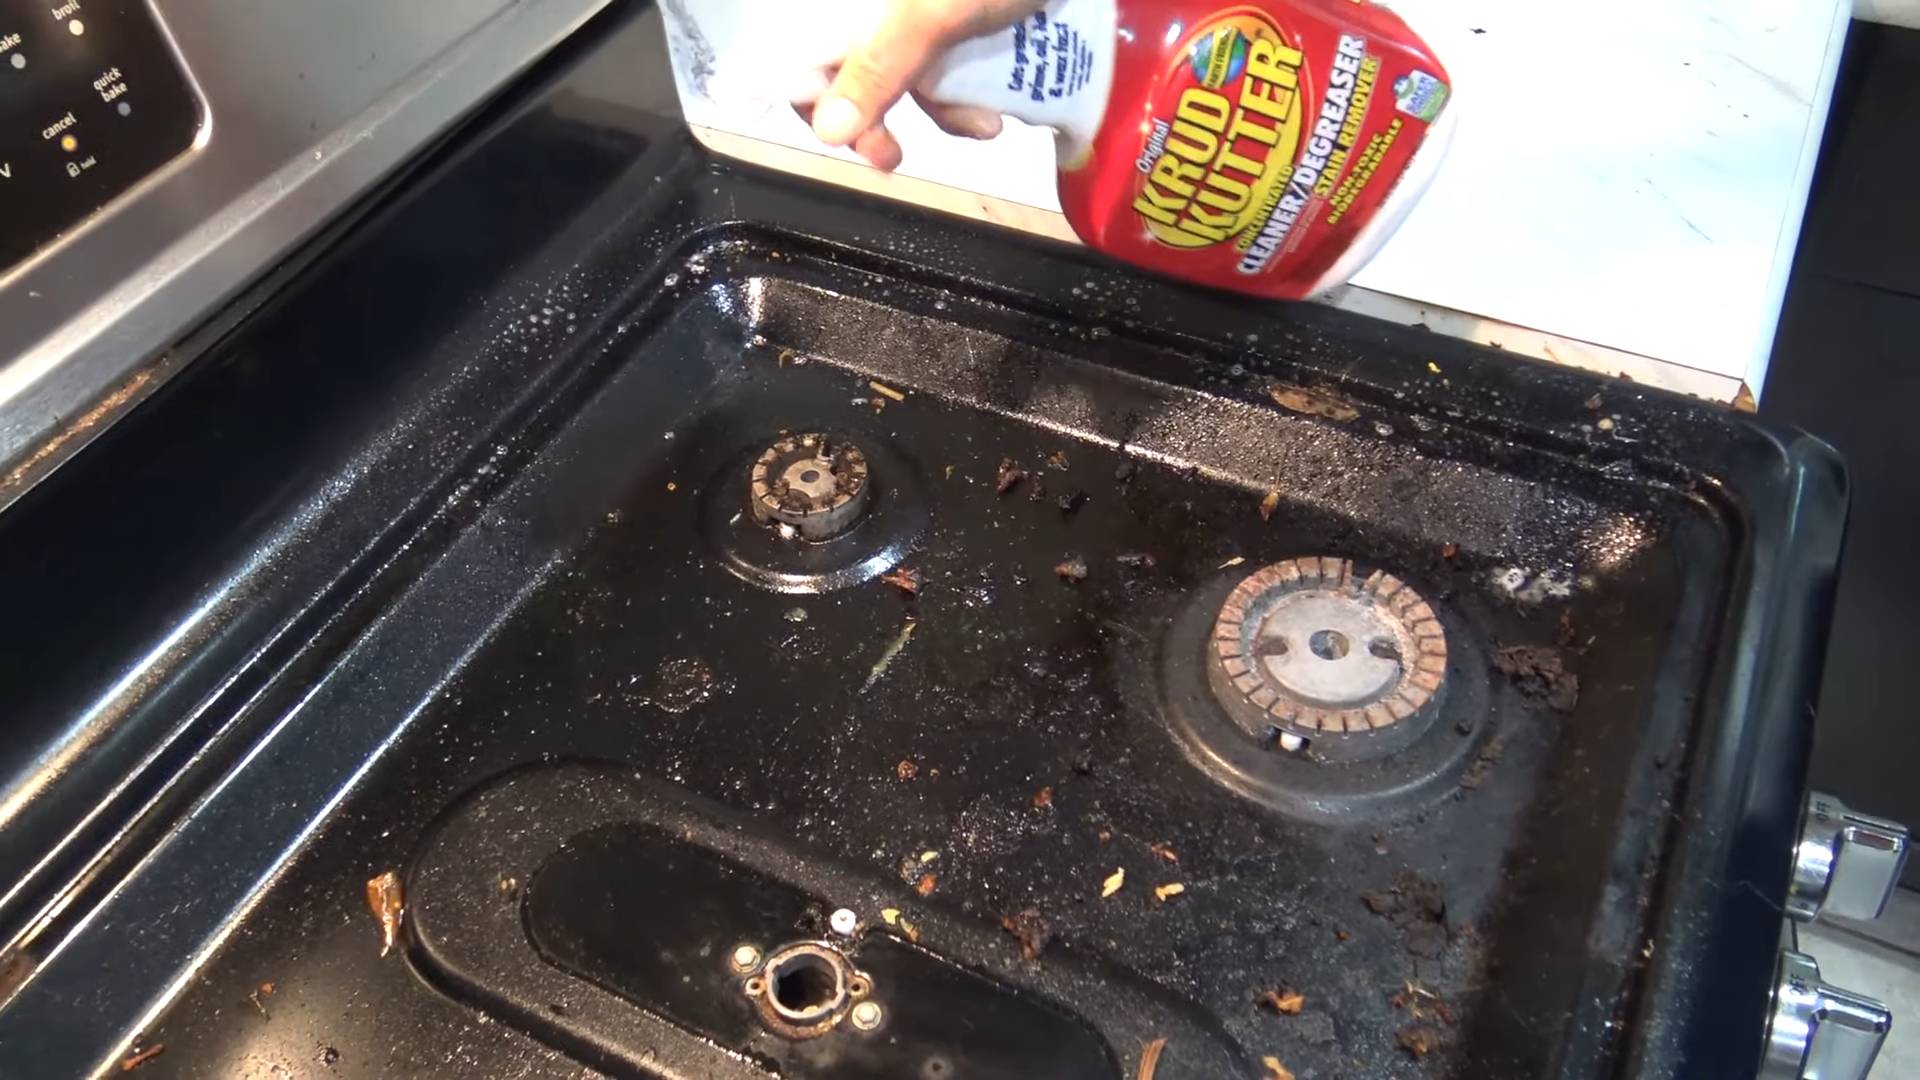
Okay, let’s face it. Gas stoves are amazing for cooking, but keeping them clean? Not so much fun. Baked-on spills, greasy splatters, and burnt food remnants can turn your beautiful stove into a sticky, unsightly mess. But don’t worry! I’m going to walk you through a super effective DIY deep clean that will have your gas stove sparkling like new. This isn’t just a surface wipe-down; we’re going to get into all the nooks and crannies.
What You’ll Need: Your Cleaning Arsenal
Before we dive in, let’s gather our supplies. Having everything ready will make the process much smoother.
* Dish Soap: A good quality dish soap is essential for cutting through grease.
* Baking Soda: This is our secret weapon for tackling stubborn stains.
* White Vinegar: Vinegar’s acidity helps dissolve mineral deposits and grime.
* Ammonia (Optional, but Powerful): Use with caution and proper ventilation for heavily soiled burner caps.
* Spray Bottle: For easy application of cleaning solutions.
* Microfiber Cloths: These are gentle and effective for wiping surfaces.
* Non-Scratch Scrub Sponge: For scrubbing without damaging the stove’s finish.
* Old Toothbrush: Perfect for cleaning tight spaces and burner grates.
* Paper Towels: For soaking up spills and drying surfaces.
* Safety Gloves: To protect your hands from harsh chemicals and grime.
* Trash Bags: For disposing of dirty paper towels and food scraps.
* Small Bowl or Container: For soaking small parts.
* Screwdriver (Optional): May be needed to remove certain stove parts for deeper cleaning.
* Safety Glasses (Recommended): To protect your eyes from splashes.
Phase 1: Disassembly and Initial Soak
This is where we break down the stove into its individual components for a thorough cleaning.
1. Turn Off the Gas Supply: This is crucial for safety! Locate the gas shut-off valve behind your stove (usually near the floor) and turn it to the “off” position.
2. Remove the Burner Grates: Carefully lift off the burner grates. These are usually the dirtiest parts, so we’ll give them extra attention.
3. Remove the Burner Caps and Heads: These are the round or star-shaped pieces that sit directly on top of the burners. Gently lift them off. Note their placement so you can easily reassemble them later.
4. Remove the Control Knobs: Most control knobs can be pulled straight off. If they’re stuck, try gently wiggling them while pulling. Never force them! Consult your stove’s manual if you’re unsure.
5. Prepare the Soaking Solution: Fill a sink or large tub with hot, soapy water. Add a generous squirt of dish soap.
6. Soak the Grates, Caps, and Knobs: Place the burner grates, burner caps, and control knobs into the hot, soapy water and let them soak for at least 30 minutes. The longer they soak, the easier it will be to remove the grime. For heavily soiled items, you can add a cup of white vinegar to the soaking solution.
Phase 2: Cleaning the Stove Top
Now, let’s tackle the main surface of the stove.
1. Remove Loose Debris: Use a dry paper towel or cloth to wipe away any loose crumbs, food particles, or spills from the stove top.
2. Create a Baking Soda Paste: In a small bowl, mix baking soda with a little water to form a thick paste. The consistency should be similar to toothpaste.
3. Apply the Baking Soda Paste: Generously apply the baking soda paste to any stubborn stains, burnt-on food, or greasy areas on the stove top.
4. Let the Paste Sit: Allow the baking soda paste to sit for at least 15-20 minutes. For really tough stains, you can let it sit for a few hours or even overnight. The baking soda will help to loosen the grime.
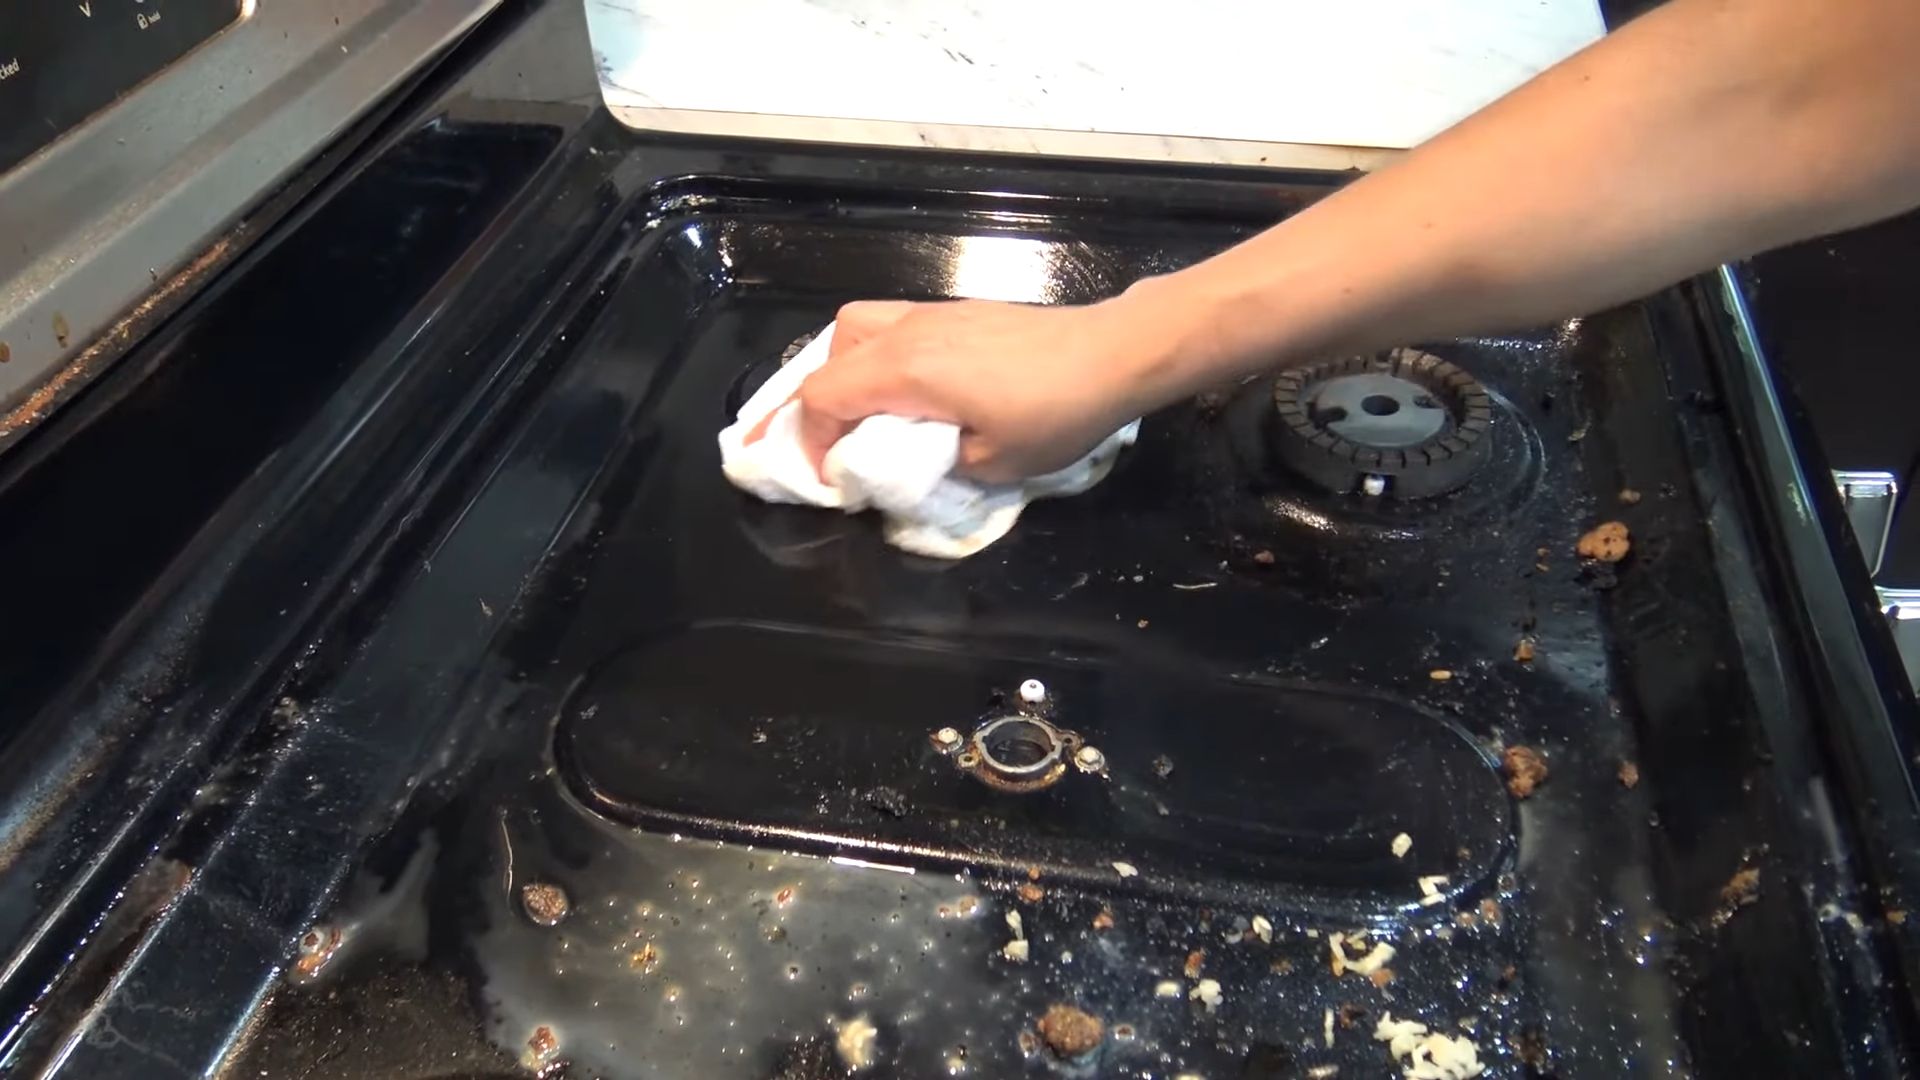
5. Scrub the Stove Top: Using a non-scratch scrub sponge or a microfiber cloth, gently scrub the stove top, focusing on the areas where you applied the baking soda paste. Avoid using abrasive scrubbers, as they can scratch the surface.
6. Wipe Away the Paste: Use a damp microfiber cloth to wipe away the baking soda paste and any loosened grime. Rinse the cloth frequently to remove the dirt.
7. Vinegar Spray (Optional): For extra cleaning power and to remove any remaining residue, fill a spray bottle with white vinegar and spray it lightly over the stove top.
8. Wipe with a Clean Cloth: Use a clean, dry microfiber cloth to wipe the stove top dry and remove any vinegar residue.
Phase 3: Deep Cleaning the Burner Caps and Grates
These parts often require extra attention due to direct contact with heat and food.
1. Remove from Soaking Solution: Take the burner grates, burner caps, and control knobs out of the soaking solution.
2. Scrub the Grates: Use a non-scratch scrub sponge or an old toothbrush to scrub the burner grates, removing any remaining grease, food particles, or rust. Pay close attention to the corners and crevices.
3. Clean the Burner Caps: Use an old toothbrush or a small scrub brush to clean the burner caps. Make sure to clear any clogs or debris from the small holes in the caps. These holes are essential for proper gas flow.
4. Ammonia Soak (Optional, for Heavily Soiled Caps): If your burner caps are extremely dirty, you can soak them in a solution of ammonia and water. Important: Do this in a well-ventilated area, and wear safety gloves and glasses. Mix equal parts ammonia and water in a container, and soak the caps for a few hours. Rinse thoroughly with water afterward.
5. Rinse Thoroughly: Rinse all the grates, caps, and knobs thoroughly with clean water to remove any soap or cleaning solution residue.
6. Dry Completely: Use a clean towel or allow the parts to air dry completely before reassembling them. Make sure everything is completely dry to prevent rust.
Phase 4: Cleaning the Burner Heads
The burner heads are crucial for even flame distribution.
1. Inspect the Burner Heads: Carefully inspect the burner heads for any clogs or debris.
2. Clean the Burner Ports: Use a thin wire, needle, or a specialized burner cleaning tool to carefully clear any clogs from the burner ports (the small holes around the burner head). Be gentle to avoid damaging the ports.
3. Compressed Air (Optional): Use compressed air to blow out any remaining debris from the burner ports.
4. Wipe Clean: Wipe the burner heads with a clean, damp cloth to remove any dust or residue.
Phase 5: Reassembly and Final Touches
Almost there! Let’s put everything back together and admire our sparkling clean stove.
1. Reassemble the Burner Heads: Place the burner heads back onto the stove top, ensuring they are properly aligned.
2. Reassemble the Burner Caps: Place the burner caps back onto the burner heads. Make sure they are seated correctly.
3. Reassemble the Burner Grates: Place the burner grates back onto the stove top.
4. Reattach the Control Knobs: Push the control knobs back onto their respective stems.
5. Turn On the Gas Supply: Carefully turn the gas shut-off valve back to the “on” position.
6. Test the Burners: Light each burner to ensure it is working properly. The flame should be blue and even. If the flame is yellow or uneven, there may still be a clog in the burner ports.
7. Final Wipe Down: Give the entire stove a final wipe down with a clean, dry microfiber cloth to remove any fingerprints or smudges.
Extra Tips and Tricks for a Sparkling Stove
* Preventative Measures: Wipe up spills immediately to prevent them from baking onto the stove top.
* Regular Cleaning: Give your stove a quick wipe down after each use to keep it looking its best.
* Stove Top Protectors: Consider using stove top protectors to catch spills and prevent them from reaching the stove surface.
* Lemon Juice: For a natural cleaning solution, try using lemon juice to remove stains and grease.
* Magic Eraser: A magic eraser can be effective for removing stubborn stains, but test it in an inconspicuous area first to ensure it doesn’t damage the finish.
Congratulations! You’ve successfully deep cleaned your
Conclusion
So, there you have it! Mastering the art of cleaning your gas stove doesn’t require expensive cleaners or hours of scrubbing. This simple, DIY trick, using ingredients you likely already have in your pantry, is a game-changer for anyone who wants a sparkling clean cooktop without the harsh chemicals. We’ve shown you how to effectively tackle grease, grime, and burnt-on food, leaving your gas stove looking brand new.
But why is this DIY method a must-try? Beyond the cost savings and eco-friendliness, it’s about efficiency and effectiveness. Commercial cleaners often contain strong chemicals that can damage your stove’s surface over time. This gentle yet powerful solution lifts away stubborn messes without the risk of scratching or discoloration. Plus, the satisfaction of creating your own cleaning solution and seeing the immediate results is incredibly rewarding.
Looking for variations? Absolutely! For extra-tough stains, consider adding a tablespoon of baking soda to your paste. The baking soda acts as a mild abrasive, helping to scrub away stubborn residue. If you prefer a more citrusy scent, a few drops of lemon essential oil can be added to the solution. Just be sure to test any variation on a small, inconspicuous area of your stove first to ensure it doesn’t react negatively. Another variation is to use white vinegar instead of apple cider vinegar. Both work well, but some people prefer the less pungent smell of white vinegar. You can also experiment with different ratios of ingredients to find what works best for your specific stove and the types of messes you typically encounter. Remember, the key is to create a paste that’s thick enough to cling to the surface but not so thick that it’s difficult to spread.
Don’t underestimate the power of prevention! After each use, wipe down your gas stove with a damp cloth to prevent grease and food from building up. This simple habit will significantly reduce the amount of deep cleaning required. Consider using stove burner covers to catch spills and splatters, making cleanup even easier.
We are confident that this DIY trick will revolutionize your gas stove cleaning routine. It’s simple, effective, and environmentally friendly. It’s a win-win!
Now, it’s your turn to give it a try! We encourage you to embrace this DIY approach and experience the satisfaction of a sparkling clean gas stove. Don’t forget to share your results with us! Post before-and-after photos on social media using #DIYGasStoveClean and let us know what variations you tried and how they worked for you. Your feedback will help others discover the magic of this simple yet effective cleaning solution. We can’t wait to see your gleaming gas stoves! Let’s ditch the harsh chemicals and embrace a cleaner, greener way to keep our kitchens sparkling.
Frequently Asked Questions (FAQ)
What if I don’t have apple cider vinegar? Can I use something else?
Yes, you can substitute apple cider vinegar with white vinegar. White vinegar is another excellent natural cleaner and degreaser. It has a slightly stronger scent than apple cider vinegar, but it works just as effectively in breaking down grease and grime. If you’re sensitive to smells, you might want to ventilate your kitchen well while cleaning with white vinegar. The cleaning power will be very similar, so feel free to use whichever vinegar you have on hand.
How often should I clean my gas stove using this method?
The frequency of cleaning depends on how often you cook and how messy your cooking tends to be. For most households, a deep clean using this DIY method every one to two weeks is sufficient. However, it’s a good practice to wipe down your gas stove after each use to prevent buildup. This daily wipe-down will significantly reduce the need for frequent deep cleans. If you notice spills or splatters, clean them up immediately to prevent them from hardening and becoming more difficult to remove later.
Can I use this cleaning solution on other surfaces in my kitchen?
While this DIY cleaning solution is primarily designed for gas stoves, it can also be used on other surfaces in your kitchen, such as countertops, backsplashes, and even stainless steel appliances. However, it’s always a good idea to test the solution on a small, inconspicuous area first to ensure it doesn’t damage the surface. Avoid using it on delicate surfaces like marble or granite, as the vinegar could potentially etch the stone. For other surfaces, dilute the solution with water to make it less concentrated.
What if I have really stubborn, burnt-on food that won’t come off?
For extremely stubborn, burnt-on food, you might need to take a few extra steps. First, try letting the cleaning paste sit on the affected area for a longer period, perhaps 30 minutes to an hour. This will give the vinegar and dish soap more time to penetrate and loosen the residue. You can also try gently scrubbing the area with a non-abrasive scouring pad or an old toothbrush. Avoid using steel wool or harsh abrasives, as these can scratch the surface of your stove. If the burnt-on food is still resistant, you can try making a paste of baking soda and water and applying it to the area overnight. The baking soda will help to soften the residue, making it easier to remove in the morning.
Is this cleaning solution safe for my family and pets?
Yes, this DIY cleaning solution is generally safe for your family and pets, as it uses natural ingredients like vinegar and dish soap. However, it’s still important to take precautions. Keep the cleaning solution out of reach of children and pets. Avoid spraying the solution directly into their eyes or mouths. If you have pets with sensitive skin, you might want to keep them away from the area while you’re cleaning. After cleaning, wipe down the surface thoroughly with a damp cloth to remove any residue. If you’re concerned about allergies or sensitivities, you can always wear gloves while cleaning.
My gas stove has electronic components. Is it safe to use this method?
Yes, it’s generally safe to use this method on gas stoves with electronic components, but you need to be extra careful to avoid getting any liquid inside the electronic parts. Before cleaning, unplug your gas stove to prevent any electrical accidents. When applying the cleaning solution, use a cloth or sponge that is only slightly damp, not soaking wet. Avoid spraying the solution directly onto the electronic components. If you accidentally get liquid inside the electronic parts, dry them thoroughly with a clean cloth before plugging the stove back in. If you’re unsure about how to clean around the electronic components, consult your stove’s user manual or contact a qualified appliance repair technician.
Can I use essential oils other than lemon?
Yes, you can experiment with other essential oils to add a pleasant scent to your cleaning solution. Lavender, tea tree, and eucalyptus are all good options. Just be sure to use pure essential oils and add only a few drops, as some essential oils can be quite potent. As with any new ingredient, test the essential oil on a small, inconspicuous area of your stove first to ensure it doesn’t react negatively. Avoid using essential oils that are known to be irritating or toxic.
What type of dish soap should I use?
Any mild dish soap will work well in this DIY cleaning solution. Choose a dish soap that is effective at cutting through grease and grime. You can use a natural or eco-friendly dish soap if you prefer. Avoid using dish soaps that contain harsh chemicals or abrasives, as these can damage the surface of your stove.
How do I clean the gas stove grates?
The gas stove grates can be cleaned using the same DIY cleaning solution. Remove the grates from the stove and soak them in a sink or tub filled with warm water and the cleaning solution. Let them soak for at least 30 minutes to loosen the grease and grime. Then, scrub them with a non-abrasive scouring pad or brush. For stubborn residue, you can try using a paste of baking soda and water. Rinse the grates thoroughly with clean water and dry them before placing them back on the stove. You can also clean the grates in the dishwasher if they are dishwasher-safe.


Leave a Comment