

Clean Fridge Coils Easily – it’s a chore we all dread, but trust me, it’s one of the simplest and most impactful things you can do to keep your refrigerator running smoothly and efficiently! Have you ever wondered why your fridge seems to be working overtime, humming loudly and struggling to keep things cold? The culprit might just be lurking behind or underneath: dusty, dirty coils.
While cleaning fridge coils might not have the same romantic history as, say, tending a rose garden, its importance is deeply rooted in practicality. Think of it this way: refrigerators have been essential for food preservation for over a century, evolving from iceboxes to the sophisticated appliances we rely on today. Keeping them running efficiently is not just about convenience; it’s about reducing energy consumption and minimizing food waste – a practice that aligns with a more sustainable lifestyle.
Why is this DIY trick so crucial? Well, those coils are responsible for releasing heat, and when they’re covered in dust and grime, they can’t do their job properly. This forces your fridge to work harder, using more energy and potentially shortening its lifespan. I’m going to show you how to clean fridge coils easily with just a few simple tools and a little bit of elbow grease. You’ll be amazed at the difference it makes – not just in your energy bill, but also in the overall performance of your refrigerator. Let’s get started!
DIY: Breathe New Life into Your Fridge by Cleaning the Coils
Okay, let’s face it, cleaning fridge coils isn’t exactly on anyone’s list of fun weekend activities. But trust me, it’s one of those small tasks that makes a HUGE difference. A fridge with dusty, dirty coils has to work harder to keep your food cold, which means higher energy bills and a shorter lifespan for your appliance. So, grab your tools, and let’s get this done! I promise, you’ll feel so accomplished afterward.
Why Clean Your Fridge Coils?
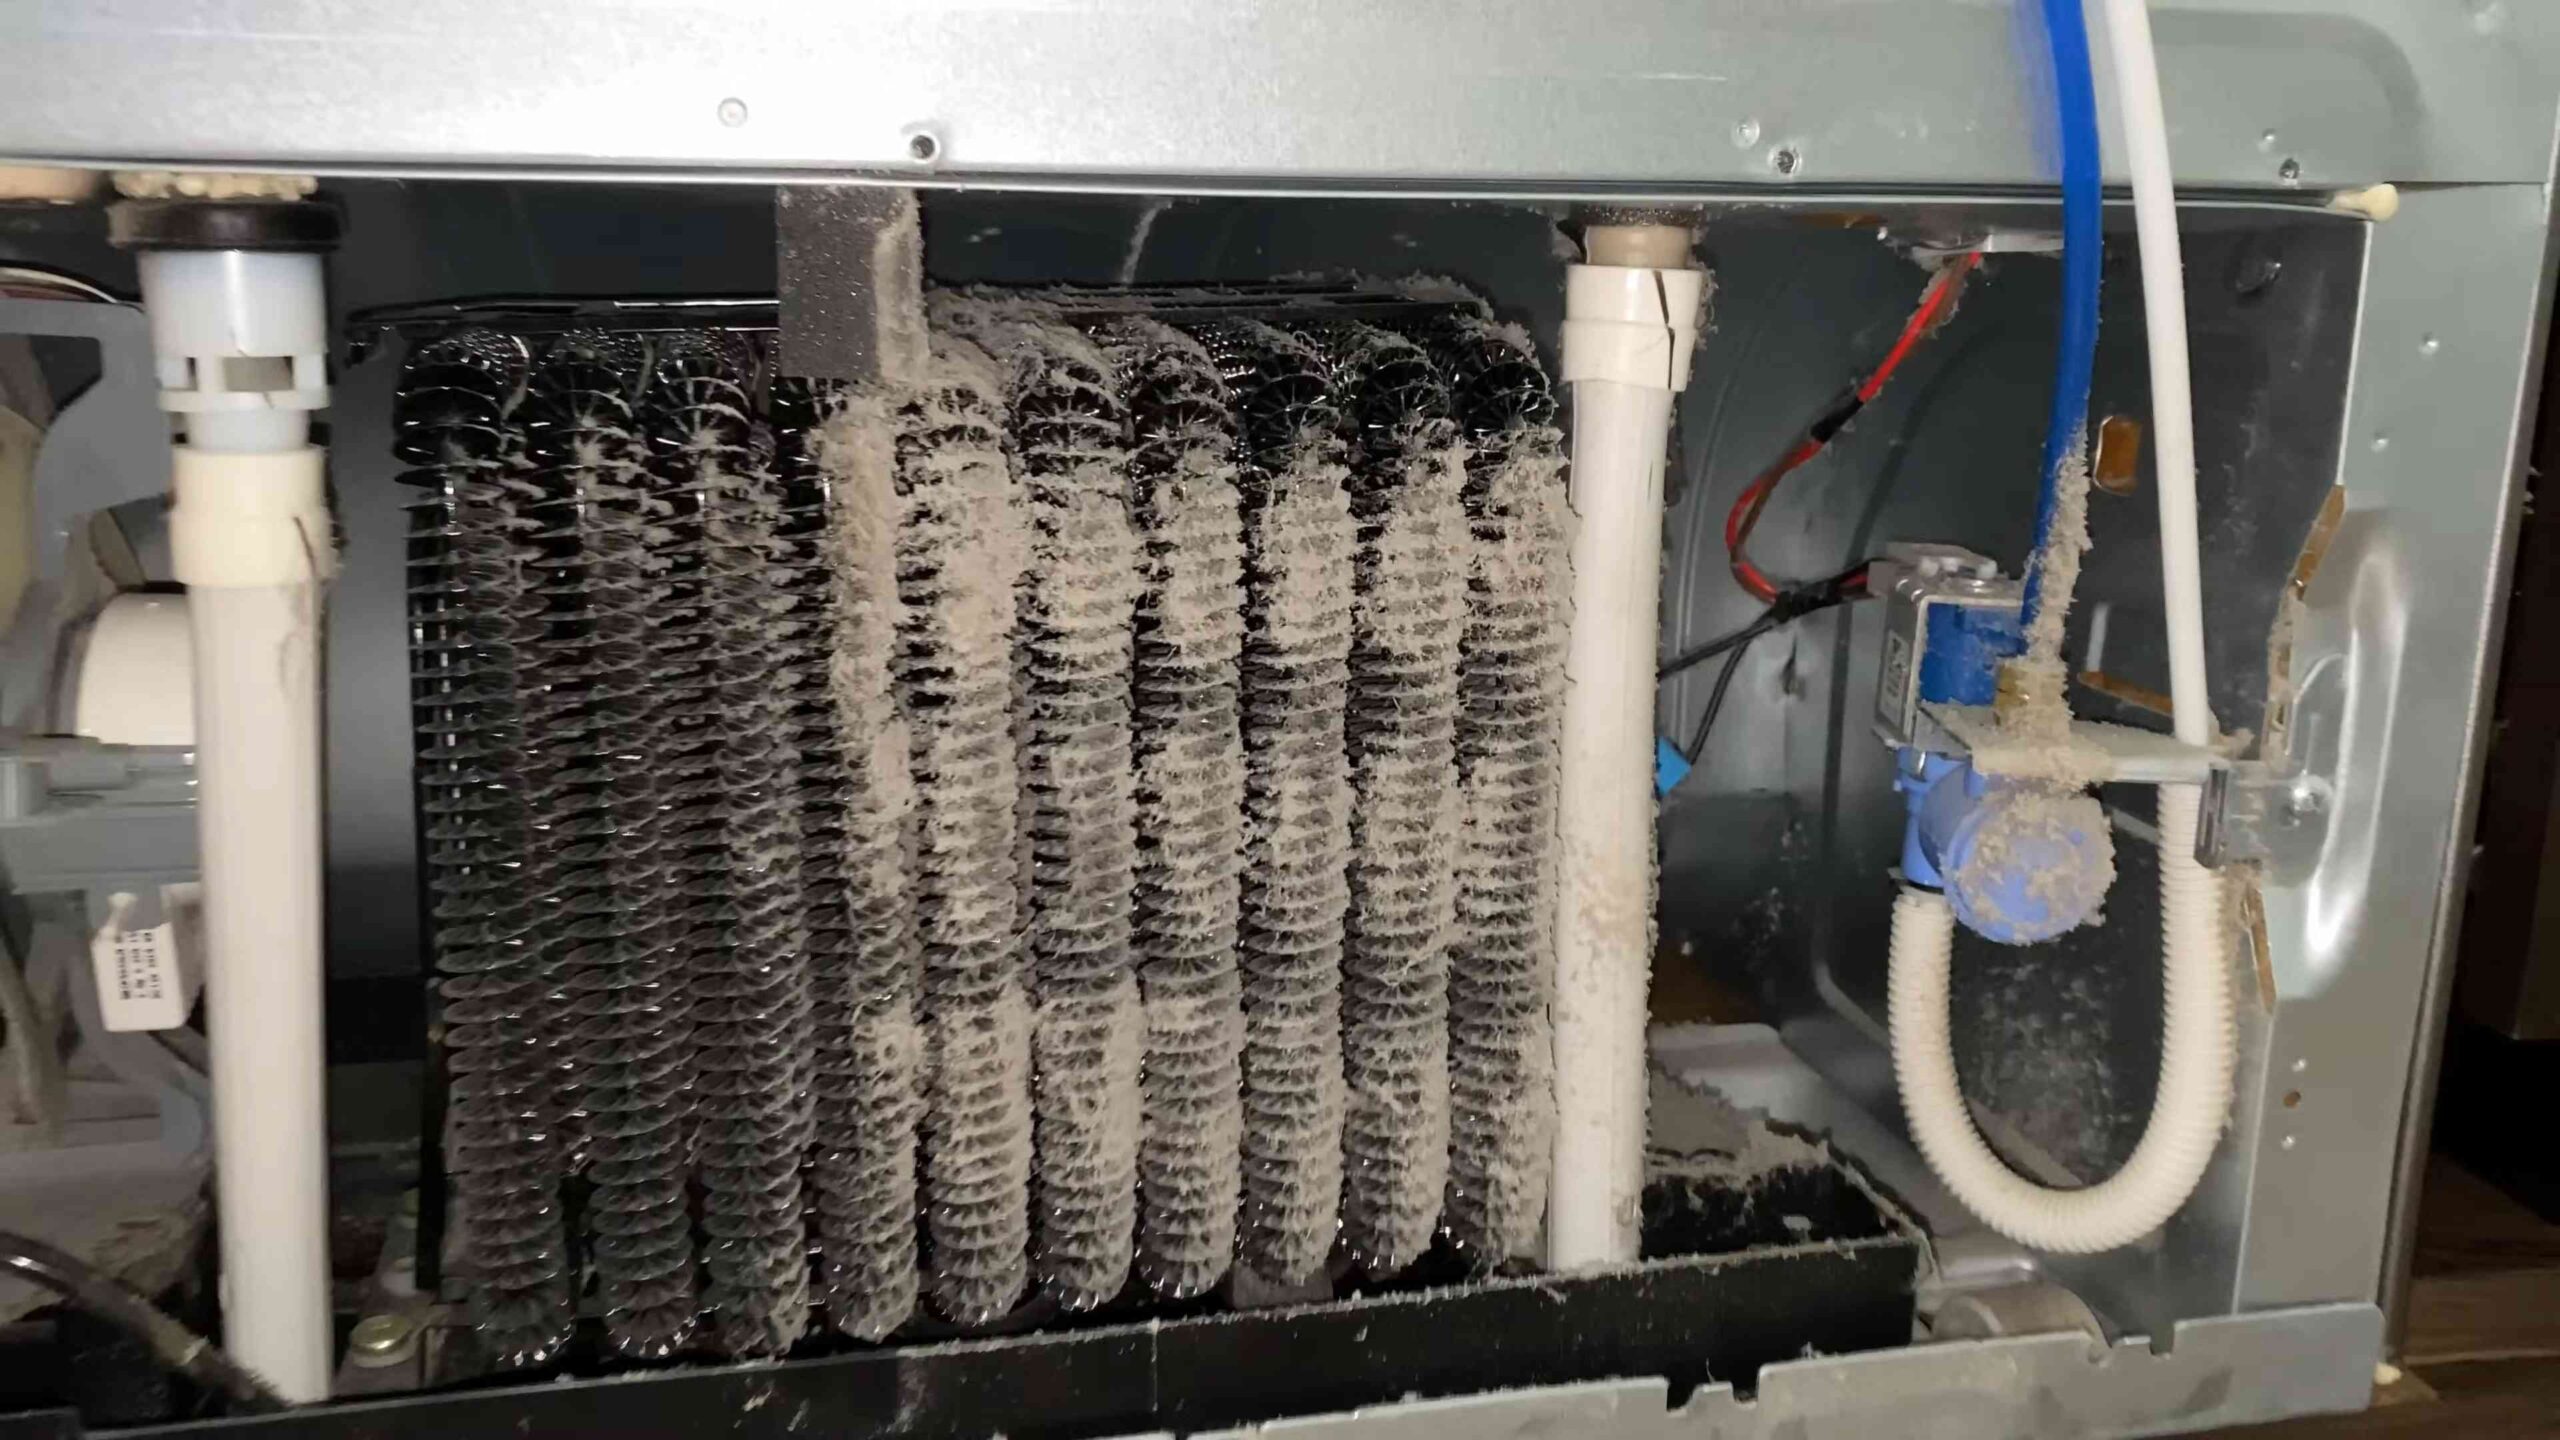
Before we dive in, let’s quickly cover why this is so important. Dirty coils act like a blanket, trapping heat and forcing your fridge’s compressor to run longer and harder. This leads to:
* Increased Energy Consumption: A dirty fridge can use up to 30% more energy! Think of all the money you could save.
* Reduced Lifespan: Overworking the compressor can cause it to fail prematurely, meaning you’ll need to replace your fridge sooner.
* Poor Cooling Performance: Your food might not stay as cold as it should, leading to spoilage and wasted groceries.
* Loud Operation: A struggling compressor can be noisy. Cleaning the coils can quiet things down.
What You’ll Need
Gathering your supplies beforehand will make the whole process smoother. Here’s what I recommend:
* Vacuum Cleaner with Hose Attachment: A must-have for sucking up all that dust.
* Soft Brush Attachment: This will help loosen stubborn dirt without damaging the coils. A crevice tool can also be helpful for tight spots.
* Screwdriver (Phillips or Flathead): You might need this to remove a panel covering the coils.
* Cleaning Cloth or Rag: For wiping down any surfaces.
* Work Gloves (Optional): To keep your hands clean.
* Flashlight or Headlamp: To see what you’re doing in those dark corners.
* Appliance Dolly (Optional): If your fridge is heavy and difficult to move.
* Safety Glasses (Optional): To protect your eyes from dust.
Safety First!
Before you even think about touching your fridge, unplug it! This is crucial to prevent electric shock. Seriously, don’t skip this step. Also, if you’re moving the fridge, be careful not to strain your back. Get help if needed.
Locating Your Fridge Coils
The location of your fridge coils depends on the model. Here’s where to look:
* Back of the Fridge: This is the most common location. You’ll usually see a black panel covering the coils.
* Bottom Front of the Fridge: Some fridges have a grill at the bottom front that you can remove to access the coils.
* Top of the Fridge: Less common, but some older models have coils on top.
If you’re not sure, consult your fridge’s owner’s manual.
Step-by-Step Guide to Cleaning Your Fridge Coils
Alright, let’s get down to business!
1. Unplug the Fridge: I can’t stress this enough. Safety first!
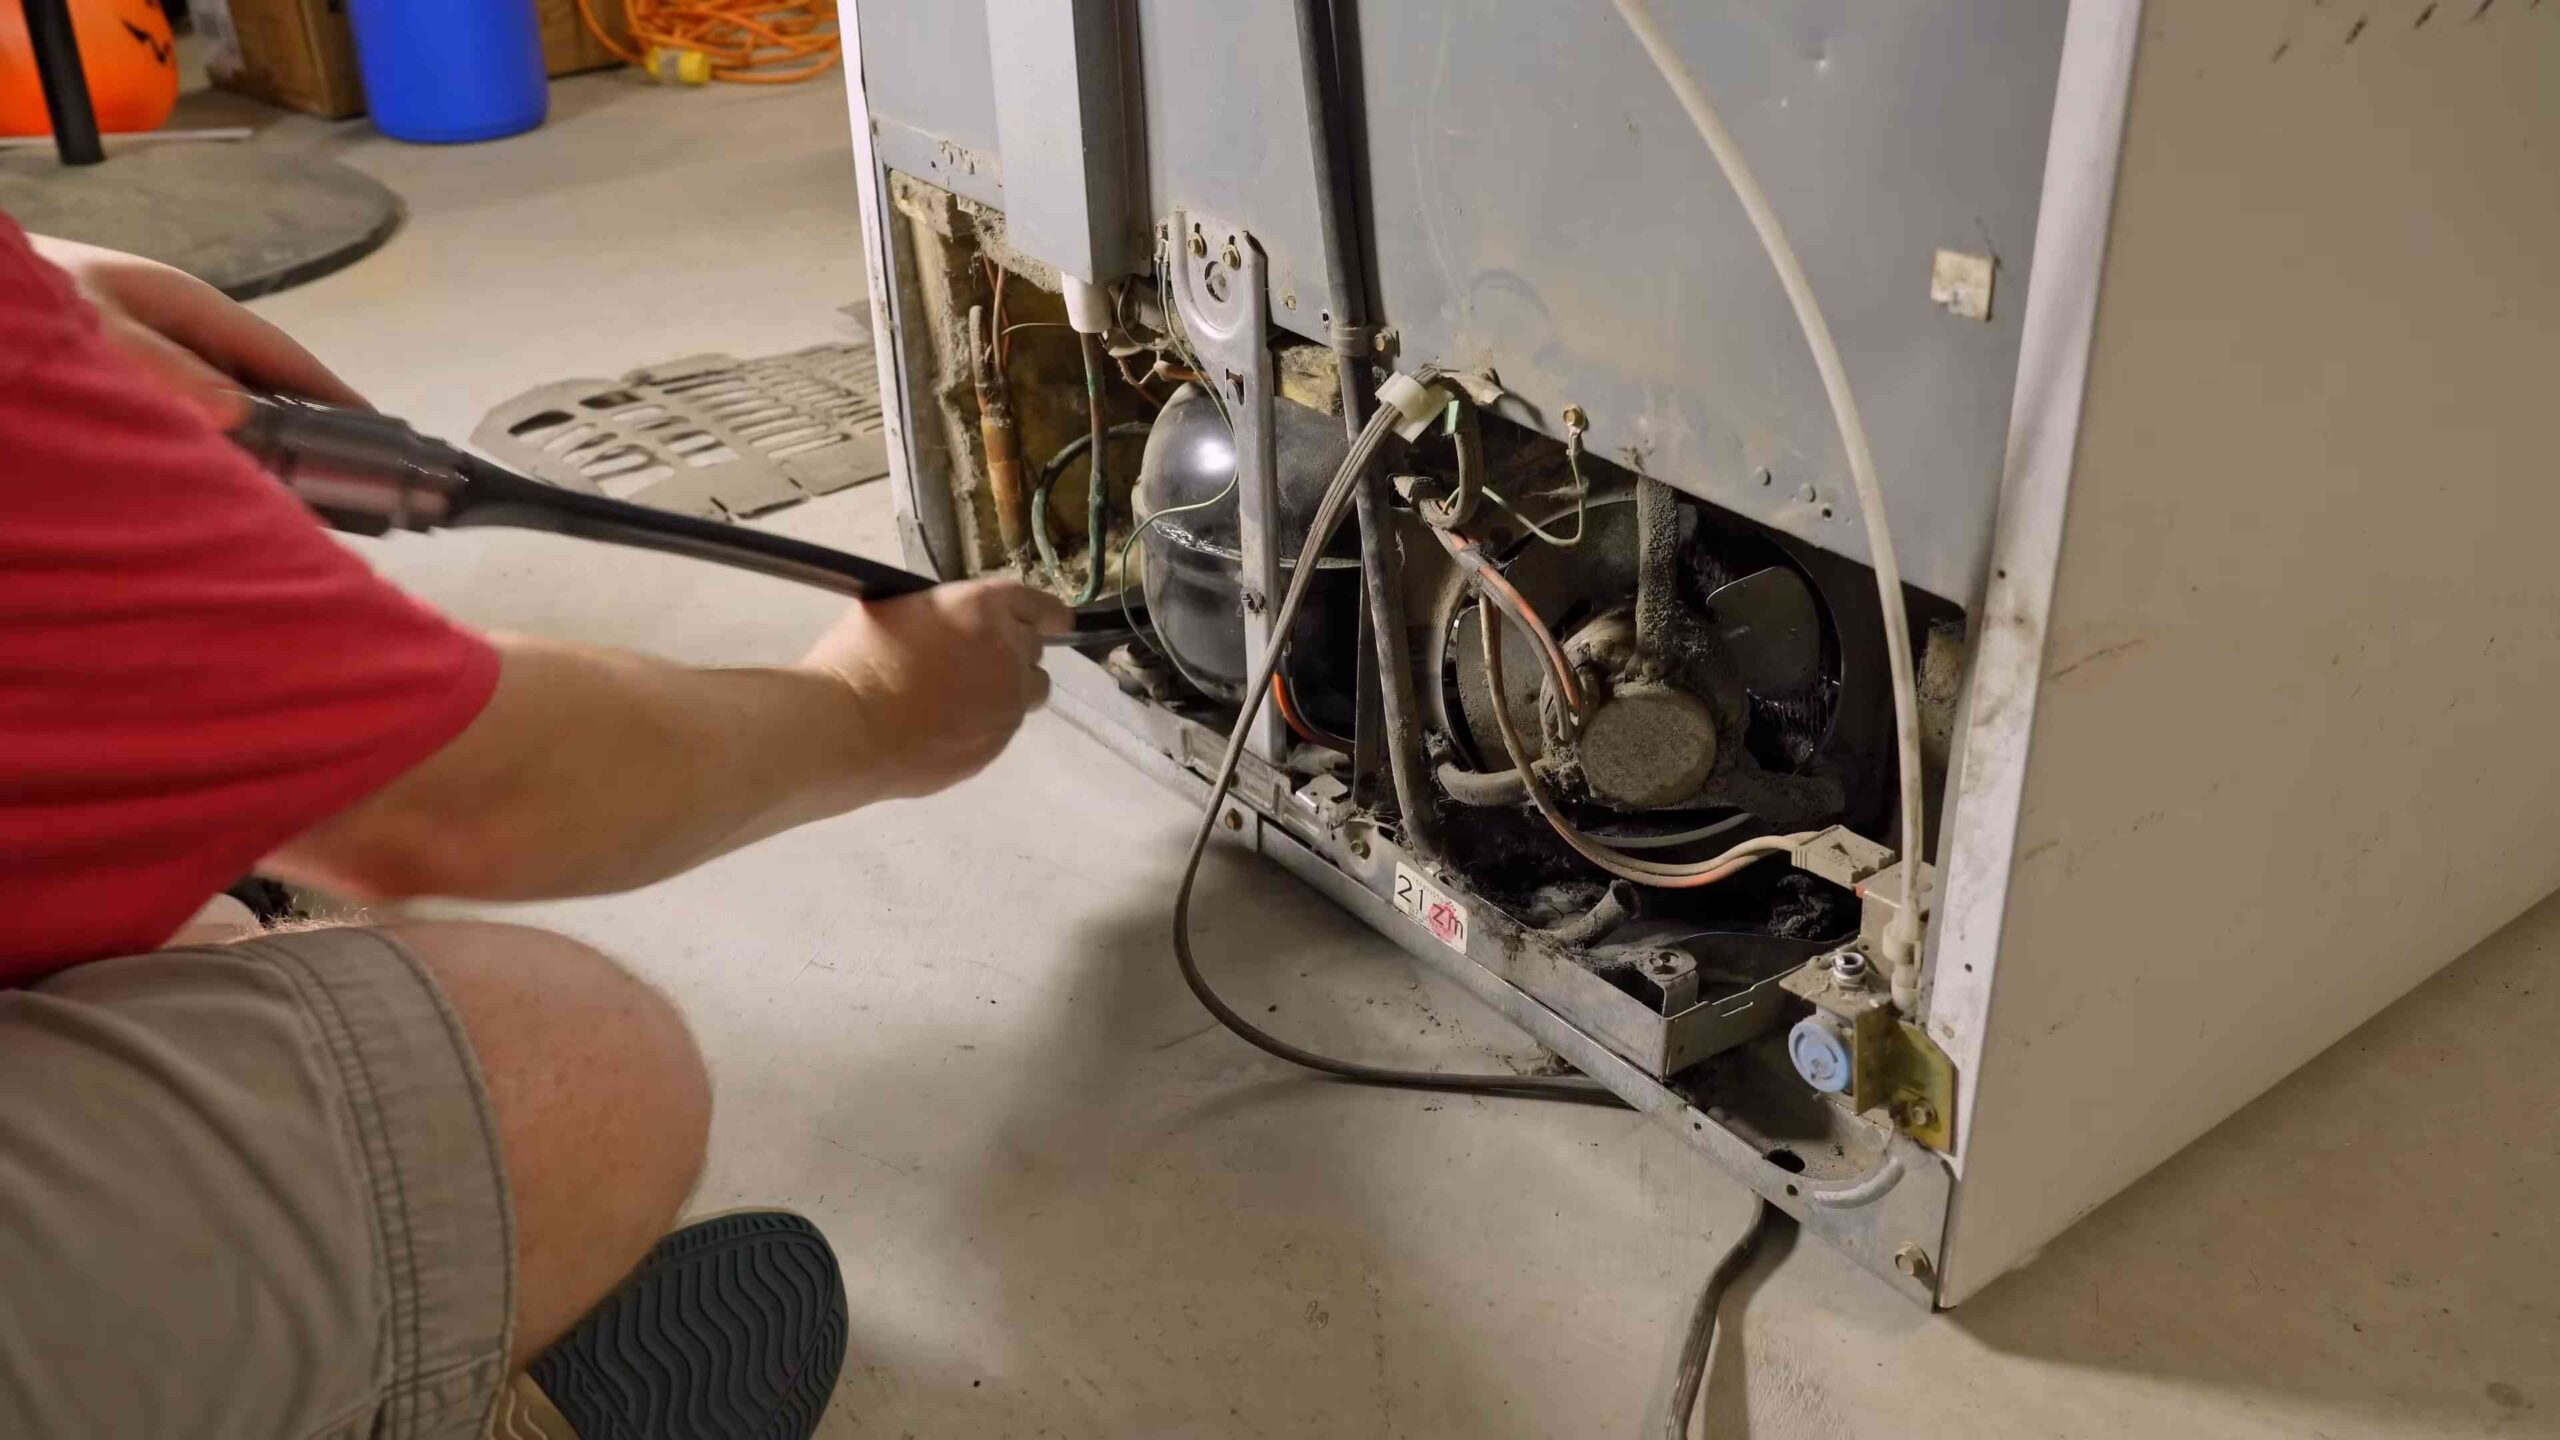
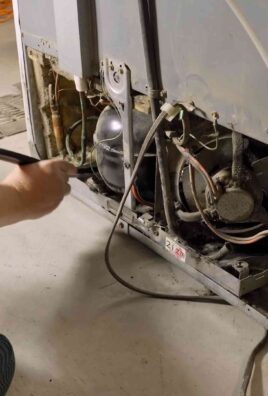
2. Move the Fridge (If Necessary): If the coils are on the back, carefully pull the fridge away from the wall. Be mindful of your flooring and use an appliance dolly if needed. If the coils are at the bottom front, you might not need to move the fridge.
3. Remove the Access Panel (If Applicable): If there’s a panel covering the coils, use your screwdriver to remove it. Keep the screws in a safe place so you don’t lose them.
4. Vacuum the Coils: This is the main event! Attach the hose and brush attachment to your vacuum cleaner. Gently vacuum the coils, working from top to bottom. Use the brush to loosen any stubborn dirt and dust. Pay close attention to the spaces between the coils. This is where dust loves to hide.
5. Use a Crevice Tool (If Needed): For those hard-to-reach areas, switch to the crevice tool attachment. This will help you get into those tight spaces and remove any remaining dust.
6. Wipe Down the Surrounding Area: While you’re at it, wipe down the area around the coils with a damp cloth. This will help prevent dust from accumulating again quickly.
7. Reinstall the Access Panel (If Applicable): Once the coils are clean and the surrounding area is wiped down, reattach the access panel using the screws you removed earlier.
8. Move the Fridge Back into Place: Carefully push the fridge back into its original position. Again, be mindful of your flooring.
9. Plug the Fridge Back In: Plug the fridge back into the outlet.
10. Wait and Listen: Give your fridge a few hours to cool down. You should notice that it runs more quietly and efficiently.
Dealing with Stubborn Dirt
Sometimes, vacuuming alone isn’t enough to remove all the dirt and grime. If you encounter stubborn dirt, try these tips:
* Use a Soft Brush: A soft brush (like a paintbrush) can help loosen the dirt without damaging the coils.
* Damp Cloth: Gently wipe the coils with a damp cloth. Be careful not to get the coils too wet.
* Compressed Air: Canned compressed air can be used to blow away stubborn dust. Be sure to wear safety glasses to protect your eyes.
How Often Should You Clean Your Fridge Coils?
I recommend cleaning your fridge coils at least twice a year. However, if you have pets or live in a dusty environment, you might need to clean them more often. A good rule of thumb is to check the coils every few months and clean them whenever you see a significant buildup of dust.
Troubleshooting
* Can’t Find the Coils: If you’re having trouble locating the coils, consult your fridge’s owner’s manual. You can usually find a digital copy online if you don’t have the original.
* Coils are Frozen: If the coils are frozen, unplug the fridge and let it defrost completely before cleaning.
* Still Not Cooling Properly: If your fridge is still not cooling properly after cleaning the coils, there might be another issue, such as a faulty thermostat or compressor. In this case, it’s best to call a qualified appliance repair technician.
Extra Tips and Tricks
* Use a Coil Cleaning Brush: These brushes are specifically designed for cleaning fridge coils and can be very effective.
* Clean the Condenser Fan: If your fridge has a condenser fan, clean it as well. This fan helps circulate air around the coils and can also become dusty.
* Check the Door Seals: Make sure the door seals are clean and in good condition. Leaky seals can cause your fridge to work harder.
* Don’t Overfill Your Fridge: Overfilling your fridge can restrict airflow and make it harder for it to cool properly.
Maintaining Your Fridge for Optimal Performance
Cleaning the coils is just one part of maintaining your fridge. Here are some other things you can do to keep it running smoothly:
* Keep the Interior Clean: Wipe up spills immediately and clean the interior regularly with a mild detergent.
* Organize Your Food: Proper organization helps with airflow and prevents food from spoiling.
* Check the Temperature: Make sure your fridge is set to the correct temperature (usually between 35°F and 38°F).
* Replace the Water Filter (If Applicable): If your fridge has a water filter, replace it according to the manufacturer’s instructions.
Cleaning your fridge coils might seem like a chore, but it’s a simple task that can save you money and extend the life of your appliance. So, roll up your sleeves, grab your vacuum, and get ready to give your fridge some much-needed TLC! You’ll be amazed at the difference it makes.
Conclusion
So, there you have it! Cleaning your fridge coils might seem like a daunting task, but with this simple DIY trick, it becomes a breeze. We’ve shown you how to bypass expensive professional services and achieve sparkling clean coils with minimal effort and maximum impact. The benefits are undeniable: improved energy efficiency, a longer lifespan for your refrigerator, and potentially lower electricity bills. Who wouldn’t want that?
This isn’t just about saving money; it’s about taking control of your home maintenance and understanding how your appliances work. By regularly cleaning your fridge coils, you’re actively contributing to a more sustainable and efficient household. Think of it as a small act of self-care for your refrigerator, ensuring it runs smoothly and reliably for years to come.
But don’t just take our word for it. We encourage you to try this DIY trick for cleaning fridge coils yourself. You might be surprised at how much dust and debris accumulates on those coils, and you’ll definitely notice the difference in your refrigerator’s performance afterward.
Variations and Suggestions:
* **For stubborn dirt:** If you encounter particularly stubborn dirt or grime, try using a slightly damp cloth or sponge to gently wipe the coils after vacuuming. Be sure to unplug the refrigerator first and allow the coils to dry completely before plugging it back in.
* **Use a specialized coil brush:** While a vacuum cleaner attachment works well, you can also purchase a specialized coil brush designed specifically for cleaning refrigerator coils. These brushes are often long and flexible, making it easier to reach tight spaces.
* **Preventative measures:** To minimize dust buildup, consider placing a small air filter near the refrigerator or regularly dusting the area around it.
* Frequency:** Depending on your environment (pets, dusty areas), you might need to clean your coils more or less frequently. Check them every 3-6 months to assess their condition.
We’re confident that you’ll find this DIY method effective and rewarding. Once you’ve given it a try, we’d love to hear about your experience! Share your tips, tricks, and before-and-after photos in the comments below. Let’s create a community of fridge coil cleaning experts! Your insights could help others discover the ease and benefits of this simple maintenance task. So, grab your vacuum cleaner, unplug your fridge, and get ready to experience the satisfaction of a clean and efficient refrigerator. Happy cleaning!
Frequently Asked Questions (FAQ)
Why is it so important to clean my fridge coils?
Cleaning your fridge coils is crucial for several reasons. First and foremost, dirty coils force your refrigerator to work harder to maintain the desired temperature. This increased workload translates directly into higher energy consumption and, consequently, higher electricity bills. Secondly, overworked coils can lead to premature wear and tear on the refrigerator’s components, shortening its lifespan and potentially requiring costly repairs or even replacement. Finally, clean coils ensure optimal cooling performance, keeping your food fresh and safe for longer. Neglecting coil cleaning can lead to food spoilage and potential health risks.
How often should I clean my fridge coils?
The frequency of cleaning depends on various factors, including the environment in your home. If you have pets, live in a dusty area, or have a lot of foot traffic near your refrigerator, you may need to clean the coils more frequently. As a general guideline, it’s recommended to check your fridge coils every 3 to 6 months. If you notice a significant buildup of dust and debris, it’s time for a cleaning. If your refrigerator is located in a relatively clean environment, you may be able to extend the cleaning interval to once or twice a year. Regular inspection is key to determining the optimal cleaning schedule for your specific situation.
What tools do I need to clean my fridge coils?
The beauty of this DIY trick is that it requires minimal tools. The most essential item is a vacuum cleaner with a hose attachment and a brush attachment. The hose allows you to reach the coils, which are typically located at the back or bottom of the refrigerator, and the brush attachment helps to loosen and remove dust and debris. You may also want to have a flashlight on hand to better illuminate the coils and identify areas that need extra attention. A damp cloth or sponge can be useful for wiping away stubborn dirt or grime. Finally, remember to unplug your refrigerator before you begin cleaning to ensure your safety.
Is it safe to clean fridge coils myself?
Yes, cleaning fridge coils yourself is generally safe, as long as you take a few precautions. The most important step is to unplug the refrigerator from the power outlet before you begin. This will prevent any electrical shocks or damage to the appliance. Be careful not to damage the coils themselves during the cleaning process. Avoid using excessive force or sharp objects that could puncture or bend the coils. If you’re using a damp cloth or sponge, make sure it’s not dripping wet, as excess moisture could damage the electrical components. Finally, allow the coils to dry completely before plugging the refrigerator back in.
What if I can’t reach the fridge coils easily?
Accessing the fridge coils can sometimes be challenging, depending on the refrigerator model and its location. If the coils are located at the back of the refrigerator, you may need to pull the appliance away from the wall to gain access. Be careful not to damage the floor or the wall during this process. If the coils are located at the bottom of the refrigerator, you may need to remove a lower panel or grill to access them. Consult your refrigerator’s owner’s manual for specific instructions on how to access the coils. If you’re still having trouble reaching the coils, consider using a specialized coil brush, which is designed to reach tight spaces.
Can I use compressed air to clean fridge coils?
While compressed air can be used to clean fridge coils, it’s generally not the preferred method. Compressed air can blow dust and debris into the air, which can then settle back onto the coils or other surfaces in your home. It can also be difficult to control the direction of the airflow, potentially causing dust to spread to unwanted areas. A vacuum cleaner with a brush attachment is a more effective and controlled method for removing dust and debris from fridge coils. If you do choose to use compressed air, be sure to wear a dust mask and eye protection to avoid inhaling or getting dust in your eyes.
What if my fridge coils are frozen?
If your fridge coils are frozen, it indicates a problem with your refrigerator’s defrost system. Cleaning the coils in this state won’t solve the underlying issue. You’ll need to address the defrost problem first. This may involve checking the defrost timer, defrost heater, or defrost thermostat. Consult your refrigerator’s owner’s manual or contact a qualified appliance repair technician for assistance. Attempting to manually defrost the coils with a hairdryer or other heat source can be dangerous and may damage the refrigerator.
Will cleaning my fridge coils really save me money?
Yes, cleaning your fridge coils can indeed save you money on your electricity bill. Dirty coils force your refrigerator to work harder to maintain the desired temperature, which increases energy consumption. By cleaning the coils, you’re allowing the refrigerator to operate more efficiently, reducing its energy consumption and lowering your electricity bill. The amount of savings will vary depending on the severity of the coil buildup and your electricity rates, but even a small reduction in energy consumption can add up over time. Furthermore, by extending the lifespan of your refrigerator, you’re avoiding the cost of premature repairs or replacement.


Leave a Comment