

Clean Ceiling Fan Easy? Absolutely! Let’s be honest, when was the last time you really looked up at your ceiling fan? I’m willing to bet a layer of dust bunnies has taken up residence, turning your breezy oasis into a sneeze-inducing nightmare. We often overlook these silent workhorses, but a dusty ceiling fan isn’t just unsightly; it’s circulating allergens and reducing its efficiency, costing you money on your energy bill.
For generations, keeping a clean and healthy home has been a cornerstone of well-being. While our ancestors might have used feather dusters and elbow grease, we’ve got a secret weapon: DIY hacks! This article is your ultimate guide to clean ceiling fan easy, with simple, effective methods that won’t require you to be a contortionist or spend hours scrubbing. I’m going to share my favorite tricks for a sparkling clean fan in minutes, using items you probably already have around the house. Say goodbye to dust and hello to fresh, clean air!

DIY: Sparkling Clean Ceiling Fan Without the Mess!
Okay, let’s be honest, cleaning ceiling fans is one of those chores we all dread. Dust bunnies raining down on you, the awkward balancing act on a chair… it’s just not fun. But fear not! I’ve got a super easy, practically mess-free method that will have your ceiling fan blades gleaming in no time. This hack uses a pillowcase and a little bit of elbow grease to trap all the dust before it has a chance to escape. Trust me, once you try this, you’ll never go back to the old way.
What You’ll Need:
* A pillowcase (an old one you don’t mind getting dusty is perfect!)
* A sturdy step stool or ladder (safety first!)
* All-purpose cleaner or dusting spray (optional, but helpful for stubborn grime)
* A damp cloth or sponge (for a final wipe down)
Step-by-Step Guide: The Pillowcase Ceiling Fan Cleaning Hack
This method is so simple, you’ll wonder why you haven’t been doing it this way all along!
1. Safety First: Before you even think about grabbing that pillowcase, make sure your ceiling fan is turned OFF. We don’t want any accidental spinning blades causing chaos. Also, position your step stool or ladder securely under the fan. Make sure it’s stable and you can comfortably reach the blades without overreaching.
2. Prepare Your Pillowcase: If your fan blades are particularly dusty or greasy, I recommend lightly spraying the inside of your pillowcase with your all-purpose cleaner or dusting spray. This will help the dust cling to the fabric and prevent it from scattering. Don’t overdo it, just a light mist is all you need.
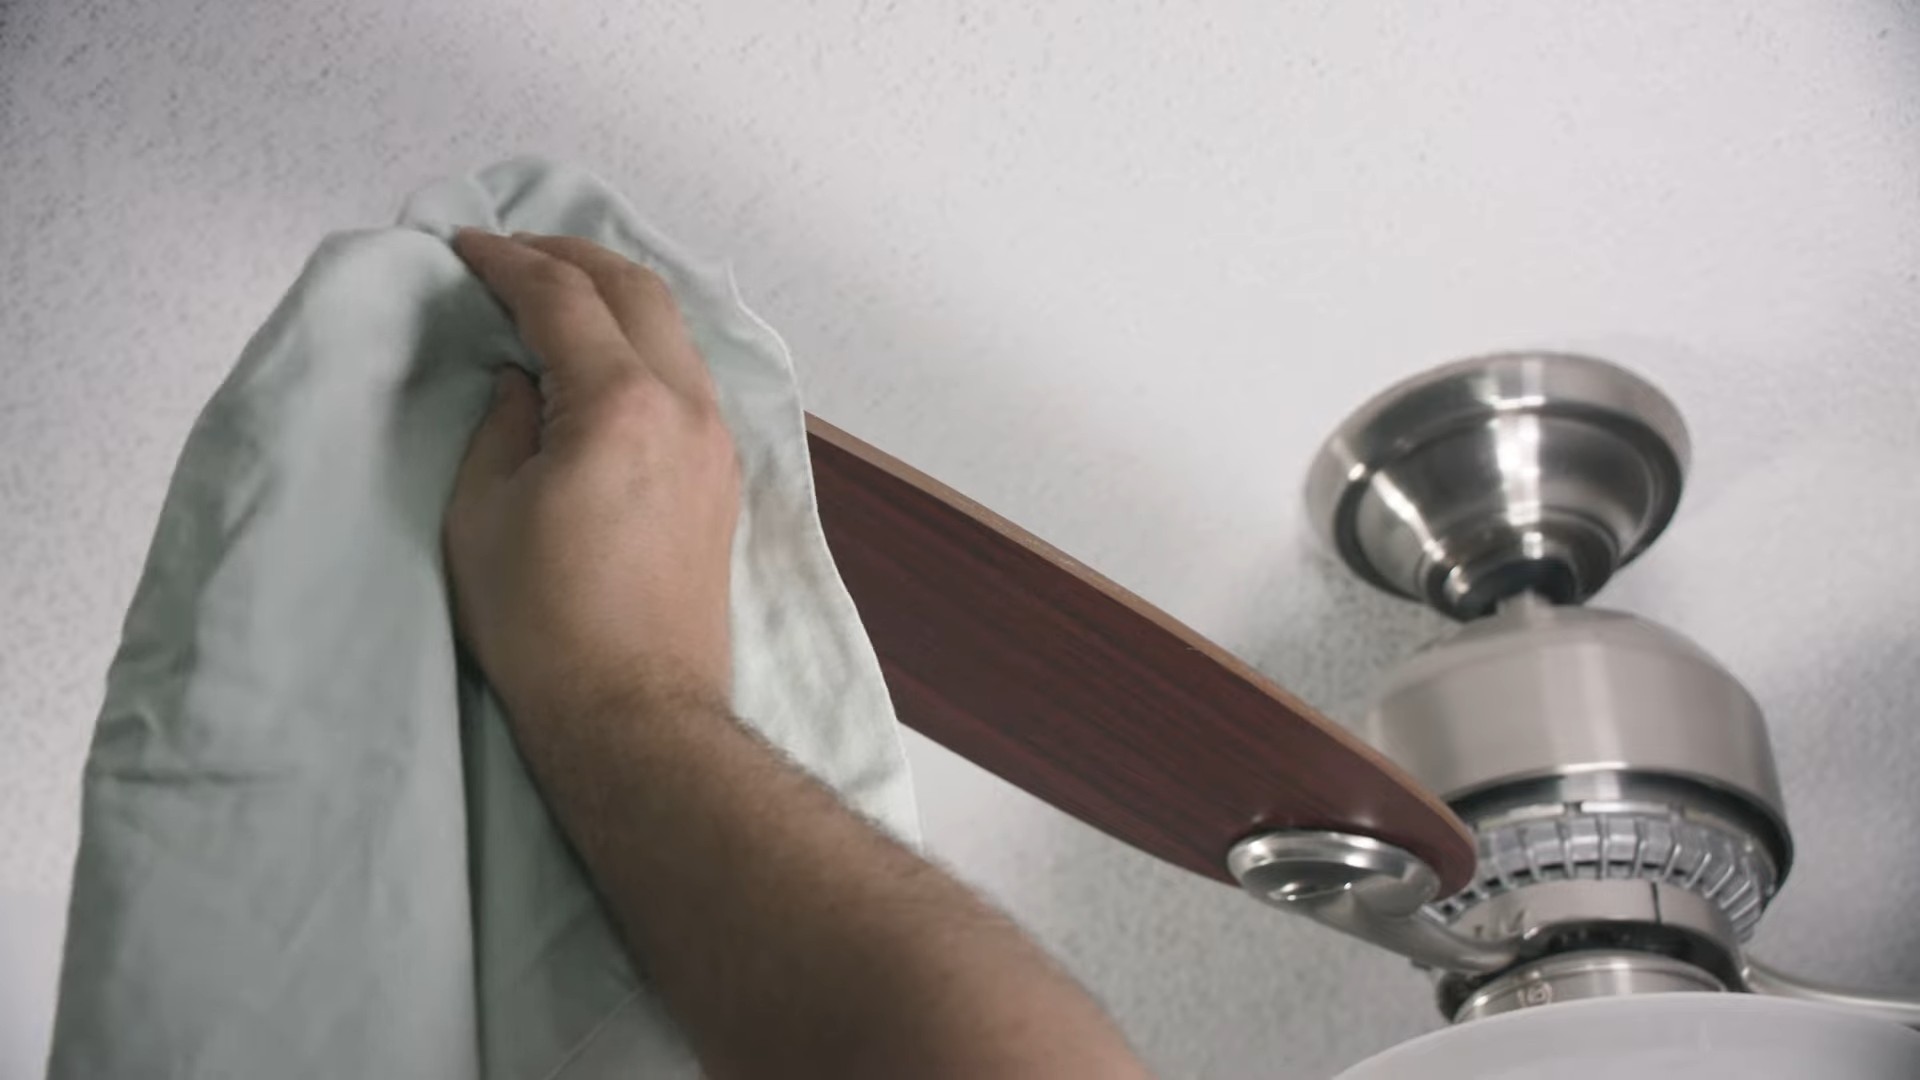
3. Encase the Blade: Now for the magic! Carefully slide the pillowcase over one of the fan blades, encasing it completely. Imagine you’re putting a little sweater on the blade.
4. Wipe and Trap: Once the blade is inside the pillowcase, gently press the pillowcase against the top and bottom surfaces of the blade. Then, slowly pull the pillowcase towards the open end, effectively wiping the dust and grime off the blade and trapping it inside the pillowcase. Think of it like milking a cow, but with dust!
5. Repeat for Each Blade: Repeat steps 3 and 4 for each of the remaining fan blades. Make sure to use a clean section of the pillowcase for each blade to avoid just spreading the dust around.
6. Empty the Pillowcase (Carefully!): Once you’ve cleaned all the blades, take the pillowcase outside or over a trash can and carefully shake out all the accumulated dust. You might be surprised (and slightly disgusted) by how much dust you’ve collected!
7. Final Wipe Down (Optional): For a truly sparkling clean finish, I like to give each blade a final wipe down with a damp cloth or sponge. This will remove any lingering streaks or residue.
8. Admire Your Handiwork: Step back and admire your sparkling clean ceiling fan! You’ve successfully conquered one of the most dreaded household chores with minimal mess and maximum efficiency.
Dealing with Stubborn Grime
Sometimes, especially in kitchens, ceiling fan blades can accumulate a layer of greasy grime that’s a bit tougher to remove. Here’s how to tackle that:
1. Pre-Soak (Optional): If you know your fan blades are particularly greasy, you can pre-soak the inside of your pillowcase with a degreasing cleaner. Let it sit for a few minutes before encasing the blade.
2. Apply More Pressure: When wiping the blade with the pillowcase, apply a bit more pressure to help loosen the grime. You might need to go over each blade a couple of times.
3. Use a Scrubbing Sponge: For really stubborn spots, you can use a slightly abrasive scrubbing sponge (the kind you use for dishes) to gently scrub the blade before wiping it with the pillowcase. Be careful not to scratch the finish of the blade.
4. Hot Water: Using a pillowcase dampened with hot water can also help to dissolve grease more effectively.
Tips and Tricks for a Super Clean Fan
* Frequency is Key: The more often you clean your ceiling fan, the less dust will accumulate, making the job easier each time. I try to clean mine every month or two.
* Use a Vacuum Attachment: If you have a vacuum cleaner with a brush attachment, you can use it to vacuum the dust off the blades before using the pillowcase method. This will help to remove loose dust and prevent it from spreading.
* Clean the Fan Motor: Don’t forget to clean the fan motor housing! You can use a duster or a damp cloth to wipe away any dust or grime.
* Consider a Microfiber Pillowcase: Microfiber pillowcases are particularly good at trapping dust and dirt. If you have one, use it for this hack!
* Dry Thoroughly: If you use a damp cloth to wipe down the blades, make sure to dry them thoroughly to prevent water spots.
* Don’t Forget the Light Fixture: If your ceiling fan has a light fixture, take the time to clean it as well. Remove the glass or plastic cover and wash it with soap and water. Dust the light bulbs with a dry cloth.
* Check for Loose Screws: While you’re up there, check for any loose screws on the fan blades or motor housing. Tighten them as needed to prevent wobbling or noise.
* Be Mindful of Blade Material: Some fan blades are made of delicate materials like wood or wicker. Be extra gentle when cleaning these types of blades to avoid damaging them.
* Wear a Mask: If you’re particularly sensitive to dust, consider wearing a dust mask while cleaning your ceiling fan.
* Ask for Help: If you’re not comfortable climbing on a ladder or step stool, ask a friend or family member to help you.
Why This Method Works So Well
The beauty of this pillowcase method is that it contains the dust as you clean. No more dust bunnies raining down on you! The pillowcase acts as a barrier, trapping the dust and preventing it from spreading throughout the room. It’s also a quick and easy way to clean your ceiling fan without having to take it apart. Plus, it’s a great way to repurpose an old pillowcase!
Troubleshooting Common Issues
* Pillowcase Too Small: If your pillowcase is too small to completely encase the fan blade, try using a larger pillowcase or even a small trash bag.
* Dust Still Spreading: If you’re still finding dust spreading around, make sure you’re using a clean section of the pillowcase for each blade and that you’re not shaking the pillowcase too vigorously.
* Grime Not Coming Off: If you’re having trouble removing stubborn grime, try using a stronger degreasing cleaner or a slightly abrasive scrubbing sponge.
* Fan Blades Still Streaky: If your fan blades are still streaky after wiping them down, try using a clean, dry microfiber cloth to buff them.
I hope this guide helps you achieve a sparkling clean ceiling fan with minimal effort and mess. Happy cleaning!
Conclusion
So, there you have it! This simple, yet incredibly effective, DIY trick for cleaning your ceiling fan is a game-changer. Forget precariously balancing on ladders with spray bottles and cloths, only to have dust rain down on you. This method is not only safer and easier, but it also delivers a superior clean, leaving your ceiling fan blades sparkling and your air cleaner.
Why is this a must-try? Because it saves you time, energy, and potential backaches. It’s a cost-effective solution that utilizes materials you likely already have around the house. And most importantly, it works! No more lingering dust bunnies clinging to your fan blades, circulating allergens throughout your home. This method tackles the problem head-on, trapping the dust instead of spreading it.
Looking for variations? Absolutely! For particularly grimy fans, consider adding a few drops of dish soap to your cleaning solution. The degreasing power of the soap will help break down stubborn dirt and grime. You can also experiment with different types of pillowcases. Microfiber pillowcases are excellent for trapping dust, while slightly damp pillowcases can help loosen dried-on debris. If you’re dealing with a fan that has a lot of sticky residue, try using a solution of warm water and vinegar. The vinegar will help dissolve the sticky buildup. Remember to always wring out the pillowcase well to avoid dripping.
Another variation to consider is the frequency of cleaning. Depending on your environment and how often you use your ceiling fan, you may need to clean it more or less frequently. A good rule of thumb is to clean your ceiling fan at least once a season, or more often if you notice dust accumulating. Regular cleaning will not only keep your air cleaner but also help prolong the life of your fan motor.
We’re confident that once you try this DIY ceiling fan cleaning trick, you’ll never go back to your old methods. It’s a simple, effective, and satisfying way to maintain a clean and healthy home environment.
Now, it’s your turn! Give this DIY trick a try and see the difference for yourself. We’re eager to hear about your experiences. Did you find it as easy and effective as we did? Did you try any variations that worked particularly well? Share your tips, tricks, and photos in the comments below! Let’s create a community of clean ceiling fan enthusiasts! We believe that a clean home starts with the details, and a clean ceiling fan is a small detail that can make a big difference. So, grab a pillowcase and get cleaning! You’ll be amazed at the results. This is truly the easiest way to clean ceiling fan blades effectively.
Frequently Asked Questions (FAQ)
Q: What kind of pillowcase should I use?
A: The best type of pillowcase to use is one made of microfiber, as it’s excellent at trapping dust. However, a standard cotton pillowcase will also work just fine. Avoid using pillowcases with embellishments or rough textures, as they may scratch the fan blades. The key is to ensure the pillowcase is clean before you start.
Q: Do I need to wet the pillowcase?
A: It’s not necessary to soak the pillowcase, but slightly dampening it can help loosen stubborn dirt and grime. If you choose to dampen the pillowcase, make sure to wring it out thoroughly to prevent dripping. You don’t want water running down your arms or onto your furniture.
Q: What if my ceiling fan is really dirty?
A: If your ceiling fan is heavily soiled, you may need to repeat the process a few times. You can also add a few drops of dish soap or a solution of warm water and vinegar to your cleaning solution to help break down the grime. For extremely stubborn dirt, consider using a soft-bristled brush to gently scrub the blades before wiping them with the pillowcase.
Q: Is this method safe for all types of ceiling fans?
A: This method is generally safe for most types of ceiling fans. However, if you have a delicate or antique ceiling fan, it’s always a good idea to test the cleaning solution on a small, inconspicuous area first to ensure it doesn’t damage the finish. Also, be extra gentle when wiping the blades to avoid scratching or damaging them.
Q: How often should I clean my ceiling fan?
A: The frequency of cleaning depends on your environment and how often you use your ceiling fan. A good rule of thumb is to clean it at least once a season, or more often if you notice dust accumulating. If you have pets or allergies, you may need to clean it more frequently. Regular cleaning will not only keep your air cleaner but also help prolong the life of your fan motor.
Q: Can I use this method on other types of fans?
A: While this method is primarily designed for ceiling fans, it can also be used on other types of fans with similar blade designs, such as some standing fans or wall-mounted fans. Just be sure to adjust the technique as needed to accommodate the fan’s specific design.
Q: What if I don’t have a pillowcase?
A: If you don’t have a pillowcase, you can use a clean microfiber cloth or an old t-shirt instead. Simply wrap the cloth around the fan blade and wipe it clean. You may need to use multiple cloths to ensure you’re removing all the dust and grime.
Q: Will this method work on ceiling fans with textured blades?
A: Yes, this method will work on ceiling fans with textured blades, but you may need to be a bit more thorough in your wiping. The texture can trap dust more easily, so make sure to apply gentle pressure and go over each blade multiple times to ensure you’re removing all the debris.
Q: What are the benefits of cleaning my ceiling fan regularly?
A: There are several benefits to cleaning your ceiling fan regularly. First, it helps improve air quality by removing dust and allergens that can circulate throughout your home. Second, it can help prolong the life of your fan motor by preventing dust buildup that can cause it to overheat. Third, it can improve the overall appearance of your home by keeping your ceiling fan looking clean and well-maintained. Finally, it can save you money on energy bills by ensuring your fan is operating efficiently. A dusty fan has to work harder to circulate air, which can increase your energy consumption.
Q: Is there anything else I should consider when cleaning my ceiling fan?
A: Yes, before you start cleaning, make sure to turn off the fan and allow it to come to a complete stop. This will prevent any accidents and ensure you can clean the blades safely. Also, consider placing a drop cloth or old sheet underneath the fan to catch any falling dust or debris. This will make cleanup much easier. Finally, if you’re using a ladder to reach the fan, make sure it’s stable and secure before you start climbing. Safety should always be your top priority.

Leave a Comment